


Wood Cover for Bathroom Light
11 Materials
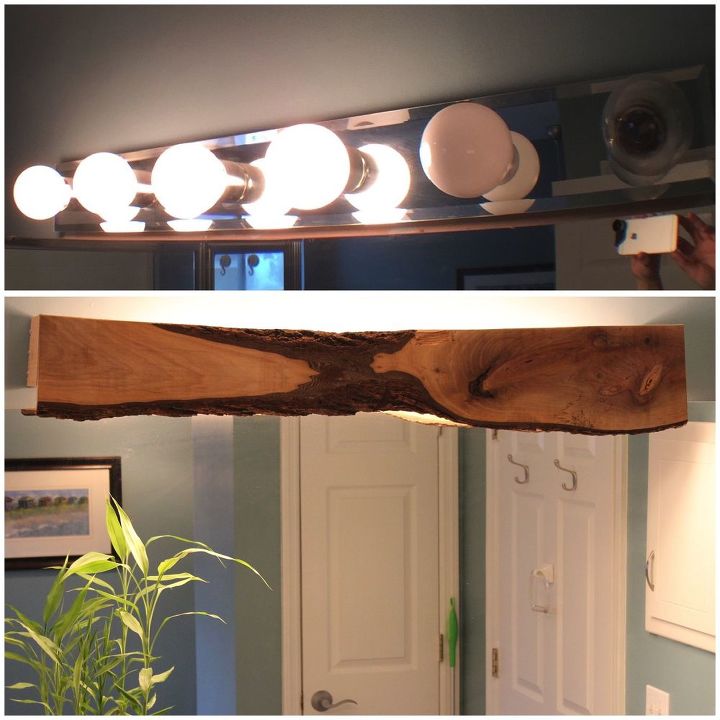
We have those builder's grade row lights in our bathrooms- you know the ones with the bare bulbs that are ubiquitous in almost every home?! Steph was unable to find a new fixture she liked, so we came up with a plan to disguise the light. Much like you would make a cornice in a window treatment, we decided to do the same for the light.
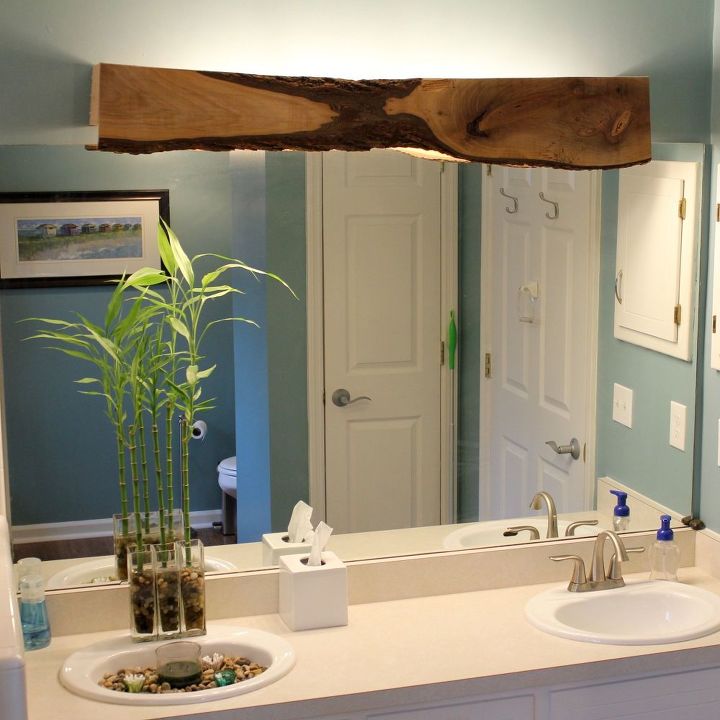
We used a piece of live edge wood as inspiration and to bring a bit of nature to Steph's bathroom.
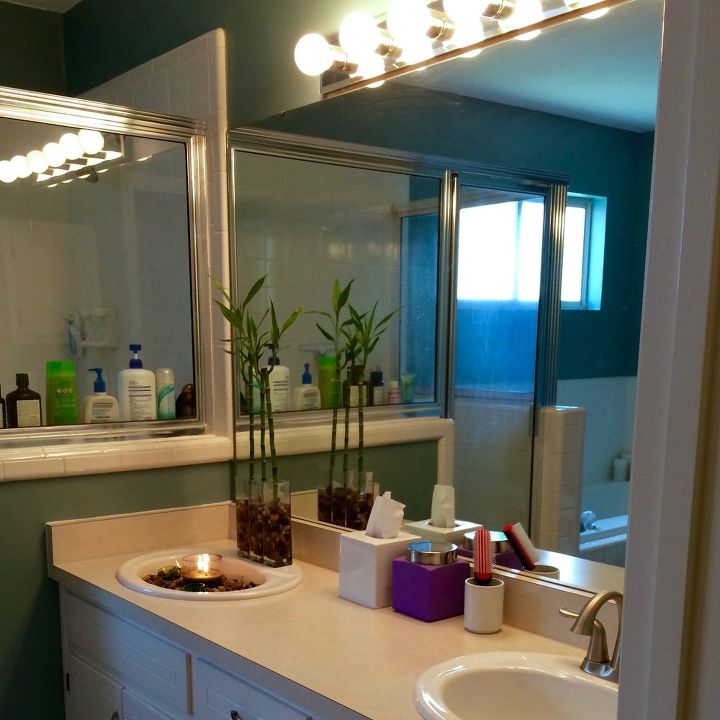
Before
Materials/Tools:
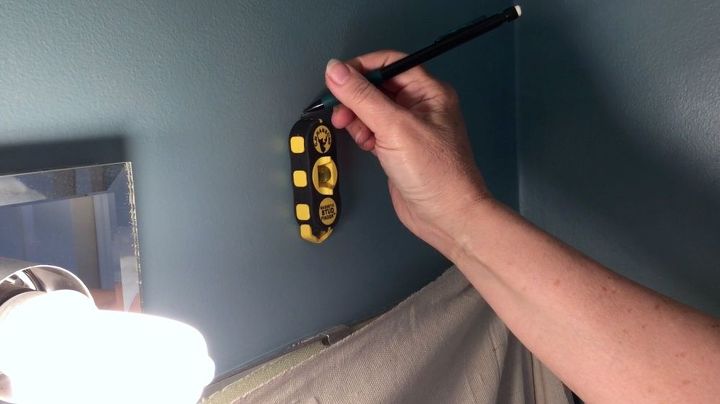
Find the closest stud on both sides of the fixture. This will determine the length of the wood.
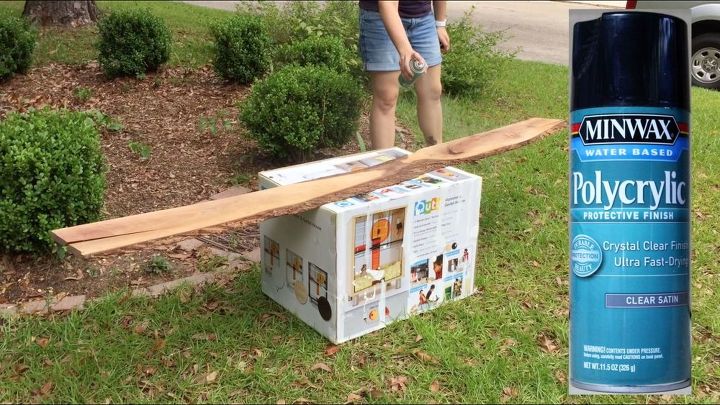
Sand and spray protective finish on wood.
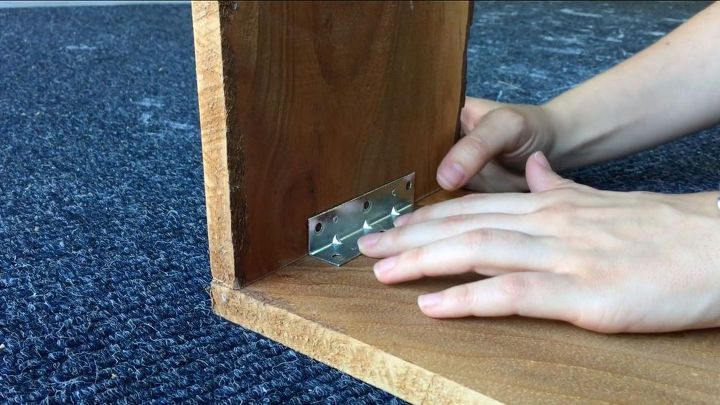
After making cuts, attach corner brackets to sides of board. Mark the placement & drill pilot holes, then screw everything in place.
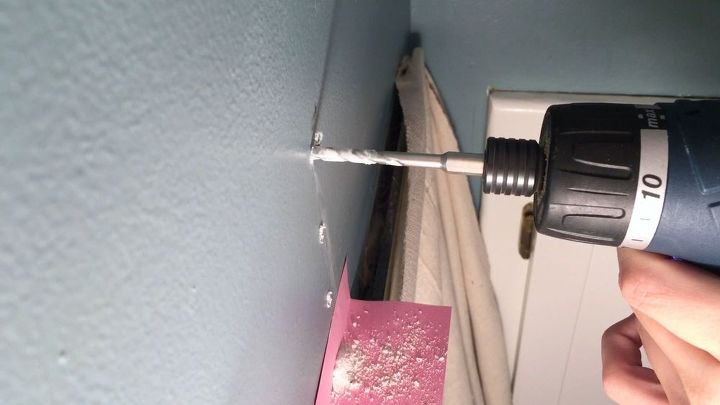
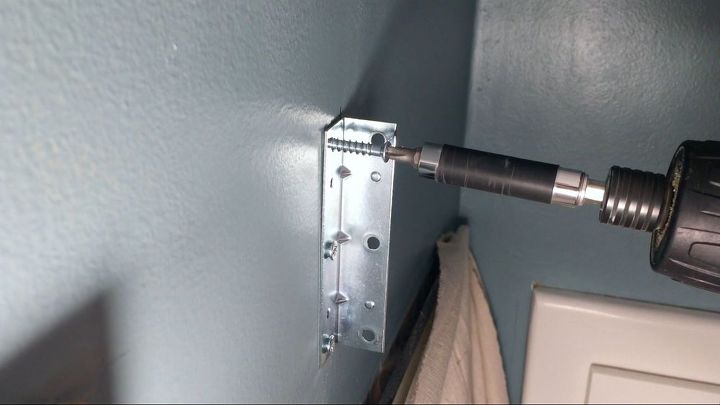
Drill pilot holes into wall and screw in L brackets.
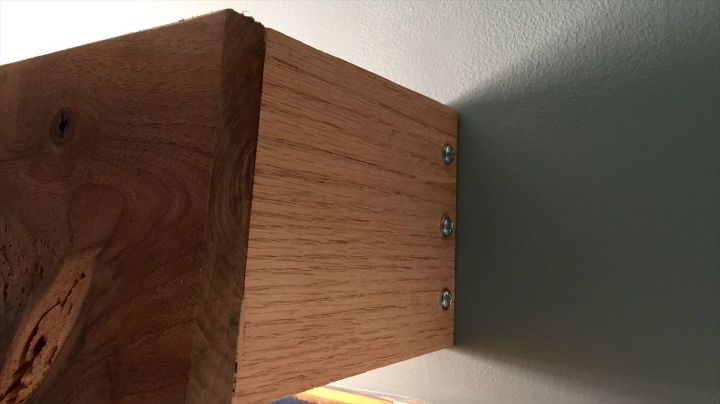
Hold the wood up and use bolts to attach cover to wall. Bolts will allow the wood to be easily removed if needed in the future.

Want more details about this and other DIY projects? Check out my blog post!
Comments
Join the conversation
2 of 29 comments
-
I love what you've done!! This is so very cute!! I have those same lights and hated to have to replace them...and now I don't have to!! Thanks for this really great idea!!
-
Yoza yooza. Finally a solution for my bathroom eyesore. I could never find a light I fell in love with as a replacement. Now I don’t have to, and I am saving big bucks. The wood stained to match my new vanity I found at habitat restore


Frequently asked questions
Have a question about this project?
Doesn't it dim the bathroom?
Nce job bit I have a question does the wood get to hot from the bulbs
Can this be used for an overhead curtain palmit as they are in vouge again and they keep out the light at the top of a window if you are a light sleeper because of light! olive