


Box Trim Walls: Powder Room Makeover Part 2

Box Trim Walls: Powder Room Makeover Part 2I want to start off with a little bit about the why and vision behind the choice to do box trim in this room. I will explain more in depth on the whole space vision in the final post about this room (linked here when available) but lets focus on the walls.
When thinking of a space like a bathroom it is a room you oddly spend a lot of time in and that you spend a lot of time looking at the walls more than anything. I wanted something classic, timeless, and elegant. Over the last year of diving deep into the DIY world box trim or picture box walls are something I have seen done in so many ways and something I have seen for years. Which to me makes it timeless, no matter what goes in and out of style it is a wall feature that we have seen for decades in homes that does what we want all upgrades to do-makes the room look expensive.
Knowing the decretive features I have planned for this space I knew the walls needed to be the background and not the focal point, YES YOU CAN HAVE WALL TREATMENTS AND STILL HAVE OTHER FOCAL/ACCENT POINTS! I wanted you to see the main features and THEN look behind and see the walls and go oh wow this is pretty.
I also love that YOU can take this and adapt it to your space and needs. You may want this to be your feature in the room and you can easily do that by having your walls be a color instead of white like I did.
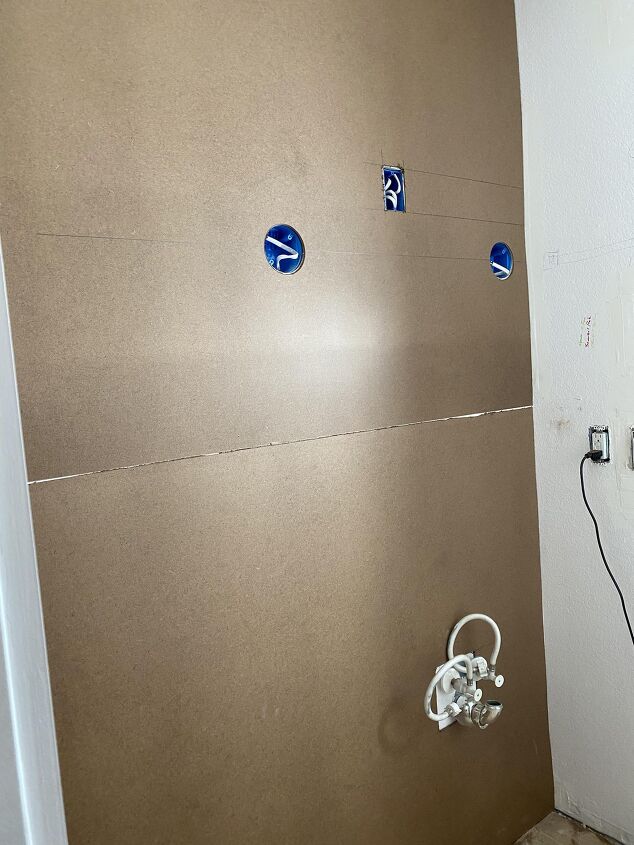
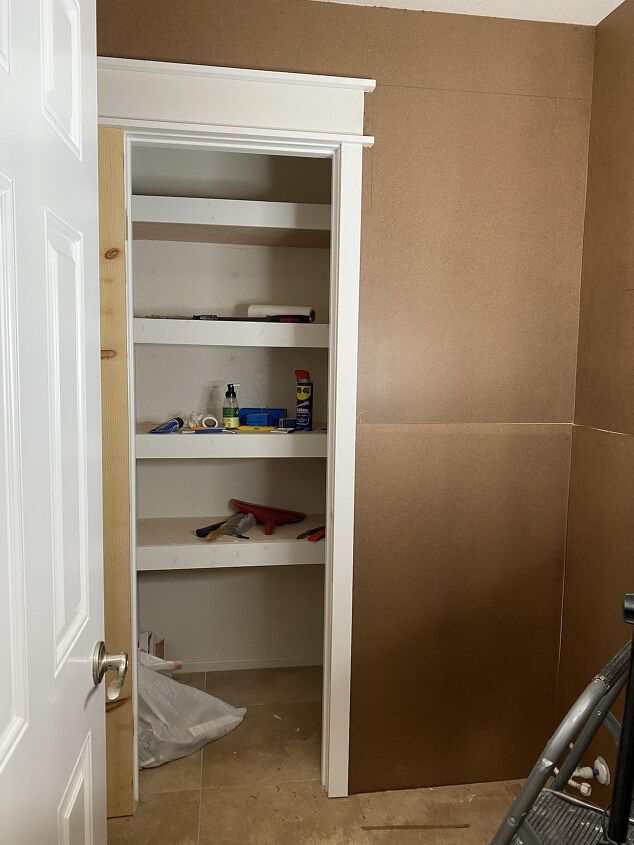
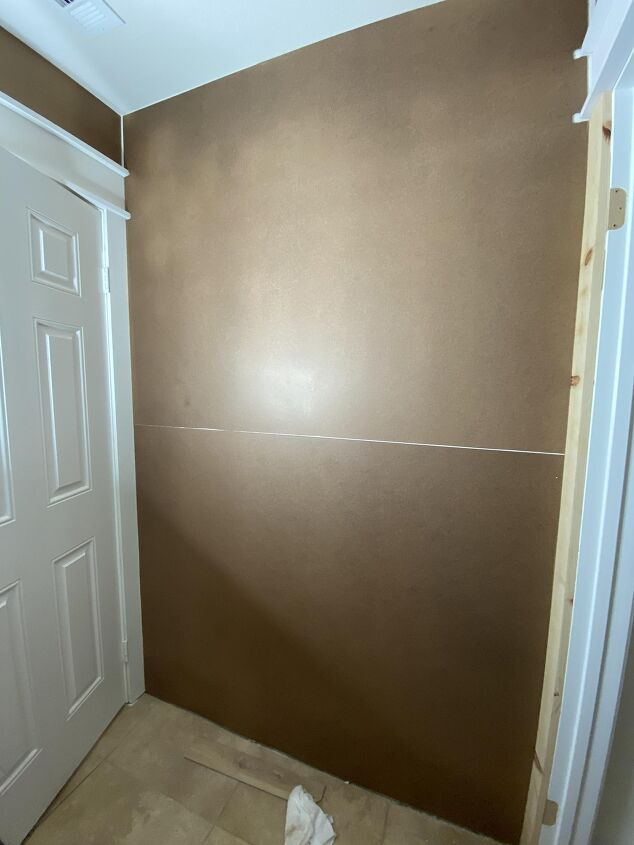
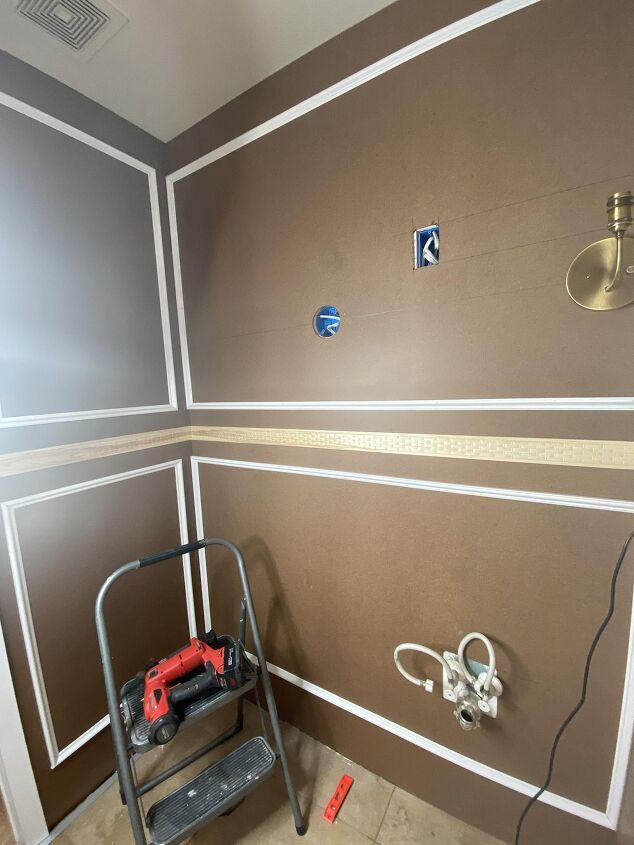
The first thing we did is cover the walls in hardboard panels. We have orange peel texture on our walls so in order to make the walls smooth this is the easiest option, you can skim coat but who has time for that!
This is a step you can skip if you have nice smooth walls or want to save money and the texture wont bother you.
Install:
We just nail these to the walls on studs but, you can use liquid nails if you need too along with brad nails just keep in mind if you ever want to remove these the liquid nails will ruin your drywall.
(as always if you are doing any wall treatment in a room with plumping or near electrical you need to know where pipes/wires are before you start nailing things to the wall, another use for liquid nails if you cant look inside your wall maybe)
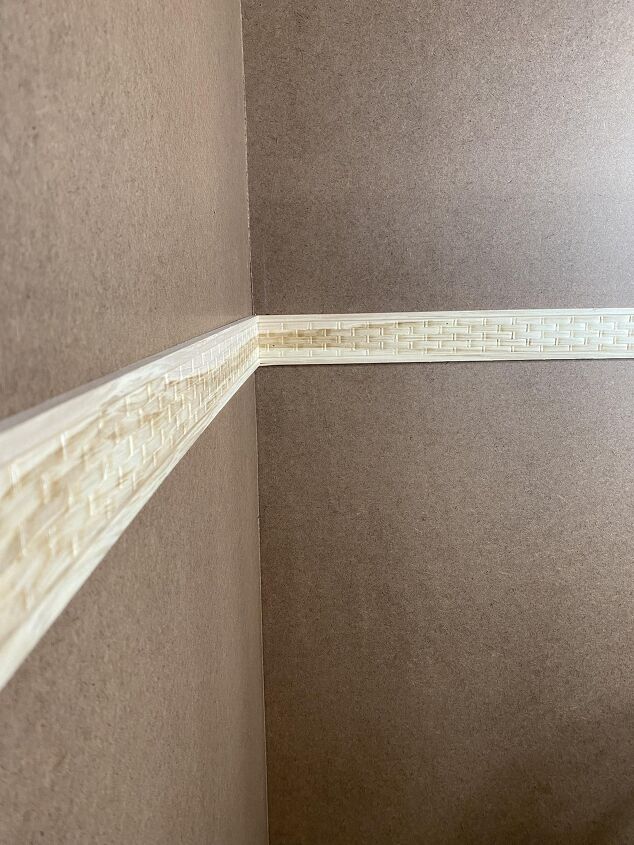
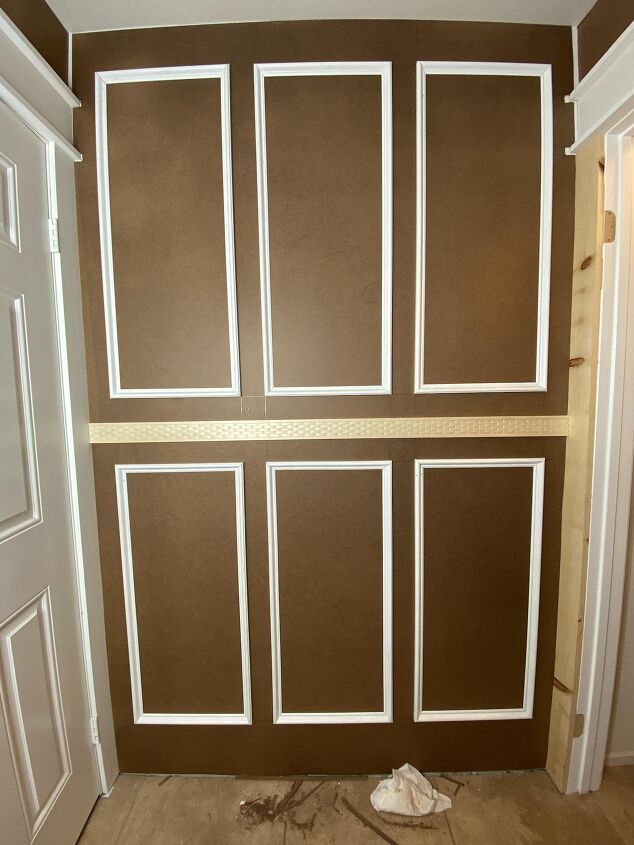
Seams:You do need to plan your design ahead of time in order to make covering the seams easy. These panels are 8ft x 4ft so you can use them however works best for your walls, we went an easy half up the wall layout and will cover the seam with a chair rail
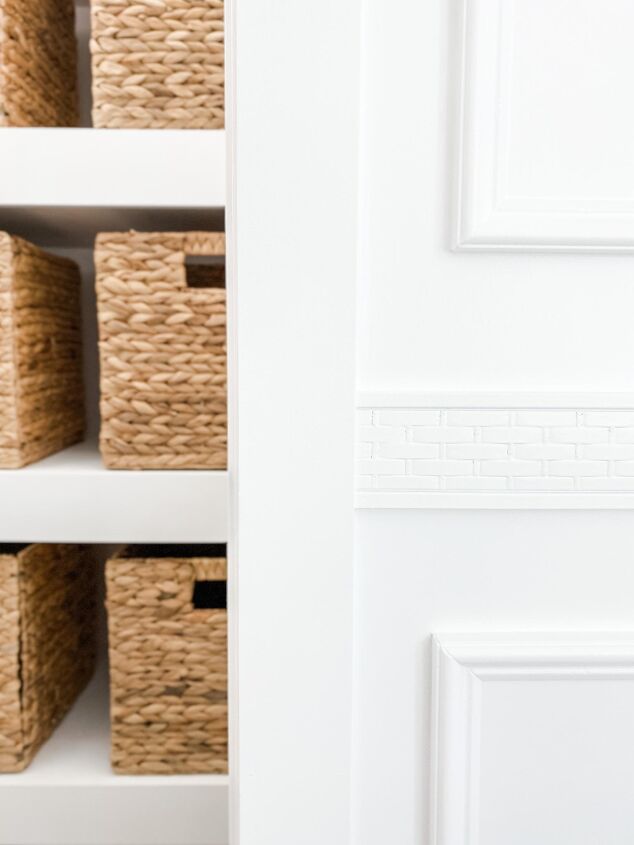
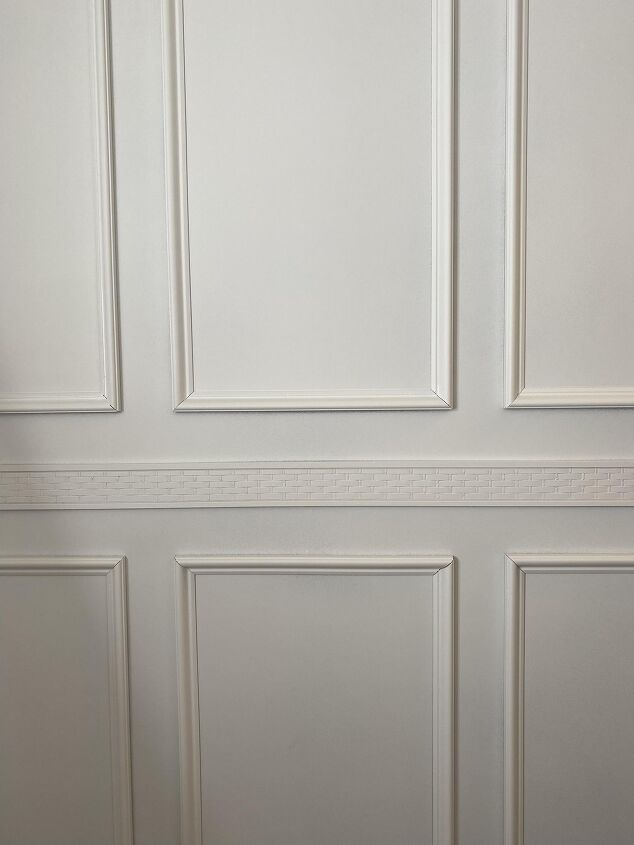
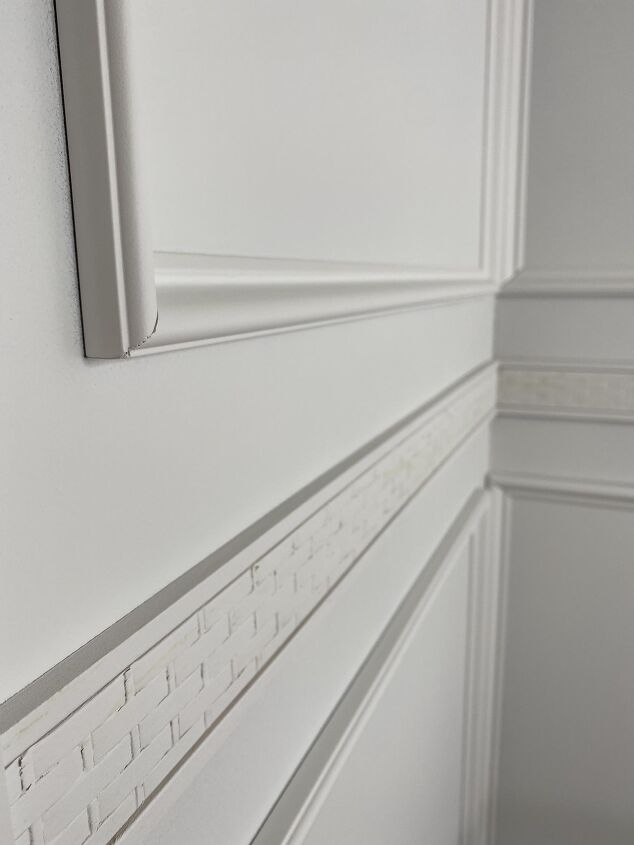
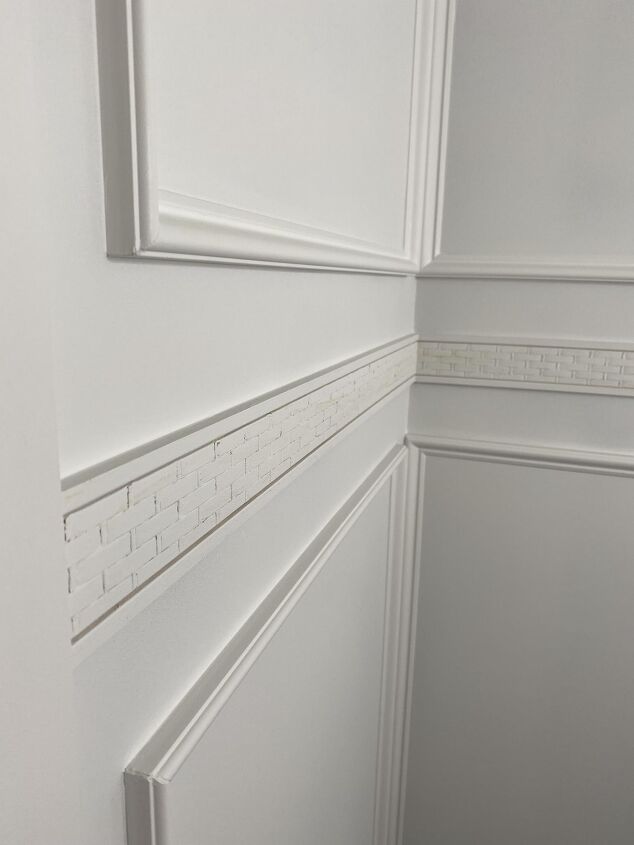
We found this chair rail at Lowe's and we were looking at more traditional ones when we both saw this at the same time and gave each other "the look" I thought for sure he would say no because its so different but we loved it and thought it gave an almost coastal vibe with the basket weave. Its definitely unique and is something that fits with the space.
Don't be afraid to try something you haven't seen, you can always test fit and take it back!
For the actual box trim we used pvc trim pieces
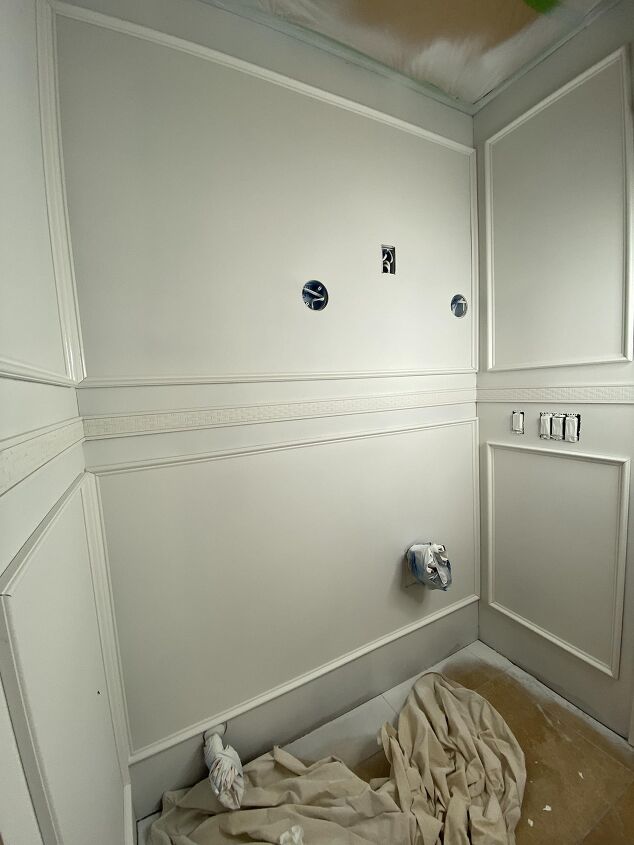
For the main wall I designed a big box layout because in order to fit the sconces and mirror everything is little off center so I wouldn't be able to have equally spaced boxes around the vanity/mirror/toilet.
I saw a photo of this while looking for design ideas and I knew it would work for this area.
Typically I saw that you should have 6-8 inches from wall/ceiling/floor (dont quote me on that) but for our space we went with three inches from crown molding (test fit a small piece) and 3 inches from chair rail and baseboards, as long as you are consistent with spacing you'll be fine.
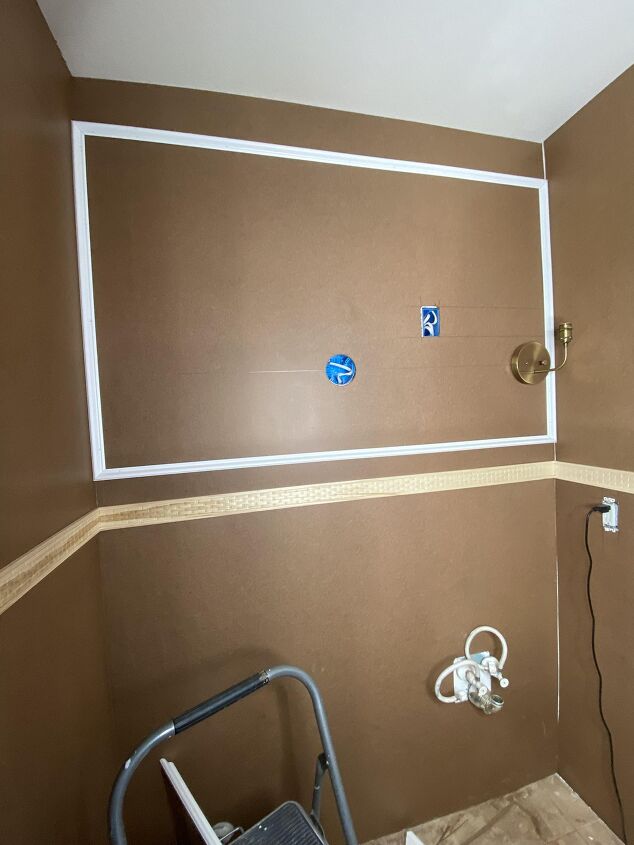
Since the items on this wall are not centered on the wall space I wanted to trick the eye into thinking everything was actually centered, helping to do this by keeping the boxes on the side walls as one big box as well.
Installing the trim is pretty easy, you will need a miter saw and everything is cut at a 45 degree angle. Install it one piece at a time and lightly sand the edges before nailing it to the wall for the cleanest look, these are pvc so after cutting the edges get a little weird.
Just like when doing board/batten you do boxes by wall size and how many you want, so each wall can technically have different sized boxes and different amounts of boxes.
On this back wall I wanted it to have more than just one big box and doing three really work, obviously everything looks a little crazy until its painted so hang with me here!
After everything is installed you will go around fill all the nail holes and seams (if you have any) will wood filler and sand once its dry.
After you sand you do have to vacuum the walls and wipe everything down with a tac cloth
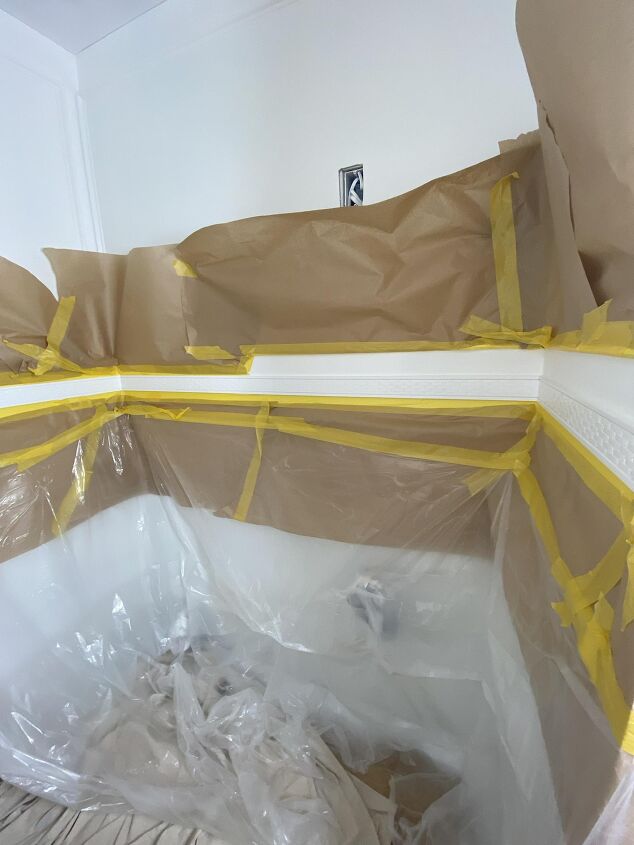
For the best finish I highly recommend investing in a sprayer, I bought (link) this one for this project and I never want to hand paint something again.
I used two coats of primer ( you can get away with one but I've found two coats of Kilz 2 All Purpose Primer works best in my home.)
Top is once coat
Bottom is after two coats
After each coat of primer you will lightly sand the walls with a 220 or 320 grit sand paper and repeat the vacuum/wiping of the walls
When you know you are done sanding (typically after you are completely done priming) you can caulk everything.
You also want to caulk the box trim pieces that meet at the 45 degree angles
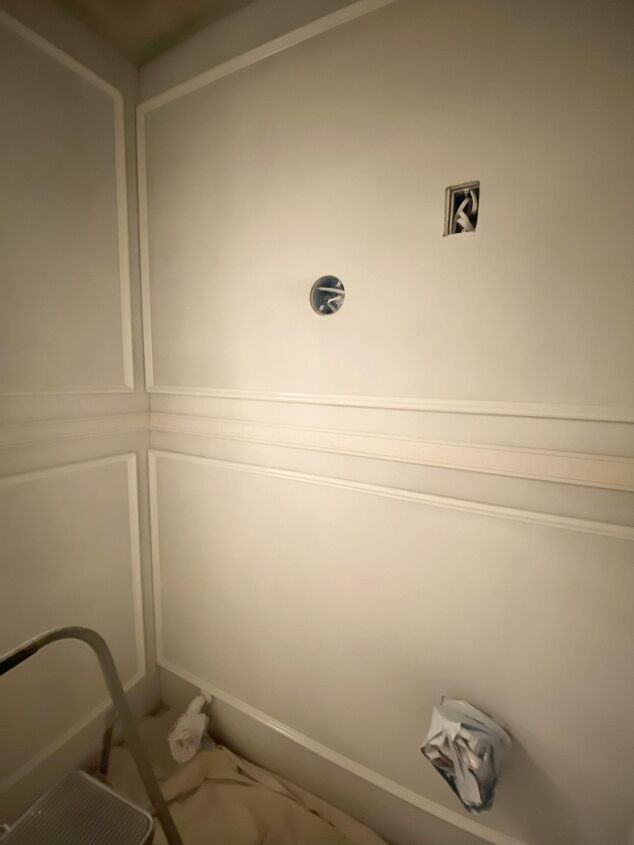
Once the caulk is dry you can paintI did two coats of Behr Marquee-Ultra Pure White paint with the sprayer
This was my first time spraying and there is definitely a learning curve. I had to do a coat under this trim and in doing so it added too much at once to this area and it started to bleed. If you get to it fast enough you can use a foam roller to smooth it out but I waited too long and it left these dents
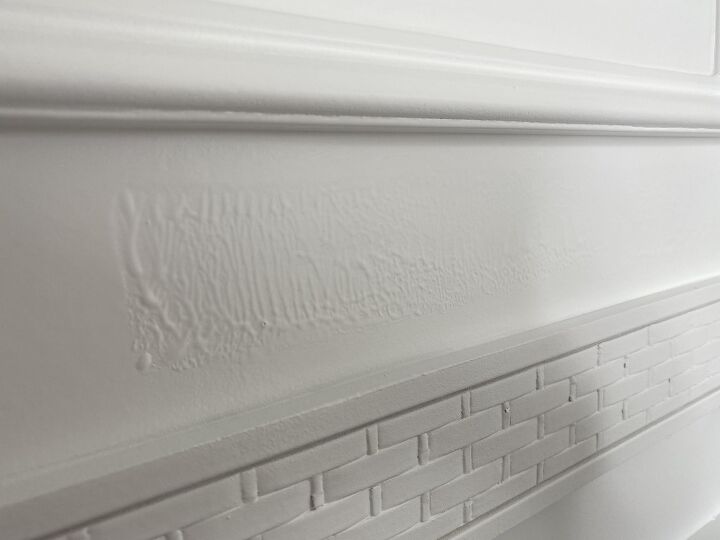
How to fix a mistakeOnce completely dry use a 1000 and 220 grit sand paper to smooth the area down, I switched between the two and it got it almost perfect. This is an area that is most seen, right above the vanity, so I knew I had to get this right. And yes, I was very stressed about this, this whole room was perfectly painted except for this.
I prepped the area around this section to make sure I didn't create another problem while trying to solve one. I noticed the chair rail on this side needed another coat as well so I included it too.
If you never knew of my mistake you would never even notice it. I can see it still but you really have to look.
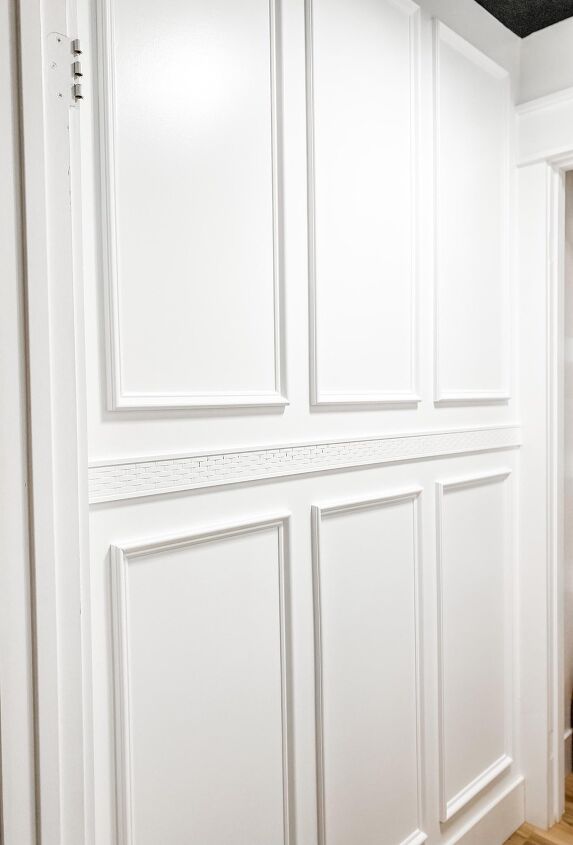
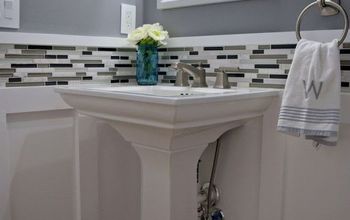
Wall Reveal
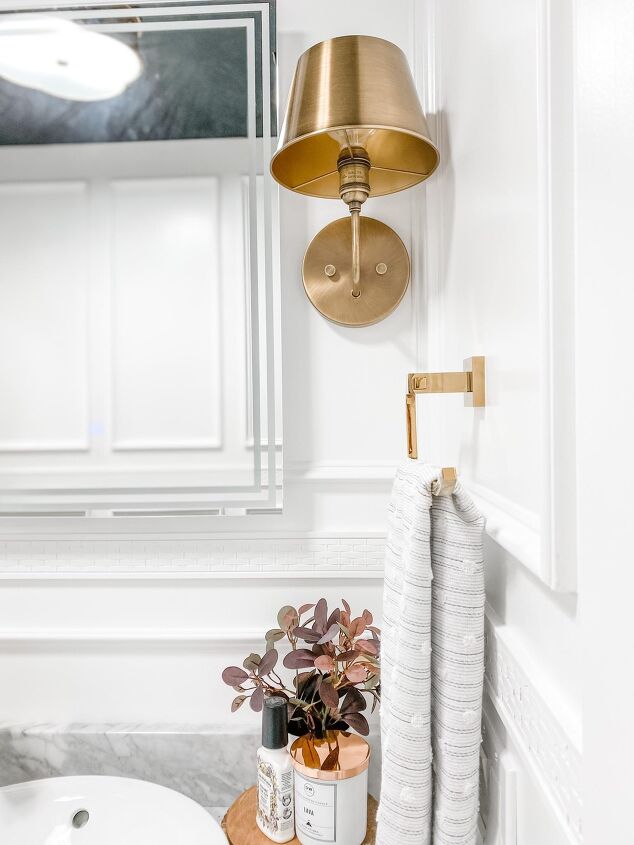
We started installing everything once the walls were dry so I don't have too many photos I can share in this post just yet, once I do a full reveal I'll update this :)
But I think you can get the feel of this space and see the details of the walls in these photos
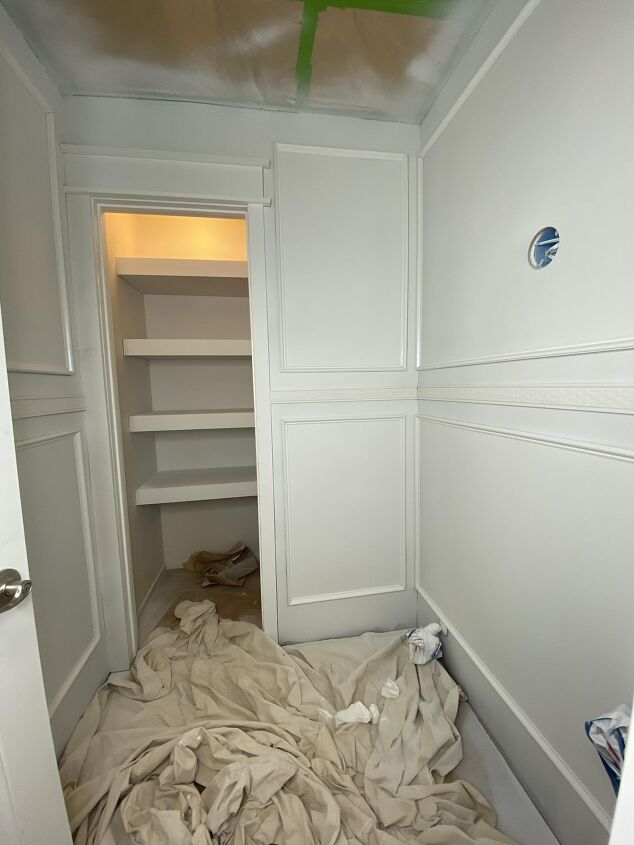
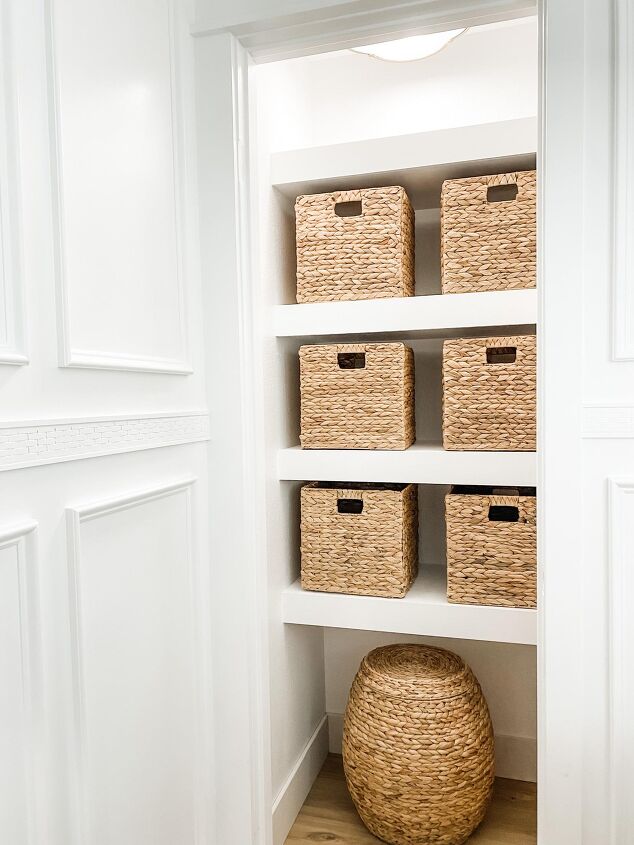
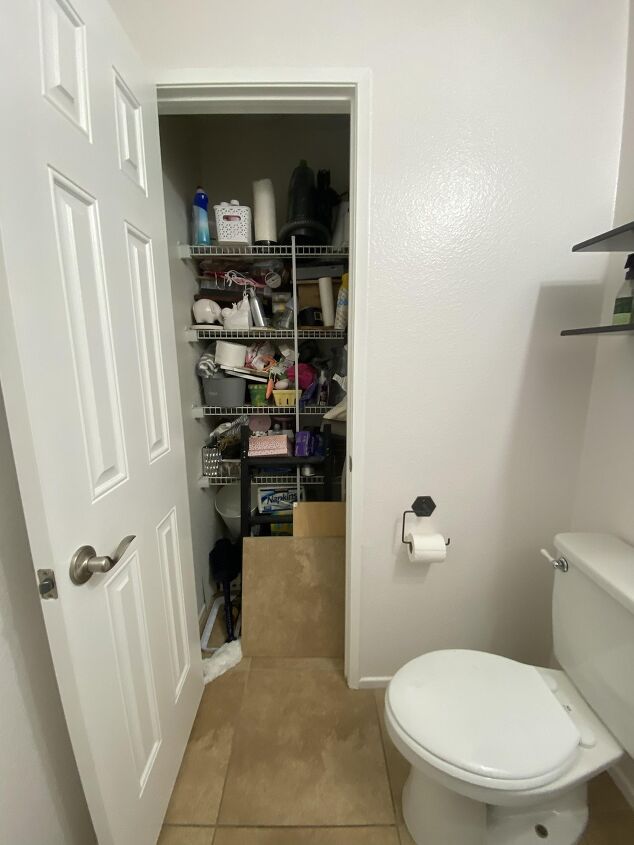
If you missed the closet update in this room you can view the post here I feel in love with the chair rail in store knowing it would match the texture of the baskets I picked out for the closet
Exploring cost-effective ways to renovate your home?
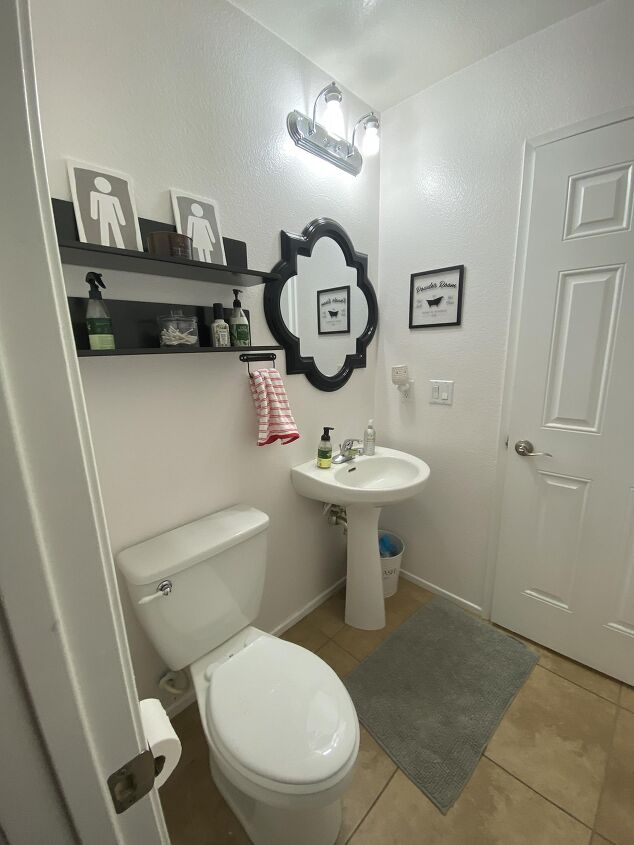
Before
For more links to my favorite DIY products used in this project visit my Amazon Store
I cant wait to share the rest of this makeover with you soon!
If you have any questions about this build please leave me a comment or DM on Instagram and I'll be more than happy to answer it!
There is always a project to do so I hope you follow along on my social media accounts where I share my life as a Mom of 3 and all things DIY Home!
YouTube
*Links may be affiliate links and if you choose to buy a product through my link I will make a small commission, helping to support these projects.
Thank you for being here with me!
Comments
Join the conversation
-
Beautiful!!!!
-
The room looks gorgeous, timeless, and classic. Kudos!


Frequently asked questions
Have a question about this project?
What was the paint sprayer you used? I am tempted but always fearful. I used one decades ago and it was a complete failure.
Doesn’t anyone proofread their work anymore?