


DIY Woodland Nursery Art
I LOVE WALL ART and I LOVE BABY NURSERIES.
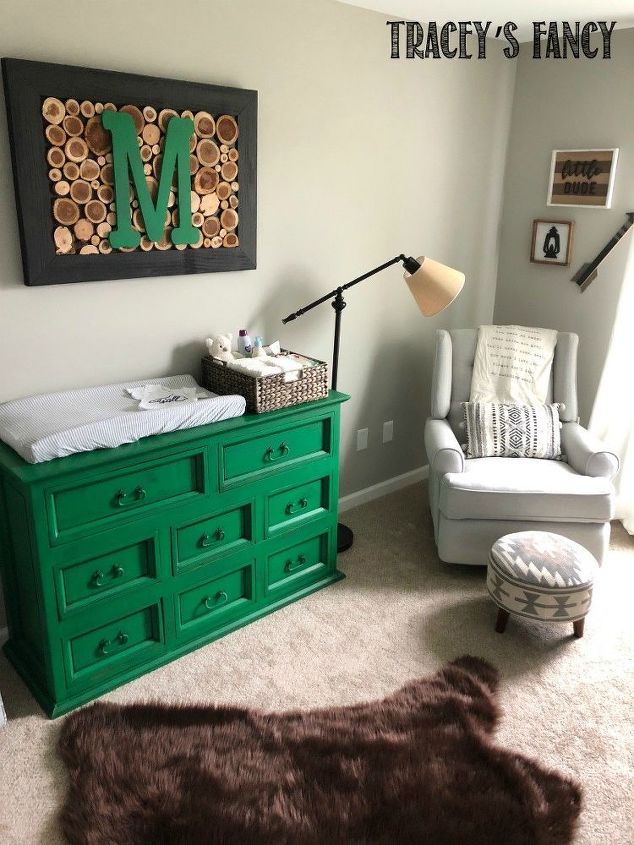
So when I debuted Collin’s nursery design, I knew a follow-up “how to blog” was coming for the feature woodland art I created for above his dresser. I really do believe it is the piece that ties the entire space together!
And it was so easy… Let me show you the how.
Check out this video where we show you our design process to create this wall art and then scroll down for a step by step guide.
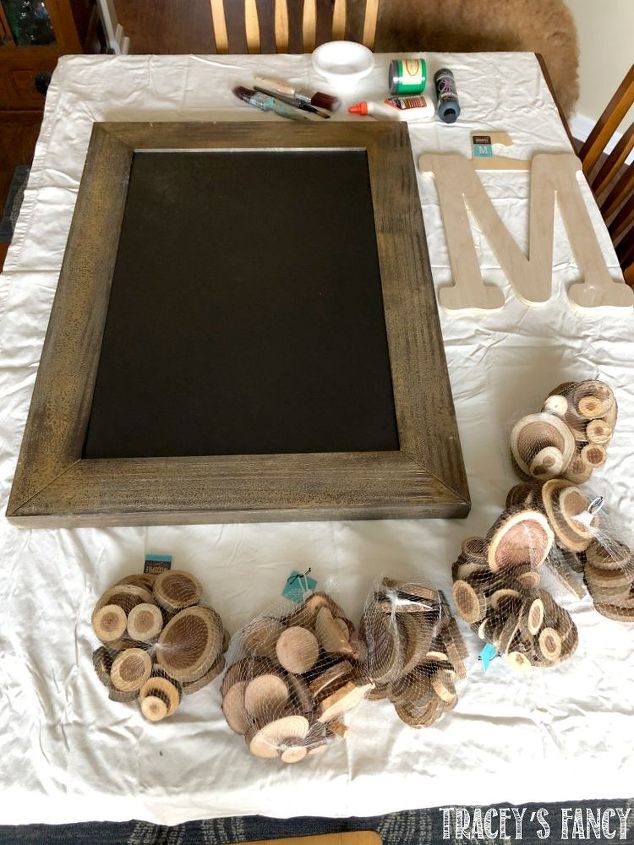
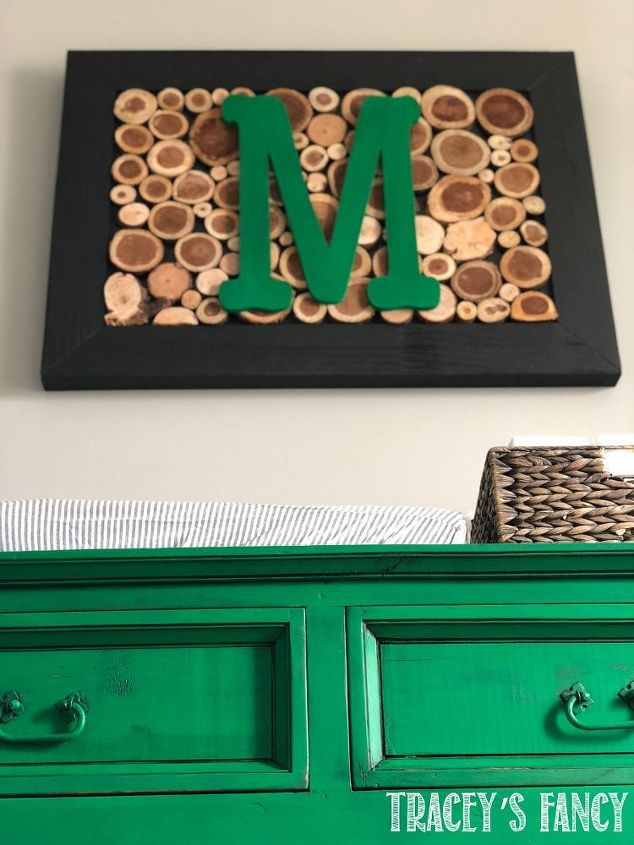
You can buy any sized, already-framed art. We got a piece of art that was very, very large and was on sale for 50% off. You can also get a framed cork board because those are super lightweight or a framed chalkboard. Just use anything that has a frame.
You can always find a color you already like, so you don’t have to paint that or you can just paint the frame like I did!
Since our frame was gray, we painted it black and added one finishing coat. Luckily the inside of our art was already black. If you do buy a piece of framed art, you will need to paint the entire picture that was inside the framed art black (or your color choice) to cover up the art.
Then we bought five bags of these wood circles (“discs”) from Hobby Lobby.
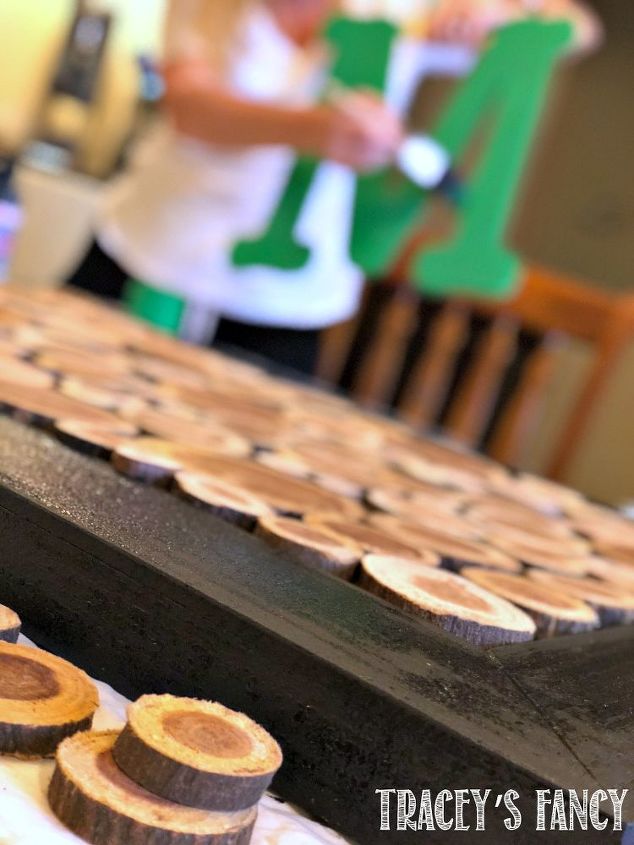
We just started laying the discs out exactly how we wanted it. We filled the entire thing with as many pieces as we could and it took both of us just moving the pieces around like a puzzle. We used Wood Glue and lifted each piece from its place and put a pretty BIG daub of glue on the back and pushed it right back in place.
We kept going until they were all glued down. It was that simple.
And you can use a wooden letter or wooden name or whatever you got!
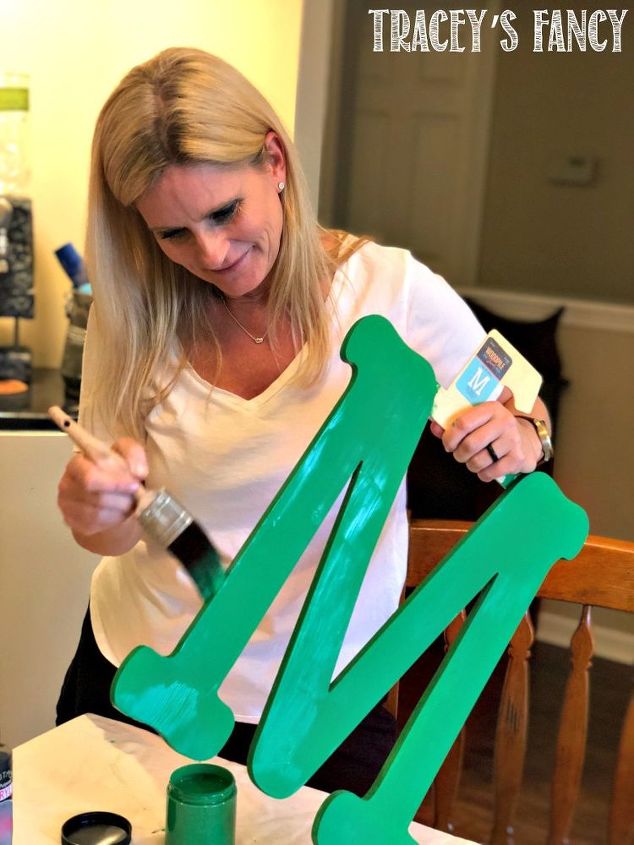
We used a large “M” and painted it in this amazingly vibrant green from Dixie Belle Paint and then rubbed some black wax on it so it would match the dresser I painted. Then we wood-glued the letter to the wooden discs.
You could also do smaller letters and do an entire name across if you wanted to …
And THAT is THAT!!! …
A super simple, so stinkin’ quick easy woodland nursery art!
Take a look at the my full blog post (link below) for a detailed list of the specific paint colors used! I also have a short video for you to check out!
Follow me on I nstagram @traceysfancy and Facebook @traceysfancy for more inspiration and don't forget to sign up to receive my emails to get a first look at all my upcoming projects!!
Resources for this project:
See all materials


Comments
Join the conversation
-
This is beautiful, it's elegant and modern and will last many years in a kid's room.
-
I love it!! What a great shade of green!


Frequently asked questions
Have a question about this project?
If your child's name is Collin, why the M????