Easy Board and Batten With Minimal Mitering!

by
OnTheFly...DIY
(IC: instagram)
18 Materials
$75
3 Days
Easy
Board and batten or ‘wainscotting’ wall treatments look amazing but can be super labor intensive with lots of miter cuts. This easy version gives you a very similar look, uses existing baseboard trim, and cuts out time and work. And best of all - minimal mitering! Sponsored in part by Rust-Oleum!
{
"id": "4805908",
"alt": "",
"title": "",
"video_link": "https://www.youtube.com/embed/YrWkvK33bRk",
"youtube_video_id": "YrWkvK33bRk"
}
{
"width": 634,
"height": 357,
"showRelated": true
}
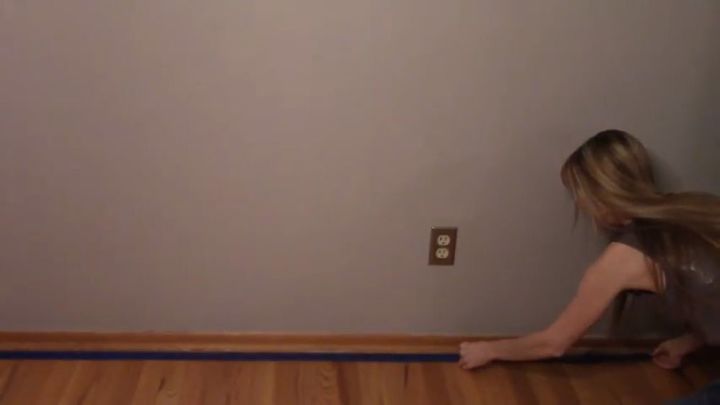
First, use painters tape to protect the floor or carpet and tape off the bottom edge of the baseboard.
Next, measure for the top trim - the 'board' in 'board and batten'. There's no wrong answer on the height - I've seen gorgeous bar height versions and just as impressive chair-rail height versions. I'm going with a 34 and a half inch height, simply because one wall in my house already has a piece of chair rail installed and I'd rather not tear it out. Mark the wall at regular intervals as reference points.
If needed, spackle any holes in the wall and lightly sand over with sand paper for a smooth finish.
Use the white paint to brush the baseboard and roll the lower portion of the wall, almost up to the reference marks.
Paint the upper portion of the wall down to the reference marks.
Paint the trim pieces. With walls, a roller makes the painting go fast and with existing base boards, I'm stuck with a brush. But...with trim I haven't attached yet, I love being able to just spray paint it. The painting step is much quicker and I don't have brush strokes. And if you choose the same finish for both spray paint and wall paint, the whites will blend beautifully. A flat white wall paint and Rust-Oleum's 2x Paint and Primer in flat white work perfectly together.
Once the trim is fully dried, it's time to cut and nail up. Even if you are doing one accent wall from corner to corner, miter the ends that butt up for a smoother look. Instead of two flat ends smack up against each other, miter 45 degree angles so one end sits on top of the other. If you are cornering around a room, work on only one end of the trim at a time. Once one end is just right, mark the other end and keep going.
Apply a bit of construction adhesive on the back of the trim.
Using a level and the reference marks as guides, press the trim onto the wall and nail in place. This is where you'll find out if your walls are truly straight! In this 50 year old house, I found that mine, sadly, are NOT. Using the glue on the back of the trim allows for some extra adhesion where the nails may not be able to go in as deep.
With the board up, begin measuring for the lath - the 'batten' in ‘board and batten’. The batten will run from the top of the existing baseboard to the bottom of the trim board.
Use the miter saw to cut the lath to size.
Again, using the time-saving spray paint, paint the batten pieces and allow to dry.
Next, determine how far apart you want your batten to sit. I decided on 12 inches between each piece. So starting in one corner, attach a piece of batten to the wall with the nail gun. Measure out 12 inches and place the next piece up against the wall. Use the level to ensure the batten is straight and nail in. Continue along the wall until you reach the next corner. Here's my disclaimer - do the math ahead of time to see how many full 12 inch sections you'll have before running out of room. It's better to add a quarter or half inch to a few middle wall sections before reaching the corner than to find you put up a piece of batten and have 3 inches left for the final section.
Apply a bit of wood filler in all of the nail holes and let dry before lightly sanding. If the paint finishes are the same, you can use a tiny brush and paint over the filled nail holes with the wall paint. I prefer to use the exact paint over the filler so I’m using a paper plate as a palette. Go outside, spray a little spray paint on it, and finger paint over the nail holes.
Run a bead of caulk along every seam - top and bottom edge of the trim, all sides of the batten, and along the corners. Caulk hides a multitude of sins...and gaps...so even if you have uneven walls, the board and batten will look seamless. Wipe up any excess caulk as you go.
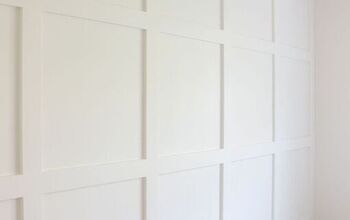
A gorgeous wall treatment with minimal mitering!
Enjoyed the project?
Any price and availability information displayed on [relevant Amazon Site(s), as applicable] at the time of purchase will apply to the purchase of this product.
Hometalk may collect a small share of sales from the links on this page.More info
Published May 1st, 2018 10:20 PM
Comments
Join the conversation
2 of 9 comments













Frequently asked questions
Have a question about this project?
I looking for a country look. I love what you did. What would you recommend. Do you have Amy other projects?. Thank You
LOve the look. what did you use for the vertical boards?
So do you caulk in white or did you caulk first and paint later?