


Faking It [painted Shiplap Edition]
$25
3 Hours
Medium
I saw a tutorial on Pinterest, originally from Bower Power but I just wanted to share my experience with you (I did do a couple things differently) and show how much it transformed this bathroom. Like the large majority of the projects I have shared with you so far, this one was done on a small budget - $25 for the "shiplap" and $15 for the new towel hooks. Everything else (stain, drawer pulls, and spray paint) I already had from past projects.
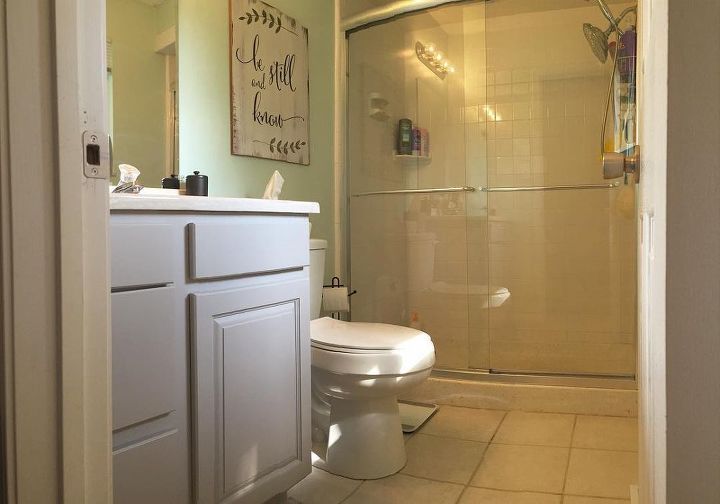
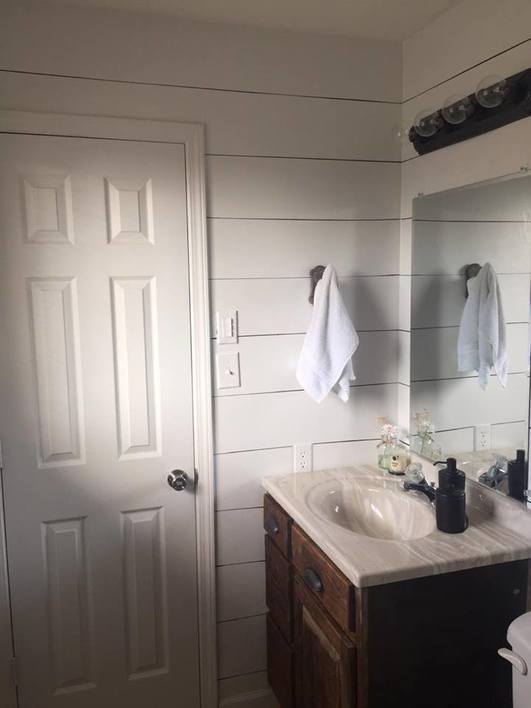
We gutted our bathroom when we bought our house and updated it some but my style has clearly changed some since then. It wasn't that there was anything wrong with it the way it was, it just simply felt out of place considering the rest of our home is now full of neutrals, woods, and whites.
For starters, the walls got a coat of white paint. I always make it a point to check the mis-tint section anytime I'm at the hardware store and I lucked out and found a $10 gallon mis-tint - its actually what started this whole project! The next step was to mark where I wanted my lines to be.
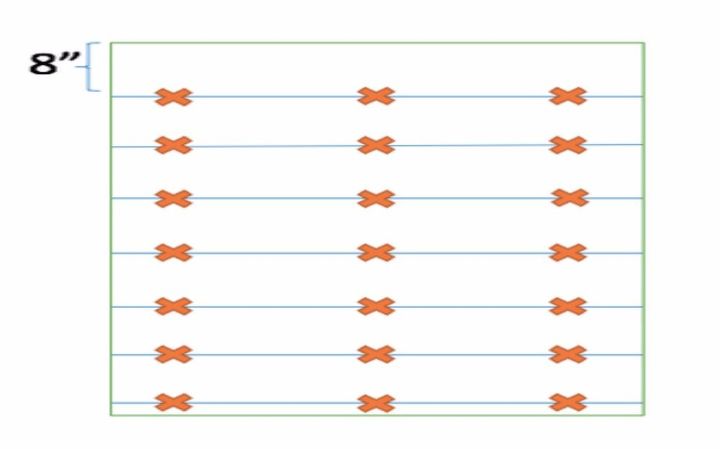
To do this, I made three "columns" per wall of little pencil marks spaced at 8 inches. Then, I ran a piece of tape across each row to connect the three pencil marks. Once that was up, I eyeballed the gap between the next piece of tape to create the paint line. You will use more tape than you would ever imagine - it took me almost 2 full rolls for our bathroom.
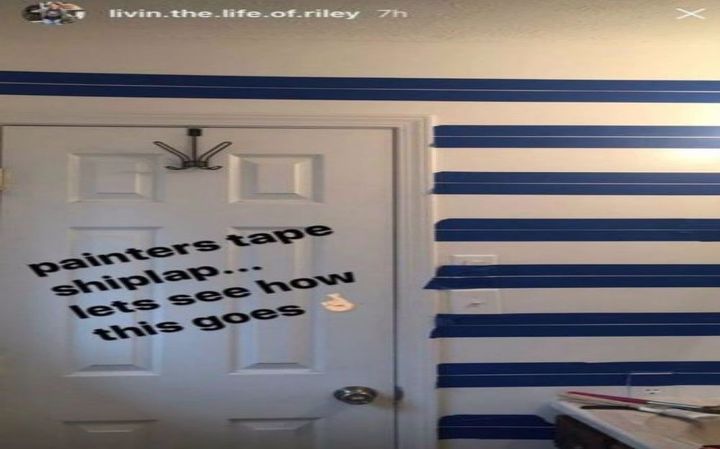
I made sure the tape had been pressed down VERY FIRMLY by running a debit card over the tape to avoid any bleeding outside of the area where I wanted the paint to be.
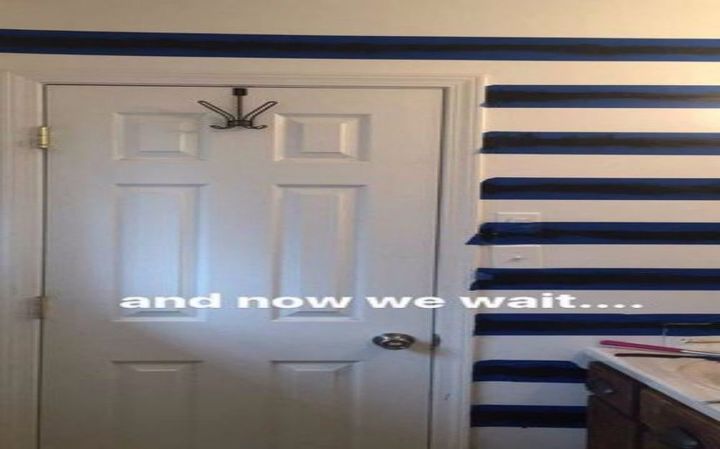
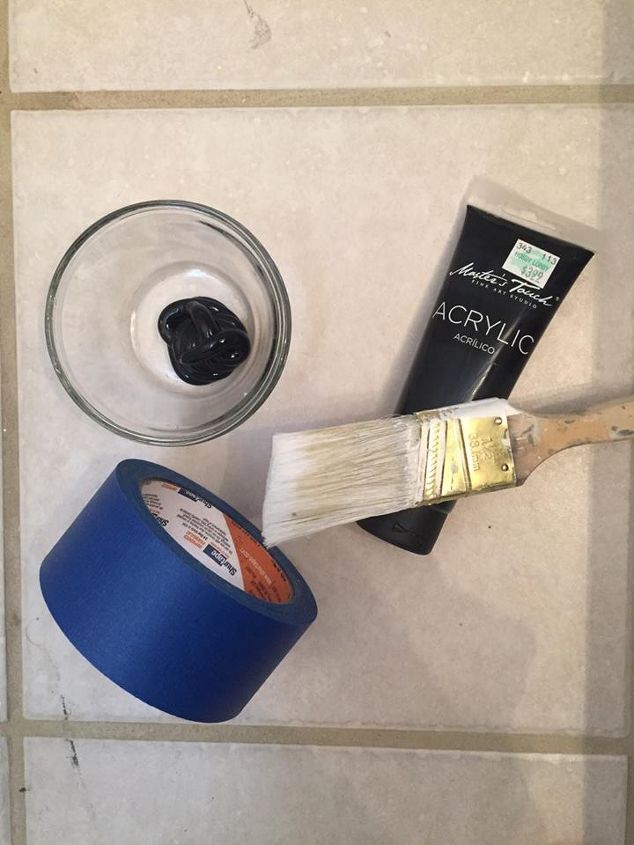
Once the tape was up, it was time to paint the "gaps." I used regular black craft paint for this part and I applied it with a brush.
I worked my way across the walls one at a time and peeled off the tape before I moved on to the next wall.
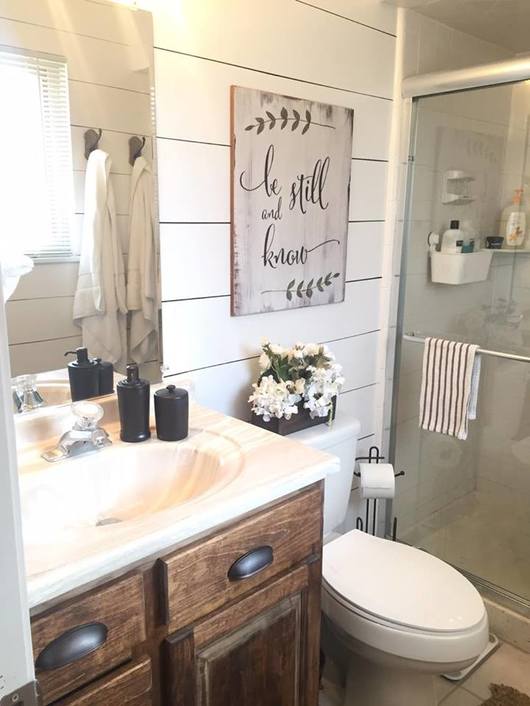
The best part? Its paint! So IF I ever get tired of the shiplap look (which I don't see happening anytime soon) I can just paint right over it without having drywall or holes to patch. Our vanity is the same vanity, I just sanded it down and stained it and then added hardware!

Want more details about this and other DIY projects? Check out my blog post!
Comments
Join the conversation
2 of 48 comments
-
❤️
-
Thank you. I've been looking for a way to spruce up those 70s style sliding closet doors. I think this will do it. With new barn door handles it will be quick, easy, and the look I want. Thanks again!


Frequently asked questions
Have a question about this project?
What did you use for paint on the vanity ? It looks like stain . Great job 👍🏼
Was this technique done on knock down texture?
the gaps look so large between the tape... how thick are the black lines?