


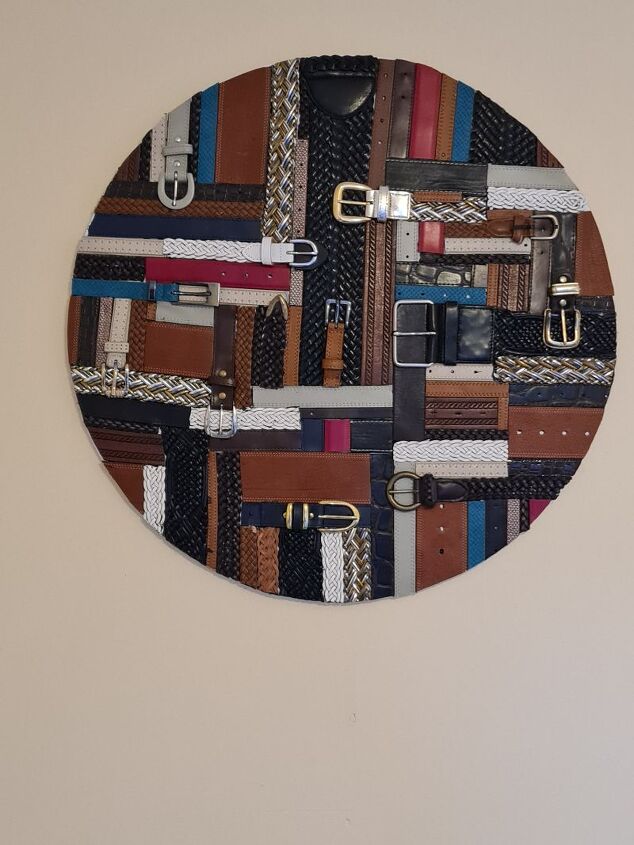
Leather Belt Wall Hanging
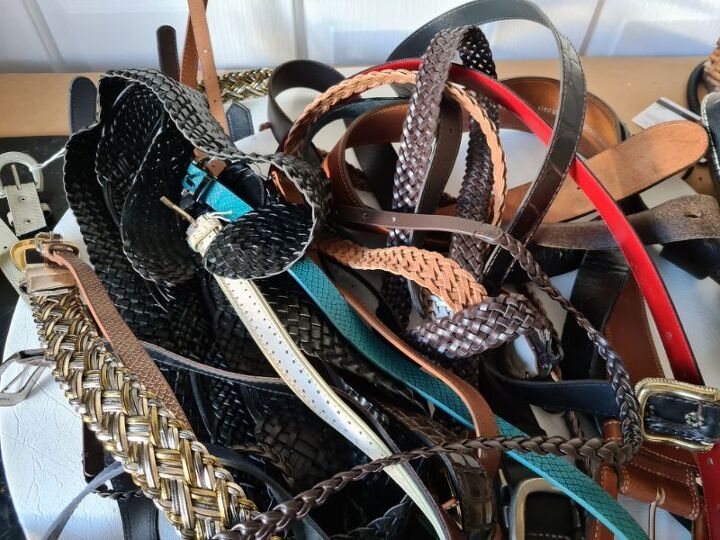
I approached my local charity shop looking for old belts that I could use in my mixed media art projects. I was looking for all the old belts that were too damaged for them to sell. I offered to pay for them. Little did I know I would end up with loads of them. I hate wastage so I wanted to try and turn them into something I could use in my home. This leather belt wall hanging was the result.
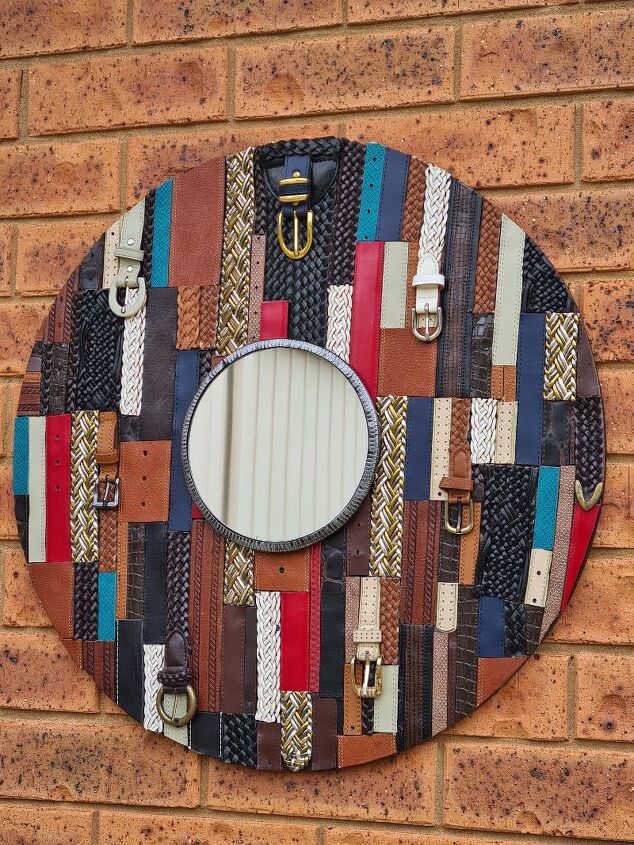
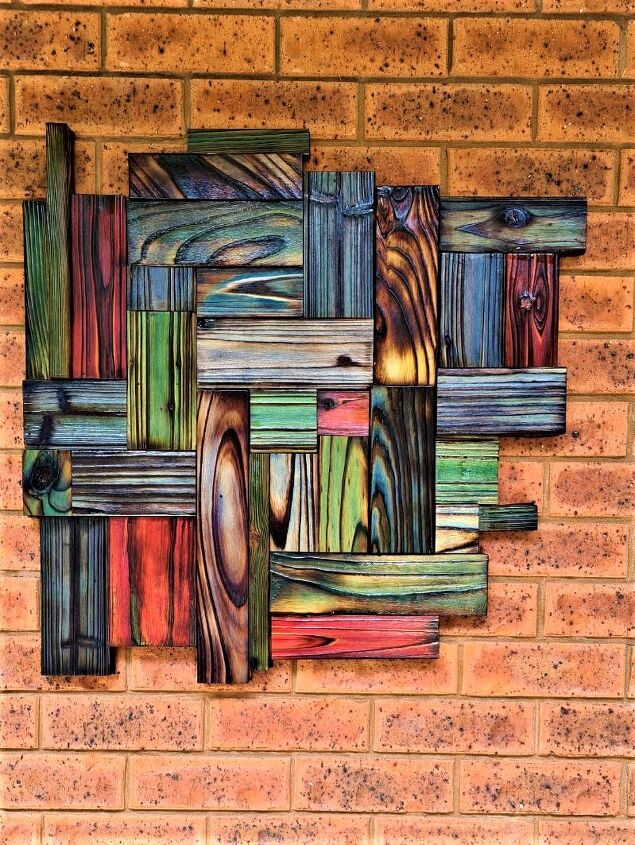
My inspiration for this project was the wooden wall art I made using scrap wood. I thought it would look cool to cut up the recycled leather belts and create a textured wall hanging.
Making the base
For the base, I used a recycled mosaic mirror that had fallen down and broken. I try to use mainly recycled materials in all my projects and seeming our blog hop is called “do-over designers” it seemed appropriate. I must also mention it was not my first attempt at this project, my first attempt failed and I will also share why it failed. The size of the wood circle was 600mm across.
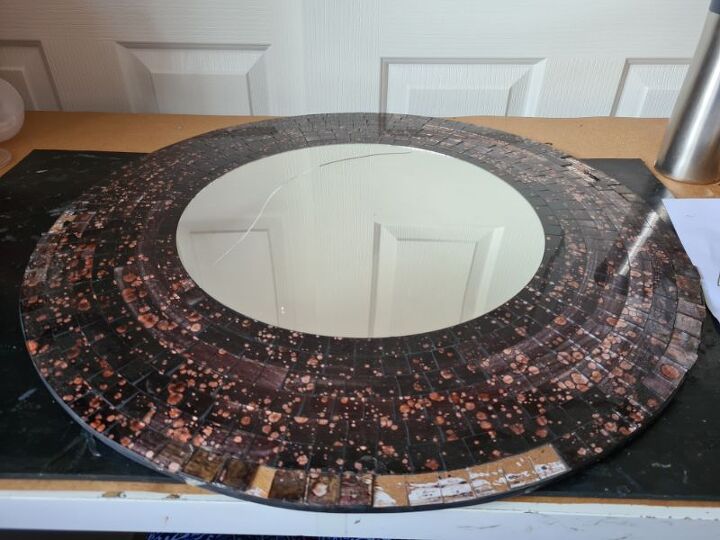
I removed all the Mozaic tiles from the wood and covered the base in a really cheap plastic leatherette fabric. This way why my first attempt failed. The hot glue would not want to stick to the surface of the faux leather but I only discovered this when I held it up once completed.

In my first attempt, I also glued the recycled belts in a random manner which was not the look I was going for. It looked a bit too messy for my liking.
Sourcing leather belts
The charity shop did think it was a strange request asking for old damaged belts, but I use them when I create my mixed media art bottles. They add amazing texture to the surface of the bottles.
But the number of belts I received was well over what I would need for my bottles but were perfect for this project. This was only a small amount of belts that were in the bag.
Glueing the leather belts to the base
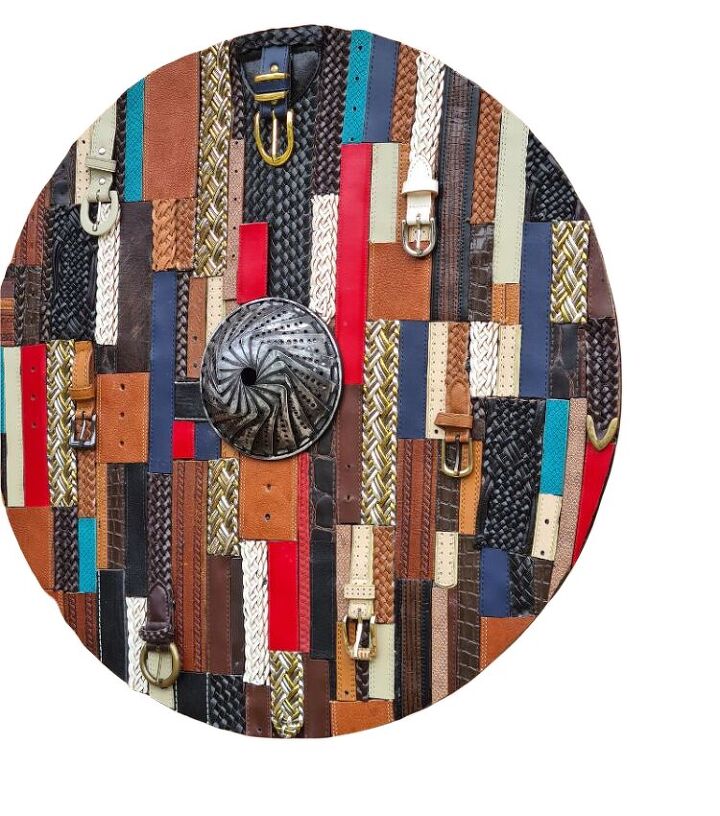
For my second attempt, I wanted to keep the belts going in the same direction. I started by cutting the belts into smaller pieces and using a hot glue gun to attach them to the base. I started at the top and worked my way down filling in all the gaps. For this project, I would recommend using black hot glue because it blends in better with the belts.

You can mix all the different colours and textures.
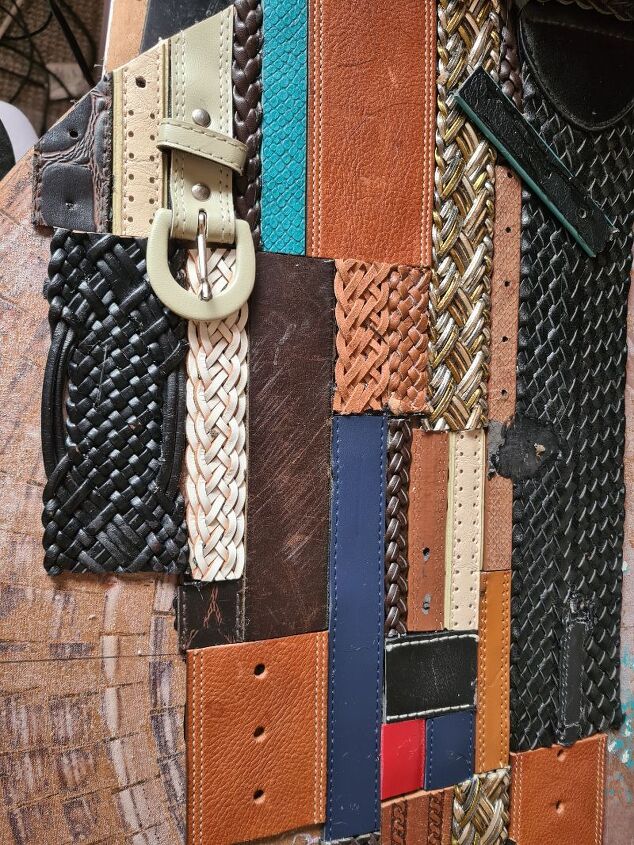
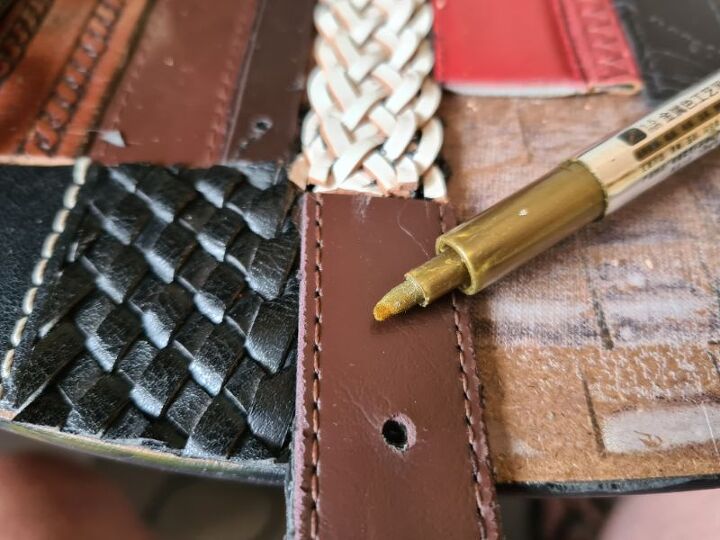
When you get to the edges, to get the correct shape here is how I cut mine. I placed the belt in place and used a marker pen to trace the shape from below. The pen mark is then used as a guide to cut the leather belt to shape.
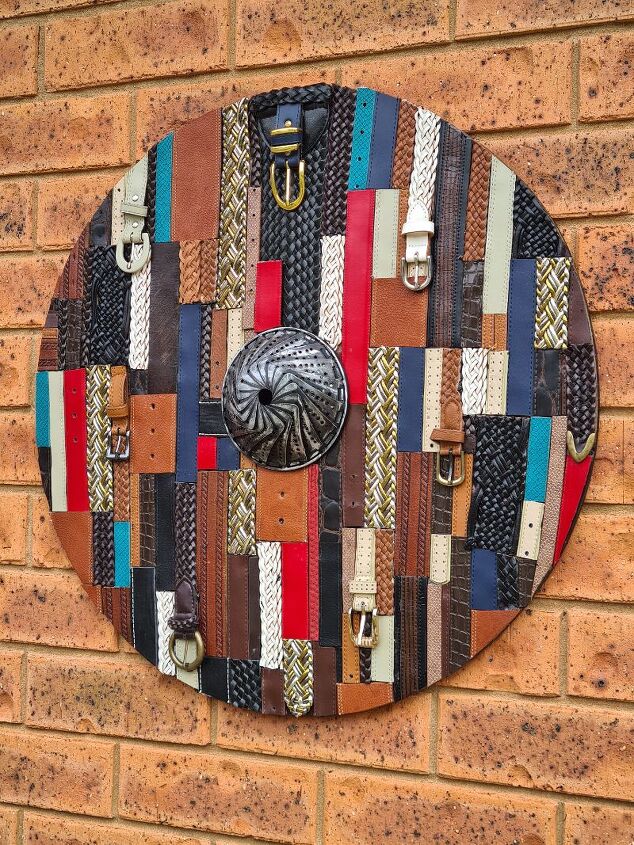
Adding a focal point
Once the surface was covered I felt my leather belt wall hanging needed a focal point. I was looking around my local charity shop and found this contraption below, I believe it is a steamer. The shape and design of the steamer I found appealing and felt once painted it would look great. I painted it black with spray paint and rubbed some silver wax over the surface to highlight the textures.

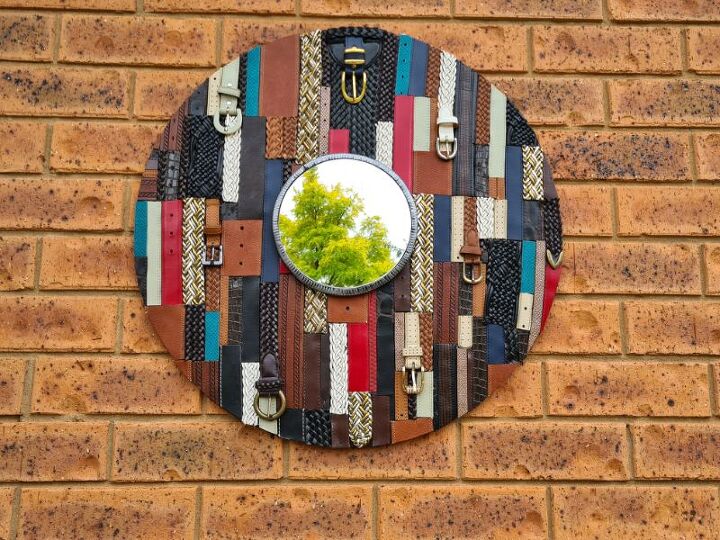
next, I drilled a small hole in the centre and screwed the steamer onto the board. My husband saw this project and commented that it looked like a Vikings shield with the steamer. Feeling I may have gone too weird on this project, I replaced the steamer with a small mirror. I would love to hear your thoughts on which one looks better.
I was told if I did not mention it was a steamer it would have been fine. But once told you could not unsee the steamer.
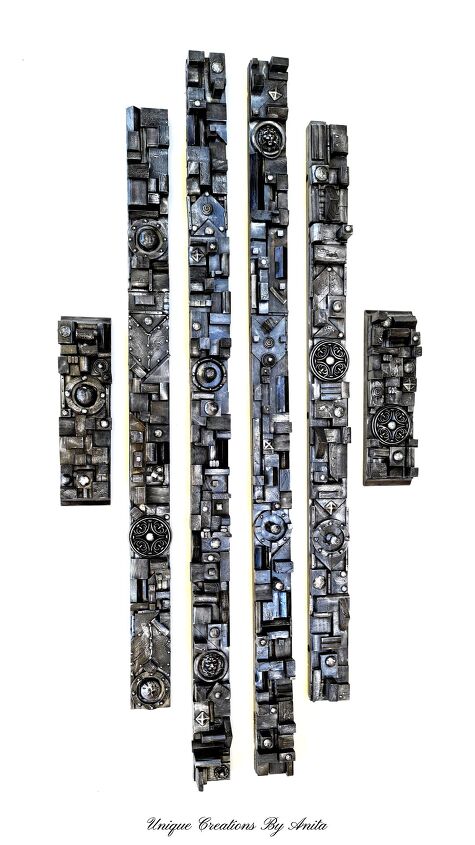
Here is another project I made using recycled scraps of wood.
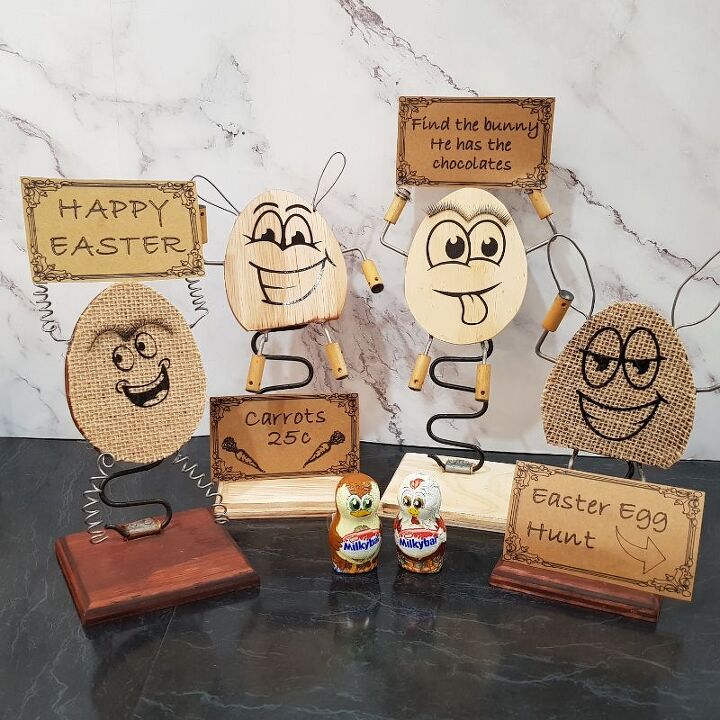
If you are looking for a unique easter idea, check out how I made these cute characters on my website listed below.


Comments
Join the conversation
-
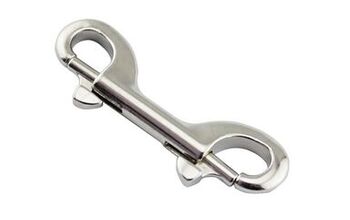
Your 'leather targe' would make for a reliable and accessible place for keys.
Simply clip one end of a double lobster clip to the belt end, and the key ring on the other end; easy to hang, and easy to grab and go.
-
Who would have thought, old belts. Really unique, and a pretty neat collection of belts. Displayed beautifully. You have a great imagination on all of your projects.


Frequently asked questions
Have a question about this project?