


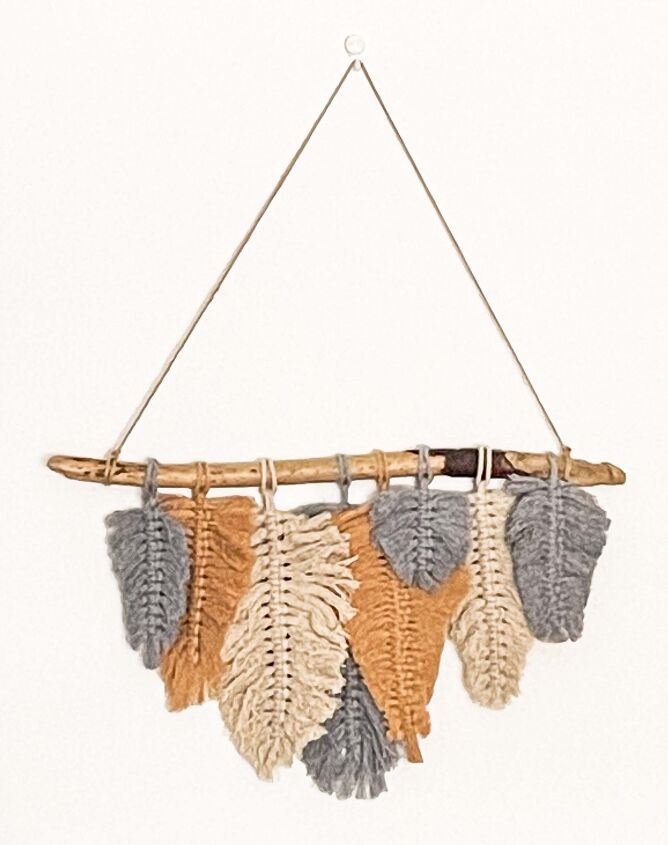
Simply Beautiful Macrame Feathers – DIY Wall Hanging
Beautiful macrame feathers have been flooding my Instagram feed. With our bedroom receiving a revamp with fabulous extensive pallet wardrobes to solve all our storage problems it’s time to turn my eye to wall decoration.
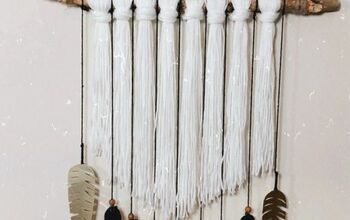
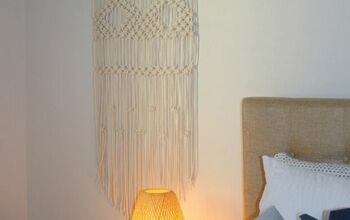
I am using my DIY macrame feather’s to make a macrame wall hanging. I found the branch on a beach walk. If wall hangings are not your style there are many ways to use macrame feathers such as key chains, to add to a macrame hanging, to use as banner across your mantelpiece.
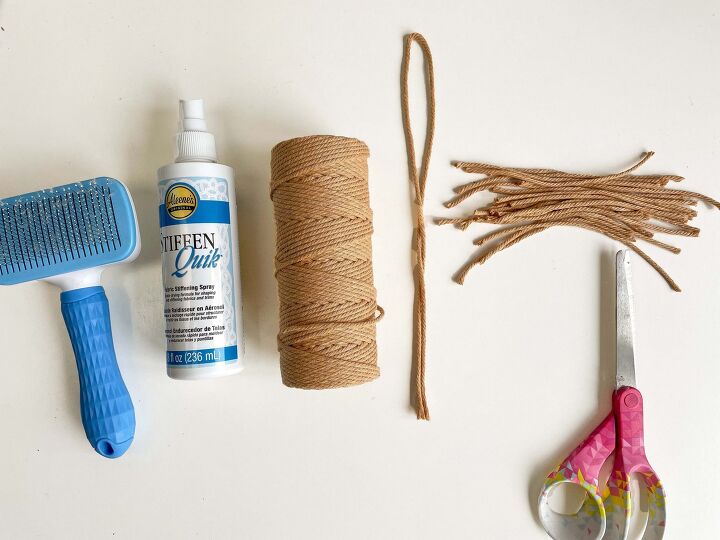
Supplies for your macrame feathers
Regular readers will know I am passionate about using what I have to hand – on this occasion piping cord was not the solution! Do buy yourself macrame cord, you will be glad you have!! If you enjoy the art of macrame regularly then this is the perfect project for small pieces of cord leftover from other projects.
I have used two different types. both 3mm think. The grey and mustard yarns I am using are a three twisted yarn which has brushed out beautifully, The cream cord is more like a plaited 6 cord , it tends to crinkle when brushed and sprayed with fabric stiffener. Stick to the three twisted yarn if you can!
- 3mm Macrame Cord, Grey, Natural, Mustard
- Fabric Stiffner Spray, or hairspray, or watered down modge podge
- Pet Brush
- Scissors
- Measuring tape or quilters ruler
How to make a macrame feather
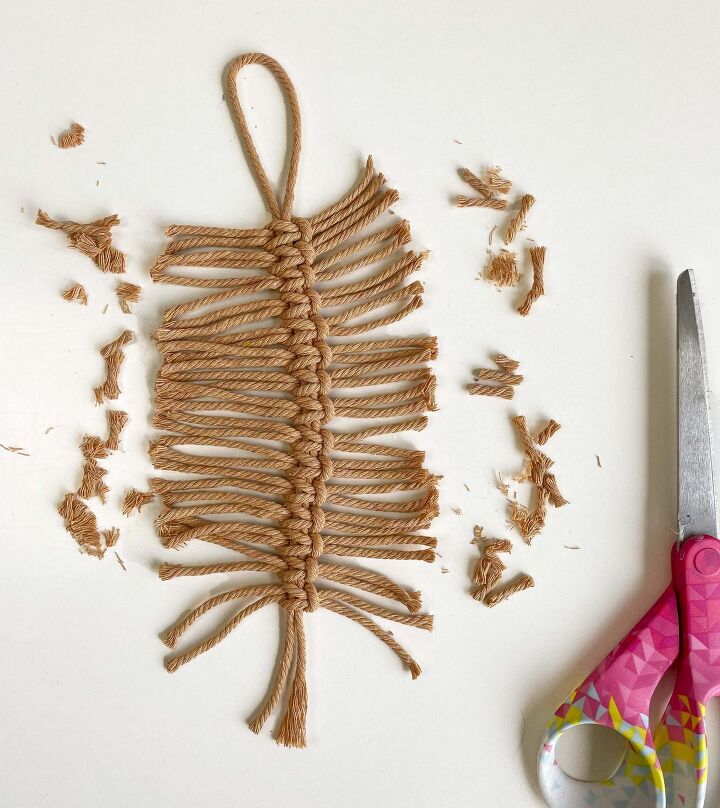
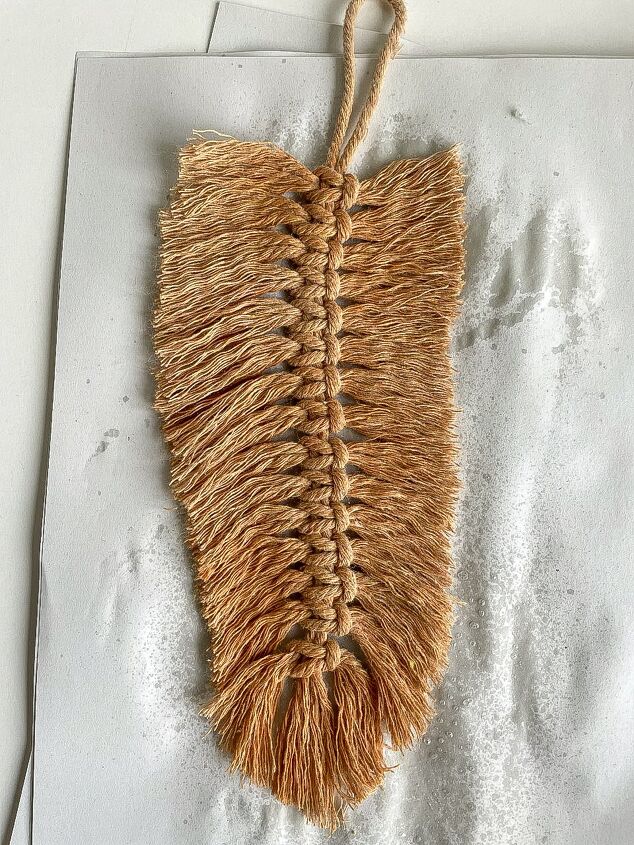
To make a feather long you need a 22″ piece of cord for the spine.
28 pieces of cord approx 5″ long
Fold your spine in half. Take one of the 5″ strands, fold this in half and then place it under the spine.
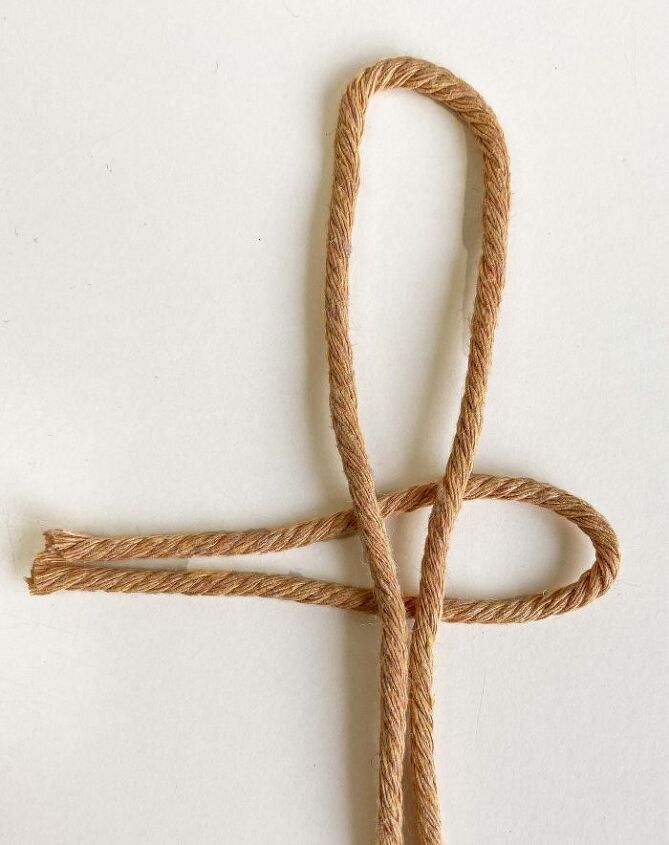
Fold another 5″ strand in half.
Place the fold through the loop of your first strand. Pull it through over the top of the spine, horizontally.
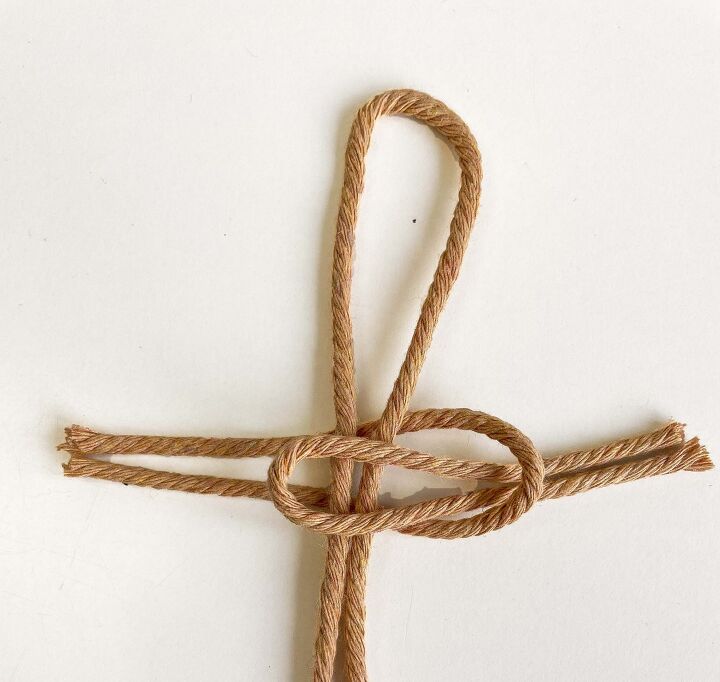
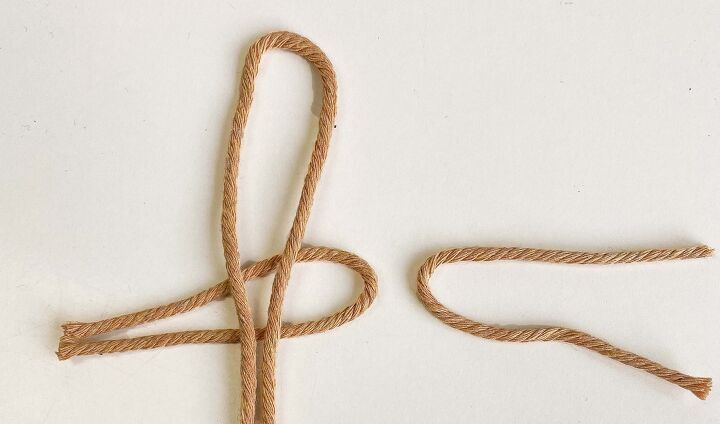
Take the ends of the first strand and feed this through the loop of the second strand to form a knot.
Pull both sides tight so it fits snuggle to the spine of your feather.
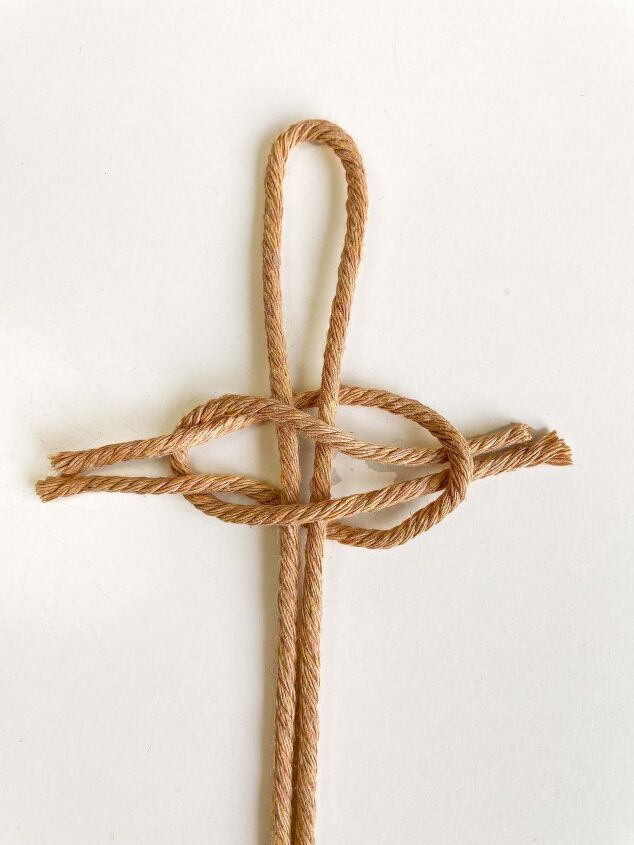
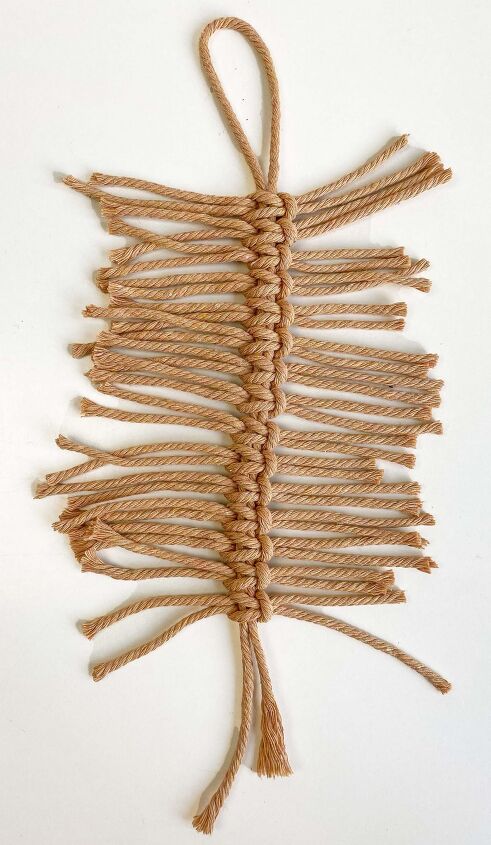
Once you have the hang of this it is super easy. Just keep going down your spine until you are about an inch from the bottom.
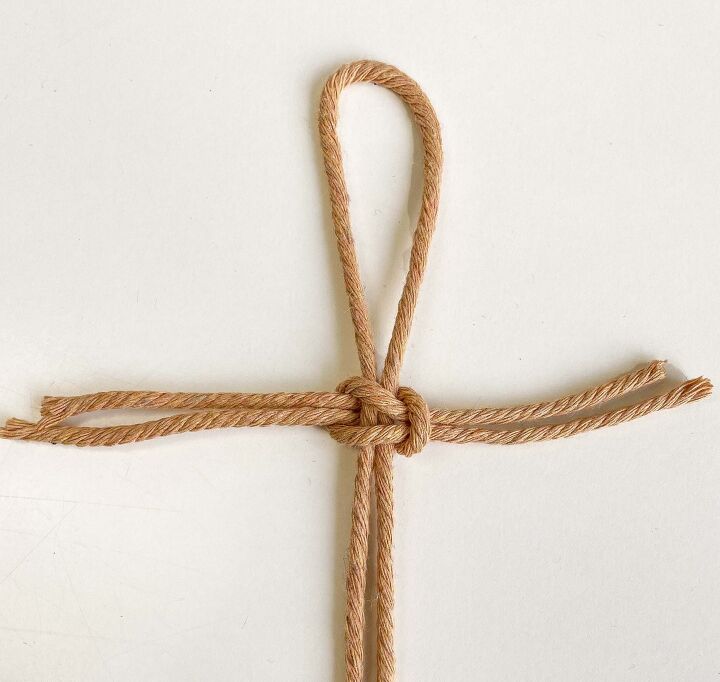
Trim the yarn to form your feather shape. Sharp scissors really help! It doesn’t need to be too precise as you will retrim in a minute.
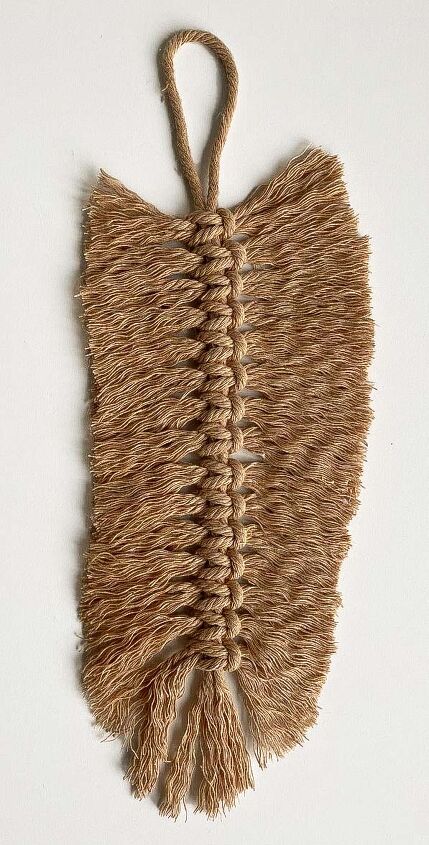
Now to untwist the yarn and brush it out, I found a pet brush very helpful for this step.
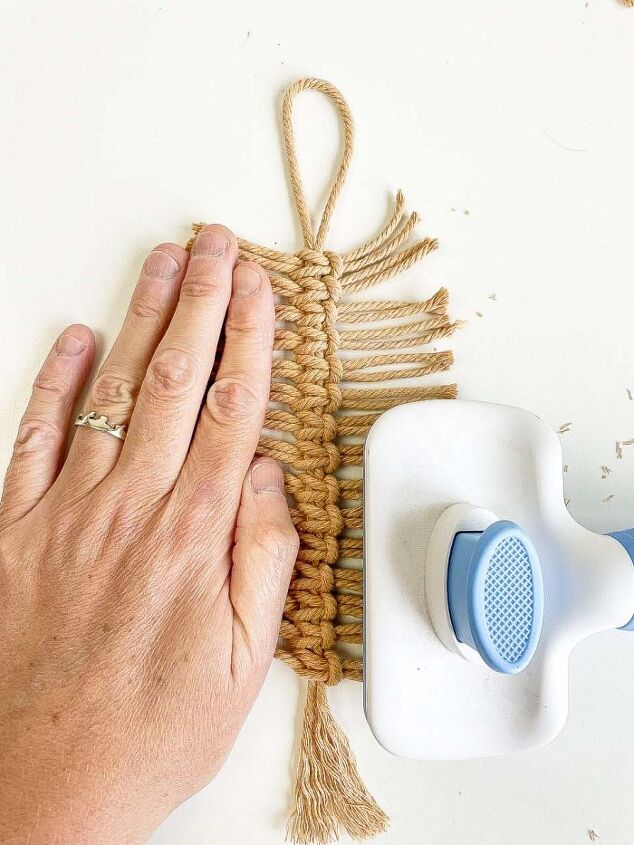
Once you have brushed the yarn out I suggest a final trim.
How to make different sizes of Macrame feathers
If you would like to make smaller or larger feathers start by shortening or lengthening the long central cord of the feather. For larger feathers you can work with a thicker yarn, or even double up your thin yarn, experiment and have fun.
How to stiffen your macrame feathers
There are three different methods for stiffening the macrame feathers. If you have hairspray to hand give this a go. Alternatively water down mod podge and paint this on, although I have not used this method my understanding is to mix 1 part water to 1 part mod podge.
I have chosen to use fabric stiffener, spraying both sides.
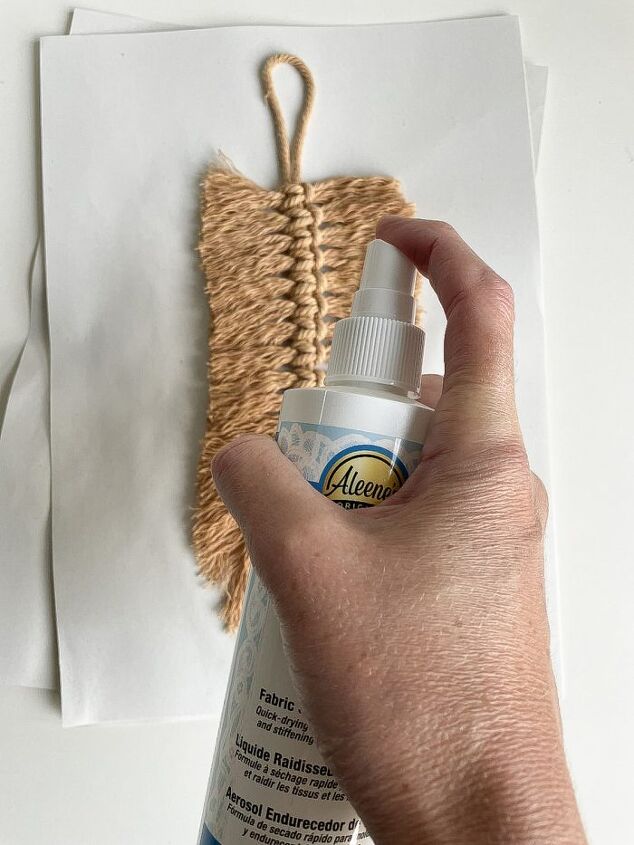
I suggest placing paper underneath to protect your work surface. The fabric stiffener will take at least an hour to dry.
Whichever method you choose ensure you do both sides of the feather, reshaping if necessary before the feather dries.
How to make a wall hanging from macrame feathers
Choose a piece of battening or branch to hang your feathers from. The piece I have is long with eight feathers of various lengths hanging from it.
Decide if you would like the feathers to hang up snug to the branch or hang below and think about the length of cord you need accordingly.
I have chosen to have the feathers up snug to the branch, making the feathers on the branch, removing them to spray them with stiffener, and then replacing them back on the branch.
To hang from the branch place the loop from the spine of the feather over the branch.
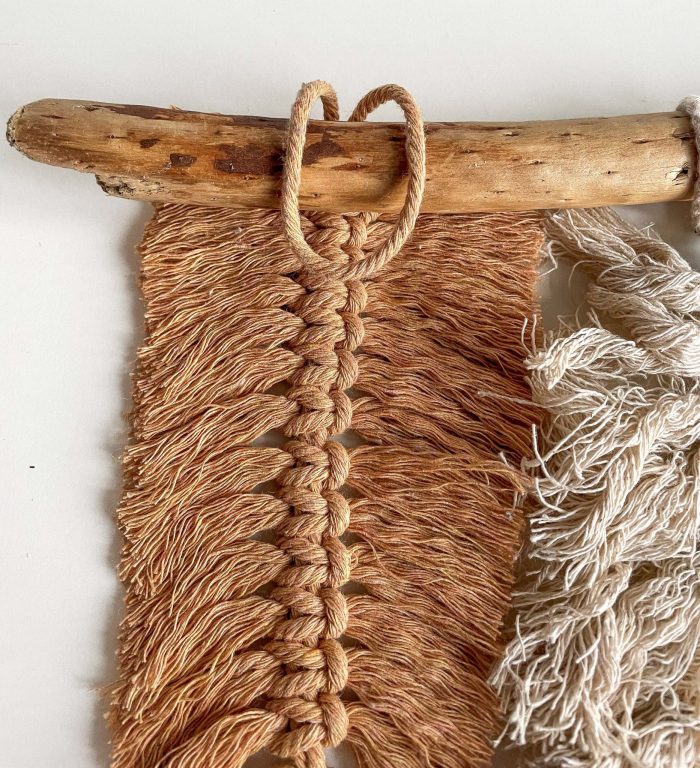
Then thread the feather through the loop.
How to hang your macrame wall hanging
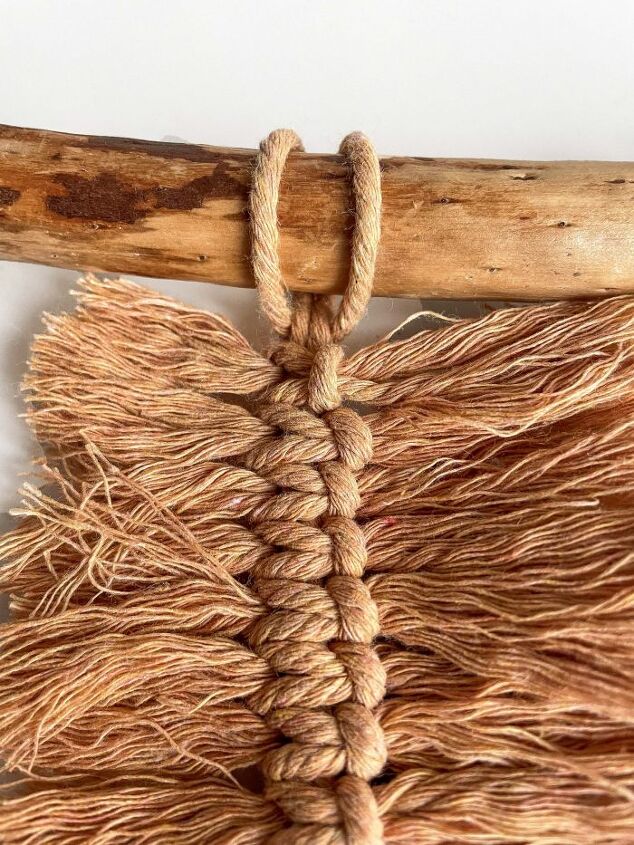
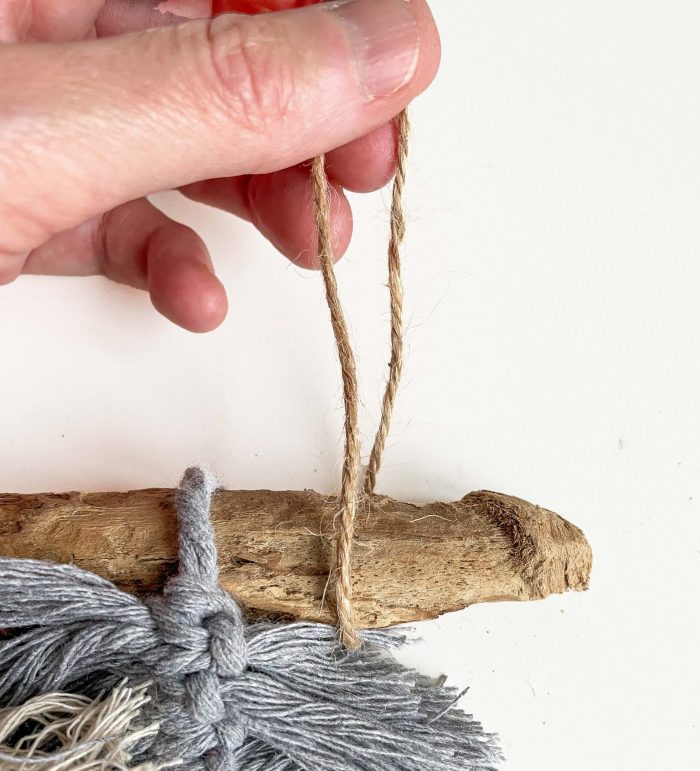
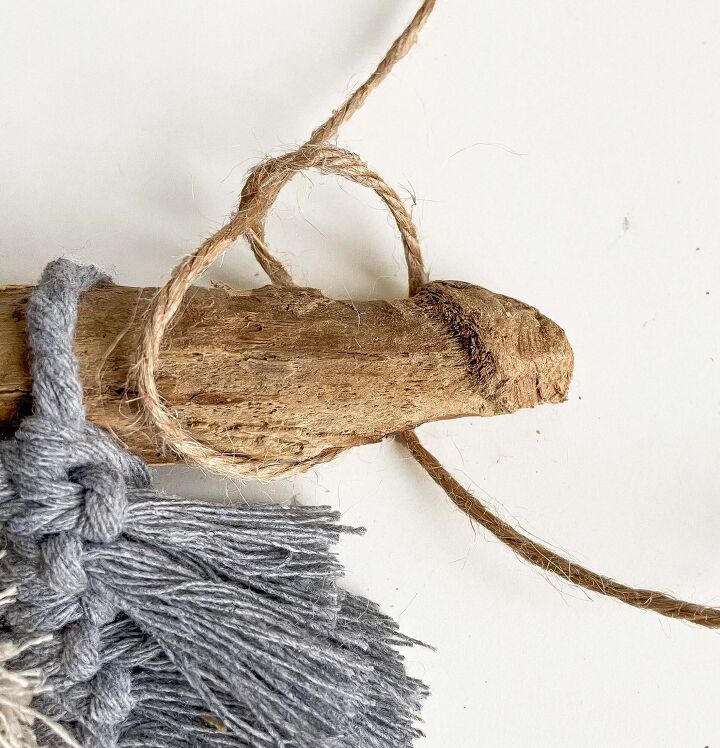
You are going to need a piece of string or rope which we are going to attach with the same loop knot you have used to make the feathers.
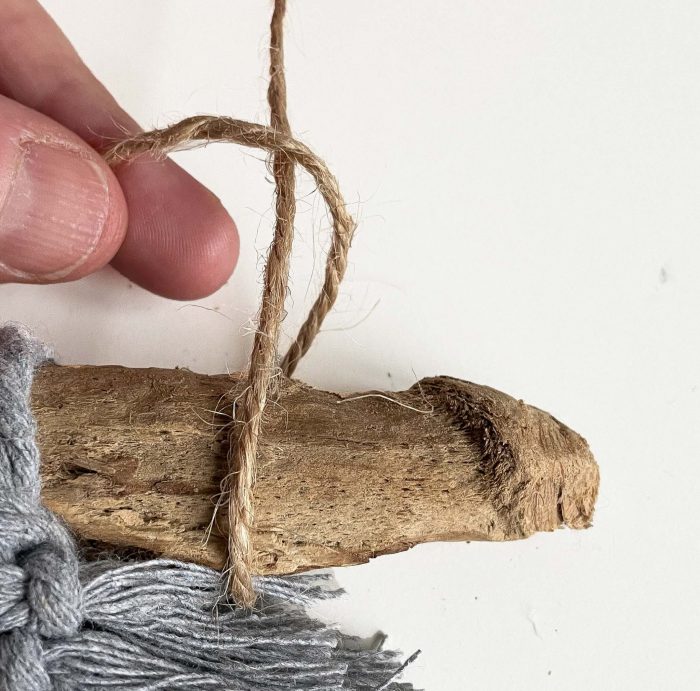
Fold the string/rope in double, place over your branch and thread the two ends through.
Now take the short thread and tie knot around the long thread.
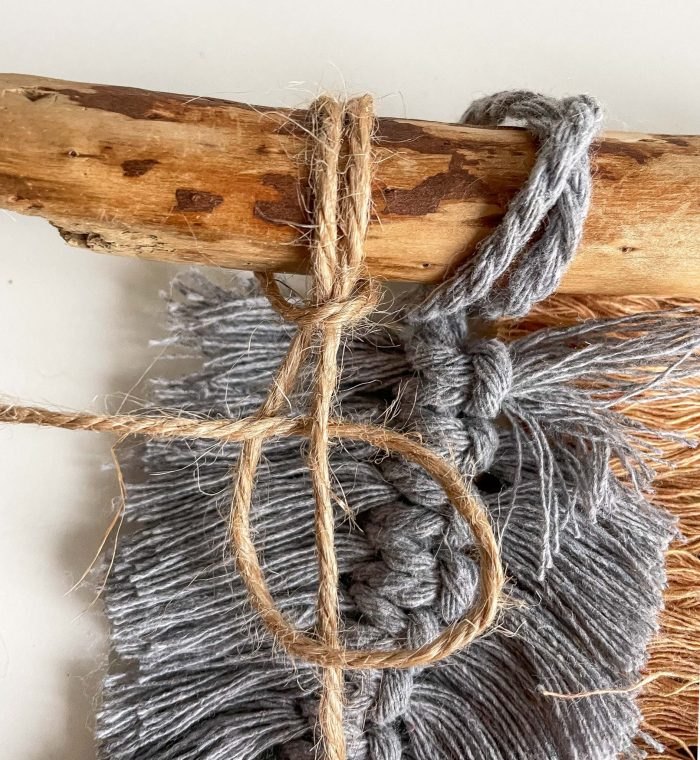
Trim your short thread off.
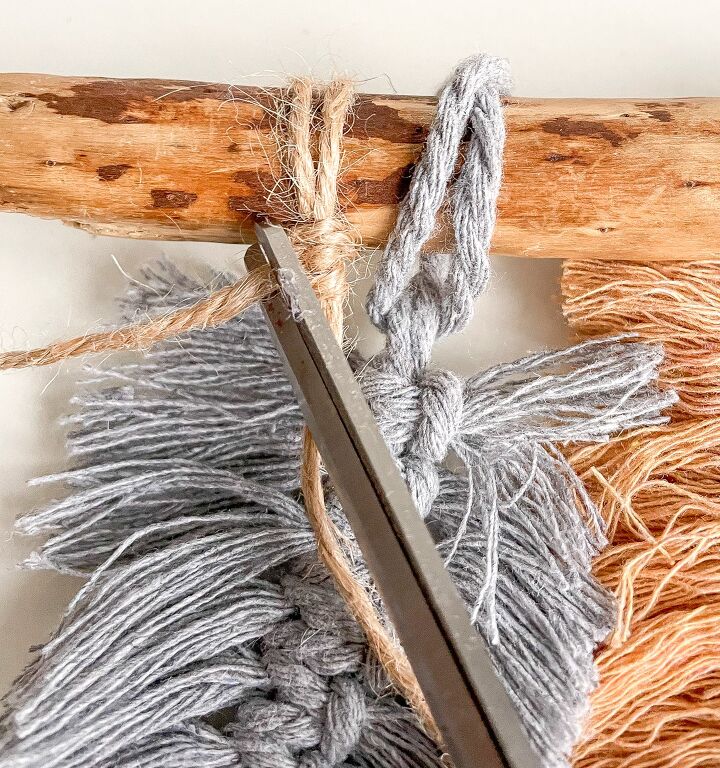
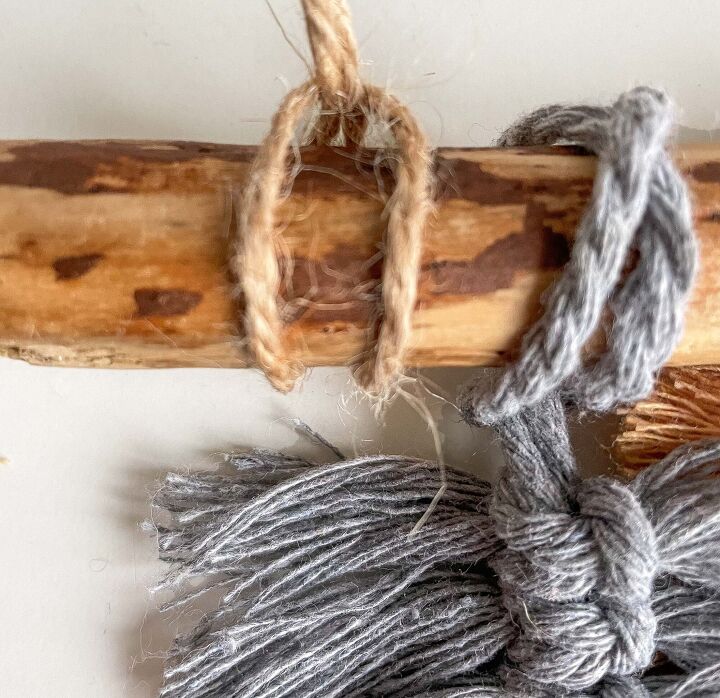
For the second side there are a few more steps. I will explain it as we go!
Thread the short end of the string over the front of branch, underneath and back up.
Pass the end of the string over the top of the long end, and then back under the branch.
Pass the end back up the front of the branch, and through the loop.
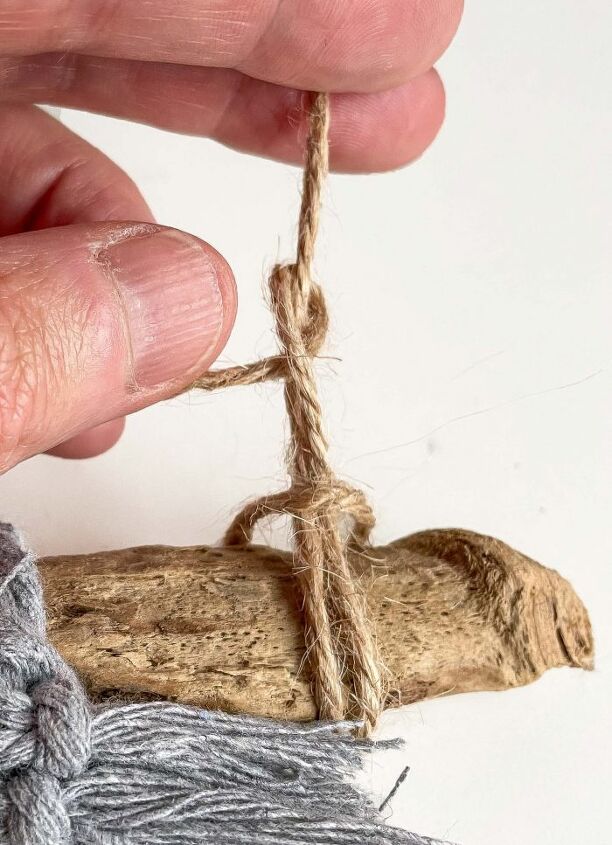
Lastly tie a knot as shown and trim the short end off.

This is my second macrame project – do check out my DIY macrame plant hanger.
Resources for this project:


Comments
Join the conversation
-
Your instructions made me want to finally try macrame!
-
Your how to instructions are easy to follow and the feathers look great. But I’m confused did you use yarn or macramé cord. The pictures look like a course cord not yarn like I crochet with.


Frequently asked questions
Have a question about this project?