


Update Outdated Wooden Doorbell Chimes Cover

by
Mary
3 Materials
$4
2 Hours
Easy
Do you have an outdated wooden doorbell chime cover that doesn't fit your decor? Check out this simple way to update it's look with a chic, art deco look.

Ok, I want to know in the comments- Who has one of these outdated doorbell chimes covers? Or something similar to it. I'm sure many of us do. And after working hard at a remodel or redecorating project- maybe it's staring you in the face too. So I put my Cricut to use and gave mine a quick face lift.
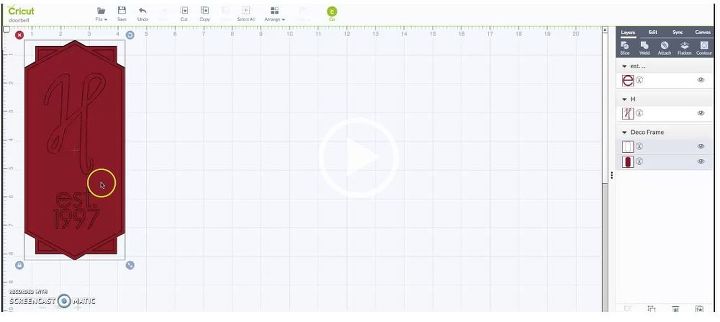
I knew the cover was the perfect "canvas" for a monogram. So, I used an art deco style border, script capital letter and simple font for the date to create a the design. Be sure to pop over to my full blog post tutorial to see a screencast video for tips on how to create the monogram design.
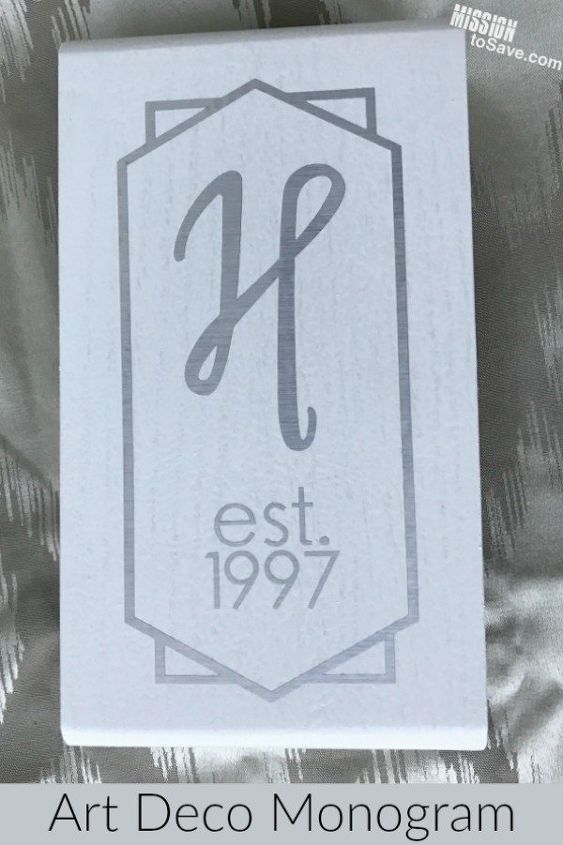
To update the oak cover, I just used some inexpensive white spray paint. Since the chimes were gold, which I didn't really like- but didn't want to try changing, I decided using silver vinyl would give it a chic "mixed metal" look. I absolutely love how it turned out.
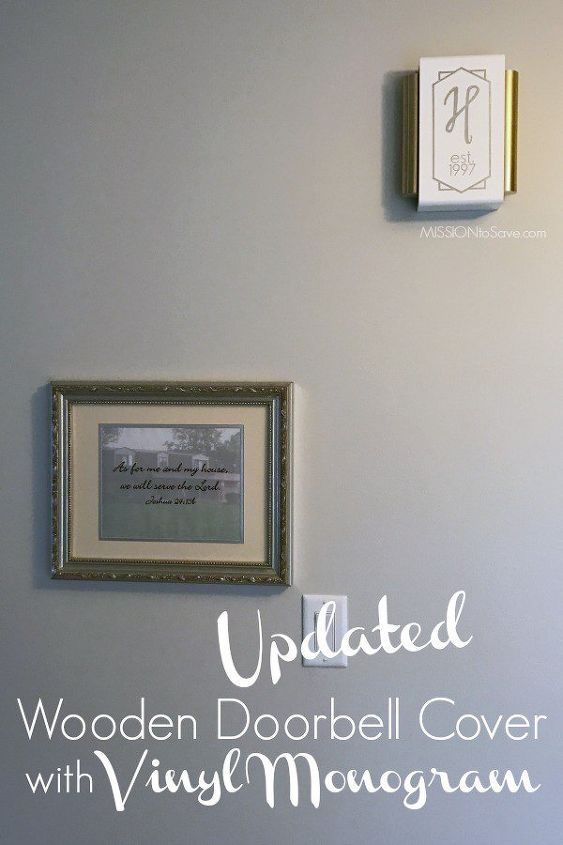
Now the doorbell cover looks like intentional decor and doesn't stick out like a sore thumb. I love how it looks with my DIY "As For Me and My House" picture too. Now our guest are greeted with a chic, accent wall. And all it really cost was a can of spray paint and a little vinyl. So get creative with your doorbell cover! What will your transformation look like?
Want more details about this and other DIY projects? Check out my blog post!


Frequently asked questions
Have a question about this project?