


Cut Plywood Into A Triangle Shape For This Stunning Shelving Idea

7 Materials
$15-20
5 Hours
Advanced
I love a good geometric piece for the home, which is why I decided to create these lil' gems. I had seen some wooden geo wall pieces online and figured with a few cutout shapes, I would be able to recreate the design. These pocket shelves are great for storing extra little knick-knacks, or adding some nice plant life to any room. With some plywood, wood glue and some elbow grease you can create these wood geo pocket shelves, too!
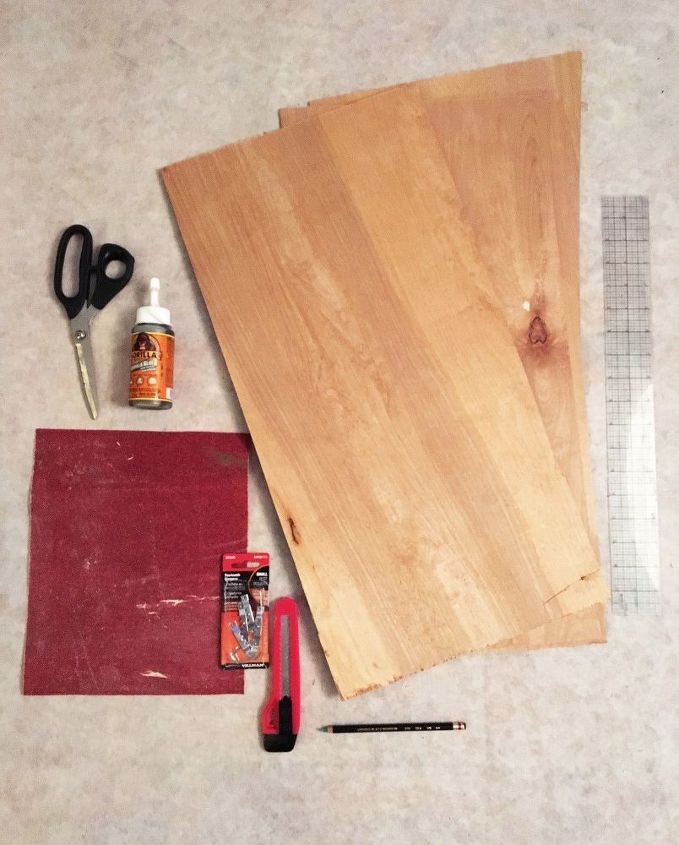
SUPPLIES: -Wood Glue -Sand Paper -Box Cutter or other tool that will cut through plywood -Plywood (I bought a 4x8 piece and had it cut at the store into what was supposed to be 12"x12". I just wanted some smaller pieces to be more manageable.) You can also buy sheets of plywood at craft stores sometimes. These would work just the same. -Picture Wall Hangers (I used 2 packs of 3 push in wall hangers so that each geo box got 2 for stability - For more ease you can also use Command Picture Hanging Strips and simply velcro the pockets to the wall) -Pencil -Ruler -*Optional - Paint (I used acrylic, but spray paint or latex would work as well)
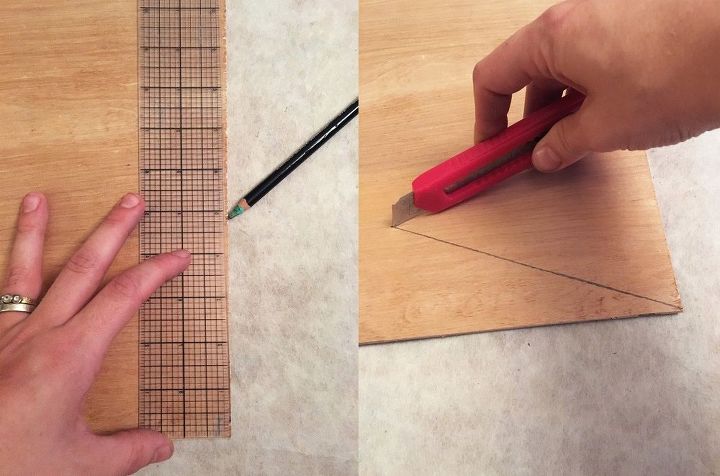
STEP 1: Cut your first plywood triangle For 3 pockets you will need 9 separate triangles that you will later glue together. For the first triangle measure the distance that you wish the base of the triangle to be. I measured 6" for my first triangle. I then drew a straight line up from the center of that line (at 3") and using my ruler drew a line from each end of the 6" line to the center line measuring 7" each. Then using your exacto knife simply cut through the lines that you have drawn to cut out the triangle. This takes several strokes and some some wiggling of the wood, but it will eventually break free. These instructions perhaps sound tricky, but essentially you are drawing a triangle with the measurements of your choice and then cutting it out.
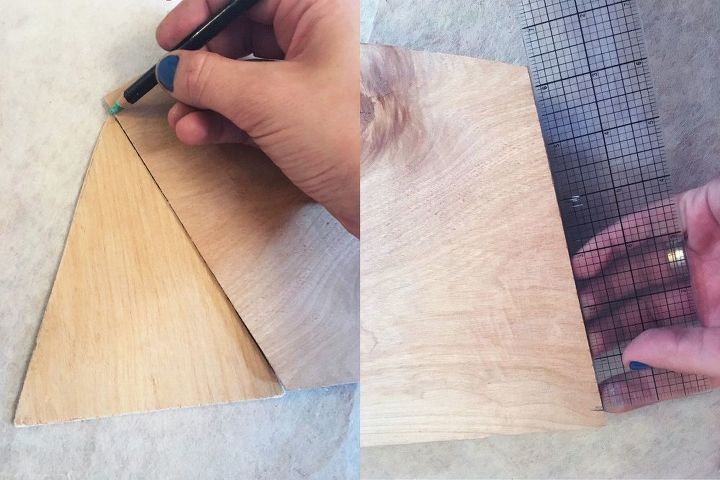
STEP 2: Cut your second plywood triangle To draw your second triangle you need to make sure that one side of the triangle is the same length as one of the sides of the first triangle you drew. *This is because these sides will be glued together. Grab your first triangle and mark the distance on a piece of plywood. Then grab a ruler just to double-check the distance. Now you will repeat step 1 for this triangle. I decided to make this one have different measurements so as to create an interesting geometric shape vs. a symmetrical one. I then took this triangle and traced out another with the exact same measurements for the opposite side of this pocket.
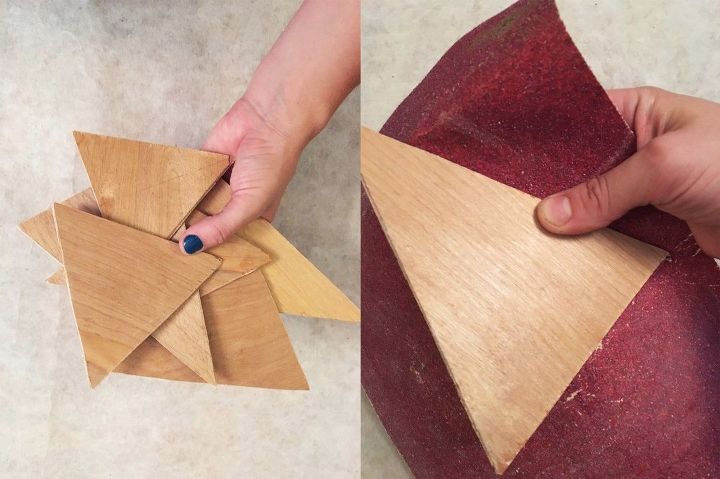
STEP 3: Cut the rest of your first plywood triangles You will repeat parts 1-2 two more times to create 9 triangles. I did not want all of my pockets to look the same so I cut various size triangles. *Just make sure that for each pocket there is one side that's length matches the sides of the center triangle so that when they connect they are even. For example, the triangles I cut were as follows: Pocket 1=Center Triangle: 6x6x6 Side Triangle 1: 6x6x6 Side Triangle 2: 6x9.5x7.5 Pocket 2= Center Triangle: 5x5x5 Side Triangle 1: 5x7x7 Side Triangle 2: 5x5x5 Pocket 3= Center Triangle: 5x6x6 Side Triangle 1: 6x8.5x8.5 Side Triangle 2: 6x8.5x8.5 Once all your triangles are cut out sand down any rough edges on the sides.

STEP 4: Attach triangles with masking tape Attach the appropriate triangles for each pocket together with your masking tape. *Make sure you match up the appropriate sides with the matching lengths. STEP 5: Make the back of your pocket shelf Set the top of the pocket on top of another sheet of plywood. Trace around the edge of the pocket and then using your ruler draw two straight lines at the same angle as the opening of the pocket. This will create a v-shape. You will then cut this shape out. *See outline in picture.
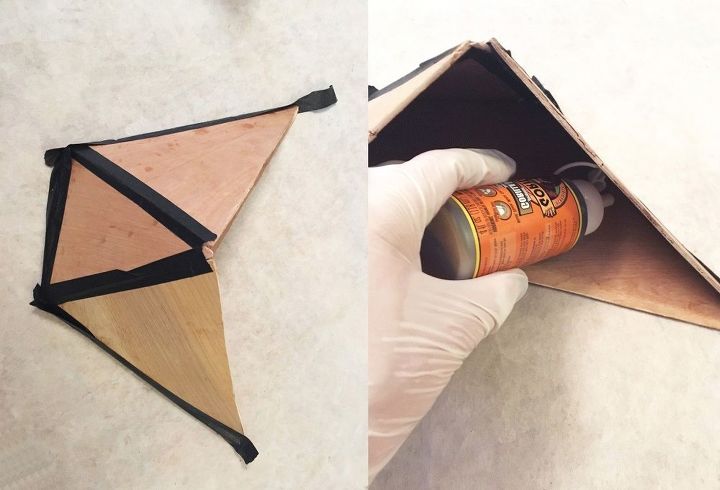
STEP 6: Attach the front pocket part to the backing and glue together Tape the top part of the pocket to the backside and glue all of the pieces together on the inside. Be sure to seal ALL the seams on the inside. Glue each of the triangles for the top part of the pocket together as well as the sides of the triangles to the back piece of the pocket.
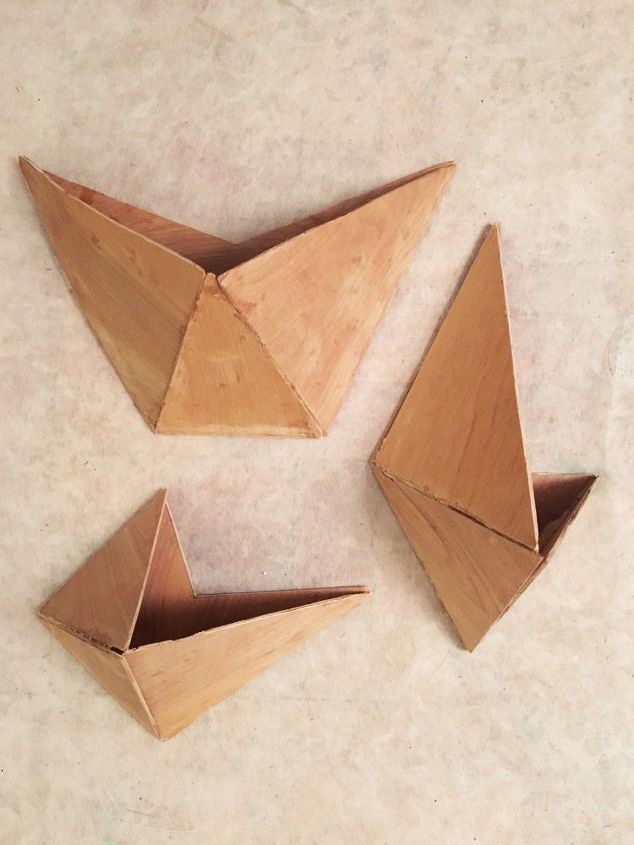
STEP 7: Let glue dry Once the glue has dried remove the tape and ensure that all pieces are glued securely.
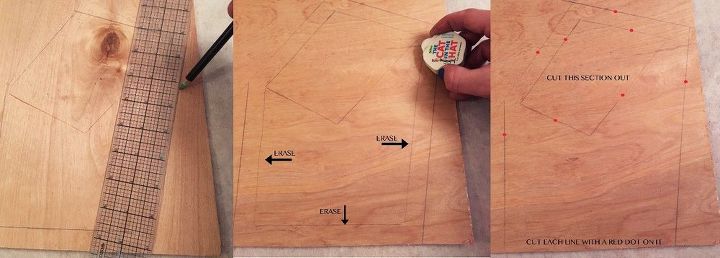
STEP 8: Make the frame For the open frame part we are going to first do some more tracing. Take your wall pockets and place them on plywood and trace around them completely. Draw lines up from the upper corners to a point making an inverse 'V'. Now draw lines 3/4" outside of the lines you just drew. Erase the 3 lines from the base of the pocket. (see picture) Now simply cut through the plywood on all the remaining lines.
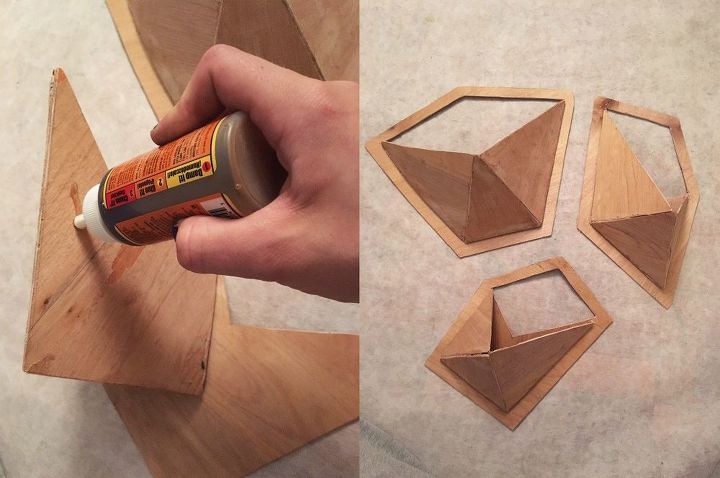
STEP 9: Glue your pocket to the frame Take your pre-assembled wall pocket fronts and glue them to the frames you just cut out. Allow to dry.
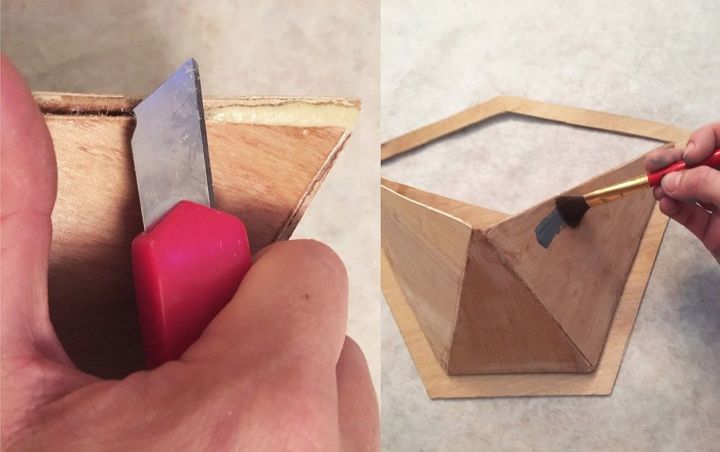
STEP 10: Scrape away excess dried wood glue As wood glue dries it expands. If there is visible glue just scrape it off with your exacto knife. Luckily wood glue is also paintable so you can paint over any smaller remnants left behind. STEP 11: Paint your shelves (Optional) If you don't wish to keep your wall pockets raw wood you can now take the time to paint them in the colors of your choice. *I painted the inside and outside since both will be seen.
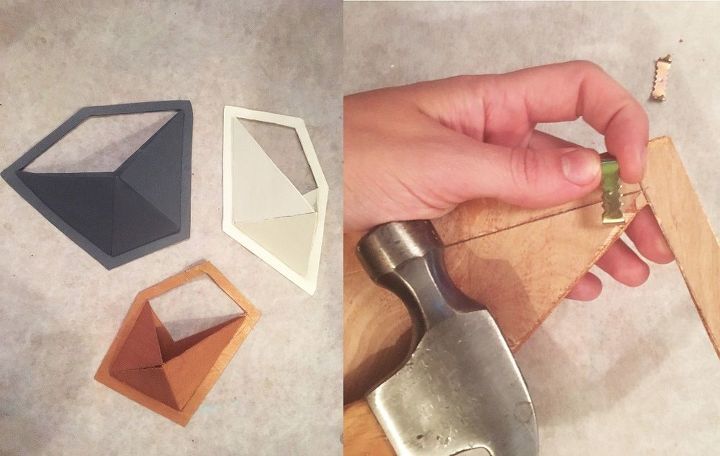
STEP 12: Prep your shelves for hanging Once your paint has dried it is time to prep them for hanging! Arrange the wall pockets on the floor in the way you will want them to appear on the wall. I used a ruler and pen to mark straight lines on the back at the angle I wanted the pocket to hang so I knew where to place my picture hangers. Take your picture hangers and hammer them into place on the lines drawn. I used 2 picture hangers per pocket to ensure security. Plywood is thin so you will want to be sure to hammer the picture hangers within the outer frame so that they don't poke through. (This is why we doubled up the back portion of the pockets) *You can also use Command Picture Hanging Strips vs. the metal picture hangers. They would be an easier application and can hold up to 16 pounds. There is also no risk of them poking through like there is with the picture hangers.
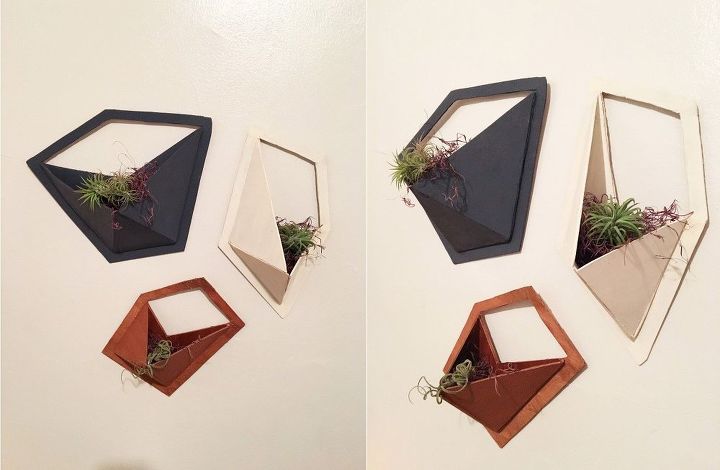
STEP 13: Hang your shelves Now just find where you would like to hang these beauties! Fill them with the goodies of your choosing and enjoy!
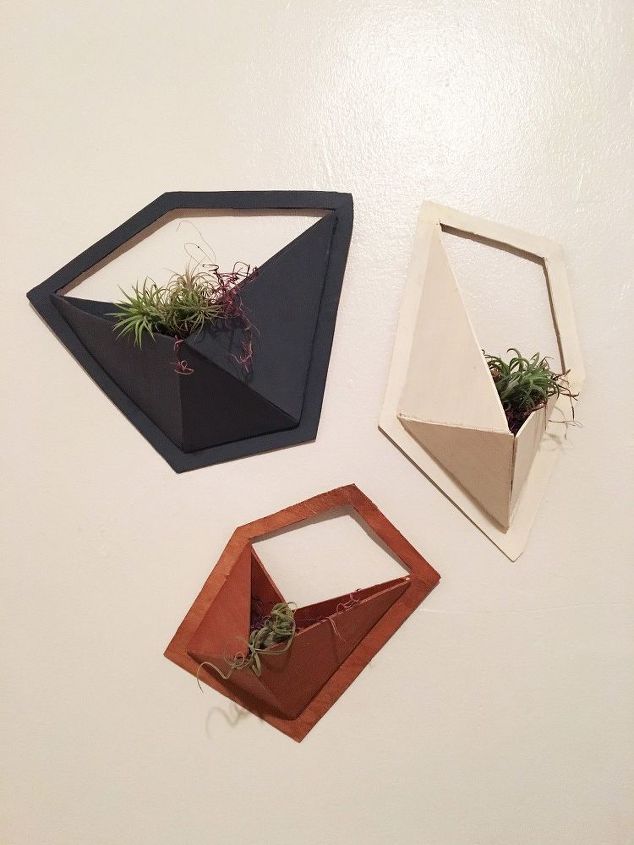
I added some small air plants with hopes that they will grow and fill up the space. I just love the touch of life it adds to my wall.
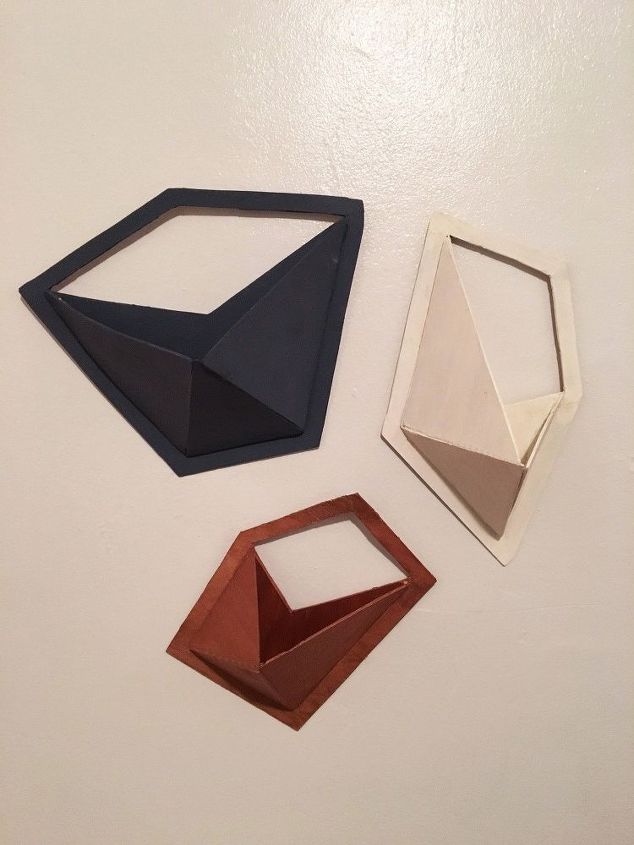
The possibilities with these are endless! You could create loads of them and cover an entire wall with a design if you wanted!
Comments
Join the conversation
2 of 52 comments
-
This is really cool! Thank you for posting.
-
I love it!


Frequently asked questions
Have a question about this project?