25K Views
A DIY Attic Hatch Option

by
SLS Construction & Building Solutions LLC
(IC: professional)
One of our most popular series on the HTRC is on Air-Sealing& Insulating especially in regards to the attic. For most of us living inthe South we are concerned with keeping the heat from the attic out of ourhomes during the summer. During the winter the issue flips a 180° for those upnorth who want to keep the heat out of the attic & stop a major cause ofice dams. The nice thing about an insulated attic hatch is it performs bothfunctions quite well & helps one Besides the materials below allyou need is a tape measure, a utility knife or saw, and a caulk gun.
For this attic hatch you need:
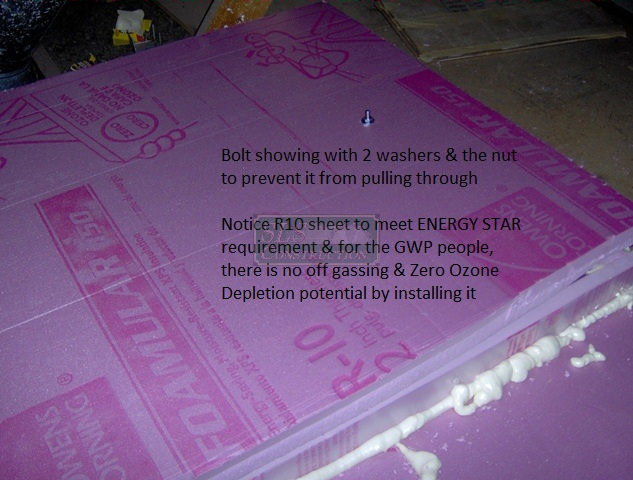
2" thick foam-board (4×8 sheet) with an R-Value of 10 orgreater (you might need two sheets for larger hatches or to make it thicker)
8 -20' foamweather stripping (the wider the better)
1 can Great Stuff® foam or similar
1 tube Liquid Nail® or other construction adhesive
Misc. hardware & 2 small bungee cords to seal ittight
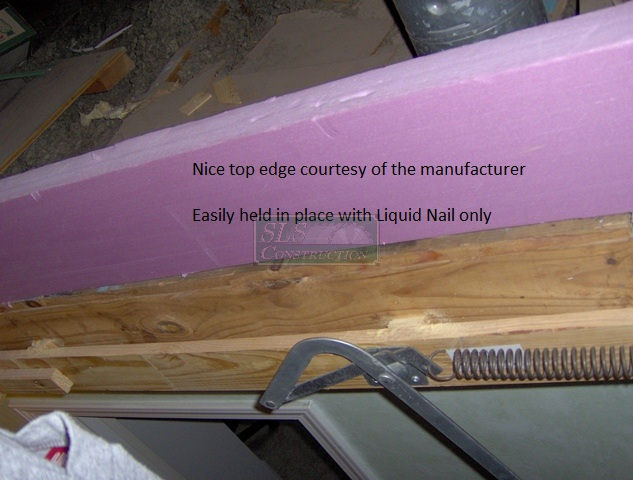
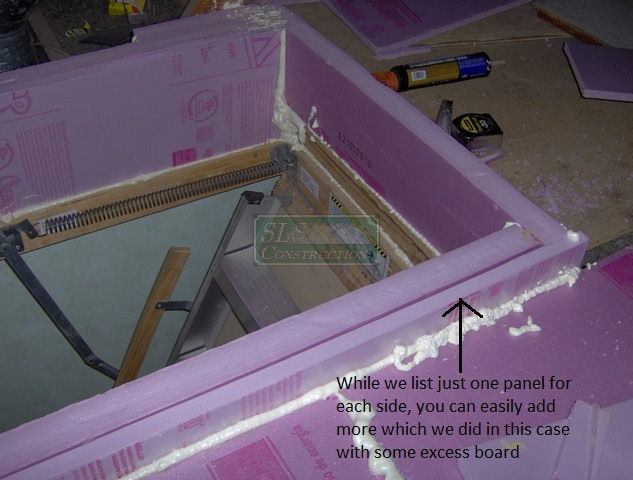
Getting started – depending on your region & insulationlevels you need to rip the side pieces at 11". For our friends up north thatrequire an R49 in the attic it should be ripped at 15". Make sure you leave thefactory edges for the lid to sit on. Move any insulation in the way gently outof the way & place the side pieces in place.
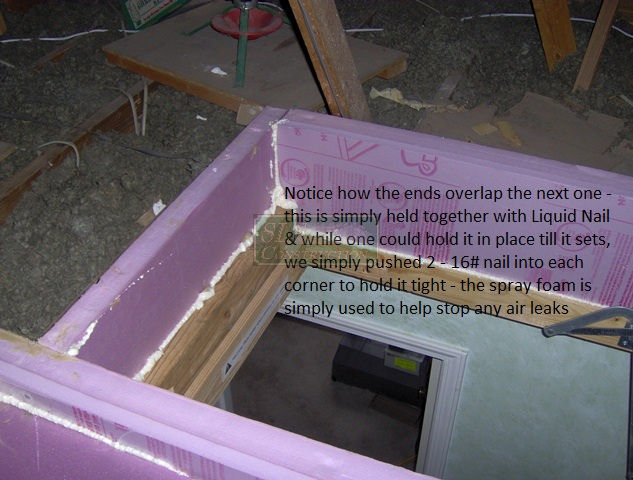
Attaching the pieces – The end pieces should span the sidepieces unless you are doubling up the foam. Apply Liquid Nail to where thepieces will meet & put them in place. I simply used some 16 penny nailsinserted through the side to help hold everything in place while the glue set. Oncethese panels were in place, I foamed up all the seams any cracks and theadjoining areas. Not only does this stop air leakage but also helps keep everythingin place. On top of this, simply add some self-stick foam insulation to helpensure any imperfections don't allow air-leaks.
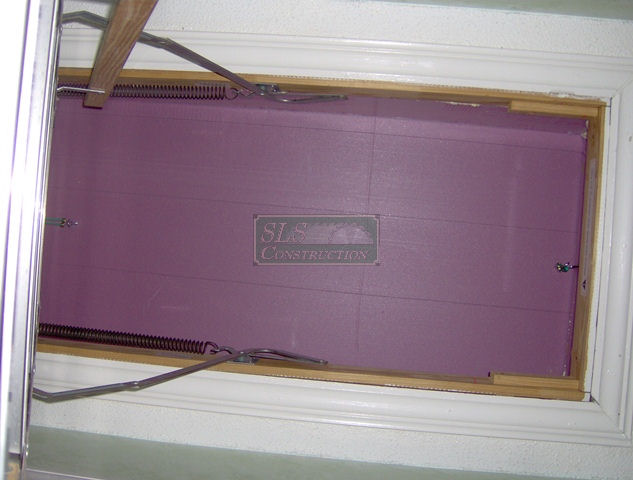
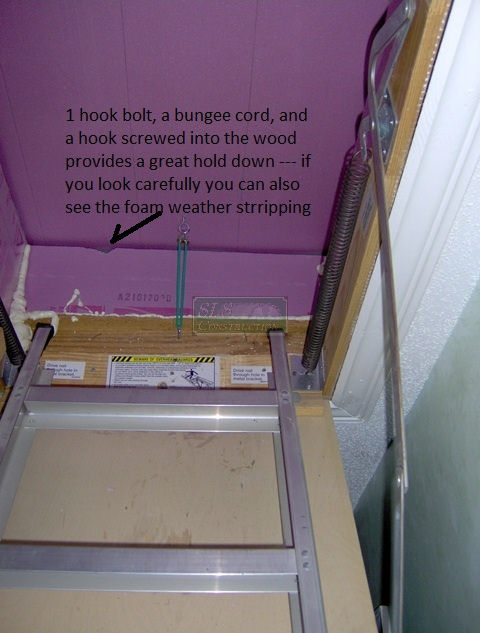
The Lid – the lid overlaps the side assembly by about aninch which means you don't have to fidget with it trying to get it justperfect. To help hold it in place, I just used some eye hooks – 2 short ones toattach into the wood & two longer ones for the lid. I also added 2 differentsize washers (a small one that would prevent a larger 1 ½" washer from slippingpast the nut) & some nuts to attach to the lid. Then I simply used a smallbungee cord to help hold the lid down.
A few other quick notes – If you do not wish to create yourown, you might want to check out Battic Door which makes a great product withan R-Value of R50. One other option is foam board with Radiant barrier alreadyintegrated into it – if you go that route it should be facing in towards the interiorof the house for best results. To see the original article with a few more tips& links: http://blog.sls-construction.com/2011/air-sealing-the-attic-hatch
Enjoyed the project?
Published January 13th, 2013 4:04 PM
Comments
Join the conversation
2 of 6 comments
-
Another option is to purchase an attic stair cover kit. Battic Door offers an R-50 attic stair cover kit that installs in a few minutes without any tools and costs less than $100.
 Mark Tyrol
on Jul 20, 2013
 { "id": "1182", "alt": "Builder magazine selected Battic Door from 1000's of exhibitors to be profiled for their Best of Day 2 video at the 2013 NAHB International Builders Show January 22-24, 2013 in Las Vegas!!", "title": "Builder magazine selected Battic Door from 1000's of exhibitors to be profiled for their Best of Day 2 video at the 2013 NAHB International Builders Show January 22-24, 2013 in Las Vegas!!", "video_link": "https://www.youtube.com/embed/WnQ5c-Ytgyc", "youtube_video_id": "WnQ5c-Ytgyc" }{ "width": 634, "height": 357, "showRelated": false }{ "id": "1181", "alt": "Battic Door's Attic Stair Cover kit was featured on DIY Channel's I Want That at the 2013 NAHB International Builders Show!", "title": "Battic Door's Attic Stair Cover kit was featured on DIY Channel's I Want That at the 2013 NAHB International Builders Show!", "video_link": "https://www.youtube.com/embed/Q17if7kJaOA", "youtube_video_id": "Q17if7kJaOA" }{ "width": 634, "height": 357, "showRelated": false }
 -
-
Good point @Mark Tyrol & I actually did recommend the "hatch" version if you follow the link to my original article - as for that flimsy $100 FG filled cover - I wouldn't waste my money on it nor recommend it - just because something can meet code, doesn't mean it is worth it or a good fit for most
 SLS Construction & Building Solutions LLC
on Jul 20, 2013
-










Frequently asked questions
Have a question about this project?