Faux Marble Flooring

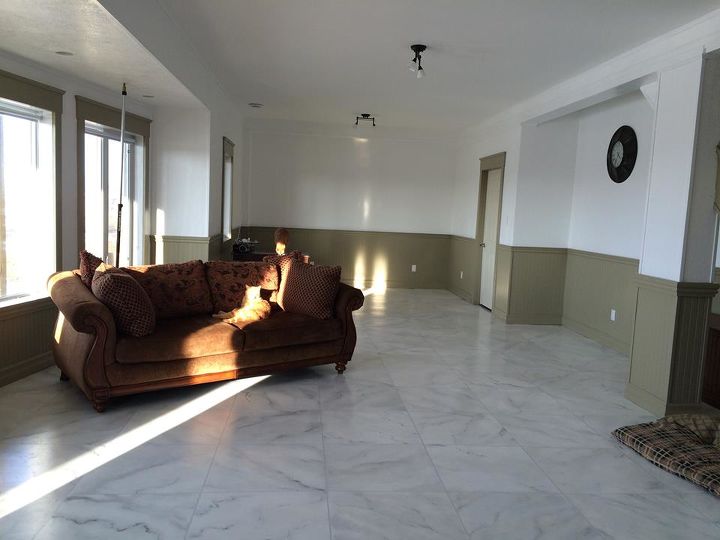
This is my faux marble floor, the room is 16 feet wide and 30 feet long. We are building our home and money gets tight sometimes, so I decided to paint our concrete basement floors.
Clean the floor completely and paint a basecoat, I used white paint because I wanted white marble
Then, I marked 2 foot marks along the walls to create a 2’ x 2’ grid, then I got a 12 foot 1” x 2” board and lined it up so I could make a midway mark on the floor. Then I used the board to draw the line so I had a pencil mark for my grid. – I did this very lightly so I would not see the pencil marks through my light grey.
Then, cover your grip lines with a coat of the colour you want your grout. Remember if you want light grout, do not make dark marks, as they may show through.
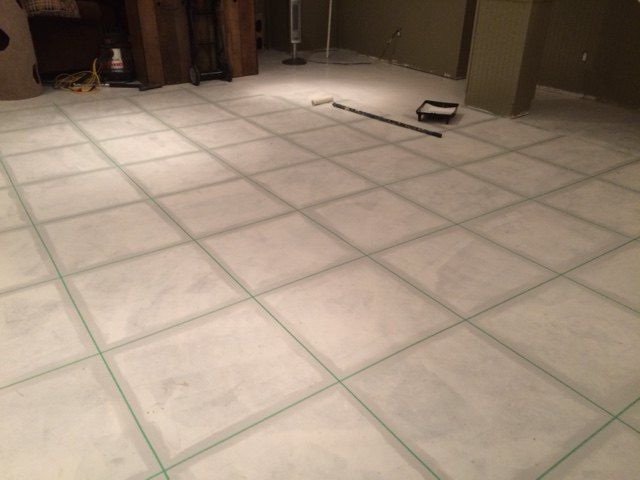
Once marked, take your ¼” painters tape – and this is easier with a helper – relay the grid work in tape. The easiest way is with a helper so they can hold one end to a mark on the wall and you can go to the other wall and pull it taut – then press it into place. If you are alone, use the 1 x 2 to help you mark it on the floor again.
Paint the whole floor white right over the tape.
Marble each square separately so that you will not have the marble continuing along the whole floor
Put black paint on the small paintbrush and pulling it towards you "roll it back and forth to make the line "squiggly". Make as many lines as you want.
Sorry I did not take photos of me doing the floor so am demonstrating on a piece of gyprok
Wait about 20 second and take the big 4: brush and brush across the lines to soften and blur them
get some white paint on your 2" brush and ...
...dab some white around where you have the black.
Soften and blur it again with the 4" brush
If you like it stop, if you want more, do more, if you want less, cover it with white..
Do each tile making sure you do not paint yourself into a corner!
Then let it dry for at least 4 hours and lift the tape. I had to use a knife to help it up in a few places.
Let dry overnight and apply polyurethane. For the floor, I let it dry for 3 days before I polyurethaned, then did 3 coats.
The whole floor took 3 gallons of latex semi-gloss paint, and 2 gallons of polycrylic – none yellowing urethane finish. Plus I bought a pint of black semi-gloss latex, and used about ¼ cup of it.
I love my floor and many people bend down to touch it to see if it is really paint!
Tools needed:
Small fine artist paintbrush
1- 2" paint brush
1-4" paint brush
I had 3 of each so when paint started getting clumped on the small brush or filling the 4” brush or drying on my 2” brush I could soak them and keep going.
White semi-gloss latex paint
Black semi-gloss latex paint.
Polycrylic non yellowing urethane finish
Has this project inspired you to transform your home with a designer touch?
Enjoyed the project?
Comments
Join the conversation
-
 Tri82776178
on Jun 07, 2023
Thanks for sharing, This is the best floor paint makeover I've seen yet and I've been searching for last few years, as hoping to tackle my worn out floors. I feel inspired
and am going to give this a go.
-
-











Frequently asked questions
Have a question about this project?
You did such a beautiful job! I have tiled floors... will this plan work on that too?? And how durable is this finish? Again.... AMAZING JOB!!!
I Have heated cement floors though out my house and garage. would this be ok on them? In love with this.
scared ti ask ...how long did it take you?