DIY Craft Table

Araceli Chan
by Araceli Chan
4 Materials
$123
4 Hours
Easy
I am an avid budget friendly DIYer… In fact, I love crafting so much that I decided to turn a hobby into somewhat of a business. The only problem is that my crafting addiction was taking over my home. There were craft supplies on the dining table, on the kitchen counter, in the living room, in the bathtub. Ok, maybe not the bathtub, but literally they were everywhere! I have a spare bedroom that served as storage and that is just no way to live! So I decided I would clean it up and create my very own craft space. I began my project with a DIY craft table!
Make sure and check out the video above for a little craft space inspiration! No two rooms are alike, so you just tweak this in a way it fits your needs and you're golden!
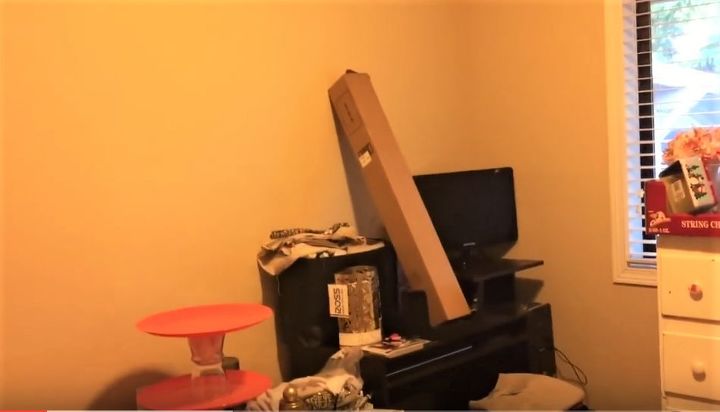
First things first! This before shot is nothing compared to the mess that you don't see. So I cleared it out to make space for my base.
I used a room planner from Good's Home Furnishings website and entered all of my room and furniture dimensions to come up with the best layout possible.
To keep it as DIY friendly as possible, I skipped the part where I shopped for wood and looked for the right tools for cutting and gluing etc and went the easiest route. This also saved me a lot of time. I'm not the only one who likes instant gratification am I? I didn't think so. I purchased 3 of these 9-cube organizers from Walmart. Lucky for me they were on sale at $33.46 a pop. They come with instructions and they are really easy to build...I skipped over that part. It was me, myself and I working on this and it took about 30-45 minutes to build each one.
This room is not that spacious and I wanted as much storage space as possible. I put the first cubbie against the right side wall and left about a foot of open space between the back wall. Then I placed the second cubbie against the back wall and flush to the corner of the first cubbie. This left empty space in the very corner, but it left the 3 left cubbie holes open for me. Confusing, I know!
The third cubbie was placed facing out for easy access.
Not the greatest picture, but I am more of a video gal! I was able to get this 4x8 sheet of maple plywood from a relative who works at a mill for $10! Now that is a deal! I know you can find these at Lowes or Home Depot, but the price will vary of course. I was able to have a friend cut it with a table saw. It was enough for a 5x3 table top and 4 extra shelves!
After sanding this down, I painted the edges with some white paint I had from previous projects.
Next I took my Peel and Stick Vinyl tiles and set them on the table top. I bought (Fifteen) 12x12 faux marble tiles from Home Depot at $0.88 cents each. This is super easy! All you do is take the peel off and gently align the tile where you want to place it. If you mess up, you can always redo it, but I don't recommend it as the adhesive may wear off. Once the tile is where you want it, smooth it out as best you can to release any air bubbles and to help it adhere.
Voila! Craft desk is done! You could probably glue this down if you'd like, but I opted not to in case I want to move it around. It is pretty sturdy so I know it's not going anywhere!
This was a 3 series piece on YouTube. Here is the final result of my craft space! To die for right!? Not too shabby for doing it on a budget. I hope this gives you a little bit of inspiration to make your own.


If you enjoyed this, you can check out my YouTube channel for more easy and budget friendly DIY projects at:
https://www.youtube.com/channel/UCehYbEpXLX_MvHZoHpQ6GJg


Thank you all so much for watching this video and for maybe reading the step by step...I'll see you on the next one! :)
Suggested materials:
  • ClosetMaid 9-Cube Organizer   (Walmart)
  • 4x8 Maple Plywood   (Relative who works at a mill)
  • Carrara Marble Peel and Stick Vinyl Tile   (Home Depot)
See all materials
Frequently asked questions
Have a question about this project?
  2 questions
  • Candy Walsh Candy Walsh on Aug 05, 2017

    Very cute! How do you access the cubbies that are under the desk?

  • Adrienna Matwey Werner Adrienna Matwey Werner on Aug 08, 2017

    I just wanted to first mentioned that I love the storage. It is awesome! I really like the wooden top at first; but thinking about it more, I really like the idea of the vinyl tiles. If you happen to be painting, then you can just wipe it down easily!


    My question is, how did you make the ribbon holder that is below the bottom shelf? I would imagine you could use a really long dowel? But what did you use for the ends, in which to place the rod?


    Thanks in advance!


    Andi in Delaware

Comments
Join the conversation
2 of 37 comments
  • Liliana Wells Liliana Wells on Aug 25, 2017

    I like the outcome and will try to adopt to my room/space. I know I would have trouble with the back cubbies. Thanks for sharing.

  • MB MB on Dec 26, 2023

    i really like this idea. I remember my youth I would be able to get in the bottom cubbies. :-) I think it would be great for not immediate or often used items. The more room the better. I would like to do a handmade cubbie like me and make the cubbies different sizes to help clear my table cause as much as I would like my cricut on the top ready for work, it needs to be stowed. I can't have my cricut my cricut iron press, pens, pencils, sharpener, tv, and computer up there at once. I must have my tv to entertain myself in my craft room. That's a must. Cannot put up on the wall to avoid any more holes and also the fact my wall is cut from the back to make storage so wall cannot take a nail. Thanks for this diy.

Next