


How to Clean a Box Fan in Under 10 Minutes

By Judy Schumer
A box fan is a solid workhorse that cools you off in the summer, moves warm air around your house in the winter, and lulls you to sleep with white noise. These machines are also great for clearing smoky air from your kitchen if you aren’t the next Martha Stewart.
Like any fan, box fans collect dust, which can eventually gunk up the motor. If you learn how to clean your box fan and maintain a solid cleaning routine, this household staple can last for many years. And once it does quit working for good, you can turn it into a super cute garden decoration or a child’s table and chairs!
Besides increasing the longevity of your fan, by keeping a clean fan you’ll breathe cleaner air without dust blowing through your home. Imagine cool breezes drifting through your abode, bringing refreshing relief from the summer heat as opposed to an angry appliance spewing dust and dirt all over your house and into your sinuses. Keep reading to learn how to properly clean a box fan.
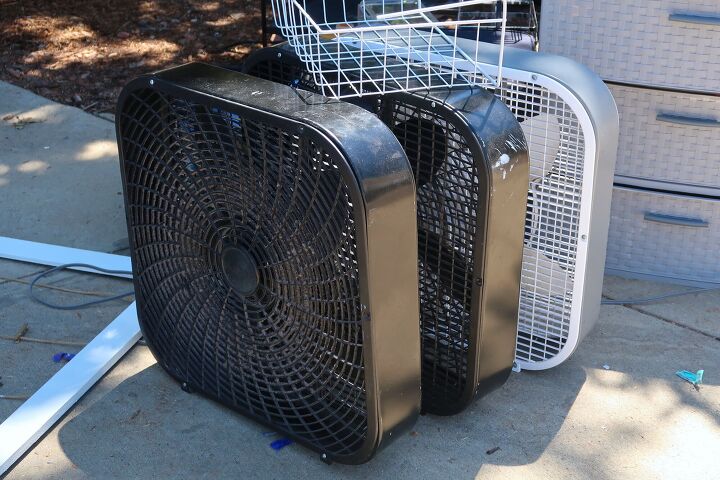
Photo via Shutterstock
Why It’s Important to Clean Your Box Fan
Sure, a dusty fan looks unsightly, but there are several important reasons you should clean your box fan:
- Keeping your fan clean has environmental benefits. By keeping your box fan regularly cleaned, you’re extending its life and, therefore, keeping it out of a landfill.
- Dirty fans pose safety issues. When enough dust builds up, it coats the motor, causing the motor to work extra hard to turn the blades which in turn causes overheating and turns the fan into a possible fire hazard.
- There are health benefits to keeping your box fan clean. A dirty fan will spew dust through the air. If the fan has been in storage over the winter, cleaning it removes any mold or mildew spores that could be lurking on the fan.
- Like any appliance, a clean box fan is cheaper to run. It uses less energy because it’s performing at its peak.
When to Clean a Box Fan
A general guide is to vacuum the grates and around the blades every two weeks (without taking the machine apart). If you notice the blades or the grille getting dusty, give the fan a quick vacuum before that.
Clean your fan and motor more thoroughly every six weeks to keep it running at its peak. If you have pets, clean it thoroughly every four weeks. Like dust, pet hair accumulates on the blades and around the motor which can lead to slower blade movement and weakened motor performance.
How to Clean a Box Fan Without Taking It Apart
If you can’t take your fan apart without damaging it or you don’t have the time to do a complete cleaning, you can give it a quick dusting using compressed air.
It’s important to always unplug your fan before attempting to clean it. Use a can of compressed air to spray towards the fan’s motor and the blades to dislodge and blow dust away from the fan. Be sure to follow the instructions on the can, using short bursts of air and keeping the spray nozzle a few feet away from the fan.
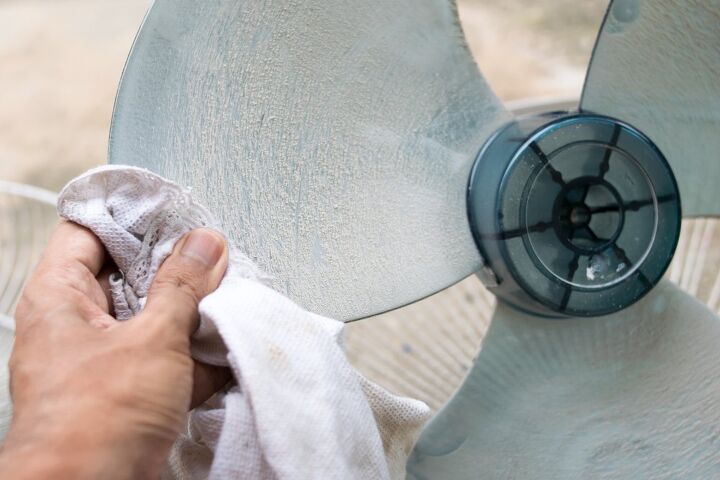
Photo via Shutterstock
How to Clean a Box Fan with Vinegar and Borax
This method utilizes a homemade cleaner and involves cleaning the fan grilles and blades by hand. It may take a bit longer, but you’ll be sure to get every bit of dust and dirt erased.
Tools and Materials Needed:
- Rubber gloves
- 1 teaspoon Borax
- ¼ cup white vinegar
- 2 cups boiling water
- Heat-safe spray bottle
- Funnel
- Screwdriver
- Vacuum with dusting brush attachment
- Clean sponge, dampened with water
- Paper towels
Step 1: Unplug the Fan
Always unplug your fan before attempting to clean it.
Step 2: Mix the Cleaner
Stir the Borax and vinegar into the hot water. Let it cool completely before pouring the mixture into the spray bottle, using a funnel if needed.
Step 3: Remove the Grilles
Remove the front and back grilles from your box fan. If your fan has screws, remove them and set them aside. If your fan has clips to hold the grills in place, unclip each one to release the grilles.
Step 4: Vacuum the Grilles
Use the dusting brush attached to your vacuum wand to clean the grilles and remove all loose dust.
Step 5: Spray the Grate with Cleaner
Put on rubber gloves, since Borax can irritate skin. Spray the grilles with the vinegar and Borax solution. Let the cleaner sit for about three minutes, then wipe the grilles down with the water-dampened sponge. Rinse the sponge frequently to remove grime.
Step 6: Clean the Fan Blades
Spray the Borax-vinegar cleaner onto paper towels to create damp—not wet—cleaning cloths. Wipe down each blade with paper towels. Be sure to keep any liquid away from the motor.
Step 7: Clean the Outer Housing
Wipe down the outside of the fan with paper towels dampened in the Borax and vinegar solution.
Step 8: Dry All Parts
Dry the fan blades and grilles with clean, dry paper towels. There shouldn’t be any water or cleaning solution on any of the parts, which can lead to an electrical hazard when the fan is turned back on.
Step 9: Re-attach the Grilles
Screw or clip the front and back grilles back onto the fan.
How to Clean a Box Fan with Dish Soap
Your bathtub can be a handy way to get your fan clean while containing any mess. If your fan lives near the kitchen, there’s a strong chance that the blades are covered in greasy grime. Liquid dish soap will help lift that grease off the appliance.
Tools and Materials Needed:
- Screwdriver
- Clean sponge, dampened with water
- Grease-cutting liquid dish soap
- Paper towels or clean old towels
- Vacuum with dusting brush attachment
- Small hammer
Step 1: Unplug the Fan
This can not be said enough: Unplug your fan before attempting to clean it! Electric shocks can be extremely dangerous.
Step 2: Remove the Grilles
If your fan has screws, remove the screws holding the grilles. If it has clips, unclip the grilles. Set any hardware aside for reassembling.
Step 3: Fill Your Bathtub
Plug your bathtub drain and fill the tub halfway with warm water. Add about one tablespoon of grease-cutting liquid dish soap as the tub is filling.
Step 4: Soak the Grilles
Place the box fan grilles into the bathtub to let them soak. Wait ten minutes, then wipe each grille with the sponge while they are submerged. Drain the tub and rinse the grilles with clean water. Dry with paper towels or old towels and set aside.
Step 5: Remove and Clean the Fan Blades
Gently grasp opposite blades and pull upwards. The blades should pop off. Rinse the sponge you used on the grilles. Add a drop of the liquid dish soap to the sponge and use it to wipe each blade clean. The sponge should remain damp, but never wet or dripping. Dry the blades with paper towels or an old towel.
Step 6: Vacuum the Motor
Using the vacuum with the dusting brush attached, vacuum the outside of the motor to remove dust and dirt.
Step 7: Reassemble the Fan
Reattach the blades by pushing them downward to get them back onto the blade shaft. Tap the center of the blades to ensure the blades are firmly attached. Screw both grilles back onto the fan.
How to Clean a Box Fan with a Hose
This method is the least messy because you do all your cleaning outdoors. Pick a non-windy day, get the hose out, and clean that fan!
Tools and Materials Needed:
- Screwdriver
- 1 cup white vinegar
- 1 cup hot water
- Sand pail or mixing bowl
- Garden hose with nozzle
- Small pail or mixing bowl
- Sponge
- Soft paper towels
- Soft-bristled cleaning brush
Step 1: Unplug Your Fan
Anytime you use water near an appliance, be sure it’s unplugged. Safety first and always!
Step 2: Remove the Grilles
Unscrew the screws that hold both the front and back grilles in place. Set them aside for when you reassemble the box fan. Some box fans have attached clips instead of screws and only require unclipping to remove the grilles.
Step 3: Clean the Grilles
Mix the vinegar and water in a small sand pail or a mixing bowl. Dip the sponge in the mixture, soaking it. Wipe down the front and back of each grill with the sponge, rinsing the sponge out often. After you’ve wiped the grilles down, rinse both grilles with the hose, with the nozzle set on the highest setting (usually jet). Let the grilles air dry for about 10 minutes before finishing drying with paper towels.
Step 4: Clean the Fan Blades
Remove the fan blades from the shaft they rest on by gently grasping two of the blades and pulling upwards. Once the blades are removed, use the sponge soaked in the vinegar and water mixture to thoroughly clean each blade, front and back. Rinse and squeeze the sponge out after cleaning each blade so you’re working with a clean sponge. Dip it in the vinegar solution again after each rinsing. Dry the blades thoroughly with paper towels after you’ve finished cleaning them.
Step 5: Dust the Fan Motor
Use a dry, soft-bristled cleaning brush to remove dust and dirt that has collected on the motor.
Step 6: Put the Box Fan Back Together
Check the grill and blades to make sure they’re completely dry. Reattach the blades, pushing down firmly to engage the fan blades with the shaft. Attach the grilles with the screws or clip them back into place. Wipe down the outside cover of the fan with a dry towel or paper towel to clean any smudges or dirt.
How to Oil a Box Fan
If you have an older box fan, you should oil it once a year to keep the moving parts well lubricated. Newer box fans (purchased within the last two years) have a sealed motor and do not require oiling at all. If you’re unsure, check your fan’s manual or search its product number online to find out if the motor is sealed or not.
The best time to oil your box fan is when you bring it out of winter storage, and remember to always unplug your fan before performing any maintenance on it.
Tools and Materials Needed:
- Screwdriver
- All-purpose household cleaner (like Spic and Span)
- Sponge
- Clean, dry cloth
- 3-IN-ONE Motor Oil (a lubricating oil with an easy-to-use applicator and recommended for its heat-resistant properties)
Step 1: Remove the Grilles
Remove the front and back grilles from the fan using the screwdriver if your fan has screws holding the grilles in place. If the fan has clips, unclip them to remove the grilles. Put all hardware in a safe spot. Vacuum and then wipe down the grilles with the sponge dampened with the cleaning solution. Set the grilles aside to dry.
Step 2: Remove the Blades
Lay the fan flat with the blades facing up. Carefully grasp one blade from each side of the fan and lift out to separate the blades from the motor. There may be a clip securing the blades to the motor. If your fan has one, remove it before attempting to lift the blades.
Wipe the blades with the sponge damped with the cleaning solution. Dry each blade then set them aside.
Step 3: Lubricate
Apply one to two drops of the 3-IN-ONE® Motor Oil to each oil port, which will be marked on the machine. Add one to two drops of oil to the shaft of the fan, coating it using your fingers.
Step 4: Reattach the Fan Parts
Reattach the fan blades followed by the grilles, being careful to fasten each part securely.
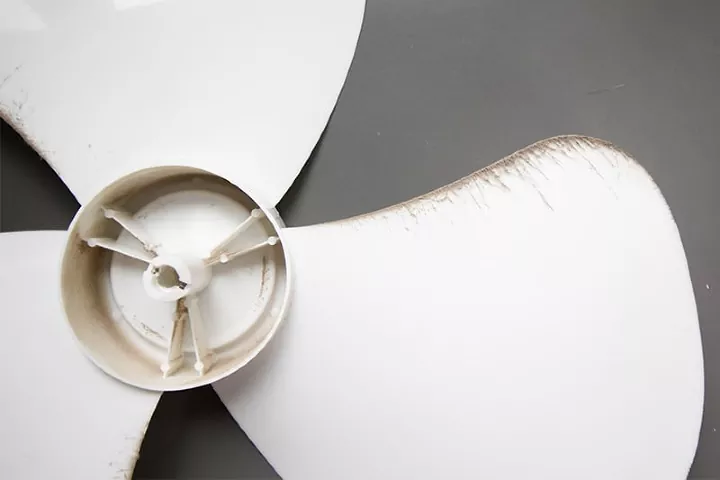
Photo via CreekLineHouse .
Tips for Keeping Your Box Fan Clean
There are two huge factors to keeping your box fan clean along with the air that flows through it: removing dust and dirt and then preventing dust and dirt before it becomes a bigger problem. Here are some tips to guide you along the way.
- Vacuum around your fan every two weeks to keep loose dust and dirt from becoming embedded in the motor. You can also spray it with compressed air weekly to keep dust at bay.
- When you take your fan apart to clean it, wipe down the blades with an allergen-reducing cleaning spray such as Pledge Dust & Allergen.
- To cut down on how much dust or dirt reaches the blades or the motor, use an air filter on the back of your fan. There are specially-made box fan air filters that can easily attach to the back and are meant to reduce the dust and dirt going into the back of the fan, which also reduces the amount of dust that comes out the front.
- As your box fan ages, it may need a bit of sprucing up. Painting a box fan is a great way to keep it looking new.
Do you use a fan to sleep at night? Let us know in the comments if you have any cleaning tips!
Comments
Join the conversation
-
I have a ceiling fan in my bedroom that runs 24/7 365. Its a dead spot for aur flow since we removed the flow thru fireplace between the front room and this bedroom. The best way to cut image heat or AC is to run a fan in there. And its a 10' ceiling!


Frequently asked questions
Have a question about this project?