


8 Tips for Beginners: Installing a Simple Tile Backsplash
Well, the pressure in on and I feel like we still have so much to do to have my laundry room finished for the big reveal for the One Room Challenge.
But, I must say it feels good to check off my list installing the tile backsplash.
It was our plan to have it finished several weeks ago, however we just couldn’t get to it.
Recently we’ve shared several tiling projects with you, from Steph’s modern coastal bathroom to my laundry room floor.
Certainly, we are not professionals, but after tackling 7 tile projects, 3 of them backsplashes, we’ve learned a few tips along that way.
And today we’d like to share 8 tips for installing a tile backsplash.
Just as a reminder, you can easily navigate through each week of this Modern Cottage Laundry Room project.
- Week 1: 12 Ideas for Creating a Functional Laundry Room You’ll Love
- Week 2: Installing Tile: Practical Tips for Beginners You Need to See
- Week 3: How to Make a Simple Laundry Room Fold Table
- Week 4: How to Make a Broom Closet in the Laundry Room
- Week 5: How to Update a Laundry Room Light Fixture
- Week 6: You are here!
- Week 7: 14 Useful Laundry Room Organization Ideas You Need to See
- Week 8: The Best Laundry Room Makeover on a Budget
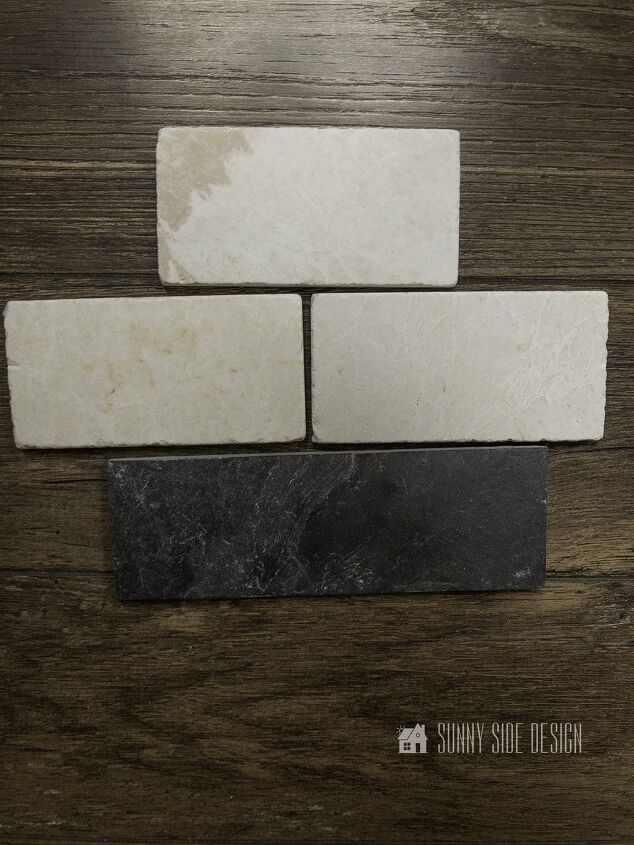
Of course, before you start a project like this you will need to select your tile.
I feel if you’re new to tiling you’ll want to select a tile that’s easier to install for a backsplash.
For instance I’d choose a basic subway tile.
Not only will it be easier to plan your design and pattern, but it’s much easier to cut and install.
While I love the look of penny tile and other geometric designs, they can be more difficult to cut and install.
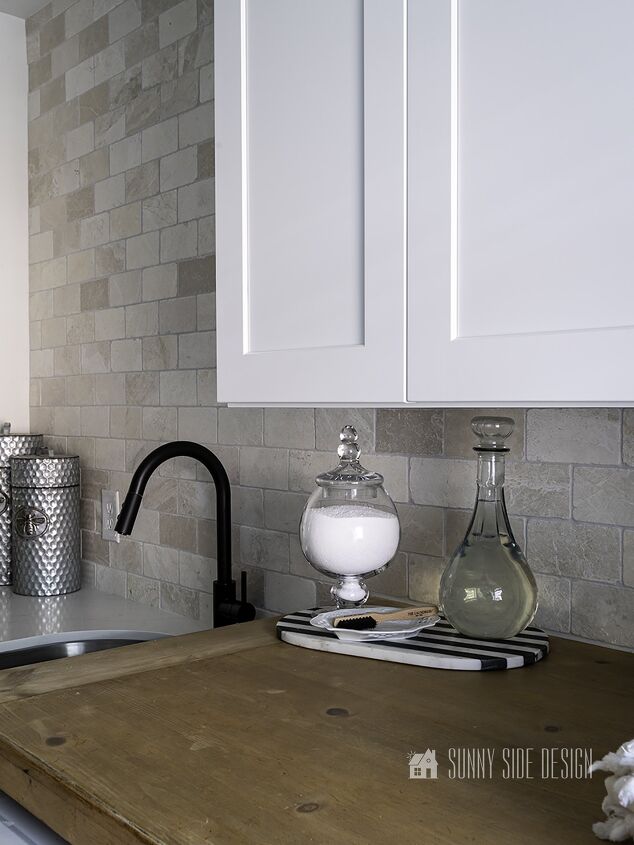
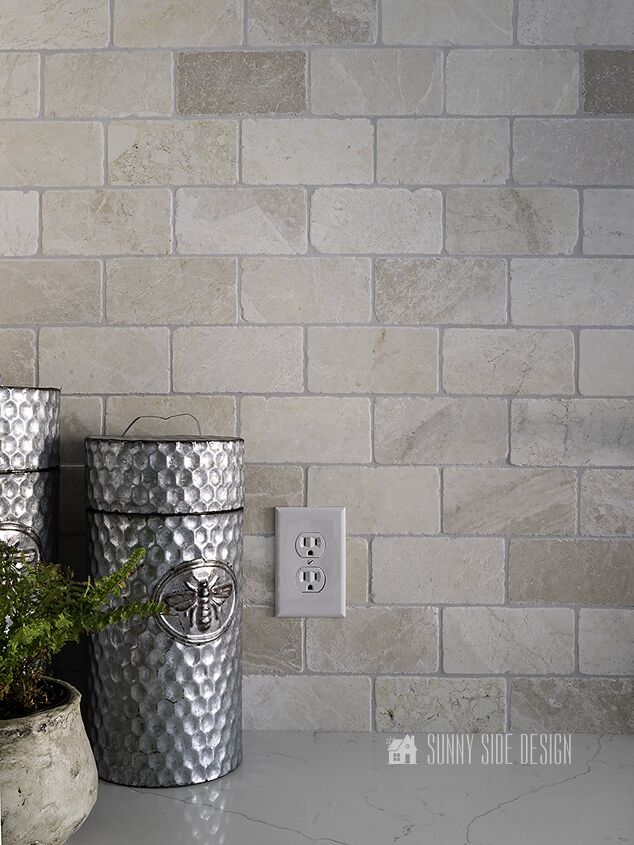
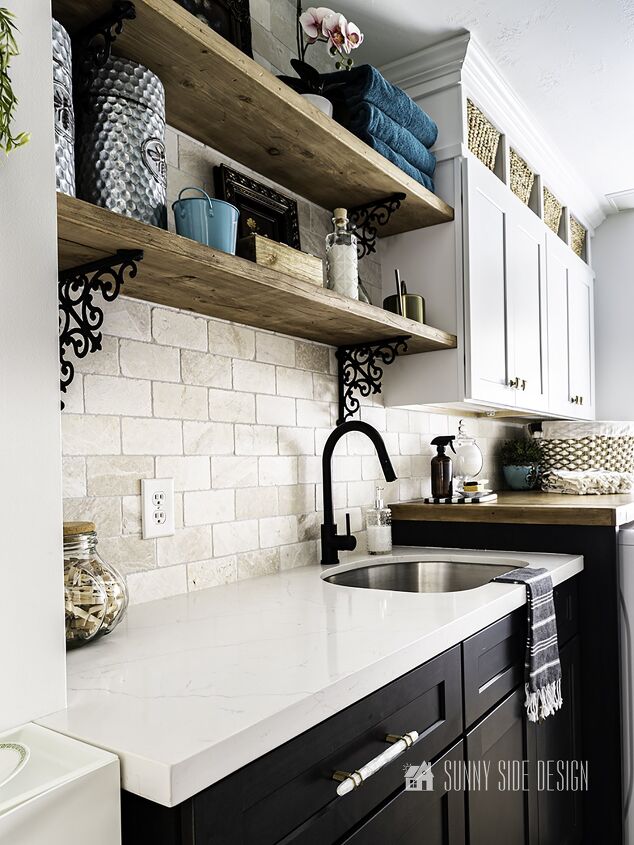
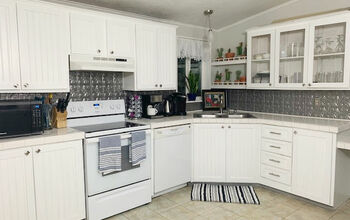
So for my backsplash I chose a tumbled marble subway tile.
With my Modern Cottage design for my laundry room, I felt a classic subway pattern would be perfect.
In addition, the tumbled marble gives it that rustic cottage vibe.
Note: If you select a stone tile, you’ll need to cut your tile with a wet saw and a diamond blade.
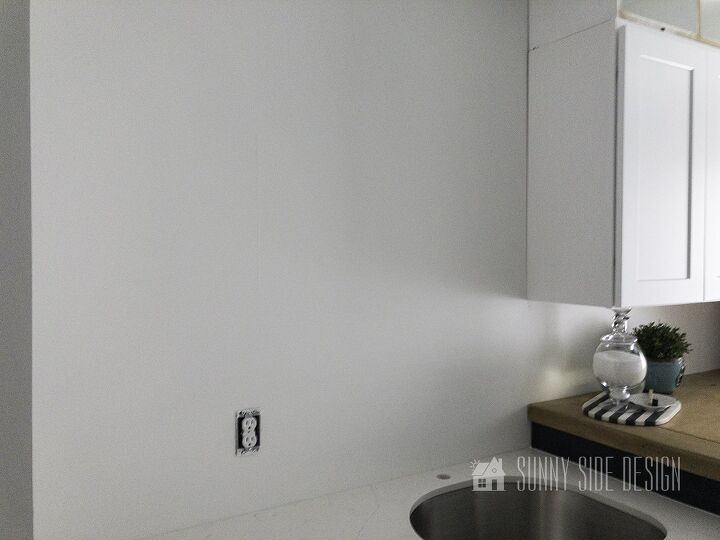
Clearly before you start any project like this you’ll want to prepare the wall for tile.
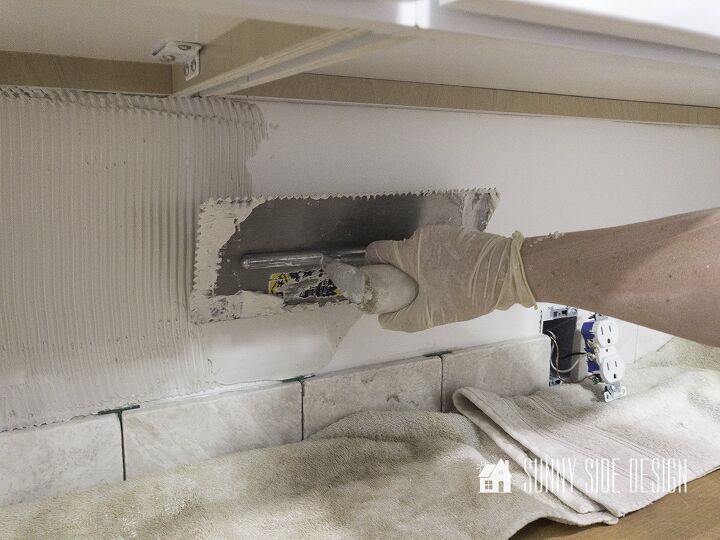
First, you’ll want to turn off the power to any outlets and remove the covers.
Next, you’ll want to clean the surface and make sure it’s degreased, especially if you are installing a backsplash in a kitchen.
Personally, I think a cleaner like TSP does a great job cleaning the wall surface.
Then you’ll want to repair any holes or cracks in your wall with a spackling paste before you install a tile backsplash.
Finally sand any high spots, you’ll want a flat and level surface before you install the tile for your backsplash.
This post contains affiliate links for your convenience. As an Affiliate Associate I earn from qualifying purchases never at any additional cost to you. See our disclosure for details.
Before you begin a project like this you’ll want to gather all of your tools and supplies before you begin.
We set up the wet saw in the garage, because it’s makes such a mess.
Supplies we used:
- tile cutter or tile saw
- notched trowel
- grout float
- bucket
- sponge
- tile spacers
- tile adhesive
- tile
When choosing your tile, be sure to ask which type of adhesive is best for your tile and application.
As you know, we made an assumption when installing Steph’s bathroom floor that we could use the same adhesive on the floor that we used on the shower wall and had to pull it up and start over.
Certainly, you don’t want to make a mistake like that.
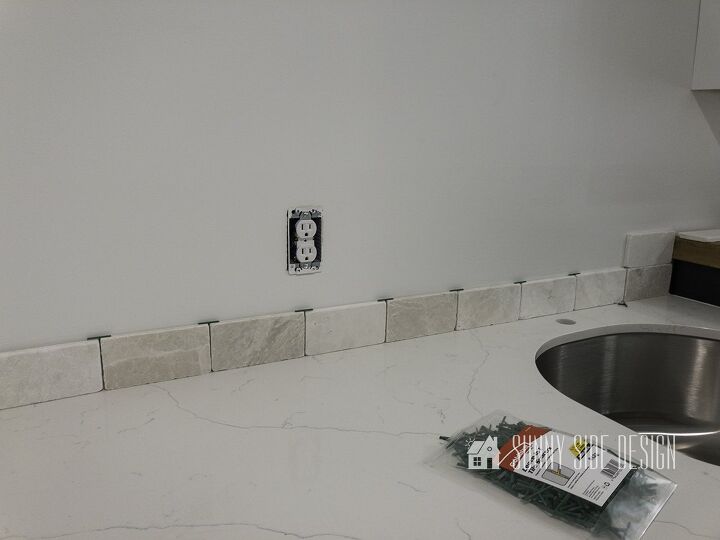
No doubt, installing a tile backsplash is a messy job!
No matter how careful you are, you’re bound to drop adhesive onto your countertops.
So, before you get started you’ll want to protect them.
First, run a strip of painters tape along the edge of where the first row of tile will be.
Then tape down either plastic, chipboard or a drop cloth.
This will ensure that your beautiful countertops will be protected.
I believe that planning your tile placement is extremely important.
You’ll want your design or pattern to be centered on your wall.
If you’re working with a window, you’ll want your design centered on the window.
Just make sure you think about your design before you begin.
First, lay out your tile with the spacers you’re planning on using.
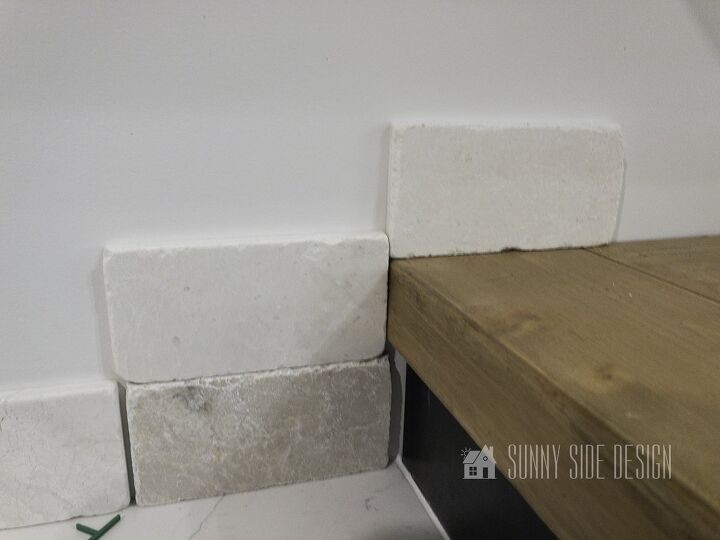
One of the challenges we faced when installing the tile backsplash in my laundry room is that we had 2 different heights of countertop.
The fold table over my appliances is a little more that 5″ higher than my countertop.
If we were to place a full tile on the countertop, the first row over the folding table would have been only 1/2″ high and would have looked odd.
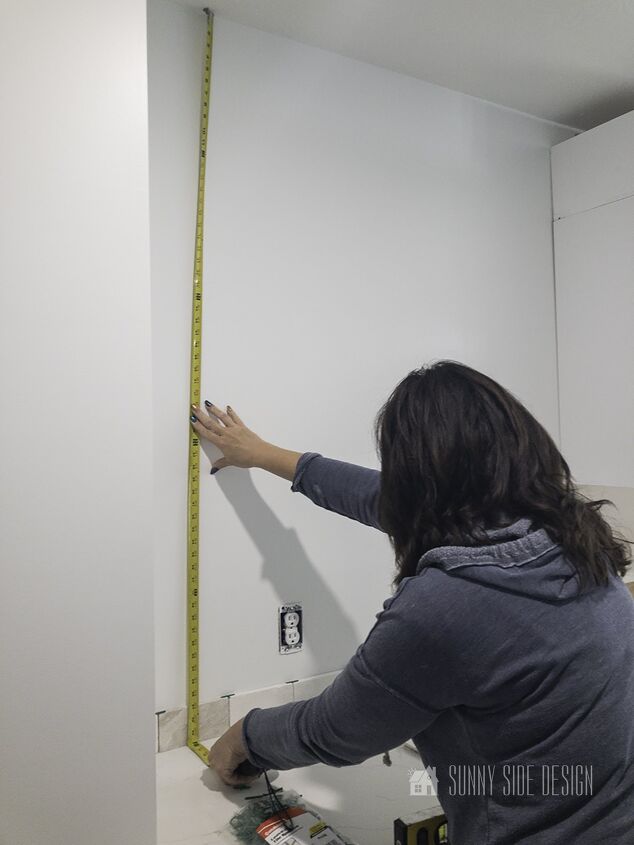
Another element to consider is the top row of the tile placement.
Since we were installing the tile backsplash all the way to the ceiling, we wanted to make sure that the last row is substantial and not a skiff.
First, we measured the height and then divided that by the height of the tile, plus the thickness of the tile spacers.
Then we were able to determine the height of the first row of tiles.
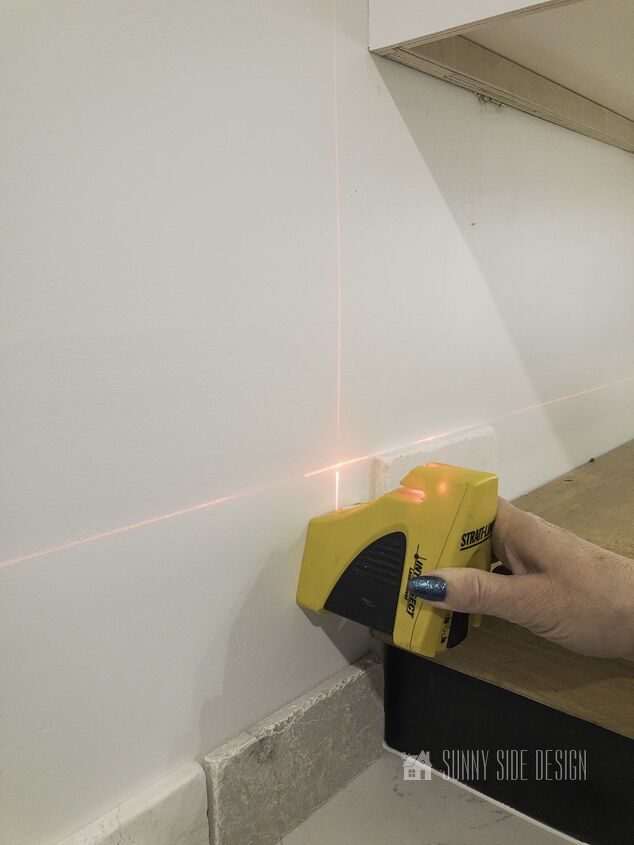
Another important step, you’ll want to make a level line.
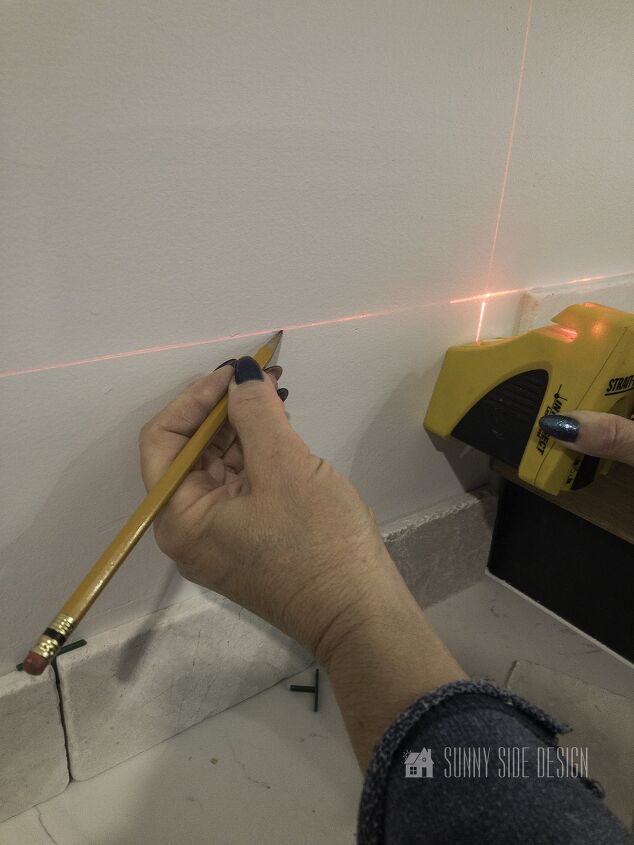
This will ensure that the tiles are level across both heights of the countertop.
Clearly with a professional looking tile job, the rows of tile are straight and the grout lines are evenly spaced.
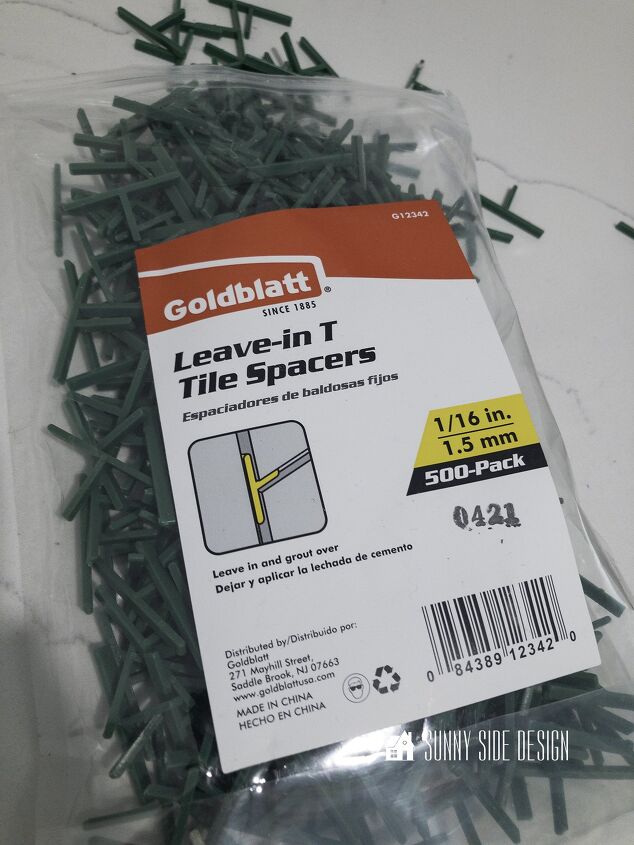
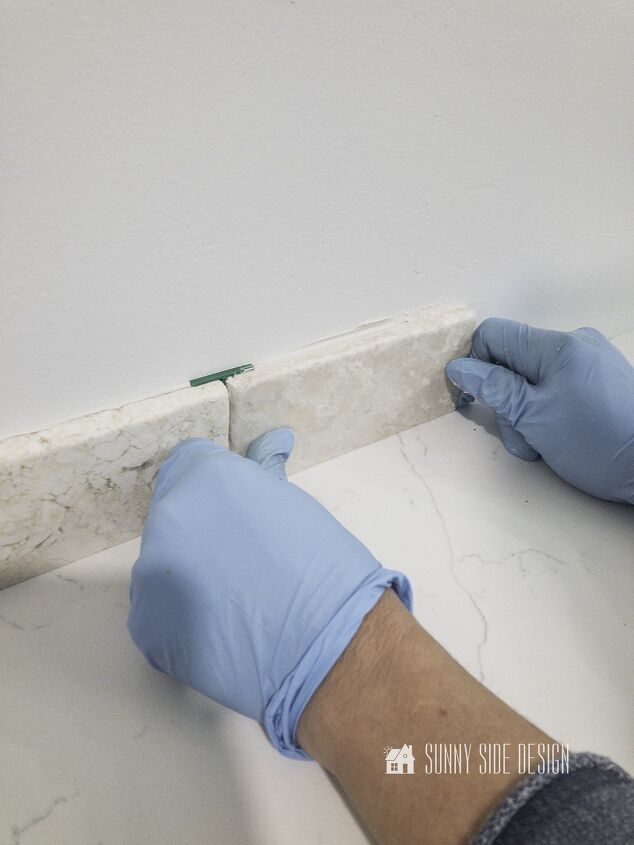
The only way to achieve this when installing a tile backsplash is with spacers.
Let me just say we’ve used several different types of tile spacers in the past.
But these leave in spacers are amazing for a vertical surface like a backsplash.
The spacer is meant to be left in and grouted over.
One of the challenges of installing tile on a vertical surface is that the spacers tend to fall out.
You’re constantly picking them up and reinserting them.
However, these tile spacers are pushed back towards the wall and are grouted over.
Certainly, it makes installing a tile backsplash so much easier!
One of the most important tips is to take your time and don’t rush through the project.
If you do, you’re sure to make mistakes.
When using a powdered mortar or mastic that you need to mix up, don’t mix up the entire bag.
Surely, it will dry out before you can use it all.
Mix up small batches and work in small areas at a time.
While usually a backsplash will be a smaller area, don’t think you can apply the adhesive to the entire wall and get the tile installed before it starts to dry.
Spread the adhesive in small areas, and then install the tile in that area.
Then move to your next section.
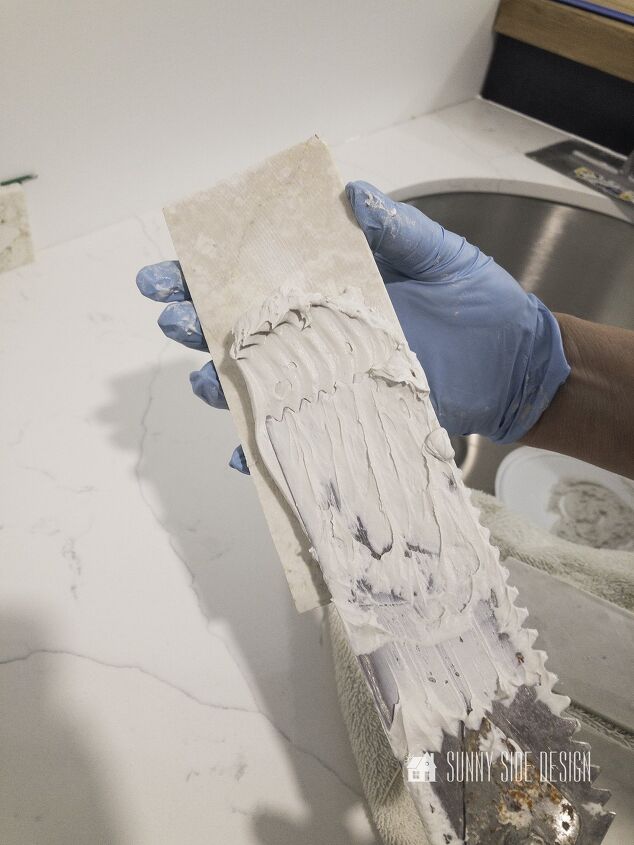
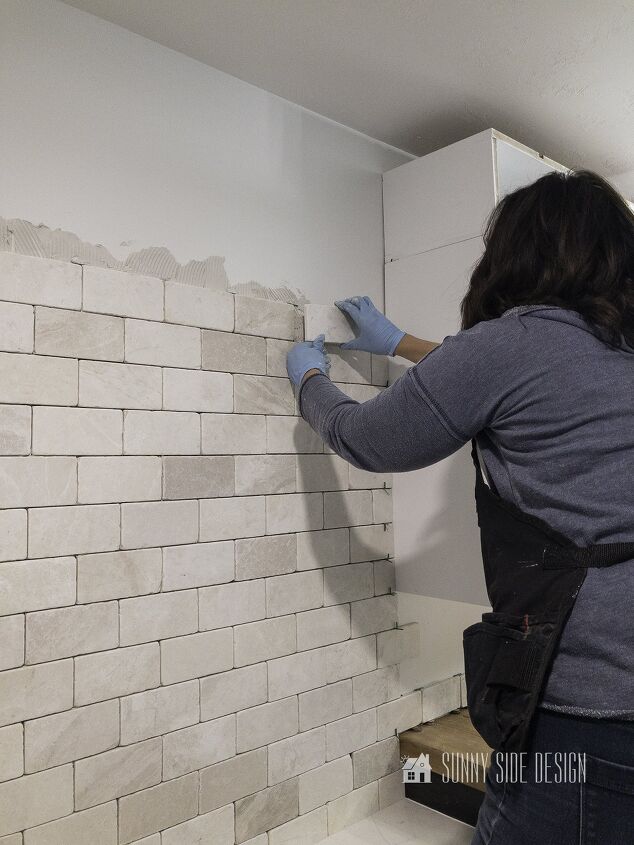
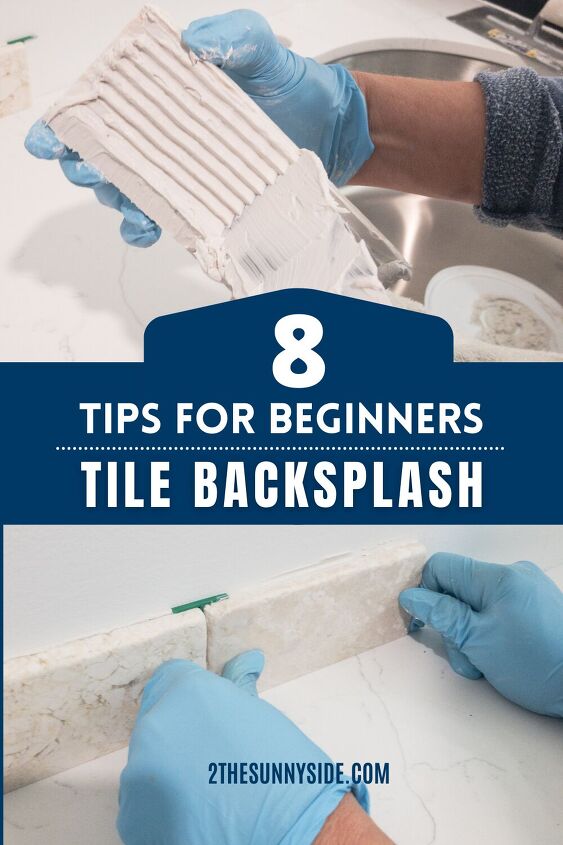
For our first row of tile, we back buttered (applied the adhesive directly to the back of the tile.)
Then tilt the trowel to a 45° angle and drag the notched end through the adhesive.
Then press the tile into place.
You’ll also want to remove any adhesive that may squeeze out between the tiles with a toothpick.
Once the first row was in place we worked in small sections, applying the adhesive directly to the wall and then installing the tiles.
Would you like more tips for installing tile, then check out our video below.

While you certainly can do this job on your own, it’s so much easier if you enlist a partner to help.
One can apply the adhesive to the wall and make the cuts with the tile saw, while the other installs the tile.
In my experience, you’ll get adhesive on the front of the tiles or it squeezes out a little adhesive between the tiles.
Personally, I think it’s easier to clean this up as you go along.
Keep a damp cloth handy to wipe off the tiles, along with some toothpicks,
They are handy for cleaning out the adhesive between the tiles.
Clearly you don’t want to have adhesive showing between your tiles and you’ll want room between the tiles for grout.
If you’re working with a porous surface like natural stone, you’ll want to seal your tile before grouting.
This was a new tip to me that I learned from a professional tile setter.
This will prevent your stone from possibly discoloring.
In my view this is the best tip I’ve received!
It made it so much easier to wipe off the excess grout too!
Let’s stay connected! Follow us on social media!
Once again, working in small batches is the key to installing a professional looking tile backsplash.
We’ve got a full tutorial for stress-free grouting that will give you all the details or check out the video below.
But we found that mixing our grout in small batches and working on one area at a time make grouting a breeze.
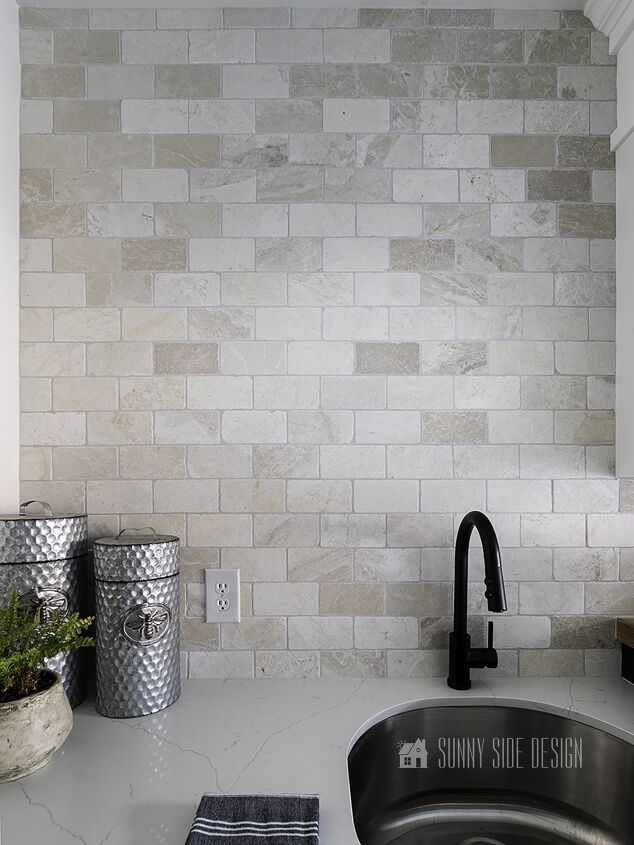
Without a doubt, I’m always amazed when I complete a project like installing a tile backsplash and the way my room feels.
Suddenly my ceiling feels higher.
Not to mention the charming character the tumbled marble tile adds to my room.
I could not be more pleased!
Now it’s your turn!
What do you think of my tile backsplash?
Is this a project you’d like to do in your home?
Do you feel confident that you can take on a project like this?
You know we love to hear from you.
Comment below and share your thoughts.

That completes week 6 of the One Room Challenge.
Certainly, I am loving the way my laundry room is coming together.
And installing this tile backsplash has transformed the room.
Of course, you will find more amazing ideas from other bloggers participating in the One Room Challenge.
Click on the link and get inspired!
If you’re new here, WELCOME! We love having new readers and friends!
You can learn more about us here.
Let’s stay connected! Subscribe to our free newsletter so you don’t miss any inspiration for your home.
Please PIN and save for later, and share with your friends! Sharing helps grow our following!
Thanks for stopping by and as always here at Sunny Side Design
WE HOPE TO BRING YOUR HOME TO THE SUNNY SIDE OF THE STREET!
Be sure to follow us on Pinterest for even more home decor and DIY ideas.
To see what we are working on before it’s on our blog, follow us on Instagram.
You can also find our video tutorials on our YouTube channel.


Frequently asked questions
Have a question about this project?