


How to Install Tile Backsplash to Transform a Space in a Weekend

By Alexa Erickson
Tiling a backsplash is an easy, relatively low-cost way to upgrade a space. Whether it’s the clean subway tile that’s super popular right now or an intricate mosaic tile that almost doubles as artwork, a beautiful backsplash can serve as a picturesque centerpiece of the kitchen or an accent in a bathroom. This how-to guide will show you everything you need to install a tile backsplash to transform a room in a weekend.
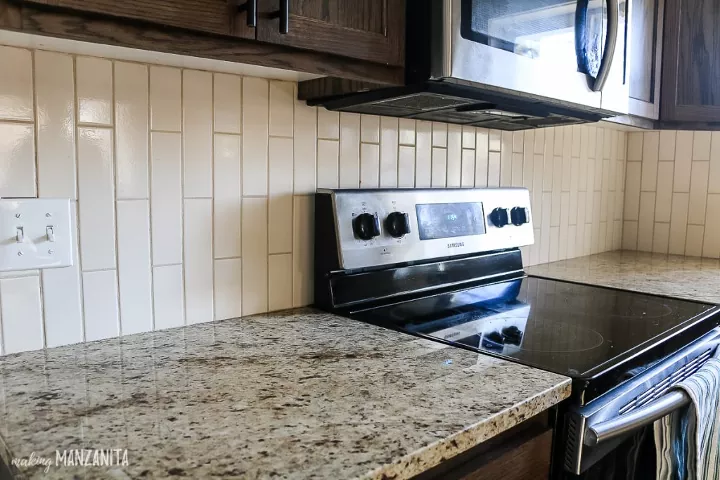
Photo via Chelsea @ Making Manzanita
How to Choose Tile for Your Backsplash
Choosing the right tile for your backsplash is dependent on style, how much hands-on effort you’d like as part of your DIY project, and the material preferred for ease of upkeep versus aesthetics. There are a few things to consider when choosing a backsplash tile:
Already Cut vs. Cut Yourself
Purchasing already-cut tiles is ideal for newbies, or for those who are positive about the amount of material they need and the pattern they want. Cutting tile yourself, however, allows for potential changes, and more experimentation when it comes to tile shape and pattern. Plus, to cut tile yourself, you’ll need a few specific tools (which we’ll get into detail about later).
Material
Porcelain, ceramic, metal, and glass tile are among the best materials for backsplash. They’re typically stain-resistant, are naturally nonporous, and can be wiped down with most all-purpose cleaners. Materials like travertine, marble, and other natural stones might be beautiful backsplash options, but they require special care like regular sealing and specially-formulated cleaners in the case that food or grease splatter on them.
Size
One of the biggest things to consider when installing a tile backsplash is the grout line, or the material and space between tiles. Grout is porous, and will ultimately discolor. To minimize the problem, apply grout sealer every day for one week following installation, and repeat once a year. Essentially, the bigger the tile, the fewer grout lines there will be across the wall.
Tile size is a matter of preference, but it can also be relative to the space you’re covering. Using large tile pieces will give off a more subtle look and can make a space appear larger. On the flip side, small tiles (like penny tile) give off a more textured appearance and are well-suited for spaces where you’re aiming to draw the eye to the backsplash. Small tiles also, however, can make a space feel more crowded.
Cost to Install Tile Backsplash
According to the experts at HomeAdvisor, installing a backsplash in your kitchen costs an average of $1,000, with costs ranging from $600 to $1,300. Prices vary depending on the material type you choose, pattern complexity, and amount of tile needed. Luckily, if you’re looking to upgrade your kitchen but don’t want to shell out the money to do an entire overhaul, installing tile backsplash in your kitchen can make a huge impact at a relatively low cost compared to many other kitchen projects.
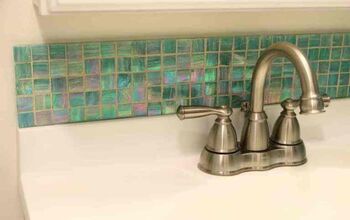
The same goes for bathrooms: The cost to install will be totally dependent on how much surface you’re planing on tiling and materials you use, but since bathrooms are smaller, tiling them is generally cheaper. According to HomeServe, a small strip of tile above a vanity will set you back about $100, while a full wall can go up to $1,000.
How to Plan a Tile Backsplash Layout and Pattern
So you’ve found the perfect tile to complement your kitchen. Now, you have to plan the backsplash pattern. Your backsplash design will be determined by your kitchen’s layout, where appliances are installed, and whether you want the tile to cover just one section or the whole wall.
Determine Your Space’s Layout and Size
Understanding your layout and how much area you want to backsplash before purchasing tile is important to ensure that you get the correct amount of material, and it’ll also help you have an easier installation process.
When working in a kitchen, take note of whether you have a U-shape, L-shape, open-concept, or enclosed kitchen layout. For backsplash behind the sink in a kitchen or bathroom, there may be a window. Or perhaps you will need the backsplash to go the entirety of the wall. If you’re working near appliances, you may want to install it just above your stove, or go for a decorative accent wall.
Measure the height and width of the walls you’re tiling. Multiply to find the square footage, which will help you determine how many tiles you’ll need for your project.
Trial a Pattern
The experts at Tile Lines recommend dry-fitting your tile pattern to make sure you like the design. Dry fitting involves placing your tile together on the ground or a table to create a pattern. Once all the tiles have been dry-fit into place, stand back and look at the empty grout lines to ensure they look straight and even.
The easiest tile layout involves laying tiles in a grid. Although setting your tiles square with a corner will minimize the number of cuts needed, this pattern can look anticlimactic when used with a plain or neutral tile (which takes away the fun of a tile backsplash!). To break the mold and create some interest, Tile Lines recommends incorporating stripes by color, color blocking, trying a checkerboard pattern, or adding an accent stripe.
Another important factor to consider is pattern angles, which all offer different looks. Horizontal-, vertical-, or even diagonal- laid tiles all add interest—it’s just a matter of personal preference.
You can even change up the shape of your tiles: Evoke natural elements by using tiles with a curvy shape. Geometric shapes are ideal for a Midcentury look, while arabesque or lantern shapes exude classic elegance. Achieve a dynamic herringbone pattern by taking any rectangular tile, turning so that two are perpendicular to each other, aligning them along one side, and repeating.
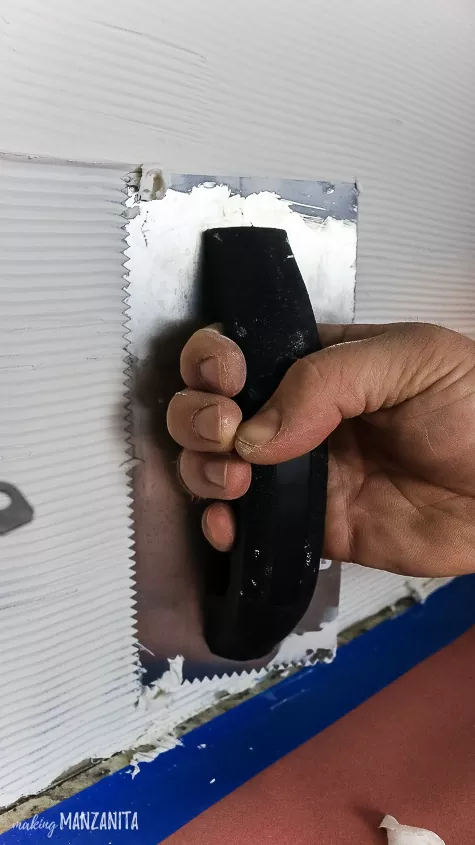
Photo via Chelsea @ Making Manzanita
How to Install Tile Backsplash
Once you clear the space you’re about to work in (moving appliances, putting away valuables, food, clothing, and any item you don’t want to get dirtied or broken), it’s time to put your tile backsplash vision to life.
Tools and Materials Needed:
- Flat scraper
- Screwdriver
- Drop cloth
- Tape measure
- Pencil
- Tiles
- Dry tile cutter
- Sandpaper
- Putty knife
- Tile mastic
- Tile spacers
- Level
- Notched trowel
- Grout
- Grout float
- Sponge
- Clean cloth
- Caulk
- Cup of water
Step 1: Prep the Area
Prior to any installation, you’ll want to make sure any old tile is demoed using a flat scraper. Once that’s complete, be sure the surface has been adequately cleared of debris, cleaned, and dried. Cover counters and appliances with a drop cloth and remove electrical outlet plates from wall.
Step 2: Find a Starting Point
Your starting point will be on the most viewable area of the wall—this might be behind a stove range or in the center of a wall if you’re tiling an entire wall. It’s up to personal preference whether you start on the bottom edge of the wall (be sure to leave ¼ inch below tile for a grout line) or in the middle and work your way outward.
Step 3: Apply Tile Mastic and Set the Tile
Using a putty knife, apply a thin layer of tile mastic adhesive to the wall. Work in sections, applying no more than you can tile in five minutes. Texture the mastic using a notched trowel—this will ensure that proper thickness is achieved to help the tile adhere to the wall better. Once texturized, very gently smooth over the mastic using a putty knife to remove comb marks without thinning it out. Lay the tiles one by one, using tile spacers between each one and along the bottom for the grout lines. Using spacers and a level as you go will help ensure that the tiles are set in a uniform pattern and are straight.
Step 4: Cut the Tiles to Size
The tile cutter will come in handy when your pattern meets a wall or edge and you need to cut your tile to get it to fit. To do this, set tile in a dry tile cutter. Adjust to the desired measurement, then cut. Check the tile against the wall to make sure it’s the right size (you may want to purchase extra tile in case of mishaps). Sand any rough edges on the cut tile using sandpaper.
Step 5: Let the Mastic Cure
Allow the mastic to cure overnight. The next day, remove the tile spacers.
Step 6: Apply Grout
Mix grout and water together until it reaches a thick consistency. Use a grout float to apply the grout to the backsplash. Work the grout into all the crevices, allowing at least four hours for it to cure.
Step 7: Clean the Tiles
Use a clean, wet sponge to wipe away the murkiness the grout left behind on the tiles, ensuring the only grout remaining is between the tiles. Wipe dry with a clean cloth.
Step 8: Caulk Edge of Backsplash
If your tile backsplash meets a counter, it's important to apply caulk along that edge—the caulk will act as a sealant against debris and liquid that can make their way to that crevice.
Squeeze caulk tube to disperse the sealant along the joint where the backsplash meets the countertop. Work in small sections (about two tiles-worth at a time). Dip your pinkie finger into the cup of water and run your wet finger along the wet caulk you just put down, pressing into the joint to make sure the caulk is evenly dispersed.
Let the caulk fully dry and cure before letting it get wet—about 10 days.
Step 9: Get Kitchen Back in Order
Put appliances back, re-screw outlet plates back into the wall, and remove drop cloths from counters.
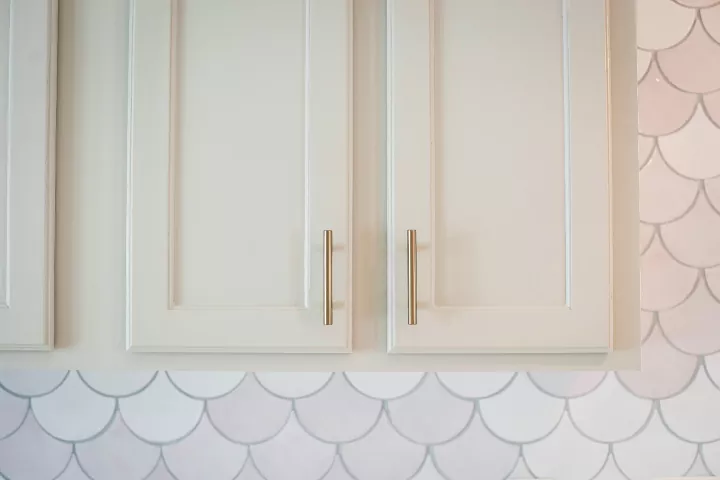
Photo via Construction2style
How to Clean and Care for Tile Backsplash
Cleaning the backsplash regularly is imperative for keeping tiles sharp. We’ll show you how to clean your tile when you spot a splatter, and we’ll also provide a regular cleaning routine and a deep cleaning routine to keep your backsplash in prime condition.
Tools and Materials Needed:
- Cleaning cloths
- Sponge
- Soapy water
Grease or Food Splatter
The minute you spot a food or grease stain on your kitchen tile, it’s important to blot it away immediately. If you wait too long, the grime will harden and be tough to remove later.
Tools and Materials Needed:
- A few clean, dry cloths
- Warm, soapy water
Step 1: Blot the Grease
Blot the grease spots using a dry cloth to soak up as much grease as possible. If it’s food, like a sauce, you’re dealing with, use a dry cloth to wipe away as many remnants as you can.
Step 2: Wash the Area
Wipe the area using a damp cloth. You can also use a cloth with warm, soapy water if the spot is more caked-on.
Step 3: Wipe Dry
Wipe the area dry with a clean, dry cloth.
Learn how to drill through tile.
Regular Cleaning
Even if there aren’t any noticeable stains on your backsplash, chances are that cooking in the kitchen will form some layer of grim over the tiles. It’s important to keep up with regular cleanings—we recommend a few times a week, depending on how often you cook—to keep your tile in tip-top shape.
Tools and Materials Needed:
- Sponge
- Warm, soapy water
- A few clean, dry cloths
Step 1: Apply Soap
Wipe the tile using a sponge soaked in warm, soapy water.
Step 2: Wash Away Soap
Use a damp cloth to wipe away the soap residue.
Step 3: Dry the Backsplash
Immediately wipe the tiles dry with a clean, dry cloth.
Deep Cleaning
Everything needs a good deep cleaning now and then— car interiors, toilets, microwaves, and even backsplash. Every three months, use these steps to give your backsplash a deep clean.
Tools and Materials Needed:
- Manufacturer-safe chemical cleaning solution
- Sponge or soft-bristle brush
- Cloth
Step 1: Research the Best Chemical Solution
For deep cleaning, you may need a chemical solution that’s safe for the tile and grout. Check with your tile and grout manufacturers to make sure the solution you’re using is safe.
Step 2: Apply Chemical Solution
Apply the cleaner to the backsplash, and allow it to sit for 5-15 minutes.
Step 3: Wipe Clean and Dry
Wipe the tile clean using a sponge (a soft-bristle brush may be needed for stuck-on hard particles). Dry immediately with a cloth.
Have you installed a tile backsplash before? Share your experience below!
Comments
Join the conversation
-
I love that you used subay tiles vertically. Great job.


Frequently asked questions
Have a question about this project?