


Shaker Style Cabinet Door With a Pallet Wood Twist

Hello. I finally got around to replacing our Kitchen Cabinet Doors after installing our Corrugated Metal Backsplash. Instead of buying new doors, the wife let me make some instead. They have a modern style frame called Shaker Style, but instead of the typical plywood panel in the center, I used Pallet Wood panels.
Best shaker cabinet doors!
Watch my video for more details.
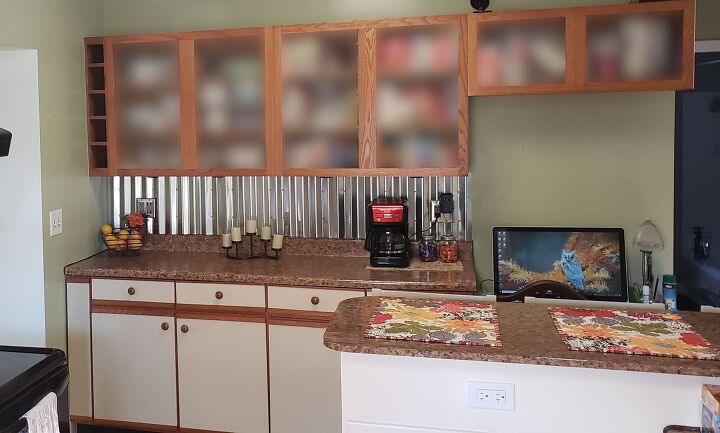
The first thing I needed to do was remove those outdated doors from the 80's. There was nothing wrong with the hinges so I removed them so I could use them on the new doors. After all that was done, I primed & painted the cabinets. I'm not going to talk about the painting process but will just show a picture after I was finished with that portion. Search the Hometalk website if you need information on painting.
Here is one set of cabinets that were painted. I only painted the outside, not inside. One coat of primer and two coats of paint. I recommend a quality paint because it will stand up better to scratches and cleaning.
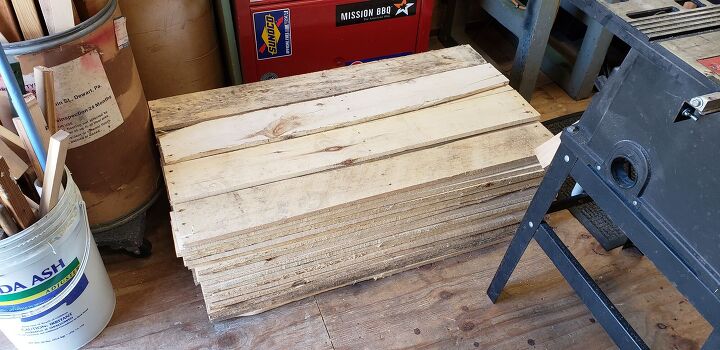
This is a stack of Pallet Wood I salvaged just for this purpose. This was way more than I needed, but originally I was going to build the entire door out of Pallet Wood. I later changed my mind and built the door frames out of 1x3 Poplar that I got from a box store and used the Pallet Wood for the panels. It was a good decision.
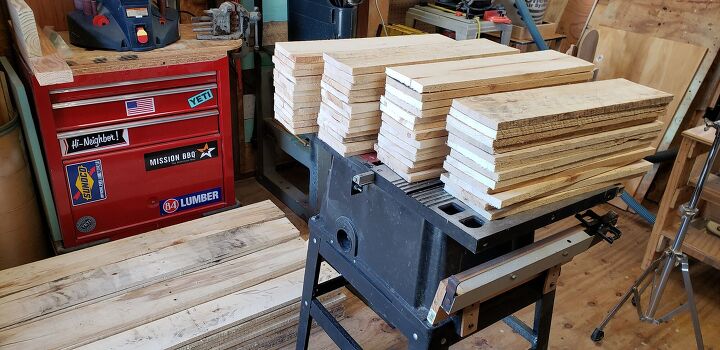
I cut the boards you see on the floor in half, and also cut the nail holes off of them. The wood on my table saw will be used for the door panels later on, but there was a lot of work to do first so I could get it to the size and thickness I needed.
In this picture I am resawing the board in half so it is not as thick and will fit in the door better. There are a lot more steps involved so check out my video to see what it took to get this wood in the shape I needed. You will see how I clean up the edges, sand it down, use my thickness Planer, cut it to final size and some staining to get the color you see.
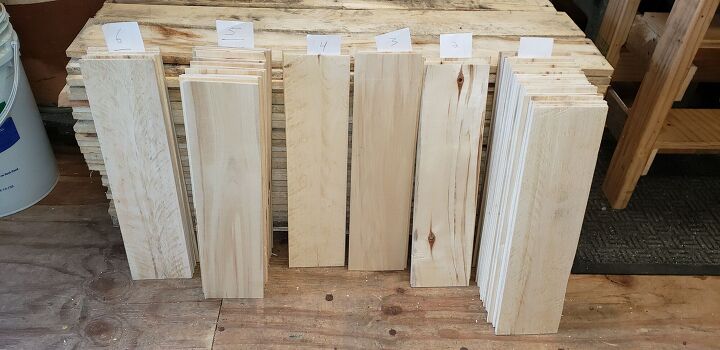
Here are the boards after getting the edges cleaned up and then resawed. They are about 1/4" thick and 100 of them in total. They still need to be cut to a specific size so they fit in the door frames, but here I just have them sorted so I know I have enough. Now I can start building the door frames.
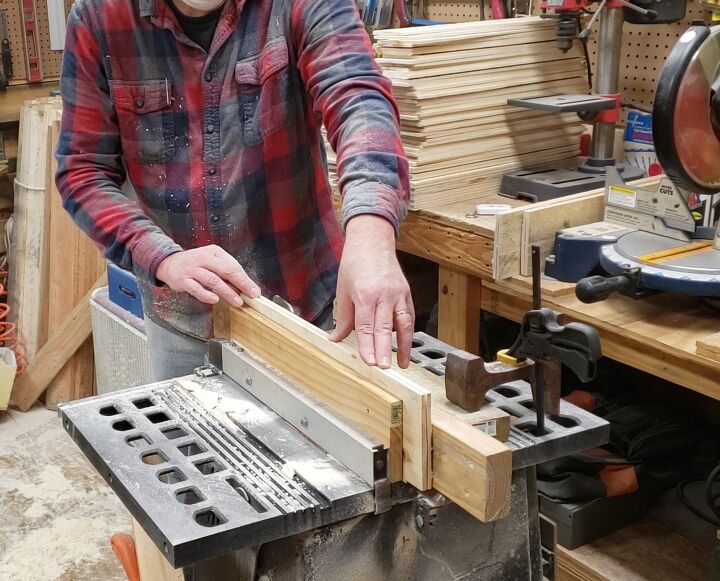
Now I am cutting the 1x3 Poplar to the sizes that match my existing cabinet doors. These will be for 20 door frames I need to build.
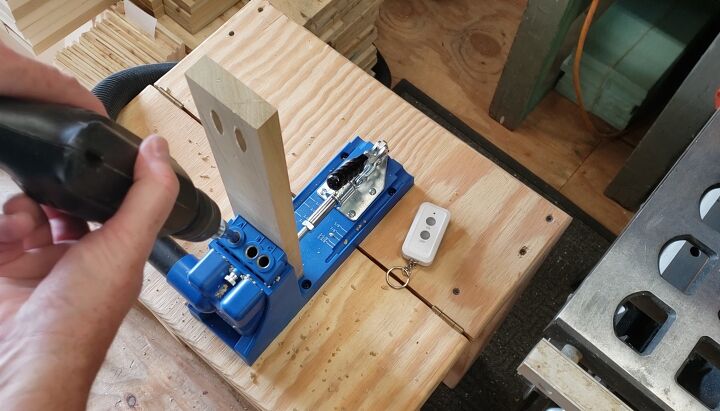
In this picture I am drilling Pocket-Holes in the 1x3's I just finished cutting. These pieces will be the "Rails" which are the top and bottom of the door and they will screw into the "Stiles" which are the pieces on the sides.
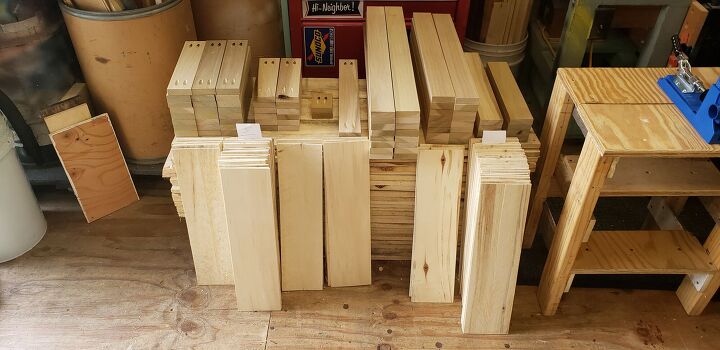
Here is a picture showing my Pallet Wood panels standing up in the front, the stack of wood on the top left are the door "Rails" with the Pocket-Holes and the pile of wood on the right side are the door "Stiles".
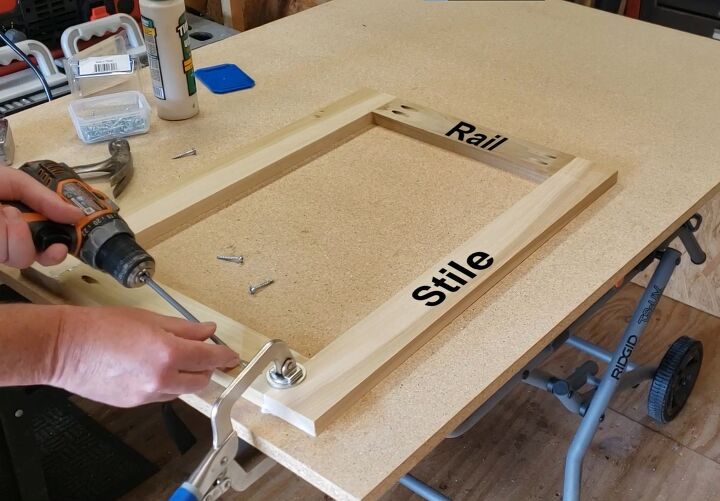
Here is a picture from the video that shows the "Rail" and "Stile" of the door frame. I put the frames together with wood glue and Kreg Pocket-Hole Screws.

I needed to put a 1/4" Rabbet in the back of the frame using the Router. This will make a groove that the Pallet Wood panels will fit in real nice. You will see this later on down below.
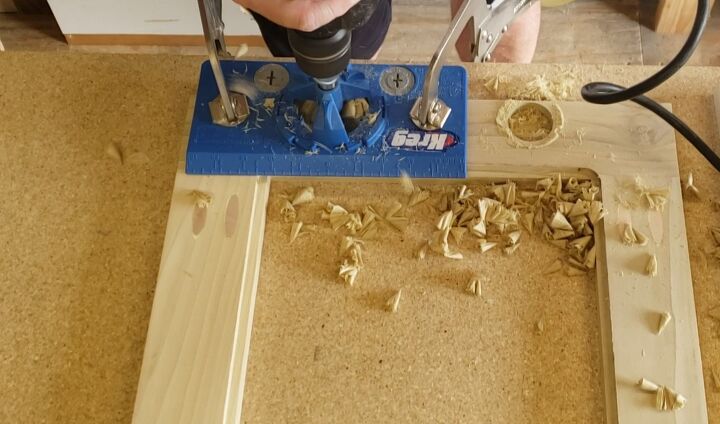
Now I am drilling the door frames for the hinges. I put the hinges in the same spots as my existing doors so they would be easy to reinstall later on. In other words, the holes that are already in the main cabinet should line up if I put the hinges in the same spot. You can also see the Rabbet going around the inside of the frame. Watch my video to see how I did this.
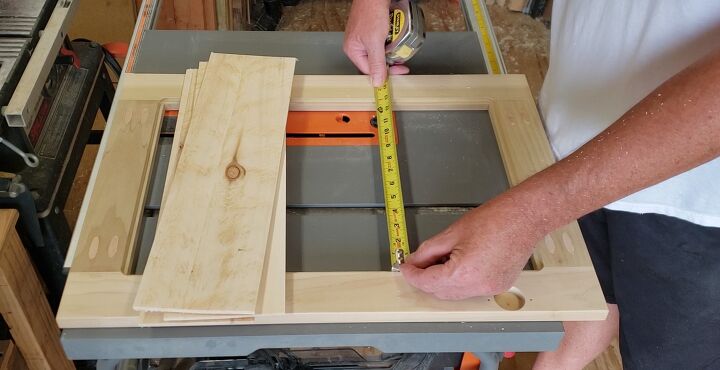
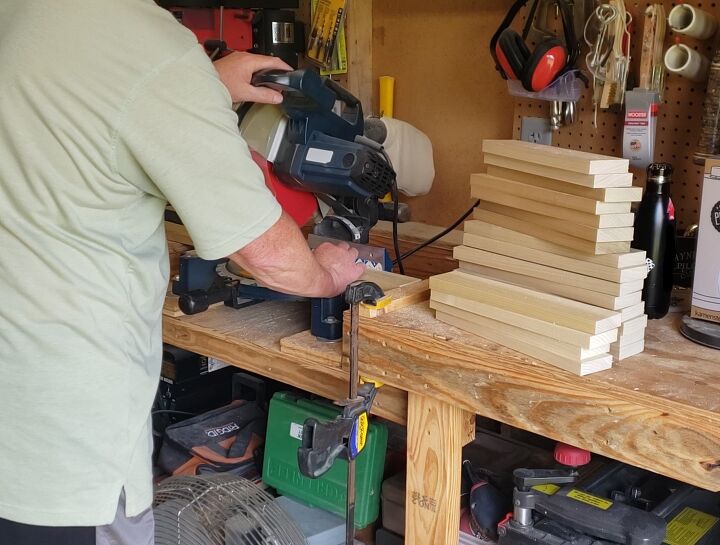
Now it was time to start cutting all the Pallet Panels so they fit in the Rabbets that I cut in the frames. First, I cut them to the width of the opening, second, I cut them to the right height so they are centered in the door, and third, I round off the corners so the fit nicely in the frames.
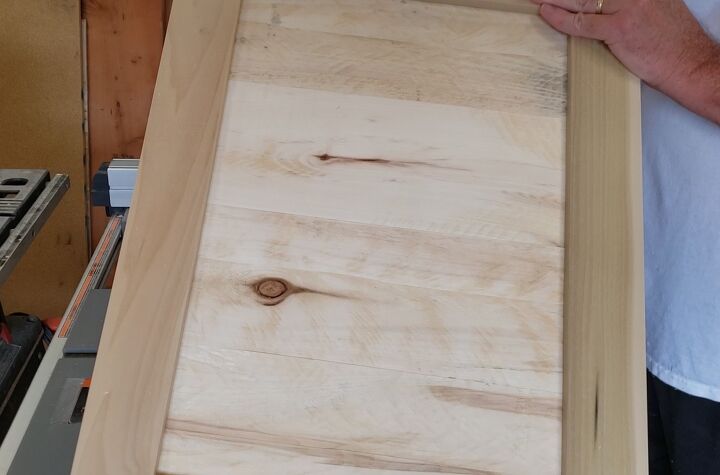
After all that I finally had a door built and I could see how it was going to look. Next is paint and stain, again, I am not explaining that except to say I put 1 coat of primer and 2 coats of paint on the door frames and stained the Pallet Wood and put on 1 coat of Polyurethane. My video has some more info on all that. You may not follow my process anyway depending on how you want your doors to look.

After painting and staining, it was time to marry the two and hope that they last a long time. I only used staples to attach the panels to the frames, no glue. I didn't want to mess with trying to clean up glue if it got on the front of the door.
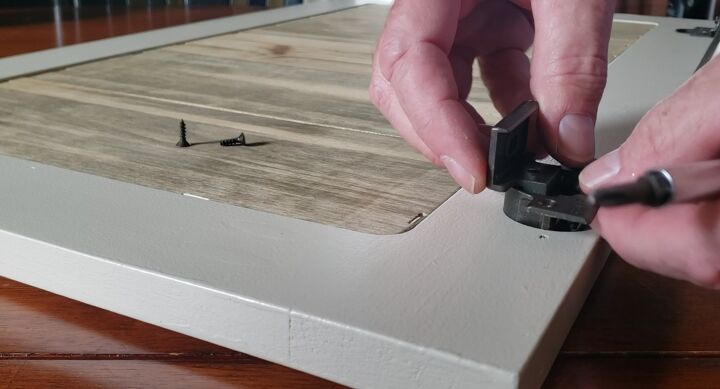
Then I put all the hinges on the new doors so I could get them installed and get the door handles put on. These were the original hinges and all I did was brush them off and blasted them with my air compressor. They're not soft closing or anything like that but we don't require all those fancy things. You could easily replace your hinges with new ones if you desire. I would recommend putting them in the same locations as your original ones though so you don't need to drill new holes in your cabinets.
Here is a video showing what I did to install the door handles and knobs if you are interested.
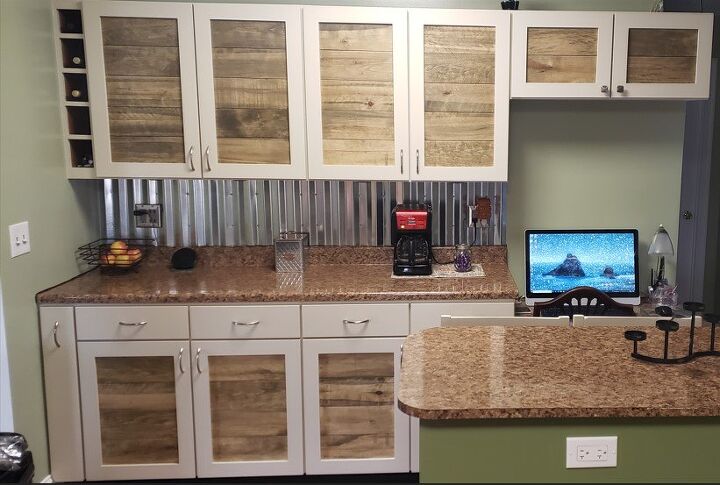
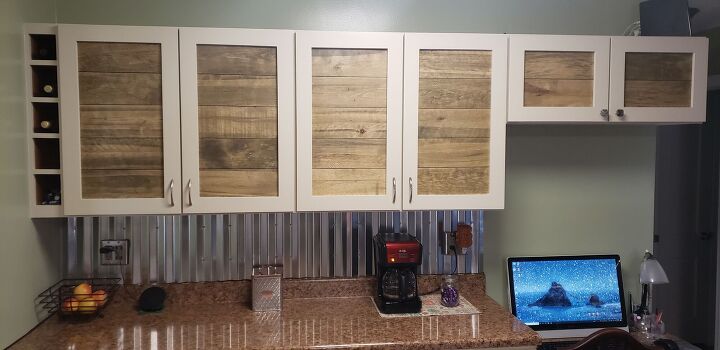
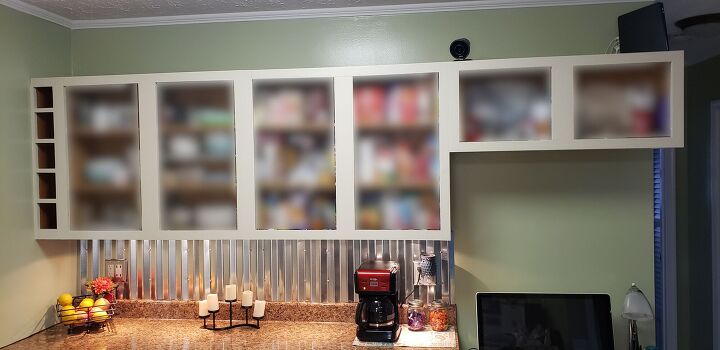
Here is one wall of finished cabinets. Oh, I didn't say anything about the drawer fronts but they are just 1x6 Poplar that I cut to size, sanded, primed & painted to match.

And here is the other wall. It was a lot of work and took way to long, but we like the way they turned out. This was my first cabinet door I built, and I learned a few things along the way that I shouldn't have done or didn't need to do, but that is what it's all about. Live and learn! Hope this helps you with something you have planned and thank you if you made it all the way to the end.
Best,
Steve


Comments
Join the conversation
-
Do they clone husbands like you? Great job. It's a gorgeous kitchen makeover.
-
I love the difference!


Frequently asked questions
Have a question about this project?
I like the look and the variation in wood color but I have heard that pallet wood is treated and should not be used indoors as it off gases? I don't know if that is myth truth or.... If true is paint enough to seal it and make it usable???