Cabinet Flip

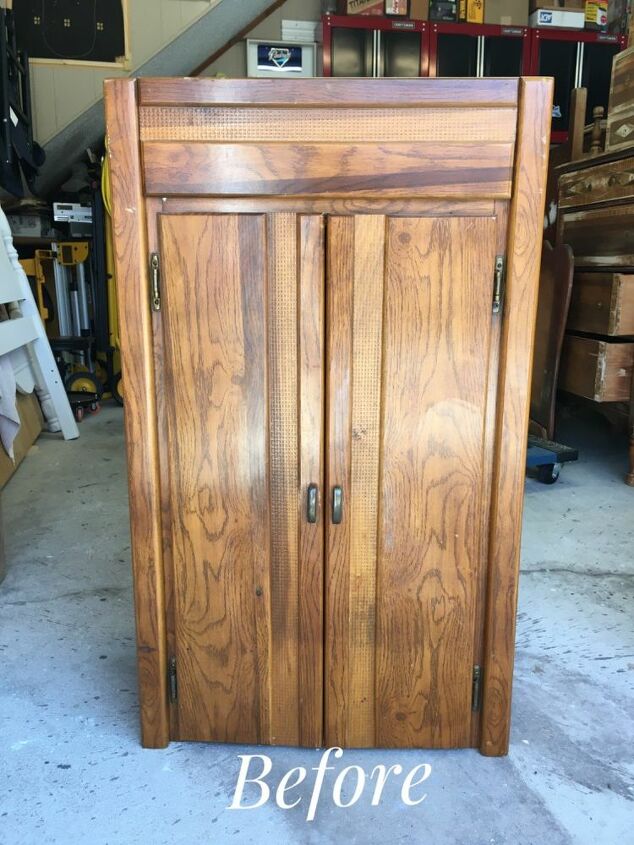
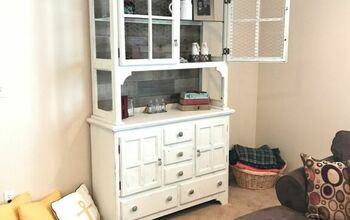
I always say one woman's trash is another woman's treasure when it comes to finding great furniture. I found this cabinet at one of our local thrift stores. It obviously had another piece that went with it once upon a time. When I saw the price tag of $5.92 there was no question it was coming home with me.
This is the upright position but my thought was to flip it upside down. After removing the door handles, I gave the inside and outside a good cleaning with Simple Green and rinsed with water. I then lightly sanded using 220 grit sandpaper. I removed the doors and filled in the holes with wood filler were the handles were because I wanted to add new handles closer to the top.
For this project, I decided to paint the bottom portion with Dixie Belle Paint in the color Drop Cloth. Since the wood was not a dark color, I did not prime before I painted. I did apply three coats of paint for full coverage. After the paint completely dried, I lightly distressed using 220 grit sandpaper and then applied Dixie Belle Clear Wax.
I wanted to add a top so I bought a stain grade wood shelf. I measured but I wanted overhang so I added an inch on each side and the front. My hubby, aka my carpentry guy, cut the wood to fit using a table saw.
I sanded the cut edges and treated the wood with pre-stain conditioner before staining.
I then stained the top with two coats of Minwax Stain in Dark Walnut. I also stained about 3 inches all the way around on the underside since there would be overhang. After 48 hours the stain was completely dry, I sealed it using Minwax Wipe On Poly in satin wiping it on with a lint free cloth.
There was a drop down where the top would be attached so I used three pieces of scrap wood to make up the difference which also gave me something to screw the top to. The strips were glued down with wood glue and then screws were driven in from the inside of the cabinet to secure the top.
This stain color was a very close match to the inside of the cabinet.
I tacked four plastic slides to the bottom so the wood base would not sit directly on the floor.
The original door handles were too small and were in the middle of the doors. I added new longer handles I purchased from Hobby Lobby and attached them closer to the top.
This will be great for the kitchen, office, or entry way now.
Enjoyed the project?
Suggested materials:
- Cabinet (thrift store)
- Handles (Hobby Lobby)
- Wood for the top (Lowes)
- Scrap wood for attaching
- Simple Green cleaner (Amazon)
- Dixie Belle Paint in Drop Cloth (Amazon)
- Dixie Belle Clear Wax (Amazon)
- Minwax Pre-Stain Conditioner, Stain, Wipe-On Poly (Amazon)
- Table saw (Amazon)
- Drill (Amazon)
- Lint free cloths for applying wax, stain, and poly (Amazon)
- Paint brushes (Amazon)
- Screwdriver (Home Depot)
- Table or chair slides (Amazon)
- Wood filler (Amazon)
- Putty knife (Amazon)
- Screws (Home Depot)
Comments
Join the conversation
-
 Lyn
on Feb 24, 2021
I love it!!! I love the look given by painting part of the piece and staining the top, or inside like you did!! Great re-do!!!
-
 Leap of Faith
on Feb 24, 2021
❤️❤️❤️
-
-
-
 Linda Blurton McKinney
on Feb 24, 2021
I really like the grain in the wood in the ‘before’ picture.
- See 2 previous
-
 Leap of Faith
on Feb 24, 2021
Sorry you feel this way. If possible, I try not to paint beautiful wood. There was more to this project than you can see. Fortunately for me, someone loved the makeover and purchased it as soon as I listed it.
-
 Jeanne Martin
on Feb 24, 2021
The great thing is when you buy a similar cabinet you can refinish it the way YOU like. She refinished hers the way she likes.
-











Frequently asked questions
Have a question about this project?
It looks wayyy better upside down! Was there a drawer in one end there or just an empty space?
How can you up date Kechen Cabints with painting them ?