


How to Get a Metallic Paint Effect on Chalk Paint
I discovered this paint effect by accident. I was varnishing a project one day when I got a parcel deliverd. It was some Mica Powder that I wanted to use in epoxy resin. I excitedly ripped the parcel open and the mica powder went flying all over my wet varnish. To try and save my finish I smoothed out the Mica powder with a brush and the effects were stunning.
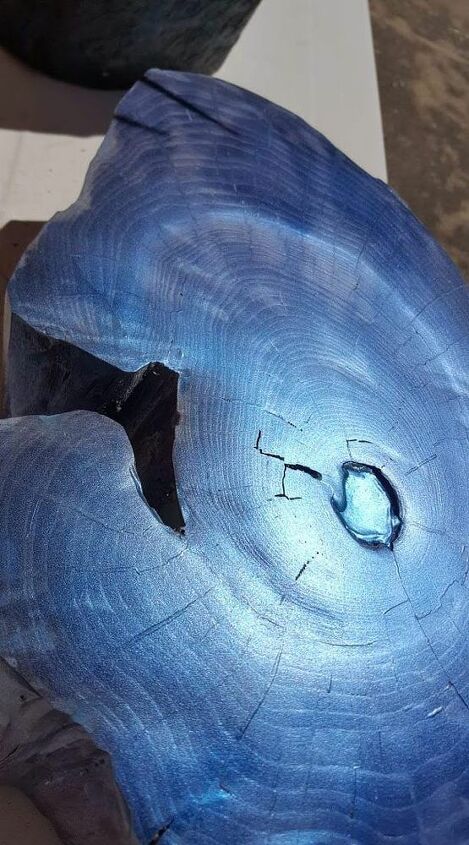
The only downside was the effect only looked metallic in the sun or the light so I tried it out on a chair over Chalk paint.
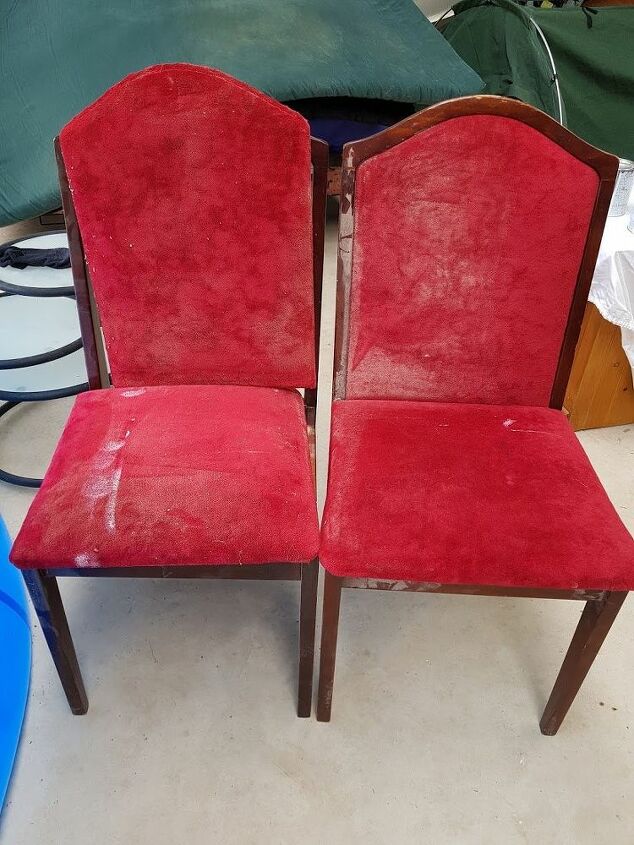
These chairs were bought from the store at the tip for $5. It was perfect for this test run because there is not a large surface so I would not waste too much paint if it did not work out.
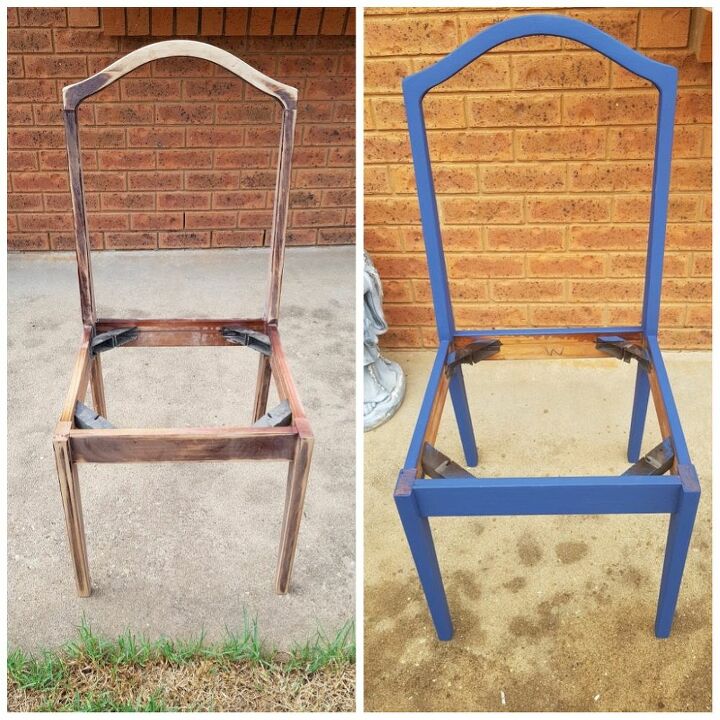
The surface was sanded to remove the old stain and varnish. They say you don't need to do this with chalk paint but I find the results are better. I had some blue chalk paint left over from my makeup table project which was added using a paint brush.
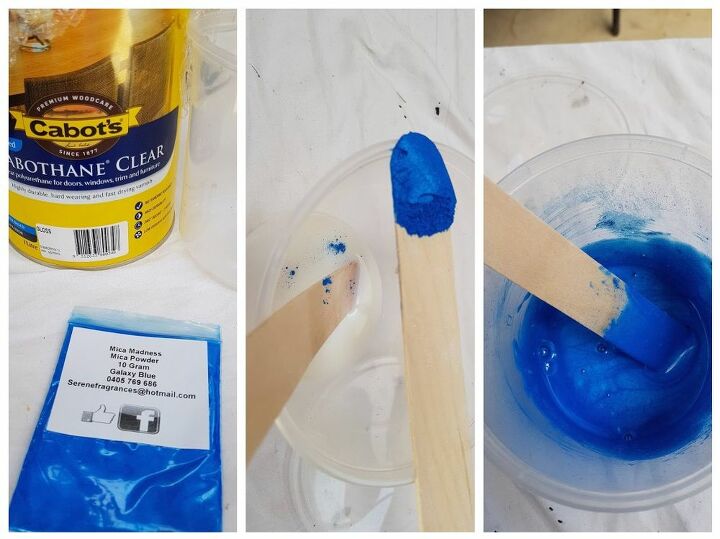
Once the surface was dry, a small amount of water based varnish was added to a tub. Blue mica powder was added into the varnish and stirred well with a wooden stick.
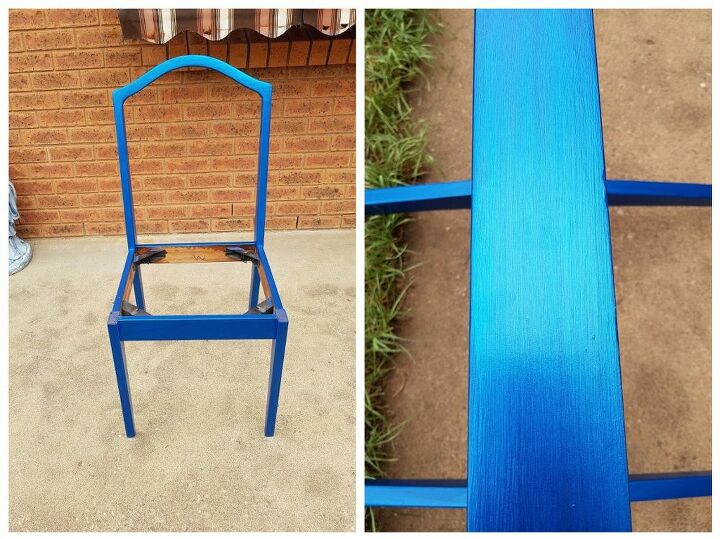
2 Coats of varnish were added. The area was so small the true effect cannot be seen in the pictures. But I can promise you it is stunning. Because the paint looked so stunning I went ahead and finished the chair makeover.
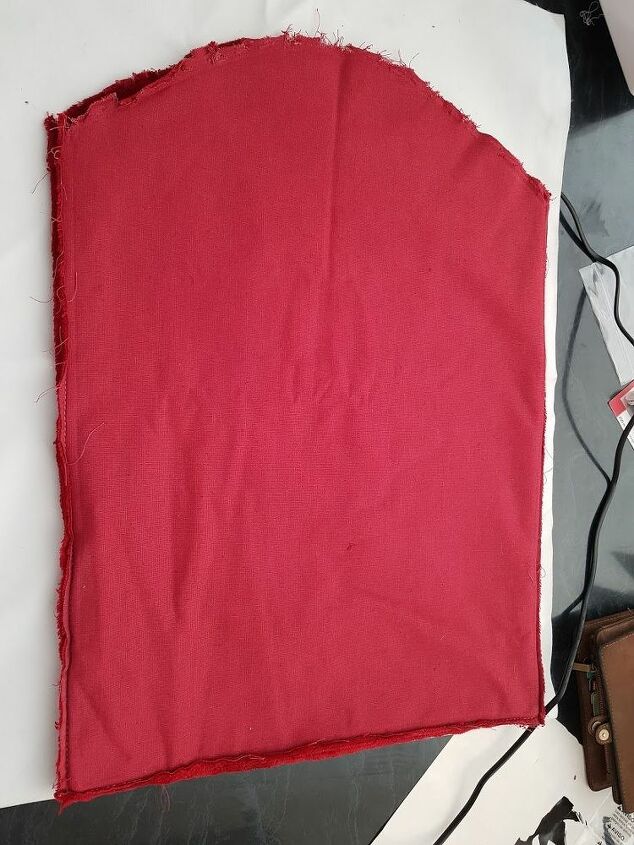
The fabric from the old chair was used as a template for the new fabric. I just left a slightly longer seem to allow for the lack of stretch in my new fabric. I used a rubber backed curtain fabric that I had laying around at home.
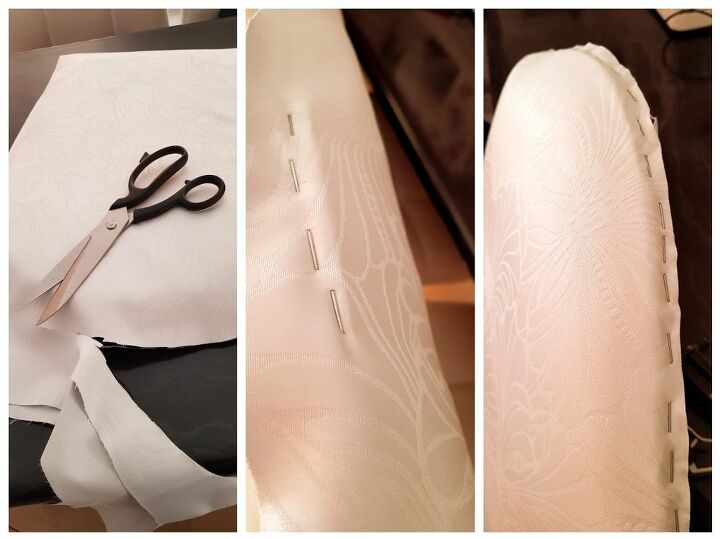
The sides were sewed up using a sewing machine and the fabric at the top was stapled and the excess cut away.
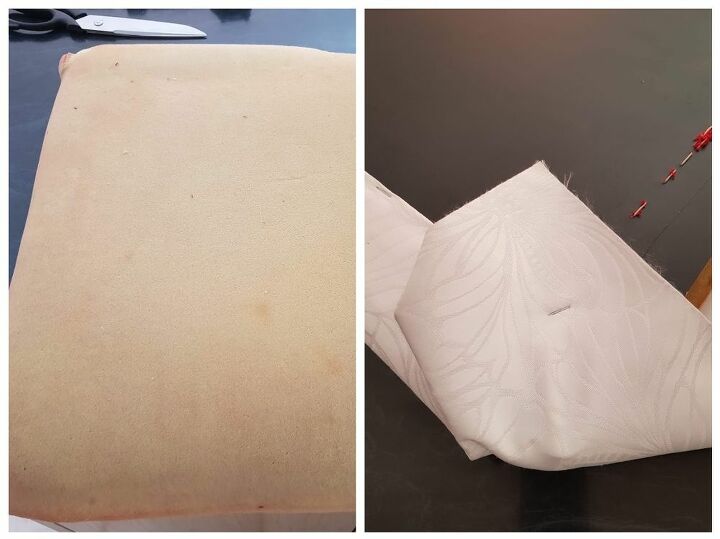
For the bottom fabric was cut larger than the base and pulled around and stapled to the bottom. And that was supposed to be the end. But I felt it looked to plain. Sorry forgot to take a picture. The chair sat for weeks while I thought what could be added to jazz it up a bit.
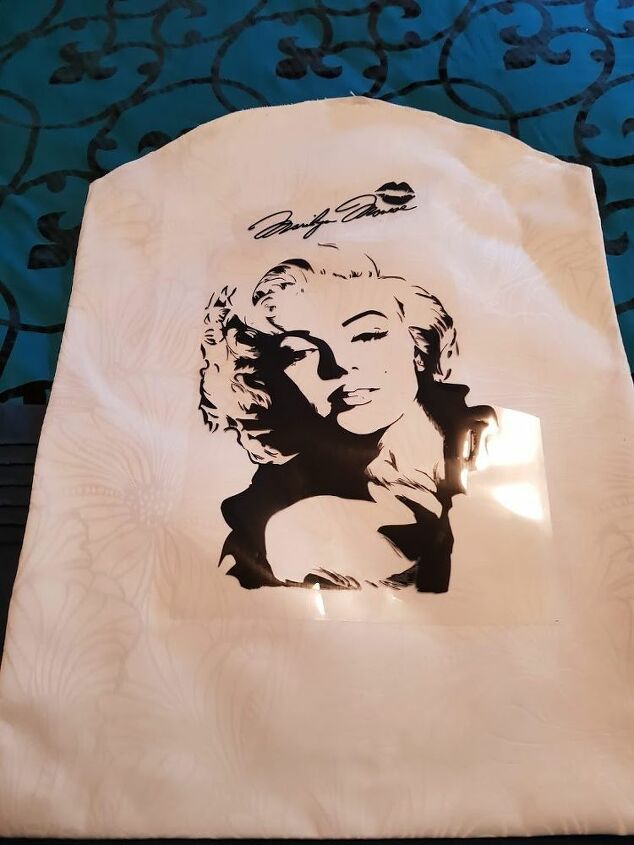
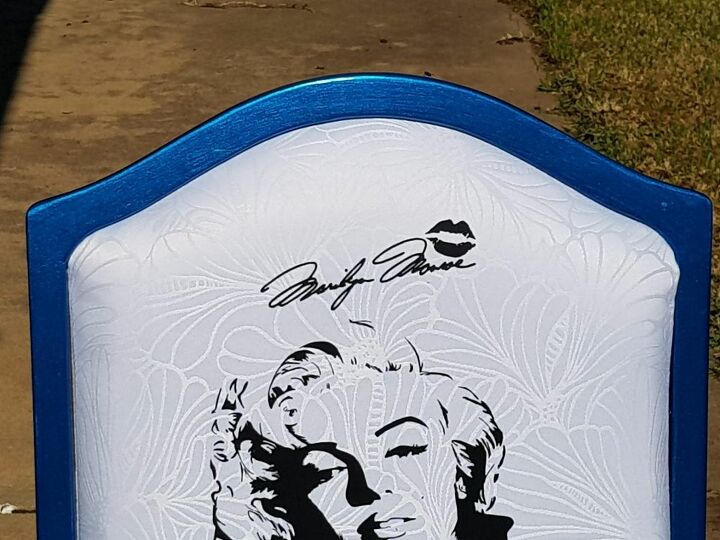
In the end I came up with the idea to use Iron on Vinyl. I chose Marilyn Monroe because she looks good in any bedroom. These can be bought on the internet under HTV vinyl decals. There are also many Etsy shops that sell them or will make them to the image you want. But this idea caused an issue with the fabric I used. I was unsure how the rubber backed fabric and the foam on the chair would survive the heat from a hot iron needed to transfer the vinyl.
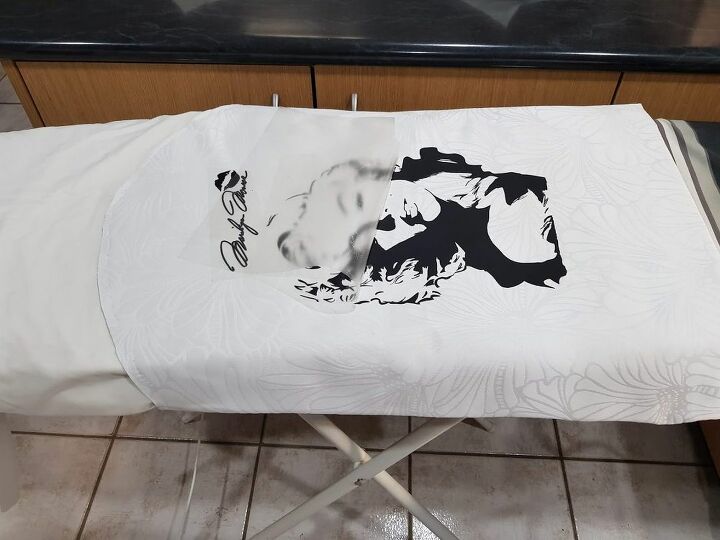
I cut a new piece of fabric in the end. Lesson learnt from this, don't use rubber backed fabric. I put a pillow case inside the fabric to stop the two sides melting together. Positioned the HTV decal in place, covered the decal with another pillowcase and ironed on the decal. You can check if the decal has transferred properly by lifting the clear carrier paper. The clear transfer sheet is then lifted off and the cover attached again as above. The chair was screwed back together.
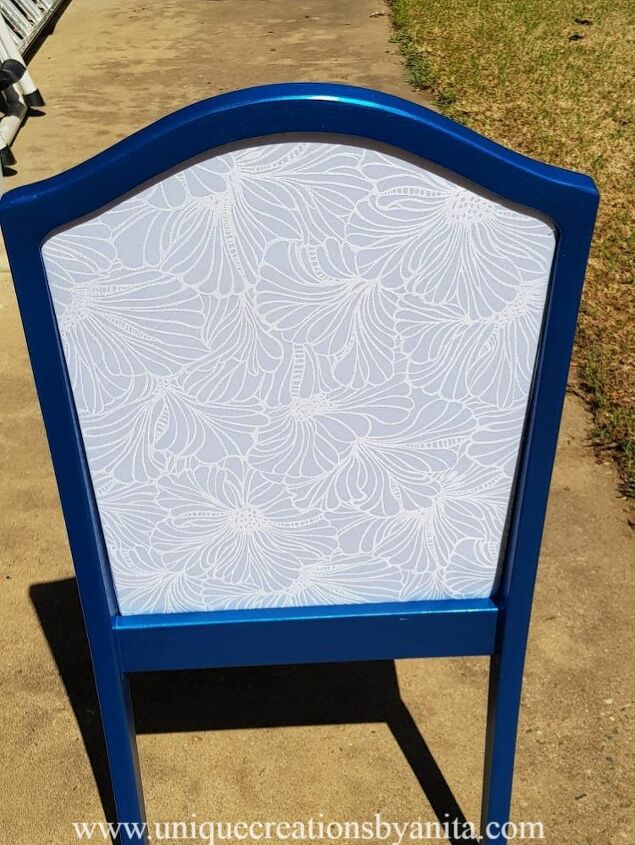
Back view of the chair

TA-DA the finished chair. I had to take the pictures outside so you could see the effects. The light in my house is not very good.
The cost of this project will depend on the products you have at home. It cost me very little because I had it all so my cost is an estimate. To see another unique makeover check out this display cabinet that was turned into a hidden jewellery box.
or this super cool lamp for decorative light bulbs
Resources for this project:
See all materials


Comments
Join the conversation
-
I love this! I just may try it myself.
-
You are amazing! looks beautiful.


Frequently asked questions
Have a question about this project?