


How to Reupholster a Dining Chair and Make It Look Like New

By Brooke Ressell
When you find a really great set of dining room chairs, you never want to let them go. They coordinate well with your table, they’re built with high-quality construction, and they’re incredibly comfortable during all those long, leisurely dinners and family game nights.
Of course, the very best dining room chairs are the ones that you find together with your partner or even the ones that get passed down from one generation to the next. So keeping them well-maintained becomes both an act of love and a source of pride for everyone in the family.
But after a while, the fabric might get stained, worn out, or even look a little outdated. And that’s when you know it’s time to give the chairs a refresh so that you can fall in love with them all over again. We’ll show you how to reupholster dining chairs the easiest way possible in this handy guide.
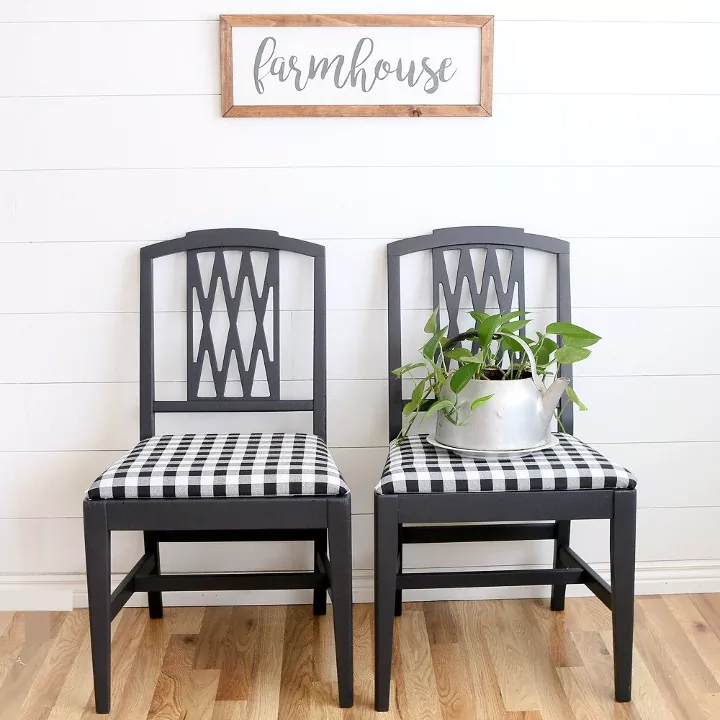
Photo via Randi @ A Fresh-Squeezed Life
How to Choose Fabric to Reupholster a Dining Chair
The first step in any DIY reupholstered dining chair project is to choose the right fabric. Looking at all of the available colors, patterns, and textures both in-person and online is really fun. But, of course, there are a few other things that you want to keep in mind while you’re shopping.
First off, the fabric material you choose is really important. You can go with a natural upholstery fabric such as:
- Cotton
- Poplin
- Silk
- Wool
- Leather
- Linen
Or, you can go with a more durable, longer-lasting synthetic fabric option such as:
- Polyester
- Olefin
- Nylon
- Acrylic
- Rayon
Remember, you want to find a fabric that you love—and one that will coordinate well with the rest of your home—while also looking for a high-performance and stain-resistant material that will hold up for years to come. After all, these will be chairs that you sit in while you eat and drink, so it’s important to keep that in mind.
You’ll also need to calculate how much fabric you’ll actually need to upholster a dining chair before you make a purchase. To figure this out, simply measure the length and width seam-to-seam of one seat cushion, adding three to four inches to each side just to be safe. Then, multiply this measurement by the number of chairs you wish to reupholster during your DIY project.
When you’re at the store or shopping online, convert your measurement into yards yourself or ask someone for help. One yard equals thirty-six inches, so a typical dining room chair will need approximately 0.75 to 2 yards to reupholster. Buy too much fabric? Use the extra to make fabric-covered flower pots.

Photo via Lindsay Fay
How to Reupholster a Dining Chair
Now that you know more about choosing fabric and how much fabric you’ll need for your project, we’ll show you everything you need to know to reupholster a kitchen chair so that it looks just as good as the day you got it.
Before we dive in, keep in mind that there are four key layers to the makeup of an upholstered chair seat. There’s the fabric, which we’ve already covered in the previous section. Then there’s the foam, which is what creates the cushion that you sit on. Between the foam and fabric is the batting, which is meant to smooth out the foam and prevent slippage when you sit in the chair. Lastly, there’s the seat of the chair, which is the (typically wooden) base of the chair that all layers of the upholstery (fabric, foam, and batting) attach to.
Tools and Materials Needed:
- Screwdriver
- Upholstery staple remover or tack puller
- 2-inch foam
- Temporary fabric marker
- Utility knife
- Batting
- Upholstery fabric
- Scissors
- Staple gun
- Staples
Step 1: Remove Seat Cushion
Flip your dining chair upside down and use your screwdriver to remove the seat cushion from the chair itself. Set the screws aside in a safe place so that you don’t lose them.
Step 2: Remove Old Fabric
Next, use an upholstery staple remover or tack puller to remove all of the staples from the chair cushion. Once all of these staples have been pulled, simply remove the old fabric from the seat cushion and set both of them aside for later use. The staples can be thrown away.
Hammer On-Hand
Step 3: Remove Old Batting and Foam
Then, remove any old batting and foam that is underneath the fabric and set them both aside for later use. Check out our tips for recycling batting scraps.
Step 4: Trace Foam
Place the old piece of foam on top of the new foam and trace around it with a temporary fabric marker. Once this is done, you can discard the old foam.
Step 5: Cut New Foam
Next, use your utility knife to cut out the new piece of foam along the lines that you previously traced.
Step 6: Trace Fabric
Take the old piece of fabric and lay it flat on top of the new fabric. Use the temporary fabric marker to trace around the old fabric.
Step 7: Cut New Fabric
Then, use your scissors to cut out the new fabric along the lines that you previously traced. The old piece of fabric can now be thrown away. Or use it to make fabric scrap frames.
Step 8: Trace Batting
Next, take the old batting and lay it flat on top of the new batting. Use the temporary fabric marker to trace around the old batting.
Step 9: Cut New Batting
Use your scissors to cut out the new batting along the lines that you previously traced. The old batting can now be placed in the garbage.
Step 10: Prepare to Attach the New Batting
Lay down the new piece of batting. Place the new piece of foam in the center of the new piece of batting. Then place the wooden seat on top of the foam.
Step 11: Attach the Batting
Next, attach the batting to the seat using your staple gun. To do this, pull the batting taut over the seat, placing one staple in the center of each side of the seat and then working your way around the seat, stapling the batting on every few inches. Be sure to fold the batting over around the corners.
Step 12: Trim Excess Batting
Trim any excess batting that remains along the outer edge of your line of staples. Don’t trim the excess batting too close to the staple line or it may come loose.
Step 13: Prepare to Attach the New Fabric
Lay the new fabric, printed side down, on a flat surface. Then lay the cushioned seat you made in the previous step in the center of the fabric.
Step 14: Attach the Fabric
Staple the fabric to the center of each side of the seat. Work your way around the seat, pulling the fabric taut, and stapling every few inches. Be sure to pull the fabric tightly when you staple around the corners of the seat.
Step 15: Trim Excess Fabric
If you have any excess fabric, trim it along the outer edge of your line of staples. Be sure not to trim it too short or the fabric may come loose.
Step 16: Reattach the Seat
Lastly, reattach the seat to the chair itself using your screwdriver and the screws that you previously set aside in a safe place. You can start using the chair immediately!
Have you tried reupholstering a dining chair before? Do you have additional tips to share? Leave them in the comments below!
Comments
Join the conversation
-
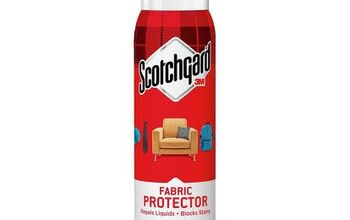
I would add one more step to this set of instructions:
-Spray your new fabric seats with Scotchguard.
This will help them repel any spills and stains and make them easier to clean.
-
I love those black and white seats! Other ideas to cover seats , besides using upholstery fabric, is to use cotton blend table cloths or cotton blend fabric shower curtains for seat material. They usually are already treated for repelling water and cost way less then upholstery fabric. I’ve used both for recovering chairs.


Frequently asked questions
Have a question about this project?