


Here Are 6 Easy Steps to Make the Cutest Bowl Light for Your Home

Have you been looking for the perfect pendant light to brighten your home's interior?
The right lighting can transform a room into something completely fab, and in today's tutorial, I will show you how to make a bowl light using inexpensive materials that can change your space completely.
I will show you how you can get the look of designer lighting using a popular kitchen item.
This post was transcribed by a member of the Hometalk editorial team from the original HometalkTV episode.
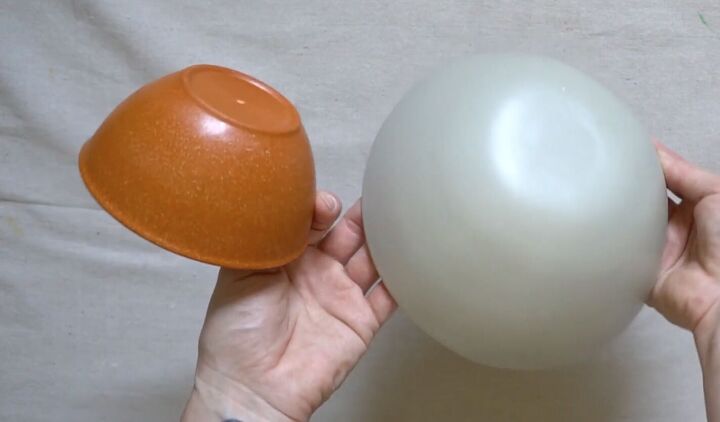
We are going to make a DIY bowl light from scratch using two plastic bowls, one large and one small.
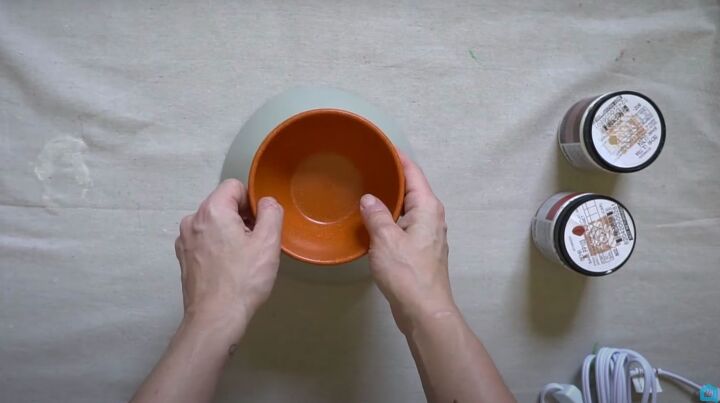
1. Stack the smaller bowl on top of the larger one
Start by flipping the bigger bowl upside down and centering the smaller bowl on top of it. The larger bowl I used was a bit uneven, which I didn't mind at all as I thought it added a bit of character.
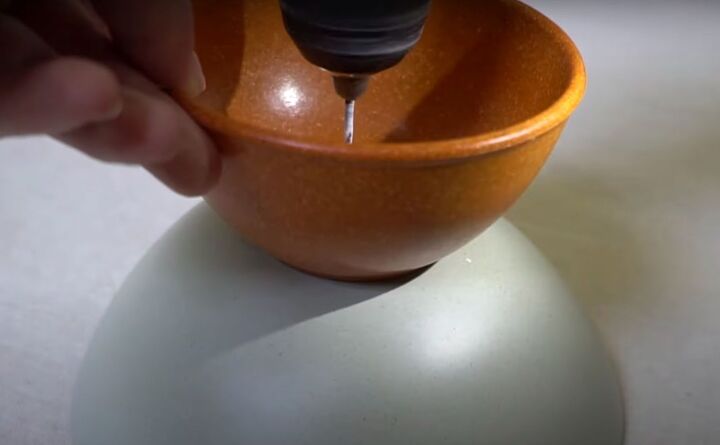
2. Drill a hole through both bowls
The next step is to drill a hole in the center of both bowls.
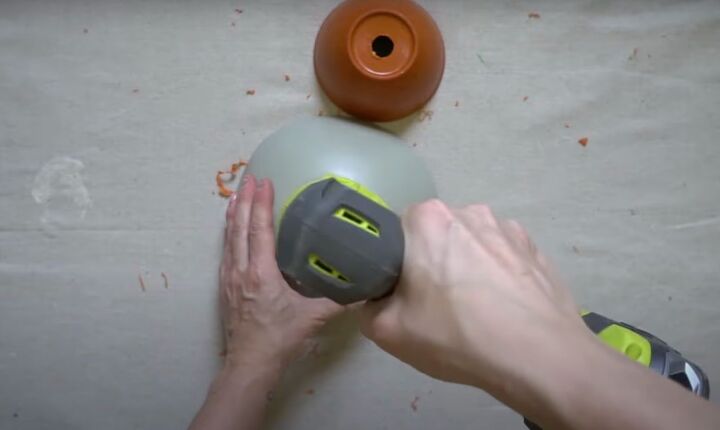
Start with a small hole and then use a 3/4-inch drill bit to make a larger hole. Due to their plastic construction, my bowls were pretty easy to drill.

3. Prime bowls
It is necessary to coat the bowls with primer once the holes have been drilled.
4. Add texture to the bowls
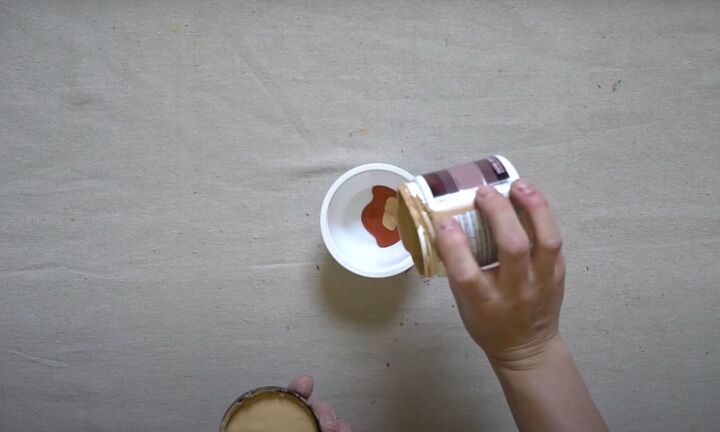
When the bowls are dry, you want to add some texture to them. I started by combining acrylic paints from Behr in the colors Kalahari Sunset and Fresh Croissant. They combined to make a nice terracotta color.
I suggest choosing a color that suits your home's color palette.
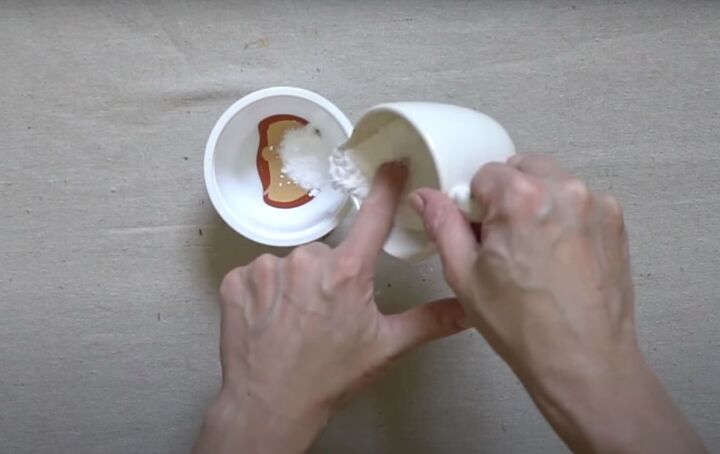
I then mixed baking soda into the paint, a little at a time, to create a paste.
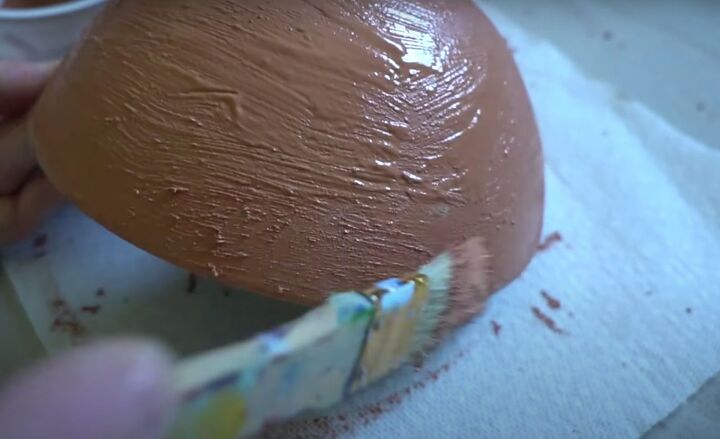
Using your paint paste, paint it in a horizontal direction all over the bowls, and then let it dry.
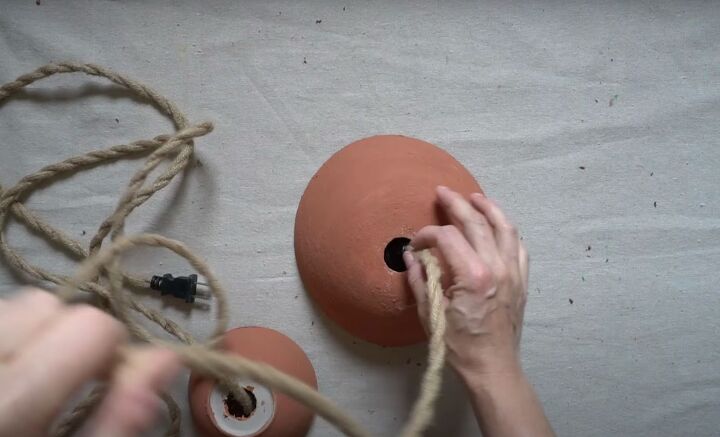
5. Connect both bowls
Once dry, you want to connect the two bowls together by threading a lightning cord through both
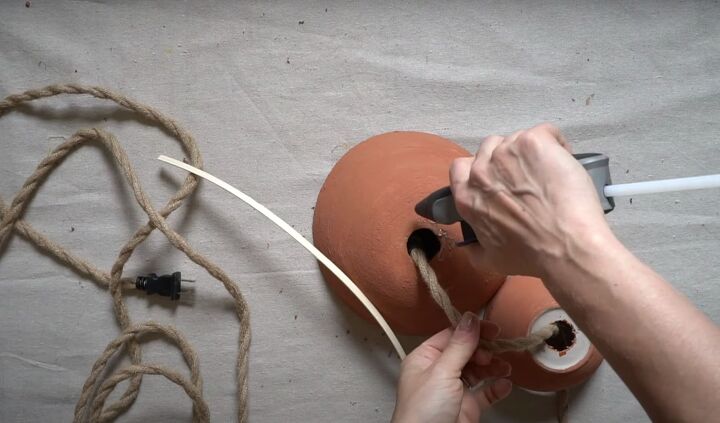
Next, you will use hot glue
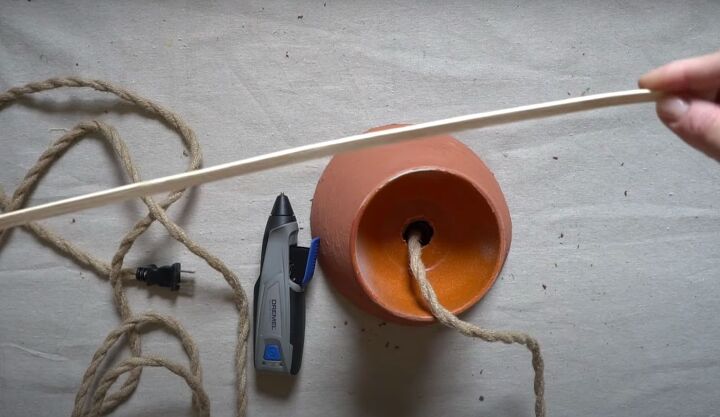
6. Cover the seam
To cover up the seam on my bowl pendant light, I used a thin reed, but cord, twine, or anything thick will do.
Here are 6 easy steps to make the cutest bowl light for your home
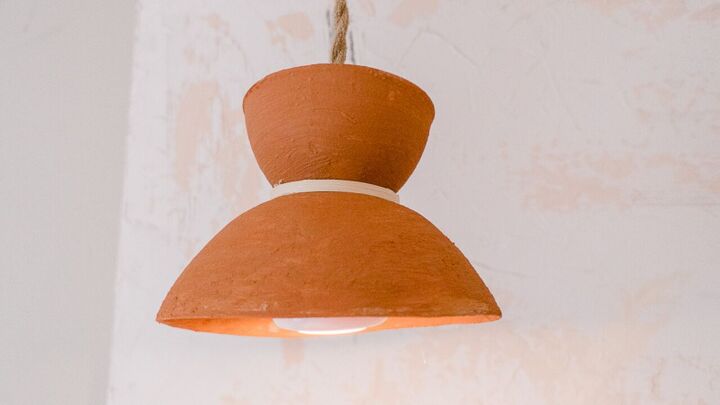
The bowl ceiling light is now finished and ready for hanging. It's a real statement piece, so it would be perfect hung above a kitchen island, dining room table, or in a foyer.
I love that I was able to make such a beautiful light from such simple materials.
I hope you enjoyed this project and try it out for yourself, I would love to hear how it went in the comments.
Where will you hang your DIY pendant light?


Comments
Join the conversation
-
Thanks. I didn’t know that.
-
Brilliant dea. Thanks for sharing!


Frequently asked questions
Have a question about this project?
I don’t understand the video. You said you don’t think gluing the bowls would hold, but they look attached together? And what kind of light did you put in there? It looked like you stuck a completely different light in there. I would be leery of doing that for safety reasons.
I know that heat loosens up hot glue. Won’t it come apart? It’s really a cool looking light which I’d love to have, but I’m worried about the plastic so close to a bulb.
Where did you get a rope electrical cord?