Easy Batik Curtains

Amanda C, Hometalk Team
by Amanda C, Hometalk Team
7 Materials
I love trying my hand at various dyeing techniques. When I saw this faux batik method being used, I had to give it a try! These hand dyed batik curtains can be made the color of your choice and only take a bit of gel Elmer's glue to create a fun and unique pattern! Without having to melt any wax you can get a very "batik" feel on any fabric form!


We want to help you DIY, so some of the materials in this post are linked to sellers. Just so you know, Hometalk may collect a small share of sales from the links on this page.
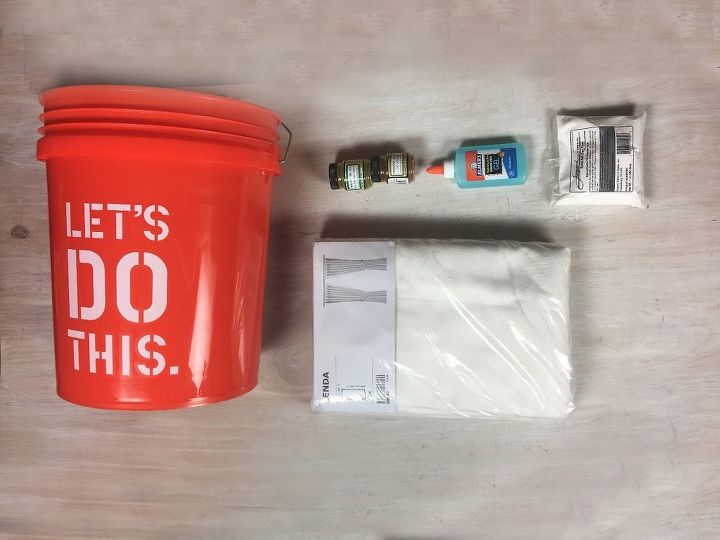
SUPPLIES:


-Big Bucket


- White Cotton Curtains


-Elmer's Gel Glue


- Soda Ash (an additive to help dye adhere to fabric)


- Procion Dye (cold temp dye)


-NON iodized Salt (not pictured above)
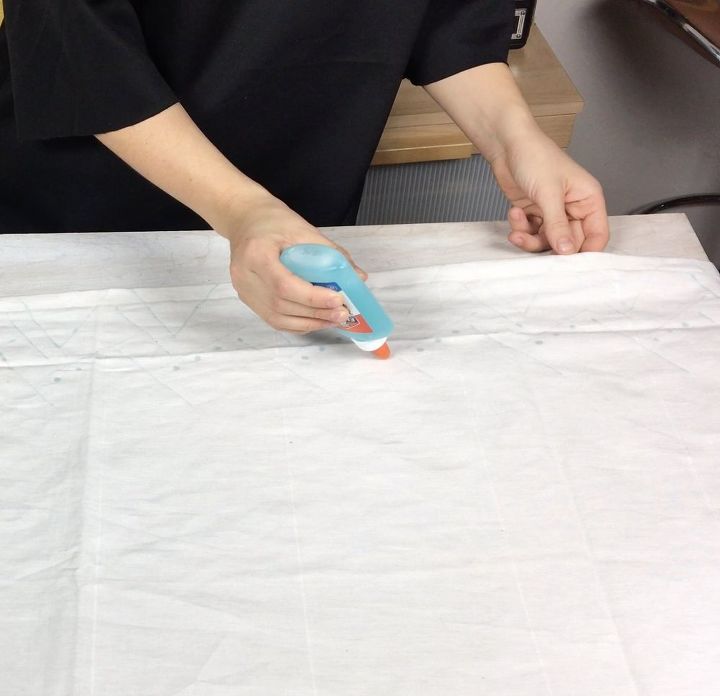
STEP 1: Draw a pattern with glue
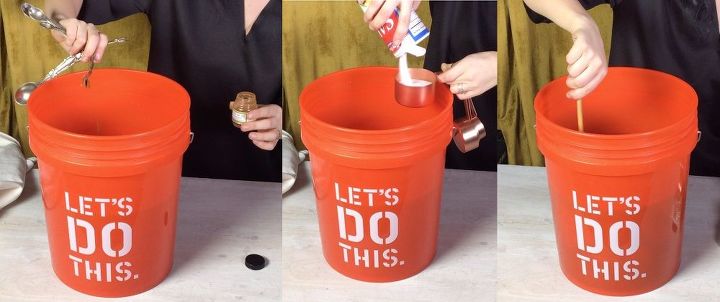

Draw the pattern / print of your choice onto your curtain(s) with your gel glue and allow to dry.
STEP 2: Mix the dye


Add 3 gallons of slightly warm water to your bucket. I decided to give a slight ombre effect to my curtain so to start out I went for a paler shade and soaked the entire curtain in it.


There is a good chart to go by below for the formula of the amounts of dye, salt and soda ash you will need for each shade. Since I was going for a pale shade, the first dye bath I created had 1tsp of dye and 1.5 cups salt.


Add the dye and salt first and stir it into the water.


For very pale shades: ¼ to ½ teaspoon dye, 1½ cups salt, ¼ cup soda ash


For light shades: ½ to 1 teaspoon dye, 1½ cups salt, ¼ cup soda ash


For medium shades: 1 tablespoon dye, 1½ cups salt, ¼ cup soda ash


For darker shades: 2 tablespoons dye, 2 cups salt, ¼ cup soda ash


For darkest shades: 4 tablespoons dye, 3 cups salt, ¹/³ cup soda ash
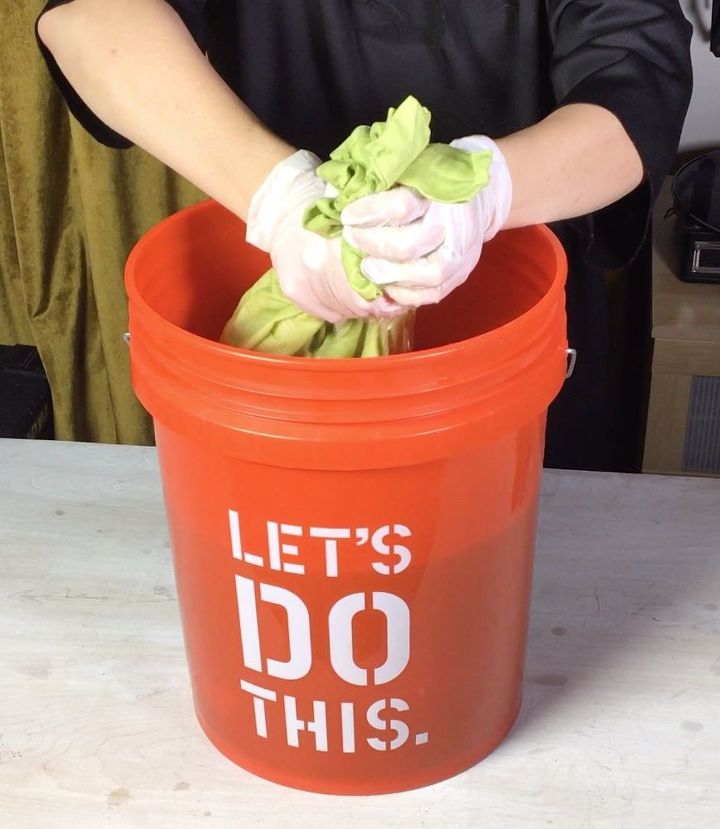
STEP 3: Dunk your fabric into the bucket


Once your salt has dissolved into the water add your fabric to the bucket. Allow it to sit for 5-10 minutes stirring every once in a while.
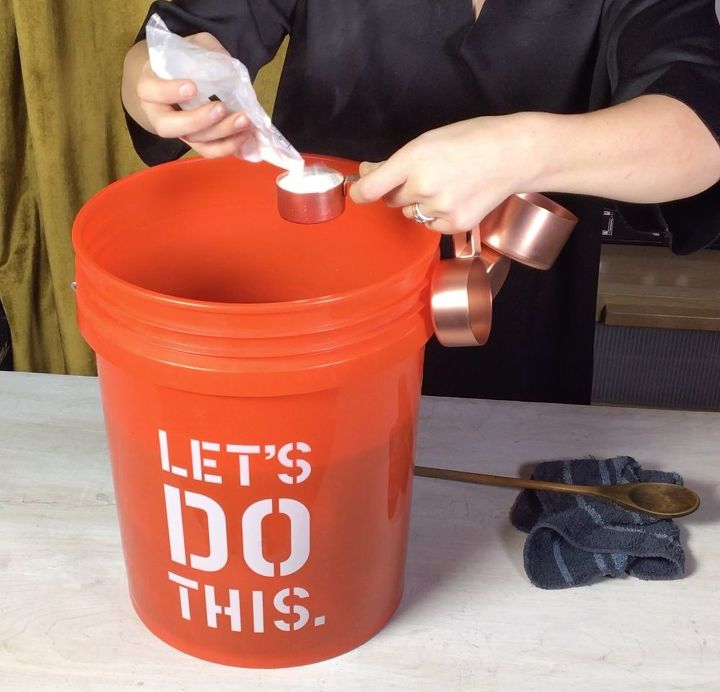
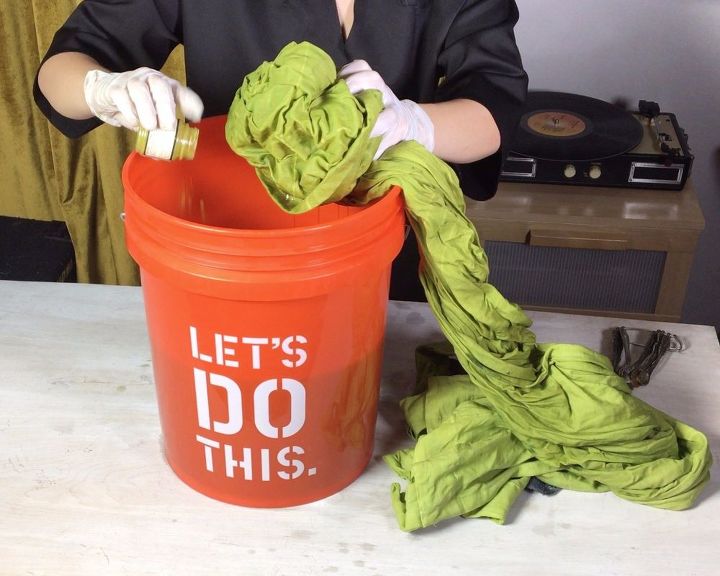
STEP 4: Add soda ash


Move your fabric out of the way and add 1/4 cup soda ash to the mix. (*If you are going for a darker shade you will need to adjust the amounts of dye, salt and soda ash that will be in your dye bath... reference the chart in step 2)


Allow the entire curtain to sit in the bath for 20 minutes being sure to stir it every 5-10 minutes.
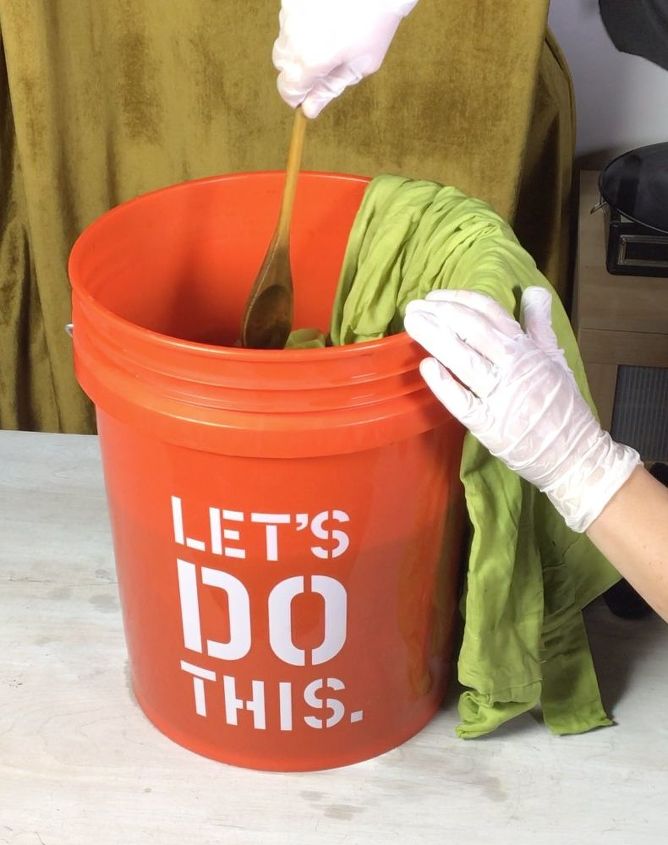
STEP 5: Take and wring out the top part of the curtain


Once 20 minutes have passed pull out the top portion of the curtain and wring out any water and allow the top to rest outside of the bucket while the remainder of the curtain still sits in the bath. This is so that the top remains the lightest shade.
STEP 6: Add a bit more dye for an ombre effect


Move the curtain out of the way and add another tsp of dye and stir it into the mix to create a deeper shade. Once it is stirred in, place the lower portion of your curtain back in the bath so it soaks in the color and gets darker than the layer above it.
STEP 7: Let it sit


Stir your dye bath every 5-10 minutes and allow your fabric to sit in the dye bath for a good 30-60 minutes depending on the depth of color you are looking to achieve.


Repeat steps 5-7 for each layer of depth you want. (Remember that you also need to add salt and soda ash when you add more dye. Refer to the chart in step 2)
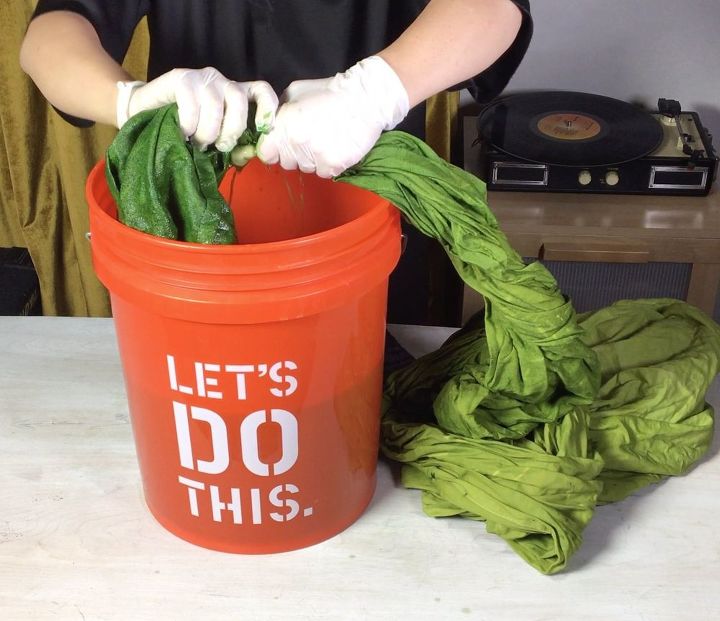
STEP 8: Squeeze out your curtain


For the bottom layer of the curtain you want the deepest shade so you will allow it to sit in the bath the longest. Once it has been in the bath for 60 minutes the dye should be set pretty well! Squeeze out all excess water and dye from your fabric.
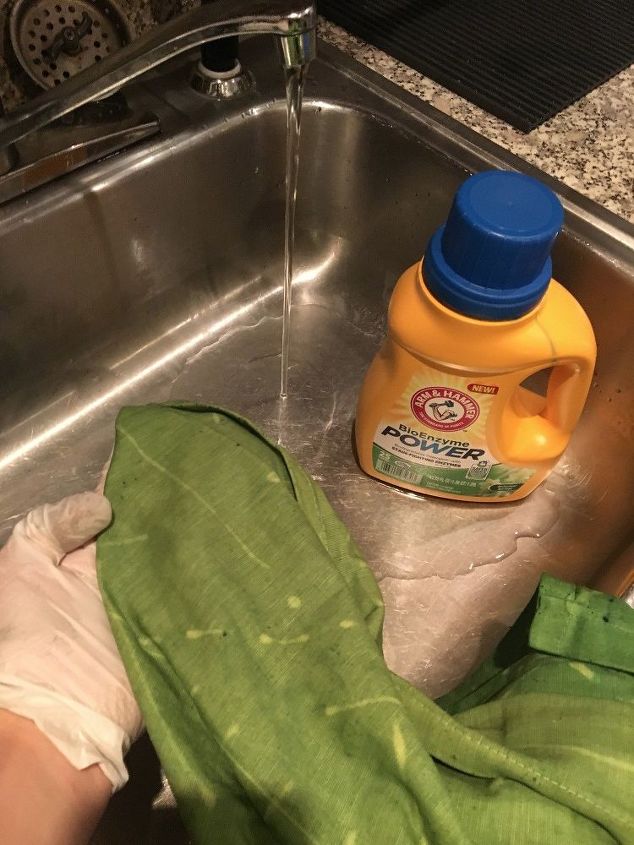
STEP 9: Rinse your curtain


Rinse your fabric out with cold water and slowly increase the heat. Rinse until the water runs clear. Then create a soap bath (normally with Synthrapol, but I didn't have any so I used some laundry detergent), and soak your fabric for 5-10 minutes in it. Then rinse it again and let it hang dry.
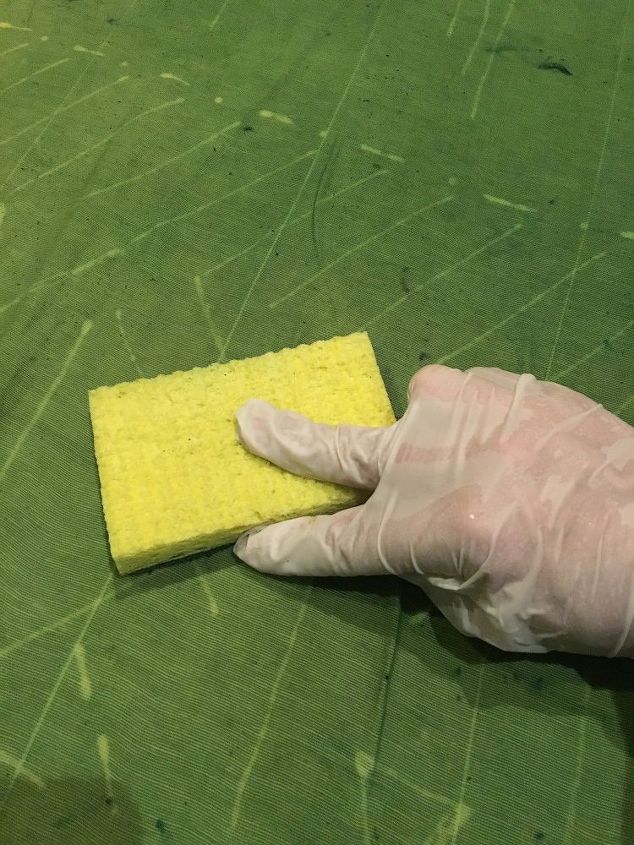
STEP 10: Scrub away any left over glue pieces.
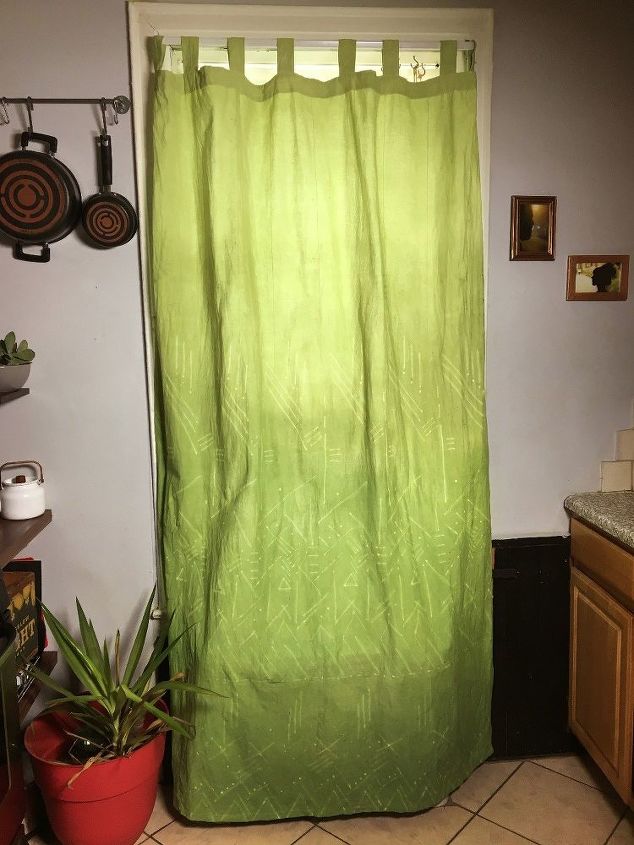
I must admit this dye turned out WAY brighter than I anticipated. It was meant to be a much more olive like tone. I will probably re-dye it at some point, but I only needed one panel, and I have another left in the package, so I may try another dye color out and see how it goes!
You can see here how the shades increasingly get darker as you reach the bottom of the curtain.
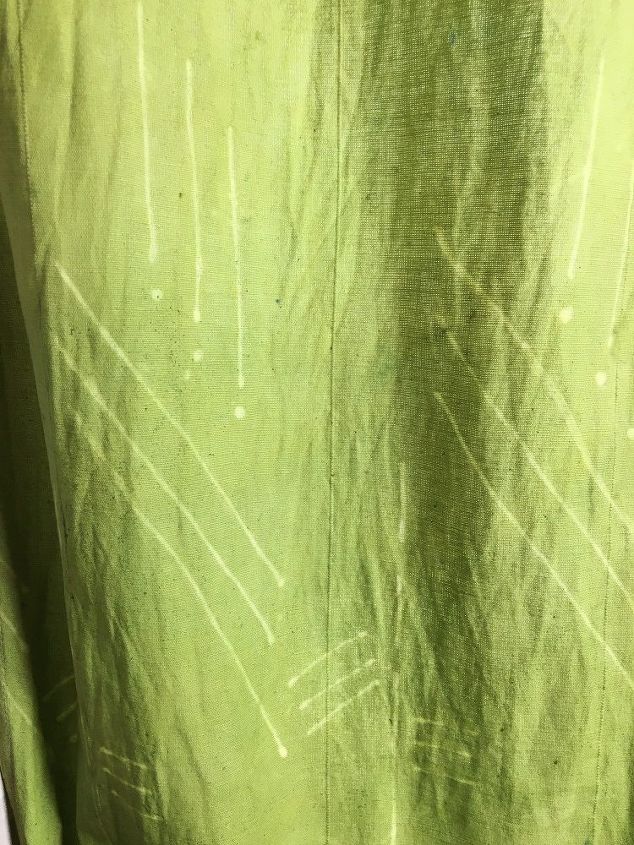
The batik lines turned out pretty well for not using wax! I would love to create an image on something with this method and perhaps paint on the dye to create a portrait of sorts!
Suggested materials:
See all materials
Frequently asked questions
Have a question about this project?
Comments
Join the conversation
2 of 5 comments
Next