


DIY Office Storage Cabinet With Dixie Belle Paint

I’ve been remodeling our blog Studio, lovingly called Organized-ish HQ, for the last month and half. The studio has served my team well, but we were in need of better storage solutions and a more functional layout. The room is long and narrow, so when I looked online for a sideboard style cabinet to hold our office supplies, I couldn’t find anything long and shallow enough to fit the area I had open. So in true Lela fashion, I decided to make one myself.
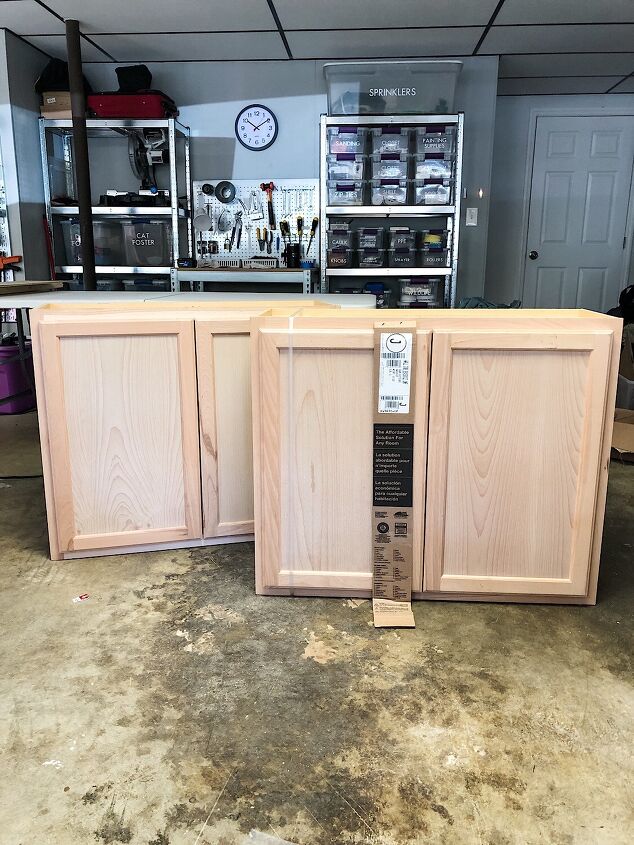
The Office Storage Cabinet Plans
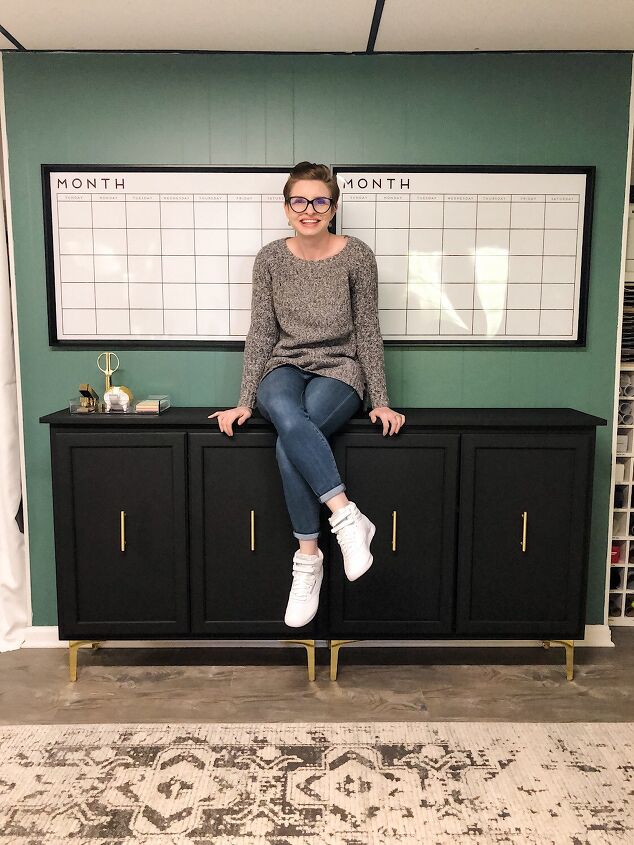
The open wall in the studio can allow for a cabinet up to six and a half feet long, so I bought two stock wall cabinets from a home improvement store that are each 36″ wide. My plan is to attach the two cabinets together, add a wood top, and install tall dresser legs to make it look like a piece of expensive furniture. Once the cabinet frame is built, I’ll paint the whole thing.
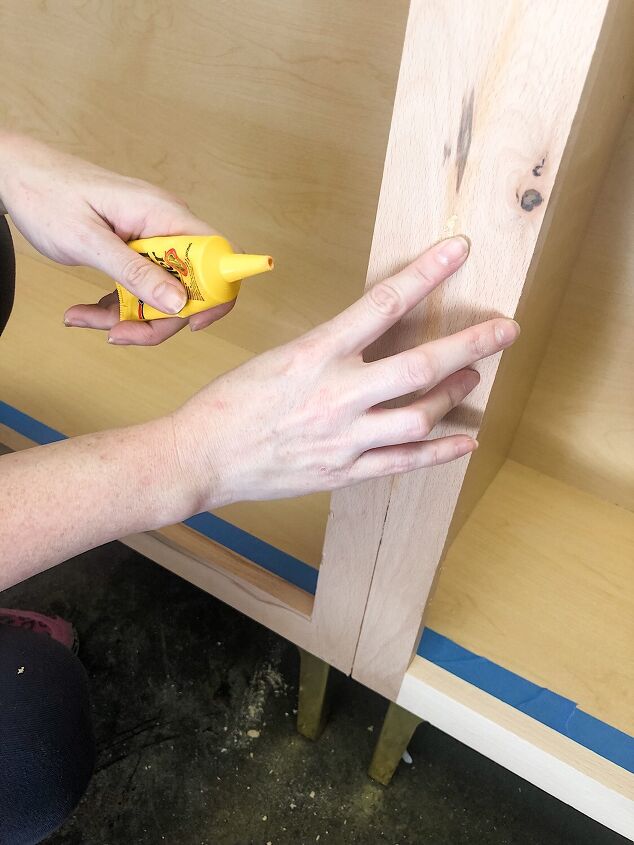
First things first, I needed to attach the two wall cabinets together. I added some scrap wood I had in my garage between the gap of the two cabinets to create a wedge, then screwed them together from the inside, top, and bottom. I ran some wood filler along the middle seam to make it look like a seamless transition, too, but it probably wasn’t necessary.
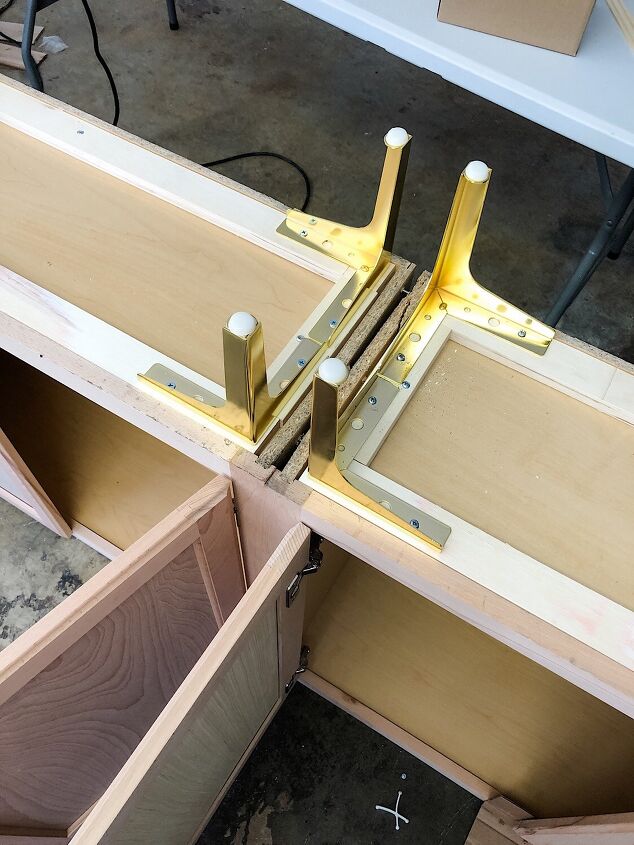
Then I added more scrap wood (which are actually slats from an old bed frame we donated) to the bottom of the cabinets to create a flat and strong surface to attach the legs. I chose 7″ tall gold dresser legs to give the cabinet some height and save our backs from bending down too far every time we need a new roll of tape.
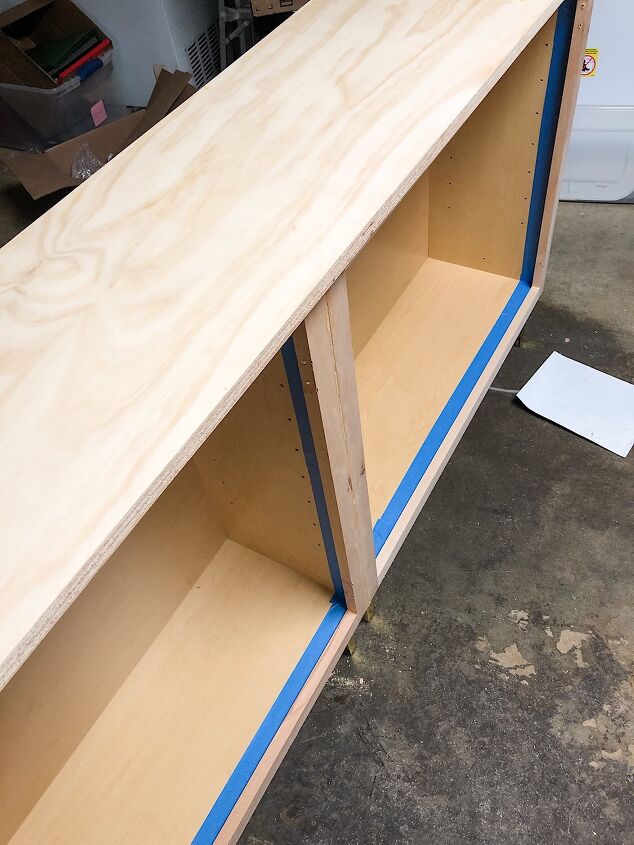
The last step of the building process was to add a top piece. I used a ripped-down sheet of thick plywood that extends 2 inches on both sides and the front to make the cabinet look more like a piece of furniture. I glued it in place with heavy duty wood glue and secured it with some brad nails for extra safety, and filled those holes with wood filler.

Once the glue set, I used iron-on wood edging strips around the rough sides of the plywood to make it look like a finished countertop.
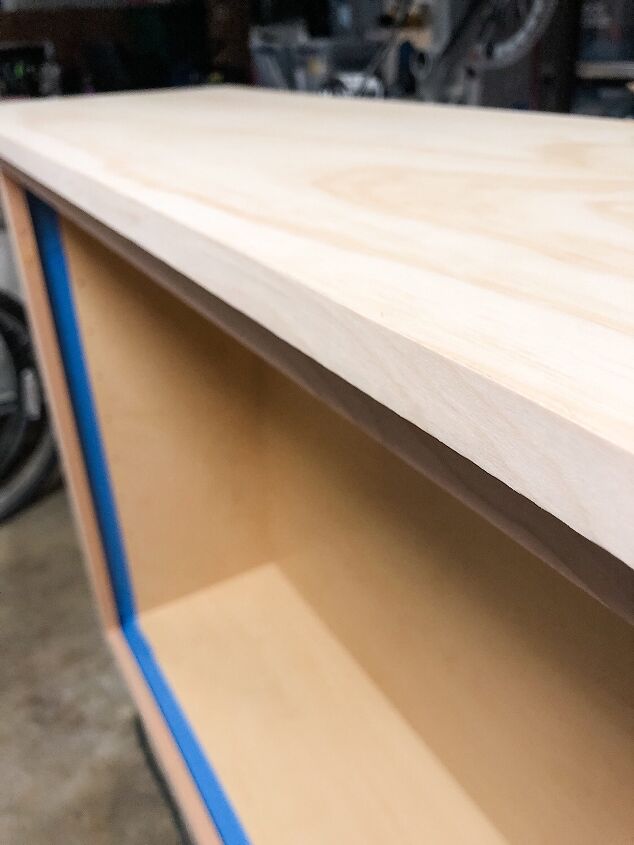
That wood edging works wonders, huh? You’d never know this was just plywood!
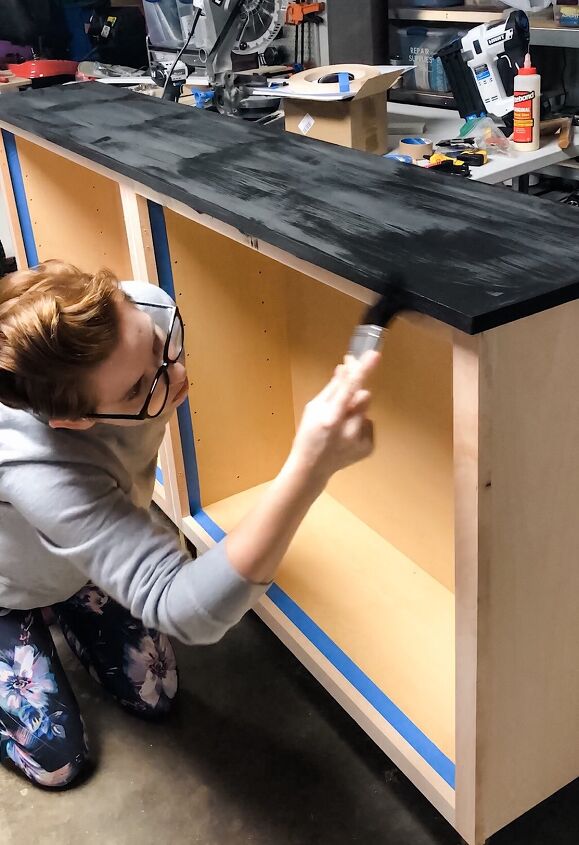
The last step in the building process was to paint the unit. I painted the base unit first, then the cabinet doors.
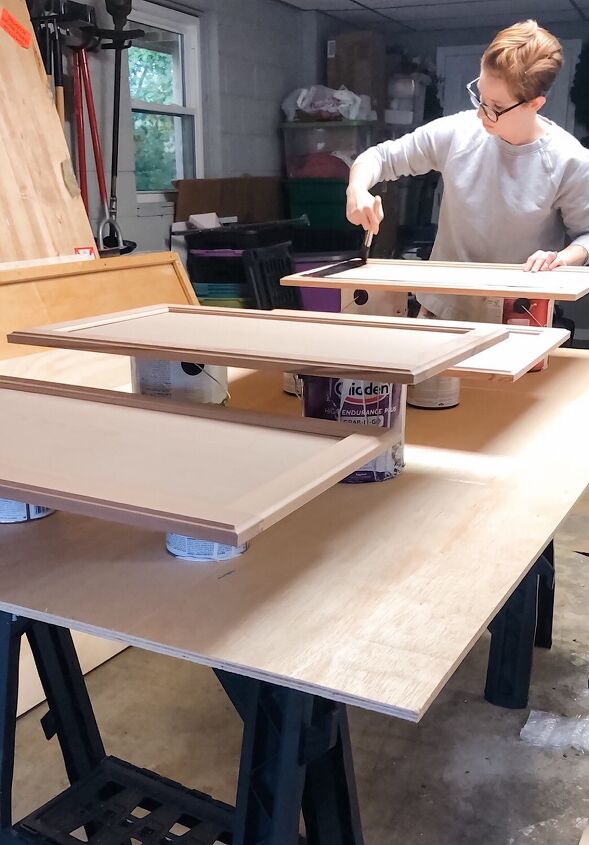
One thing that I think worked really well for me was removing the doors before painting. Having the doors off made painting the cabinet easier, and I didn’t have to try to maneuver around the hardware. I just set up a piece of plywood on sawhorses and lined up old cans of paint to use as risers for the doors.
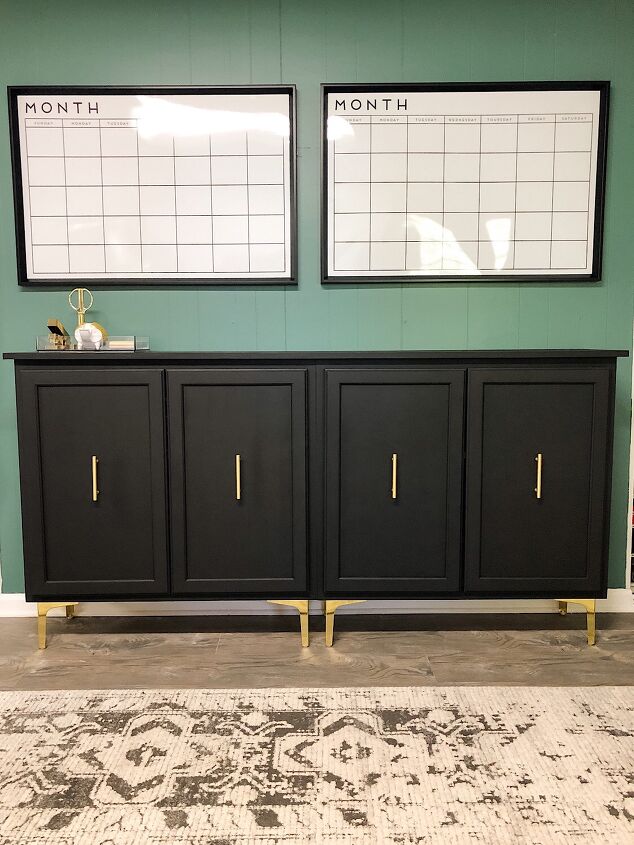
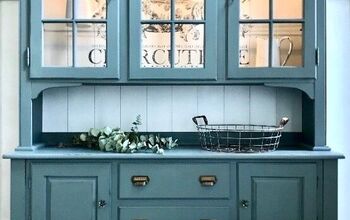
Ta Da! Isn’t she gorgeous? You would never know that this was two kitchen wall cabinets, would you? It looks like a fancy expensive sideboard from one of those stores you have to have an appointment to get into. And the fact that I was able to customize it to the exact dimensions I needed worked out so perfectly.
Step by step breakdown recap:
- Remove cabinet doors.
- Attach the two cabinets together using shims to fill the gap.
- Add finished end panels to the two open sides.
- Add scrap wood to the bottom corners and attach legs.
- Flip over, then apply wood glue around top edges.
- Put plywood table top on wood glue and secure with brad nails.
- Once dry, iron on wood edging to the unfinished sides of the plywood.
- Paint first coat.
- Allow to dry for at least two hours.
- Apply a second coat of paint, and let dry for 24 hours.
- Reattach doors and install handles.
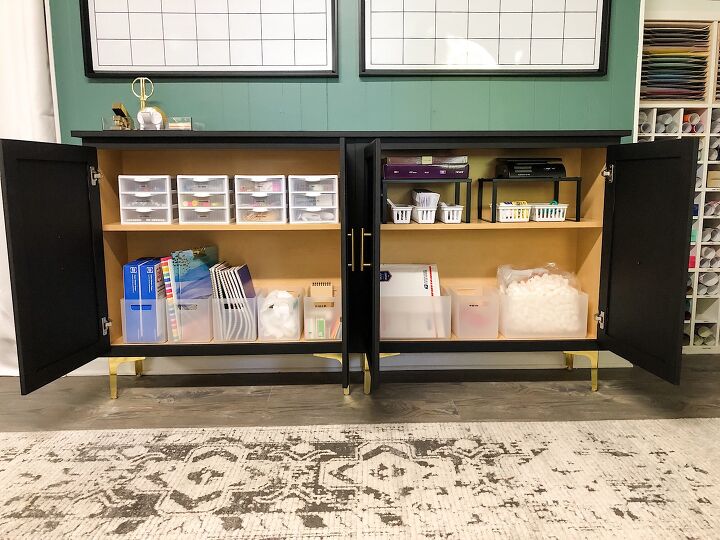
Want to see how I organized the inside and all the products I used to turn it into a functional office storage cabinet? Head over to my blog for more at https://www.lelaburris.com/office-cabinet-dixie-belle-paint/ or watch the entire process in video form on Instagram or TikTok @lelaburris
Resources for this project:
See all materials


Comments
Join the conversation
-
Looks amazing 👏 😍
-
WOW! Love it.


Frequently asked questions
Have a question about this project?
Love it except for double legs in center. Makes it look like 2-separate pieces. Could you have braved the center and just used one set in center?
Very well done! The only thing I would do differently was putting the two center legs together, not leaving any space between them.
How do you keep painted wood from being sticky long after painted and dried?