


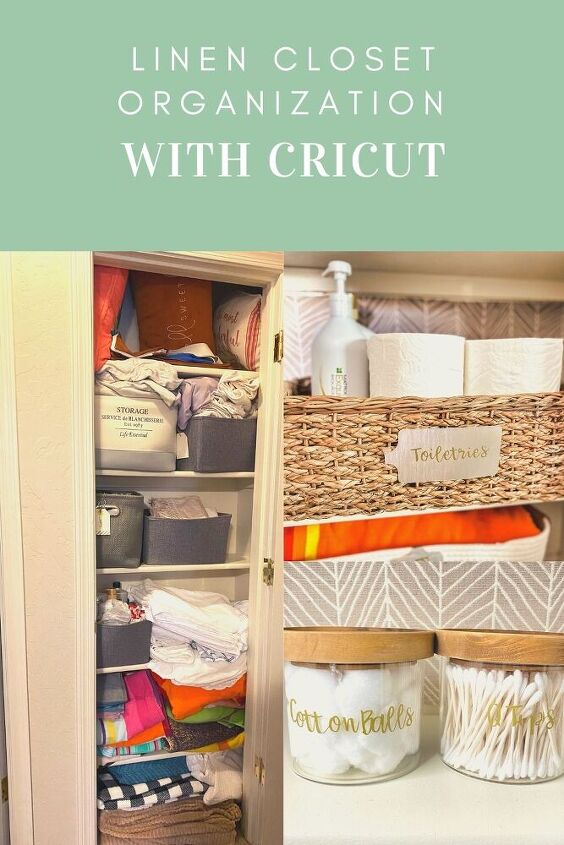
Linen Closet Makeover With Cricut

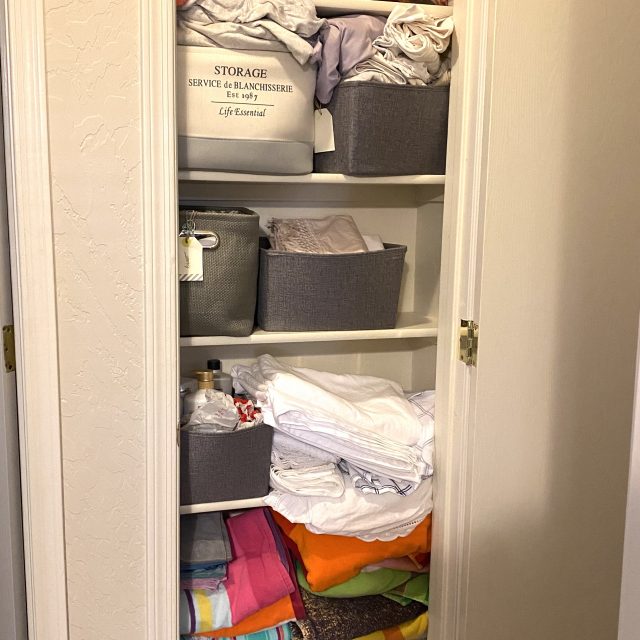
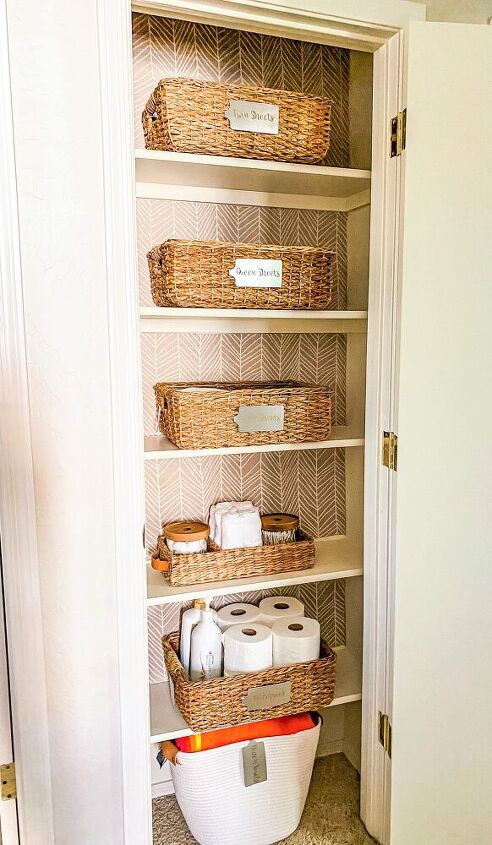
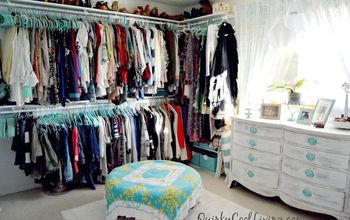
Well, this is quite embarrassing, but here was the state of our linen closet for all the world to see! The closet is sooo teeny tiny, and was crammed full of all kinds of miscellaneous things. Not to mention the mix-matched bins! Needless to say, it did not function well at all! And then along came Cricut!!! Most people know that Cricut is an amazing crafting tool, but did you know it can be used for organization as well??? Because you can use your Cricut to make labels AND tags, the organization possibilities are endless!!! Here is how I gave my linen closet a makeover with Cricut!
Disclosure: This post is sponsored by Cricut.
1) Clear out the Space
As with all of my organization projects, the first step is to clear out the space. I took everything out and wiped down all the shelves. All of the miscellaneous things were re-homed, and all of the linens sorted and organized. We donated the extra sheet sets we weren’t using. I only kept one set of each size of sheets, besides the set that is on each bed. My kids are almost grown, so the extras that we might have used when the kids are little are no longer needed.
2) Wallpaper with fabric (optional)
Next, I wallpapered the back of the closet with fabric using the same method that I used in our pantry. It’s such a quick and easy process, and it adds so much visual interest to the closet!
3) Organize into categories and decide how many containers are needed
Then, I organized all of the remaining sheet sets, and decided what else I wanted to be stored in the linen closet. I picked what aesthetic I wanted, and what containers to purchase. I determined how many baskets to use.
4) Measure
Measure the length and width of the shelves, and the space between them. This is such an important step to do before buying!!! In full disclosure, I must’ve measured wrong the first time, because the first set of baskets that I purchased did not fit!!! So maybe measure twice!!!
5) Choose the shape of tags, font, and material
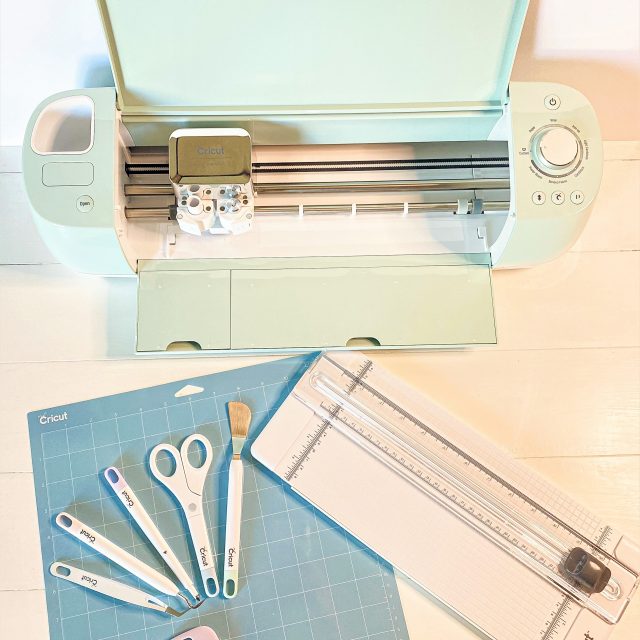
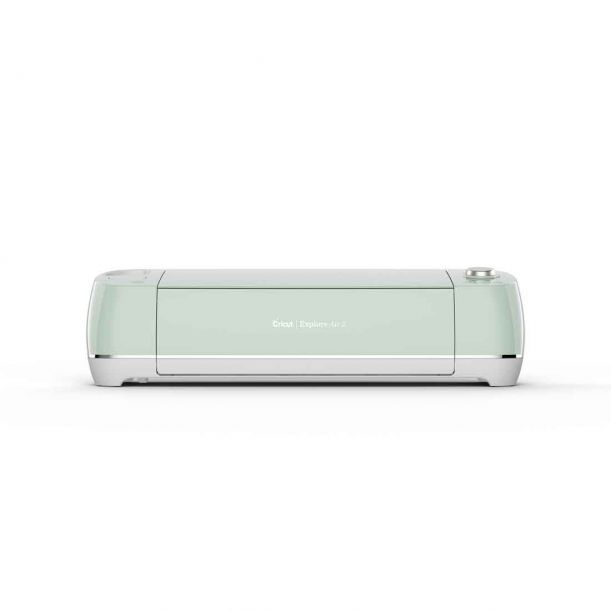
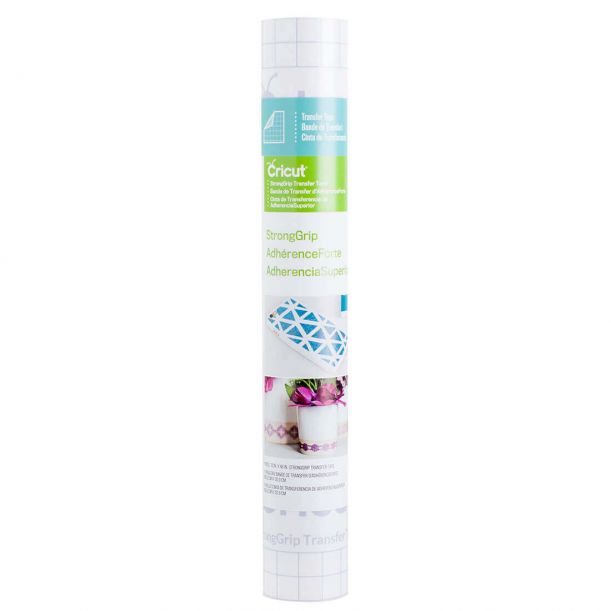
And then….drumroll please…in came Cricut!!! I just got the Cricut Explore Air 2, and it was so easy to set up and use! I knew I wanted a cursive text on my labels, and I knew I wanted them in gold vinyl. After looking through the size and shape of the tags, I chose the Leather Luggage Tag. The True Brushed Paper in silver looks like real metal, and I wanted to have a mix-metal look with gold and silver! The combination looked great against the texture of the baskets, and against the fabric in the background!
6) Cut the tags
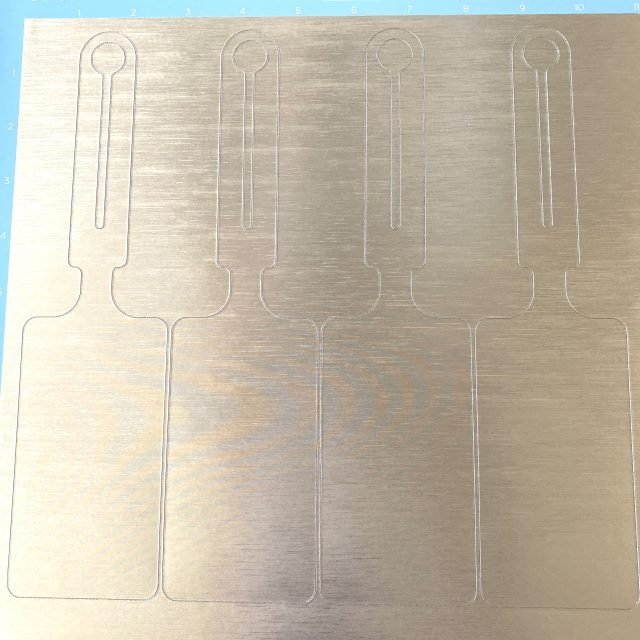
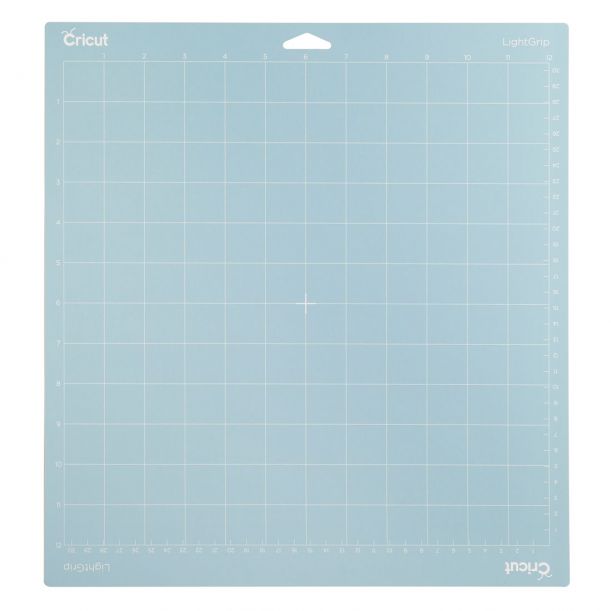
Cutting out a shape is a much quicker and easier process than making labels. I clicked on Images in Cricut Design Space, and then typed Tags in the search bar. I used the Duplicate feature to put 4 tags on the Design Space canvas. Then I selected the Custom Material option on the dial, and the computer prompted me to select the True Brushed Paper. I attached the paper to the mat and inserted it into the machine.
7) Enter the text in Design Space
Getting the cursive text to look how I wanted it was a little tricky at first, but then I found this tutorial, and it ended up to be a simple process! I chose the Babette text, which is a paid text. Cricut has so many videos on YouTube and so many tutorials on their site, as well as other bloggers! The answer to any question or problem you may have is just a Google search away!
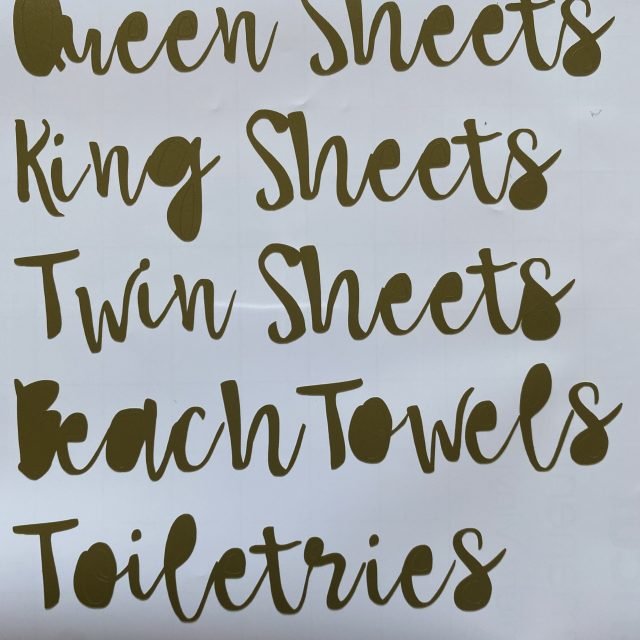
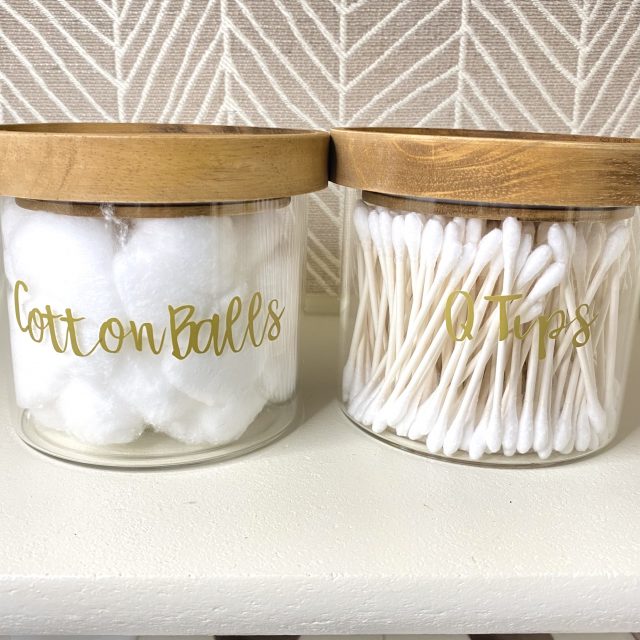
If you are going to be making labels with different words, the simplest way I found was to type them all out. (You will see later below that I forgot to add Cotton Balls and Q Tips.) If you are using multiples of the same word, you can just use the duplicate function.
I highly recommend signing up for a subscription to Cricut Access! Design Space is free to use, but having a subscription to Cricut Access gives you access to thousands more fonts and graphics! It also gives other benefits like10% off licensed images, 1,000s of ready-to-make projects, and 10% off cricut.com purchases, including most machines. If you do two projects a month, it can pay for itself!!!
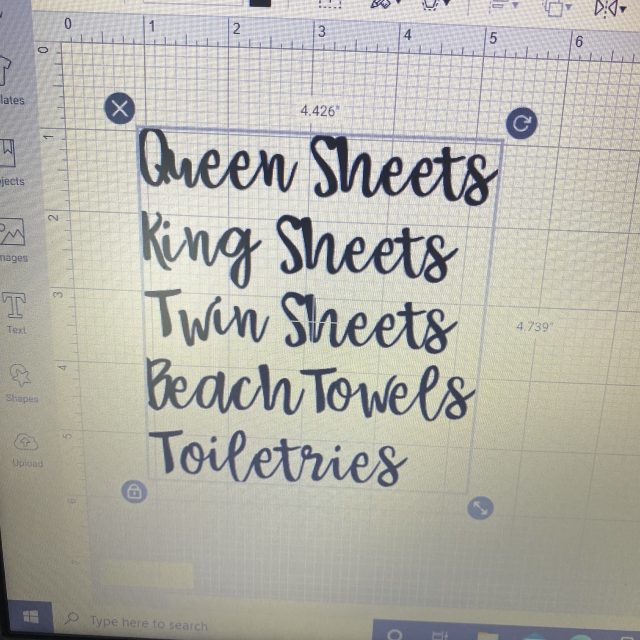
8) Check the size of the tag, and be sure that the text fits
The way I found that worked for me was to open another Design Space Canvas window and select the tag. It gives the size of the tag. Then I made sure the size of each of my words would fit. If the words don’t fit, you can resize the text in the other window.
9) Cut the material for the text
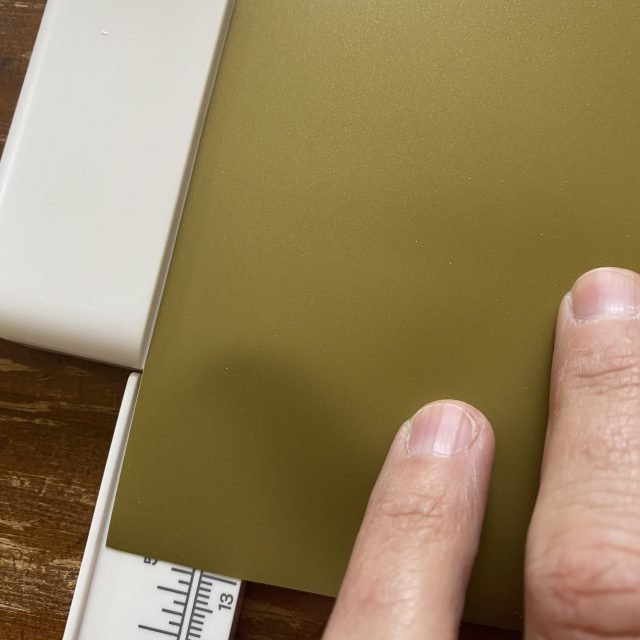
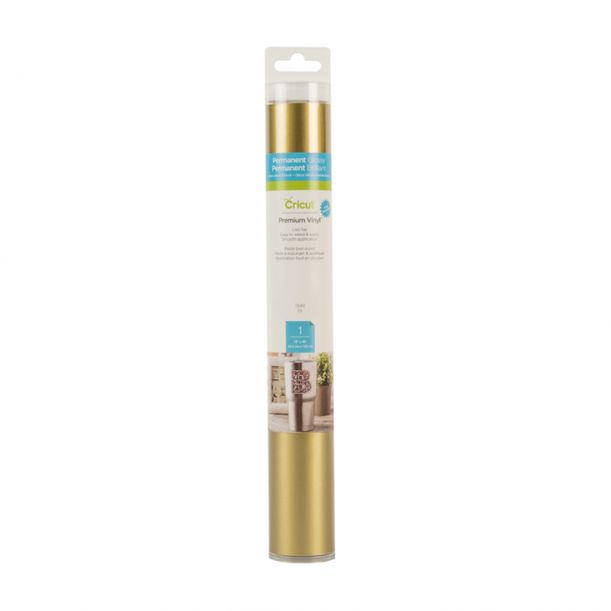
The grid in Design Space shows the size of the words or graphic you are using. My text took up 4.5″ x 4.7″, so I used the ruler on the Cricut paper cutter to measure the size of the vinyl I would need. I cut a 5″ x 5″ piece of vinyl so that I would have a little extra on all sides. I chose gold vinyl for my labels.
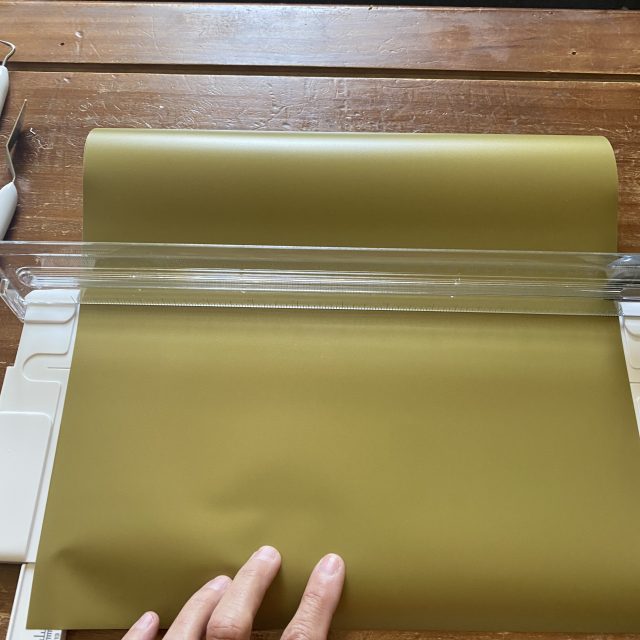
Because the vinyl I chose came in a roll, I found it easiest to place the roll on top of the cutter, and pull it down to cut the it.
10) Insert material into mat and cut
**You may want to use a scrap of cardstock to make a test cut first. This will ensure that your cuts are just how you want them before you cut up vinyl or other material. Set the dial to the correct material, and follow the prompts to cut.
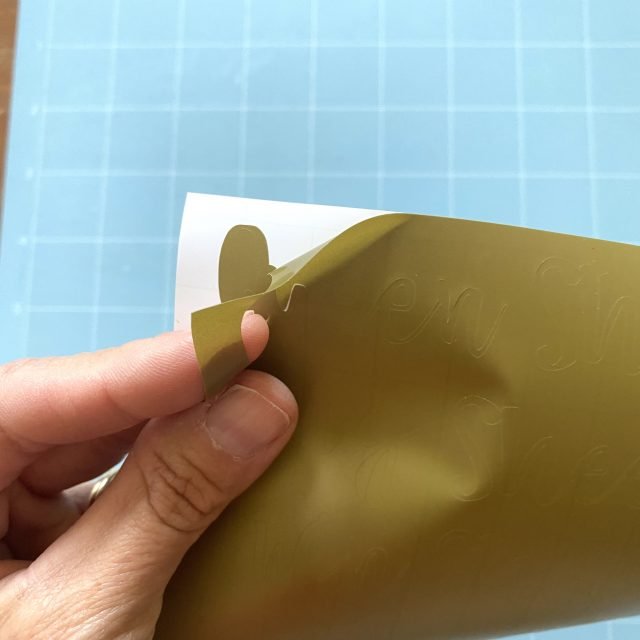
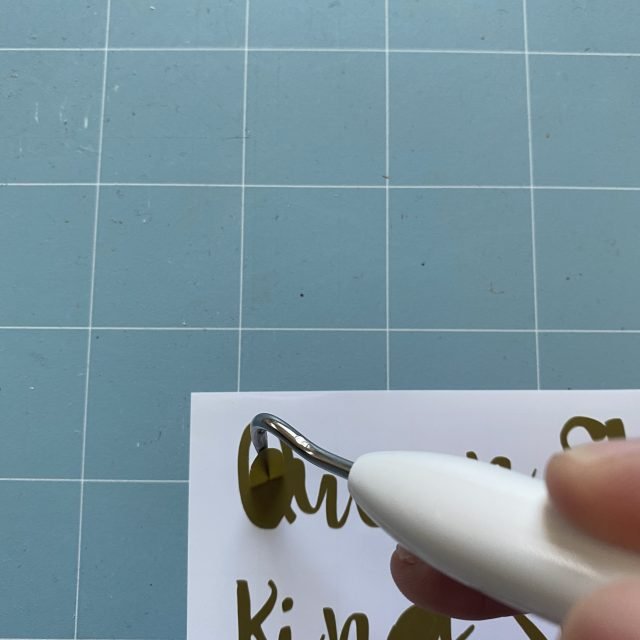
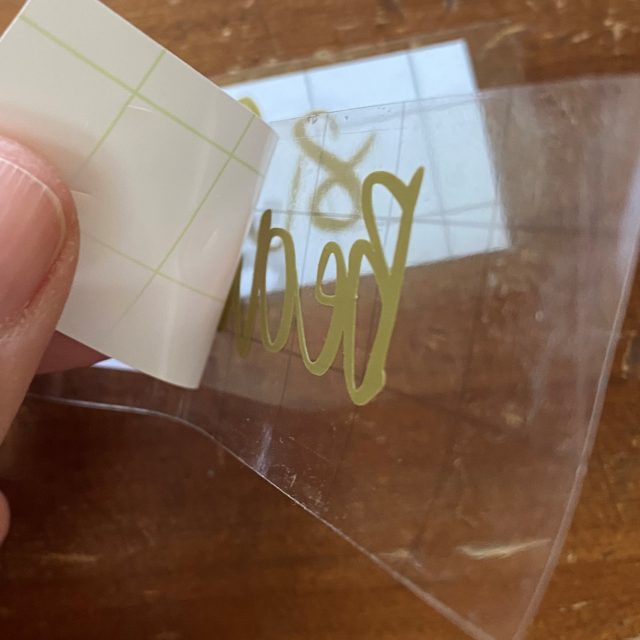
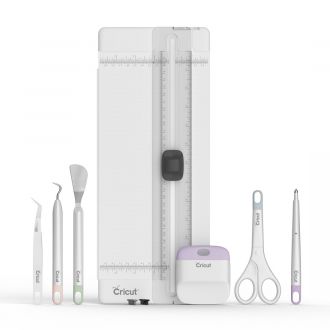
11) Weed the design
If you are working with vinyl, peel off the vinyl from the backing, leaving the words on the backing. This process is called weeding.
Be patient and go slow! It worked best for me to leave the backing attached to the mat for the beginning of the peeling. It just helped it stay put while I was starting. But then I didn’t want to muck up the mat with my skin touching it so much, so I removed it from the mat and the rest came up just fine!
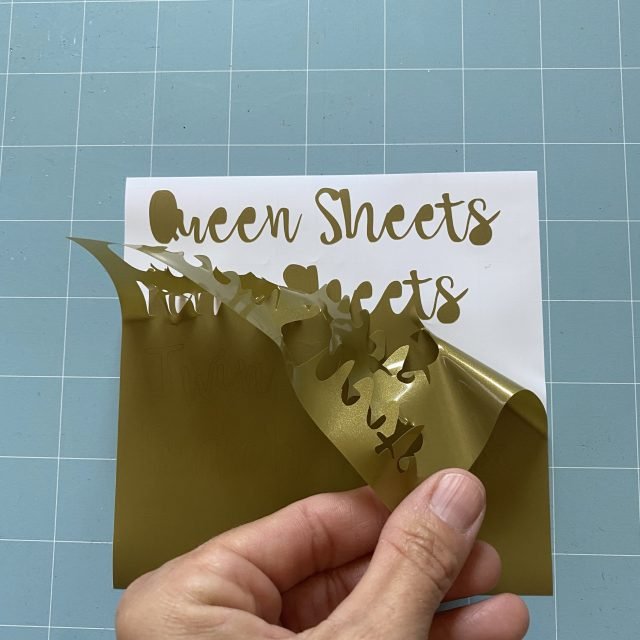
The second part of weeding involves the weeder tool. I suppose there are other things you could use, but I wouldn’t recommend it! This tool is designed to remove the middles of the letters, and works perfectly!!!
12) Cut the words
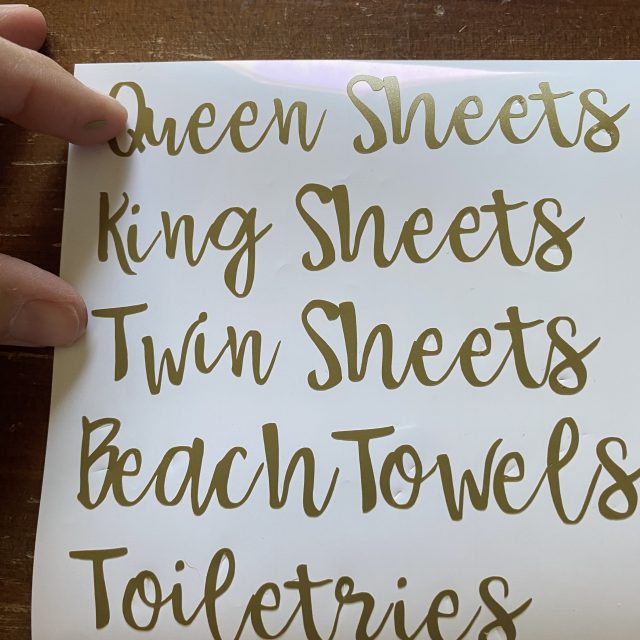
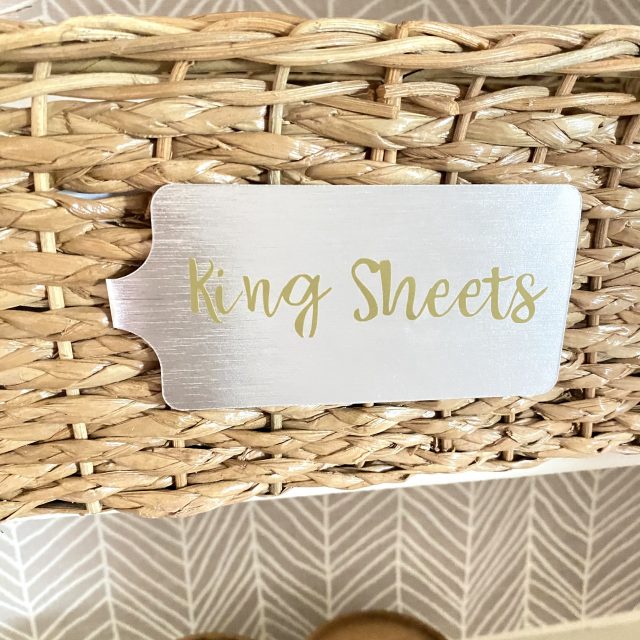
The words will be left on the backing after weeding. DO NOT REMOVE THEM YET!!! It might seem like you are done here, but there is a bit more left to the process! Trust me, it will only make things easier if you do the remaining steps! Cut out the individual words into strips very carefully so that you don’t cut off part of another word. If you look very closely at the King Sheets tag below, you might notice that I cut off a tad of the g.
13) Transfer tape
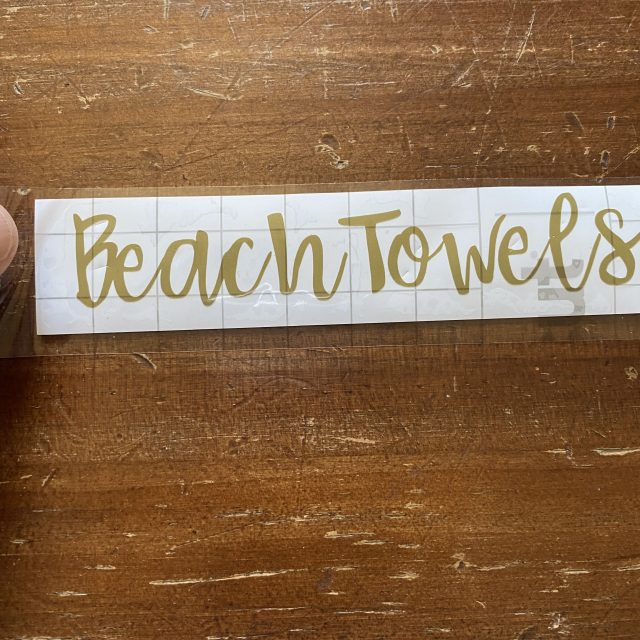
Transfer tape is the easiest way to get the text off of the backing and onto your project. Cut a piece of transfer tape just a little bigger than your word. Remove the backing, and stick it over the word, pressing down in the middle, and then all over so that it completely sticks.
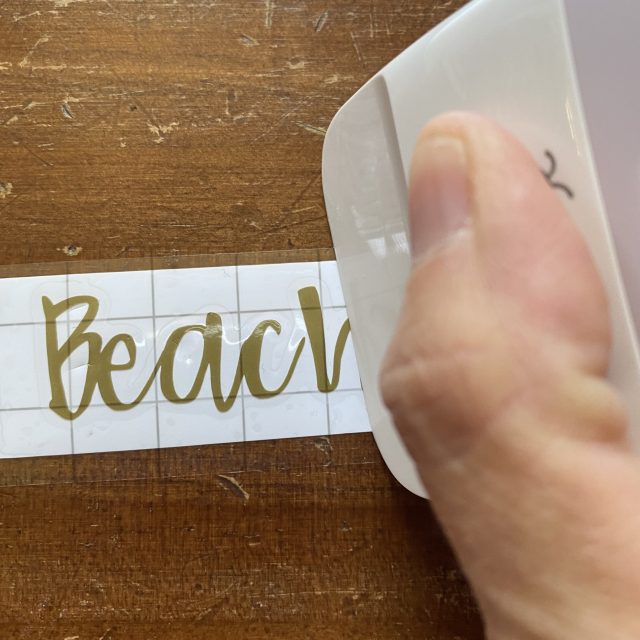
Burnish the tape onto the word. Use the burnishing tool to completely press across each letter until the tape is firmly stuck. If you’ve ever applied a transfer onto something, it is the same process. I don’t recommend using a craft stick, though, as it can dent the letters. The burnishing tool is made to do this, and does a fabulous job!
Remove the backing from the transfer tape. Place the tape with the word attached onto the object and burnish again. Remove the tranfer tape, and voila, the label is on!
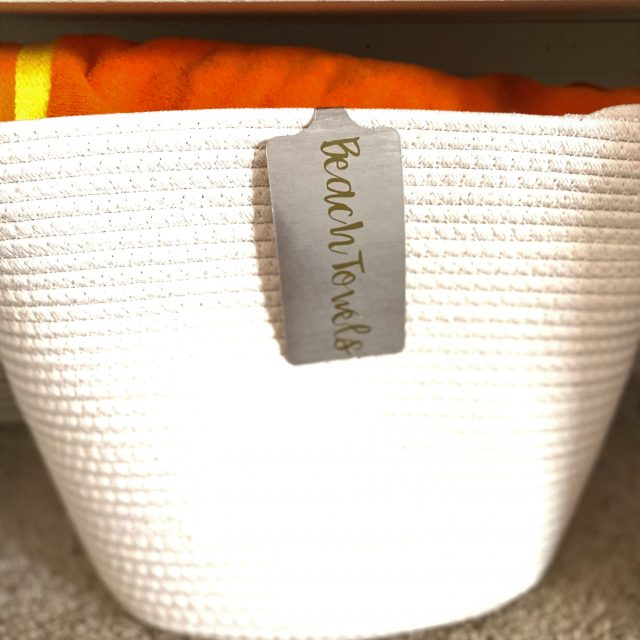
I selected the Leather Luggage Tag to use for the labels because I love the unique look of them, and how versatile they are! Remember when I said that I bought a first set of baskets, but I measured incorrectly and they didn’t fit? Well the good thing about them is that the weave of the baskets were loose, and the strap of the tag slid right in!
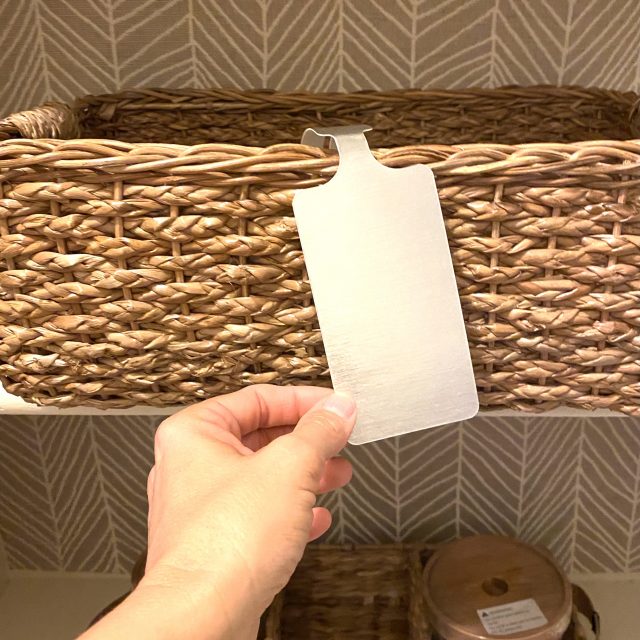
The Leather Luggage tags can also hang off of the basket, just tack it down with glue dots or a square of foam tape.

The tags can also hang through the handles of a basket, again just tack down with a glue dot or foam tape.
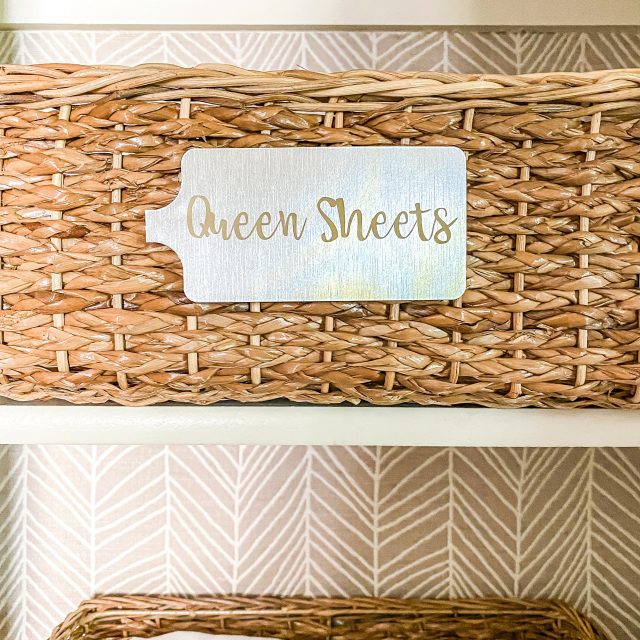
But for my tiny closet, I had to turn the baskets the other way, and wanted the tags to be horizontal. It made me very sad to cut off the strap, but it still worked great! Use foam tape squares to hold them in place.
The Cricut machine made all the difference in my Linen Closet makeover!!! I didn’t have to shop around for labels to say what I wanted them to say, in the font I wanted, and end up paying for a huge set of something that I didn’t need! I didn’t have to try and find tags that would be the size and look that I wanted, and that would fit the labels! Cricut allowed me to create the exact look, font, size and shape of my labels!!! Now I can organize anything and everything in my entire house and have it be the exact look I am going for!!!
Can you even believe the difference???!!! It’s such a more functional space now!!!
Materials Used:
Comments
Join the conversation
-
Love this! I am going to be reorganizing my laundry room, and I have a very small closet too! Thank you for the idea!! I just got my Cricut too so this will be perfect! Thank you for the share!


Frequently asked questions
Have a question about this project?