


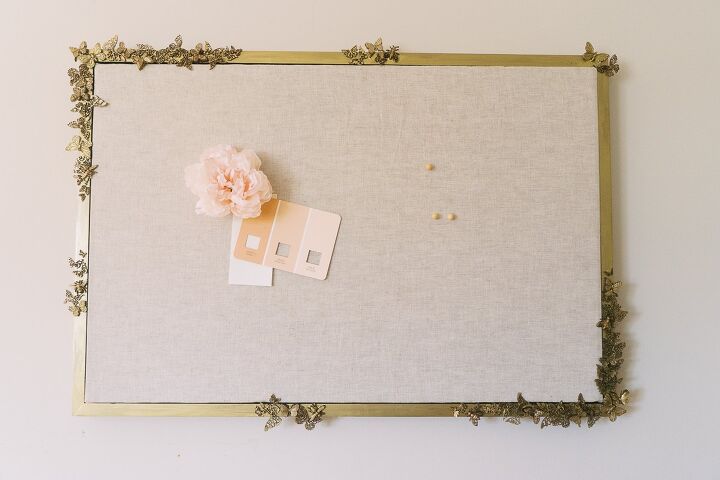
How To Make A Butterfly Pinboard Inspired By Pottery Barn

I'm going to use it in the playroom that I recently renovated. You can see all the details about the playroom in the post here. My kids need a place to pin their art projects and I think this DIY pinboard would be a perfect solution.
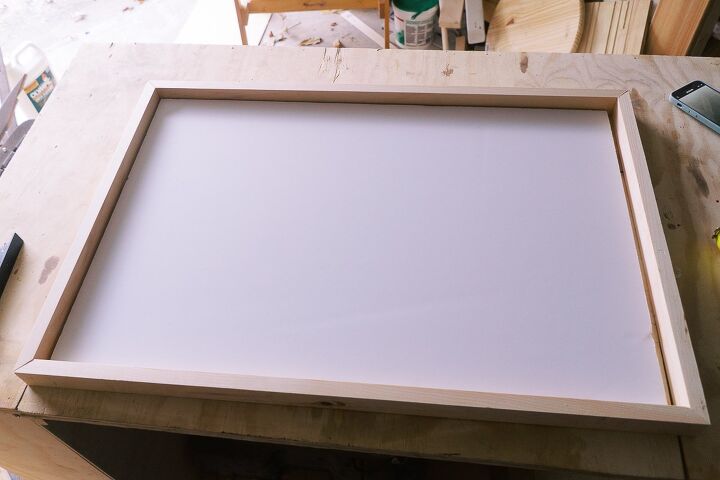
Step 1. Making a floating frame.
First, measure the pinboard size. Mine was 20 x 30".
Cut your boards at length using a 45° miter angle.
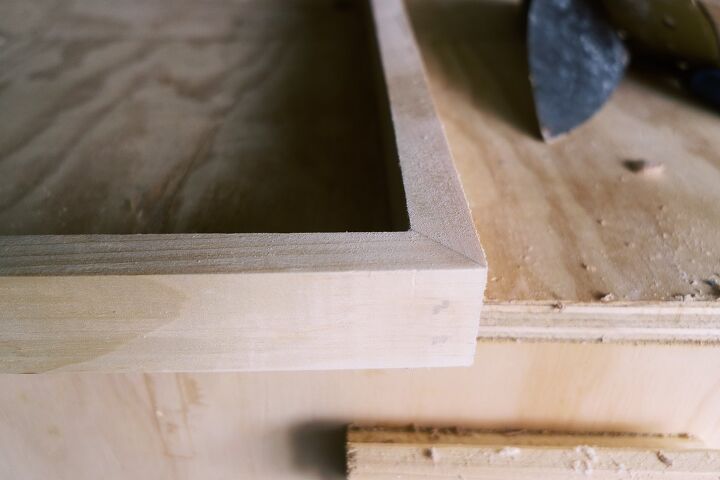
To assemble it are used wood glue and 1 ¼" brad nails. Make sure to use a speed square at all times to make sure that the frame is level.
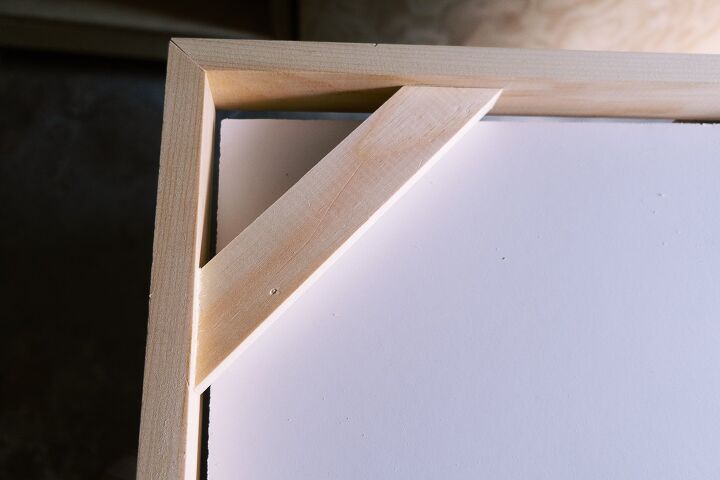
Step 2. Add brackets to the back of the floating frame
When the boards are attached, cut the supporting brackets. They could be any length. I think mine are about 8 inches each.
Attach them with wood glue and brad nails.
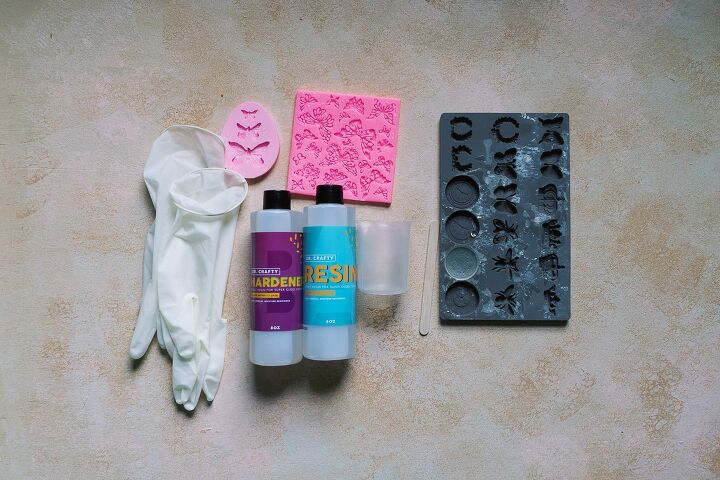
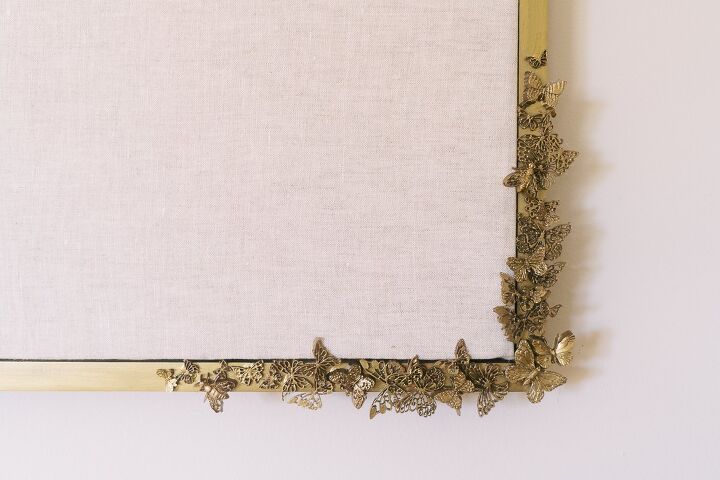
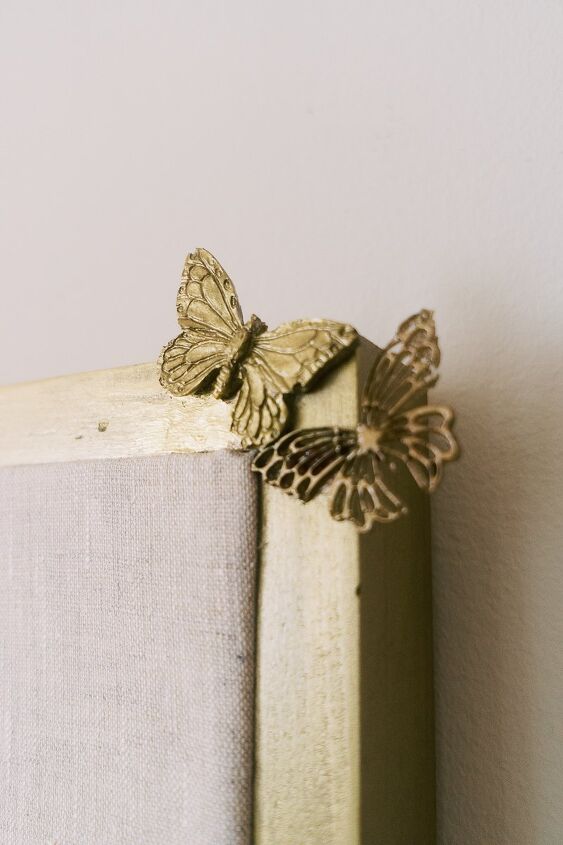
Step 3. Make butterflies from epoxy
Mix the epoxy as per instructions and pour it into your mold. Wait for 24 hours and take it out.
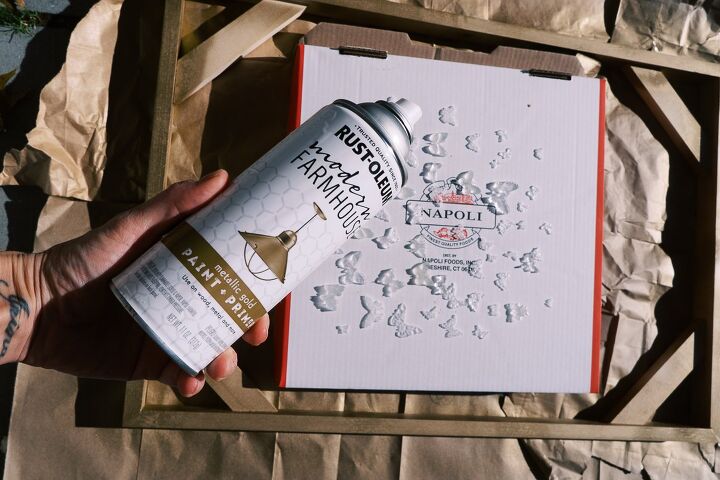
Spray paint butterflies and the frame

Read the blog to see what technique I used to paint butterflies.
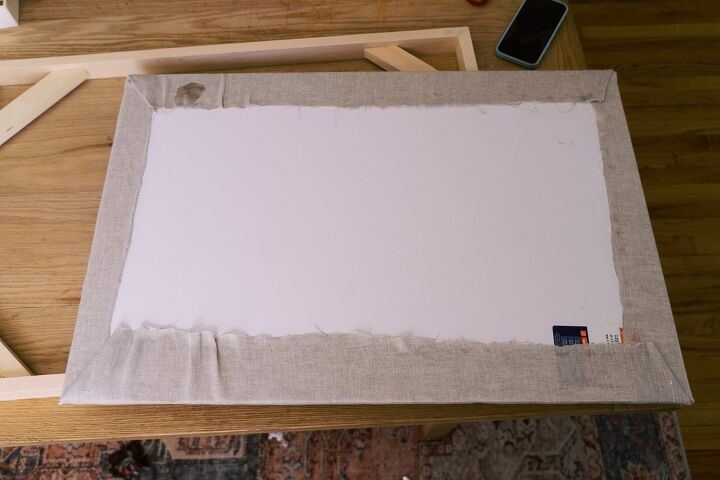
Step 4. Make and assemble the pinboard
This part was probably the easiest. I got a piece of linen fabric and attached it to the board using spray glue and a Dremel glue pen to secure the edges on the back.
To attach foam board to the frame we'd need to use brad nails, but since I didn't have brad nails right size I just used E6000 glue.
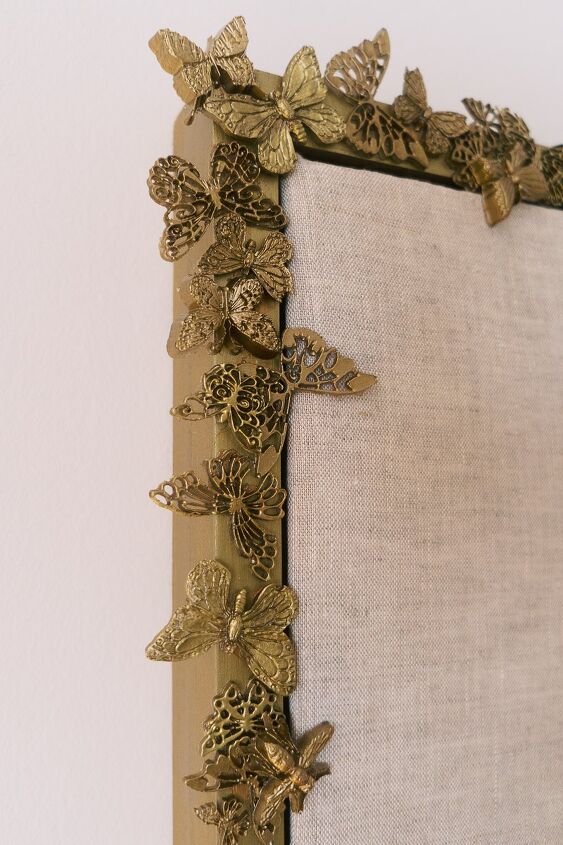
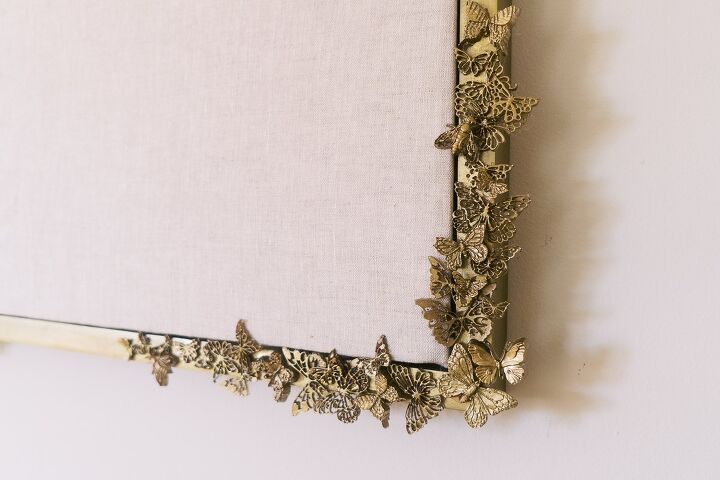
Step 5. Attaching butterflies to the frame.
This was such a satisfying process. I arranged butterflies (and even added some bees) and glued them with E6000 glue.
Resources for this project:
See all materials


Comments
Join the conversation
-
Beautiful!
-
I think this is the perfect way to update my 1990s sewing room pin board which is in blue and yellow at the moment and I'm sure there is some linen in my fabric stash this colour


Frequently asked questions
Have a question about this project?