


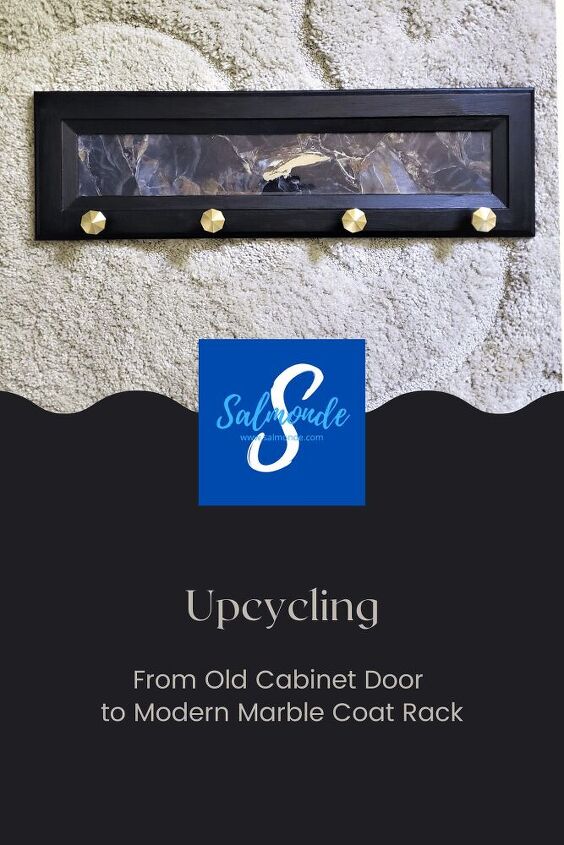
How to Easily Upcycle an Old Cabinet Door Into Faux Marble Coat Rack
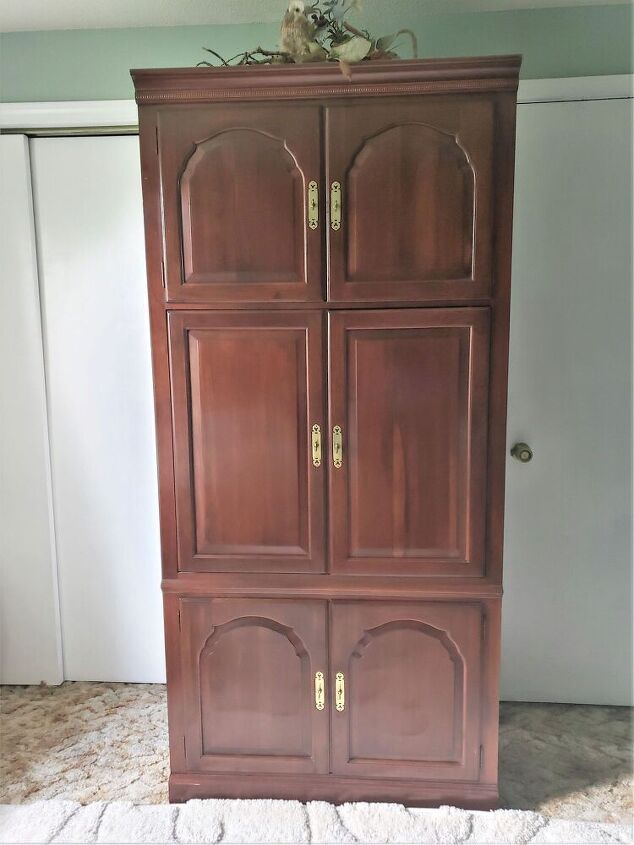
When I head out to find supplies and inspiration one of my favorite places to go is my local Restore. If you have never heard of Restore before think of it as a thrift store for used household fixtures. They carry used vanities, lighting, cabinets, and yes, cabinet doors themselves. I have gotten lucky enough to find brand new doors there as well as used ones. They also have new items such as their own brand of paint, or new flooring tiles or laminate. You can also fine appliances and furniture. Plus, bonus, they also have a few aisles of thrifted household items like you could find at Goodwill or the Salvation Army. A couple of years ago we bought an old solid cherry entertainment center and turned it into a wardrobe for my husband. The price we paid for this massive piece of furniture? A mere $35.00!
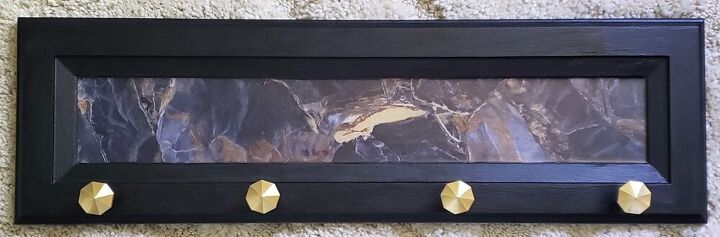
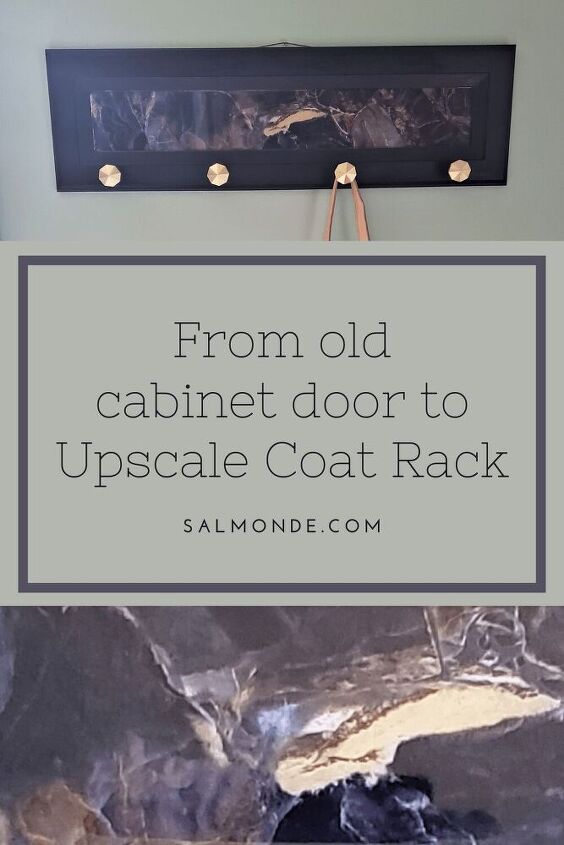
The last time I was there I picked up some cabinet doors for a couple of dollars each. There are so many possibilities for them that I am sure I won’t run out of ideas any time soon. For today though, I will show you just how I made this gorgeous Modern Marble Coat Rack using an old cabinet door I picked up recently.
How to Make a Faux Marble Coat Rack
Any links to Amazon.com are affiliate links, and I will earn a small commission if purchased at no additional cost to you.
Most of the items need I already had on hand, but I did pick up a few things on Amazon. I knew I wanted to make a more modern-looking coat rack, so I picked up these gorgeous brushed brass wall hooks. I also knew I wanted the inset to have a marble look, so I picked up this for the center of the coat rack.
Supplies Needed for the Faux Marble Coat Hook
Here are the supplies you will need for the coat rack:
- Cabinet Door
- Liquid Sandpaper
- Removable Marble Wallpaper
- Brushed Brass Wall Hooks
- Epoxy Resin
- Black Chalk Paint
- Polyurethane
- Large Sawtooth Hangers
- Hot Glue Gun
- Hot Glue
- Craft Knife
- Drill
Once you have your tools and supplies gethered, it is time for the fun to begin.
Let’s Build a Modern Faux Marble Coat Rack
The prep work is always the least fun to do, but it is necessary in order to have a good quality finished product, especially when dealing with used items such as a cabinet door. Any dirt, oils, or grease will prevent the paint from properly adhering to the wood. For this step, I usually use this or this.
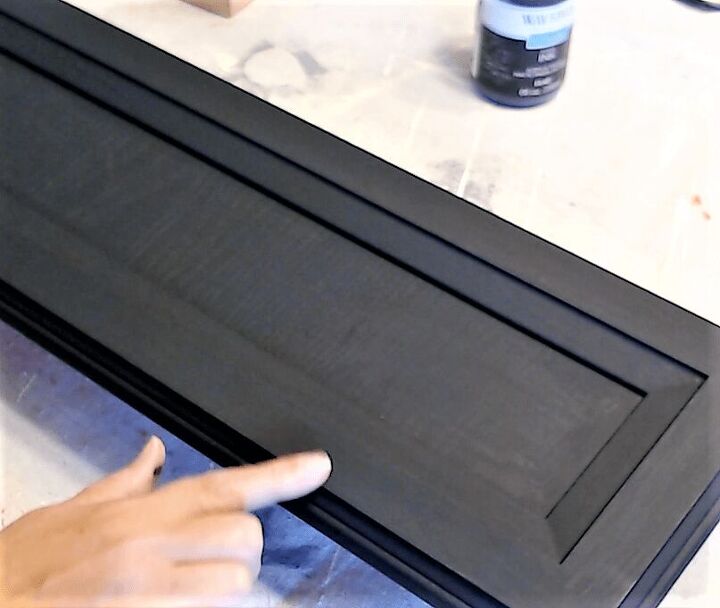
Once I had the wood cleaned I used some Liquid Sandpaper to etch into the finish, creating a surface that paint will adhere to. If it is a surface that is pitted, scratched or damaged it won’t smooth the surfaces, but it will work just fine to degloss a surface that would only need a light sanding and eliminate the need to sand the surface.
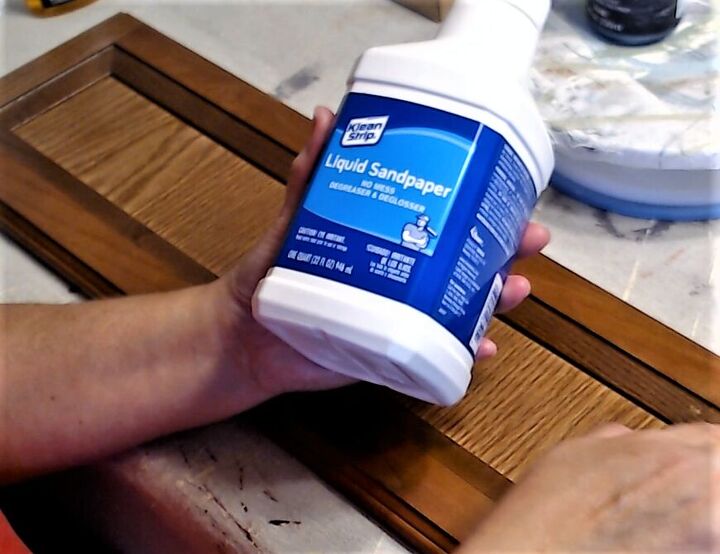
Once the Liquid Sandpaper had completely dried you are ready to paint… no rinsing required. I used black chalk paint because I wanted to offset the glassy shine of the finished marble inset. I painted one coat over the entire piece, front and back, and once that was completely dried I painted a second coat on the raised portion of the front and sides. I didn’t worry about the inset as that will be covered by the marble wallpaper, but I did want the first coat in order to make sure any light areas on the dark wallpaper would really pop and not take the chance the wood grain would show through.
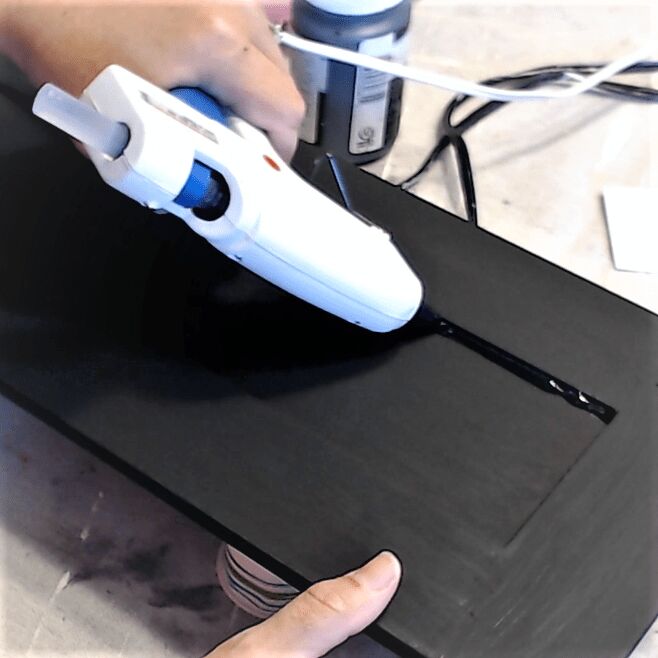
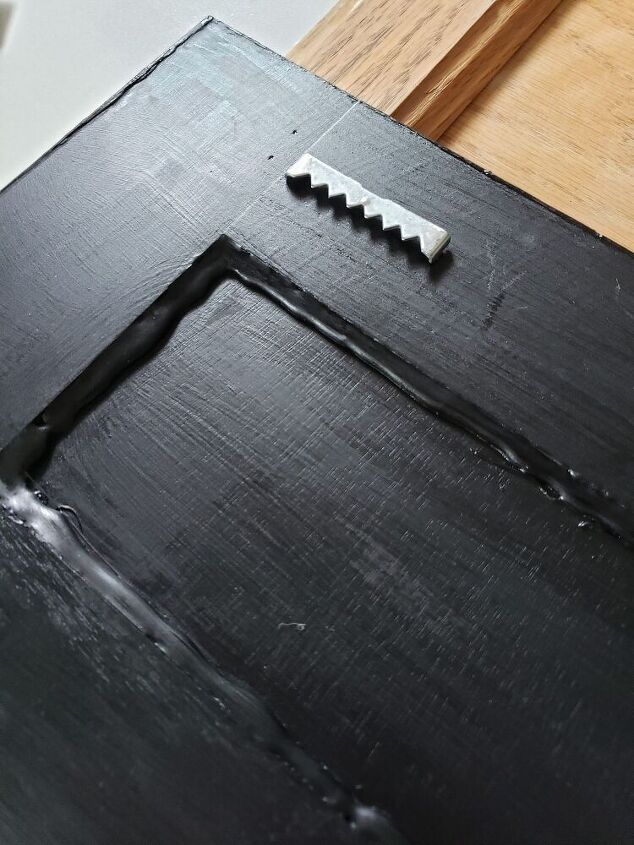
After the paint was completely dry I used some hot glue to completely seal the inset on the back side. this step is extremely important to the quality of the finished product as if there are any holes in this seal the resin applied in the next step can seep through and possibly ruin both your project and the table or countertop you are working on.
Now it’s time for the fun to begin. After flipping the cabinet door back over to the front side I pulled out the marble wallpaper and measured it for the inset. I left a bit of extra length and width so that if it did not lay perfectly even it could be trimmed and would never show.
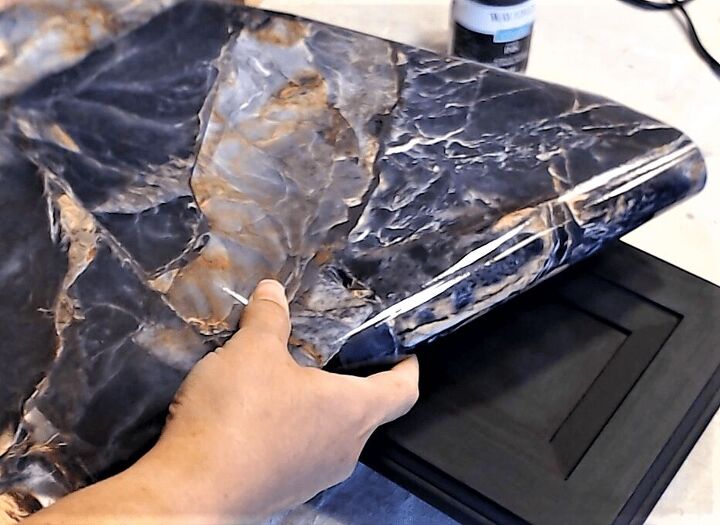
To start laying out the marble wallpaper I folded back about a half inch of the backing on the short edge and carefully lined it up with the short edge of the inset of the cabinet door. Then, using a squeegee (or scraper) to slowly push out any air bubbles from the center or the wallpaper as I pulled off the backing a bit at a time. If you do not have a squeegee you can use an old gift card or credit card. Once that was done I worked the squeegee along both edges, carefully working out any air bubbles as I went. Once I got to the opposite long edge I took my craft knife and cut the extra wallpaper at a 45 degree angle to the corners and carefully cut down to the corner of the inset so that I could get a clean edge.
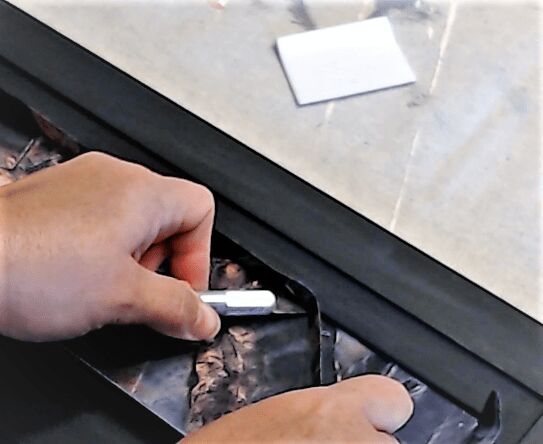
I then took the craft knife and slowly cut along the edge of the inset. It left a nice clean line and then it was ready for the resin. I use a two-part epoxy resin whenever I use resin. This is a great resin and is easy for beginners to use. I mixed 4 ounces of resin for this particular project and it turned out to be the perfect amount for this particular cabinet door. I poured the resin down the center of the inset and then used a craft stick to gently push the resin along the edges and into the corners. You want to be sure the resin completely covers the entire bottom of the inset.
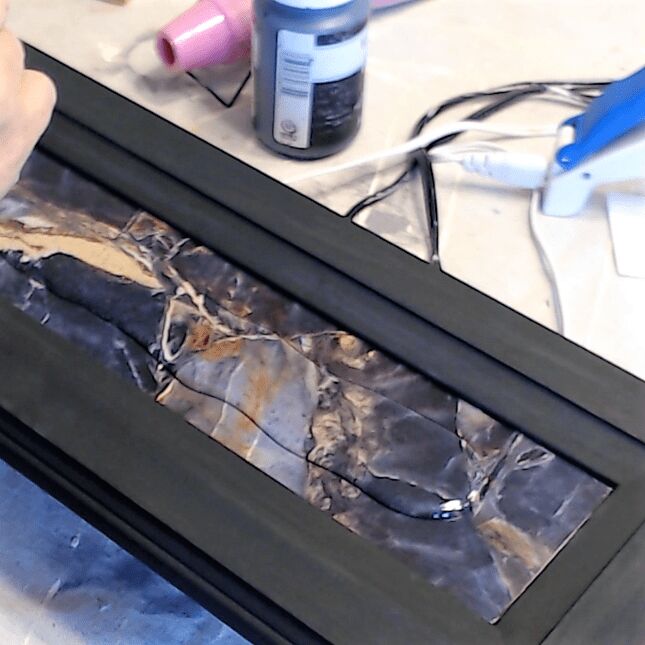

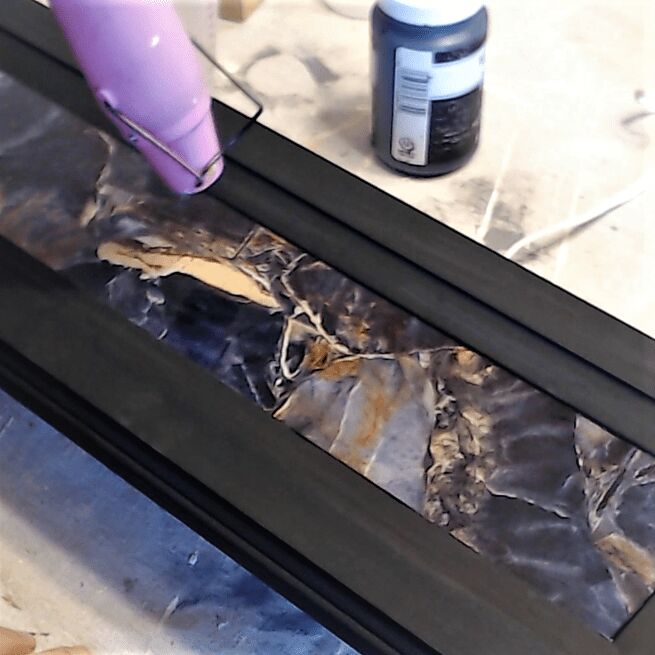
Once the resin is completely covering the inset area, take your heat gun and using quick back and forth motions about six inches above the resin, move down the entire length of the door to pop all the air bubble in the resin. You may have to repeat this motion a few times, but it it important that you do not hold the heat gun still over the resin or you could scorch the wet resin and it will not have the nice smooth, glassy sheen you want.
Once the bubbles are popped you will want to cover the cabinet door in order to protect the resin from any dust, debris, and bugs (yes, bugs… if they land on the resin they will not be able to get out of it). It will take anywhere from a few hours to a day to dry. Several environmental factors such as temperature and humidity go into play on this as much as the brand of the resin you are using. I usually let mine set up overnight.
After the resin dried I took the cabinet door out into my garage to drill holes for the coat hooks. After I brought it back in I touched up the paint where needed and coated the painted area of the door with polyurethane, front and back.
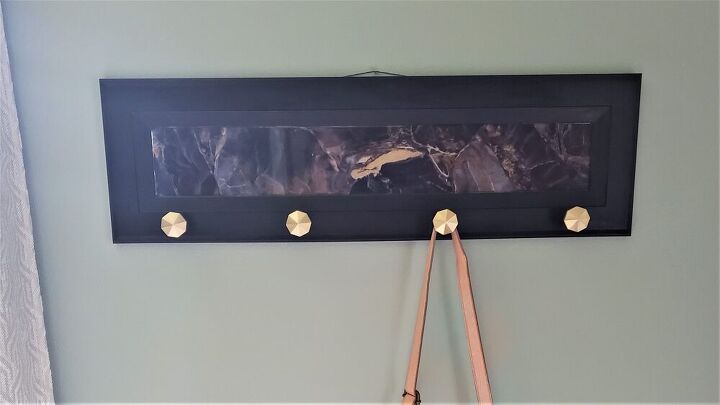
Once the polyurethane was dry I used sawtooth hangers on the back, placing one on each side, measuring carefully in on each side and down from the top to be sure they are even. Now the coat rack is ready to be hung, and be hung on.
I love the way this coat hook turned out. Resin just gives everything a finished, professional look, and it is really pretty easy to work with. If you want to see more resin projects, check out my Resin Love Coasters. They came out amazing and can be changed up for any occasion.
Resources for this project:
See all materials


Comments
Join the conversation
-
It’s really beautiful! ❤️
-
What a great ides


Frequently asked questions
Have a question about this project?
Can the liquid be used with verithane