Your Wish is My Command...Challenge

by
Susan K Mullins
(IC: homeowner)
7 Materials
$30
1 Day
Medium
I could be in a commercial for Command Hooks. Love them! I just don’t love the price, In this post I am going to share to ways I have recently used Command Hooks and Command Velcro Strips. I recently used some scrap lumber and made a frame to go around my bathroom mirror. I did not want to drill holes or drive nails into wall. I purchased strips that stated they were for Upton 16 pounds. No way did my boards weigh that much, but I wanted to sure the boards would stay in place. I also purchased Command Hooks to use on the outside on my vinyl fence. I bought hooks for 12 pounds and same story, no way the stars weighted even a pound.
I laid out my painted and dry distressed boards along with the Command Velcro Strips.
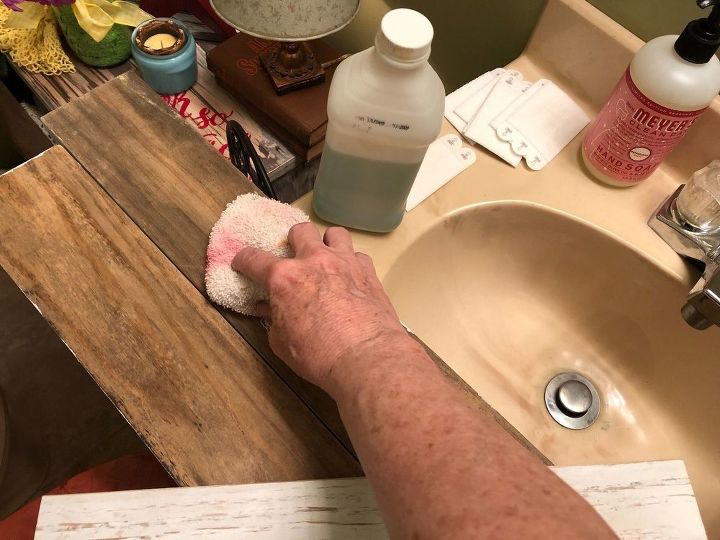
I followed the directions and cleaned both surfaces with alcohol. I allowed about 30 minutes to make sure both the wall and the boards were throughly dried From using they alcohol for cleaning.
Next, I placed the velcro strips together and peeled the paper off of the side that went on the back of the wood. I use two set of Velcro sticks for each board. Then I peeled of the paper that went on the wall side and pressed the wood on to the wall, holding it in place for about 45 second.
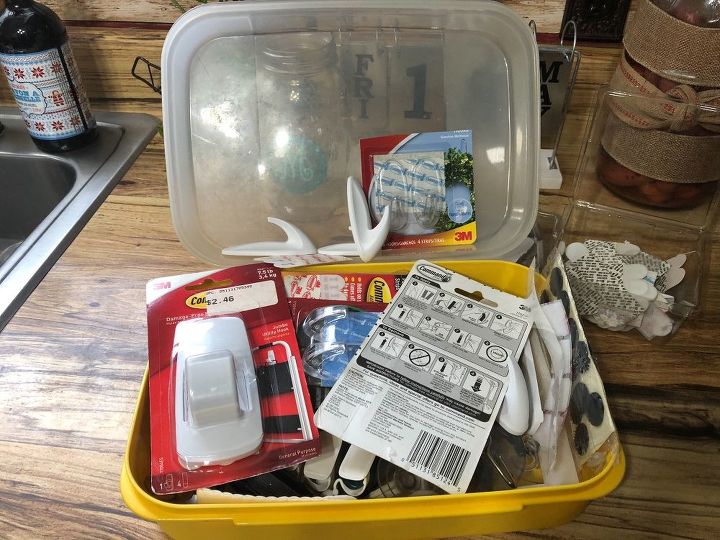
To begin, I searched through my box of Command items. I look for these things to go on sale or for discountsed items.
I laid out the Velcro strips for the boards to frame the mirror.
I followed the directions and cleaned both surfaces with alcohol. I allowed about 30 minutes to make sure both the wall and the boards were throughly dried after the alcohol cleaning.
Next, fold the Velcro strips together and press firmly. Read the directions on the tape. Peel off the protective covering. Place the side with the red writing on the back of the board or what ever you are using. Then peel and press the side with black writing onto the wall, it will have wall side printed on the tab. Hold the board for about 45 seconds to allow time for the glue to bond to the surface. On the long wood pieces, I usd two strips for each piece, one on the top and one on the bottom, If you are unsure if the strips will hold your piece. You can just press the wall side to the wall in place and let it sit for 24 hours before attaching the other piece. I had to do this once when I was using strips for a picture in our camper.
Follow the same format for all boards or whatever you are attaching to your surface.
In this picture, I am holding th board in place for 45 seconds.
Here is the finished product. The boards are up and holding and no holds drilled. I plan on painting a couple of latches on the left hand side. This sure made my mirror look more complete and pricey, like a West Elem or Pottery Barn piece and it only took a little paint, scrap lumber and Command Strips.
Now, onto the next hanging projects with hooks.
A set of three metal stars I purchased to hang on my vinyl fence with Command Hooks. I am also going to hang solar lights using Command Hooks. I haven’t found the type of lights I prefer as of yet.
After searching through my stash for a hook that would fit the hanger on the back of the stars, I chose these hooks to use for hanging the metal stars. I wanted a hook that could hold more weight than required because I knew the star would be blown on windy days and be in the rain.
I used alcohol and a paper towel to clean the spot I was going to place the hook. Once you clean a spot and see the dirt, it is understandable why the manufacturers suggest cleaning before attaching the hooks. Once again, I allowed time for the cleaned area to dry well, before placing the hook on the surface of the fence.
The directions for the hooks are the same as the strips. Except you place the side with the red writing on the back of the hook and the side with the black writing on the surface of your hanging area
I held the hook in place for about 45 seconds also. The directions only suggest 30 seconds, but I have found a ittle more time for bonding can make a difference, especially for something that willl be placed outside and have to endure the mixture of weather we have in Alabama.
This is a picture of two of the stars I will hang. There are a total of three stars in all. You also see a black metal sign at the end of the fence. I will paint this piece and place in under the center star. The colorful metal can is where I store my birdseed. It doesn’t show in the pictures, by t close by the birdfeeder.
Once I held the hook in place so the glue could properly bond, I just hooked the hook on the back of the star. Perfect fit.
There is my star studded fence. Unless you zoom in, it is hard to see the colors in the metal piece with the red and birds. It was solid black. I painted it to add more color in this area as a finishing touch. I am searching for solar light to hang over the stars for a bit of light when we sit out in the evenings. I will use small command hooks made for hanging ourdoor lights.
I am very pleased with both projects I used the Command products to complete. Hanging was easy and no walls or vinyl fences were harmed in this endeavor... LOL ! I do however, advise you to follow the clearly coded words and/or pictures on the back of each Command product. The Command items are pricey, so it is best to do it right the first time.
The purpose of this picture is to show you peeps the rain and windy storm we received the afternoon after I hung the stars. I know you cannot see the stars, due to the trees. However, I just wanted to show you the heavy rainfall and wind blowing to say the stars remained on the fence. Way to go Command Hooks! Here’s your commercial 3M 

Enjoyed the project?
Resources for this project:
See all materials
Any price and availability information displayed on [relevant Amazon Site(s), as applicable] at the time of purchase will apply to the purchase of this product.
Hometalk may collect a small share of sales from the links on this page.More info
Published May 22nd, 2018 3:15 AM
Comments
Join the conversation
2 of 63 comments
-
 Susan K Mullins
on Jun 15, 2019
Thank you!
-
-
 Julie, Dunnellon Florida
on Aug 02, 2019
Yes, I did use the best. They were NOT knock offs!!!
-












Frequently asked questions
Have a question about this project?
I sure hope you have better luck with those Command stripes than I did. Have one that had a ceramic item up on the wall it came CRASHING DOWN, then I stuck a small ladder to my kitchen cabinets and it came down again. NEVER EVER AGAIN.
All the talk about Command Hooks. I can't get them to stick. I tried to hang a small plastic grocery store bag under my kitchen counter to hold empty pop bottles for recycle. I used extra big hooks in case there were a lot of glass to go in, but no, never put any glass in the bag. Within a week it was all on the floor. Tried it on wood, metal, ceramic, wiped down first with alcohol, let dry, held hook in place hard. Does the glue get old before you use them? I didn't think they were old but they were on sale. Any comments welcome. I was going to use them for small pictures next but now I don't want to risk it. Thanks, folks.
Question, did you remove the plastic mirror clips or how did you work around them?