


DIY Curved Floating Deck
We have had an area of ugly rocks and dirt directly in front of our house since we moved in over 7 years ago. It has driven me CRAZY (which according to hubby is a short drive... :-P) It took me a while to figure out exactly what it was I wanted to do with this area and I finally settled on a DIY floating deck!
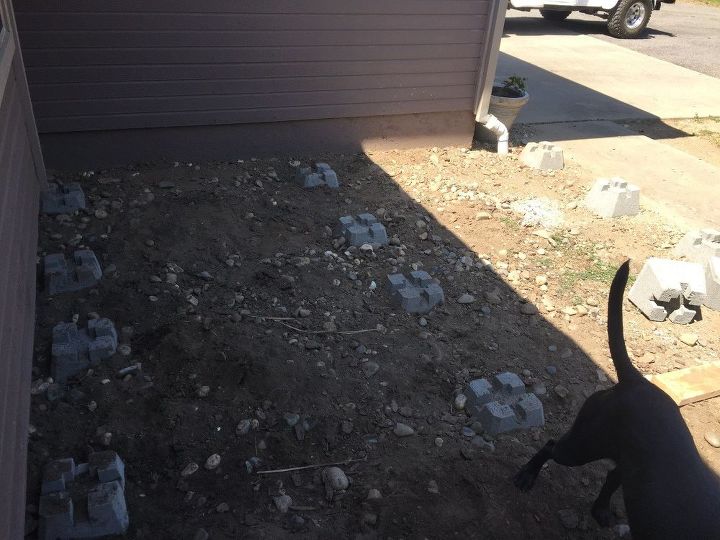
Here is what the area looked like prior to the new deck:
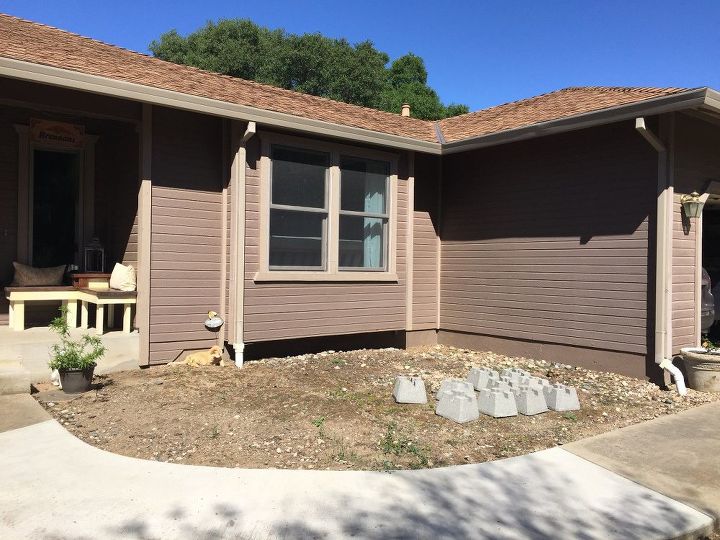
I know, bleh, right?! Just weeds, rocks, and dirt (mud when it rains). I had already added a border on the other side of the front of the house using concrete blocks, you can view that project here
That made the left side of the house look nice, but that area on the right side needed some serious help. So, in this area of ugly dirt, I decided to add a floating deck, since based on the instructions I found online, it looked completely doable as a one-person project and seemed like it would only take two or three weeks max.... Ha ha ha! My eyes and stubborn mind definitely betrayed me this time! :-) Building this mostly by myself was definitely a lot harder and time consuming than what it seemed when I first took on this project!
Here is an abbreviated version of how I built my new DIY Floating Deck (and with a curve in it to follow the sidewalk!) For full details, including a list of supplies and detailed information, please visit my blog at the link at the bottom of this post.
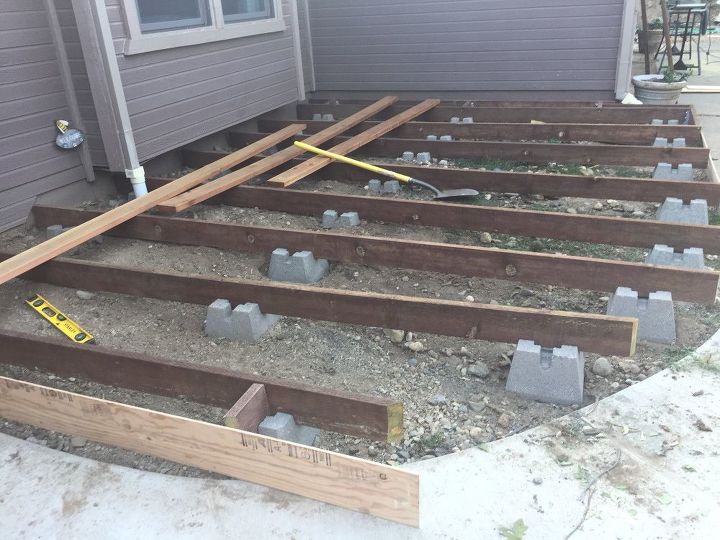
First, I figured out the locations for my concrete deck blocks. The area I was building my deck in was ~13 feet x 20 feet at the longest points.
I began in the section with the highest ground level, digging down until the block was level with a block placed in the lowest area of ground (it's easier to dig down to level than it is to find dirt to fill up an area... ). I used a spare 12' 2x4 and a level to determine when the blocks were level with one another. When placing each block, I made sure it was level with all other blocks that had been set.
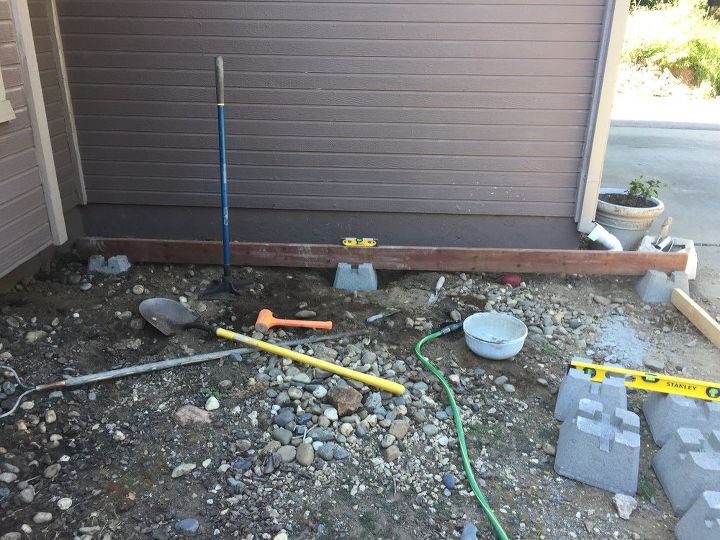
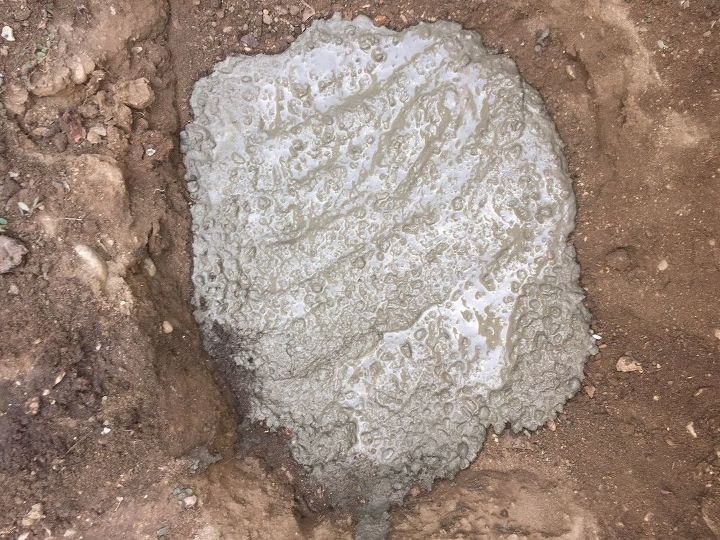
For each block, I dug a hole if needed, and poured some quick drying concrete at the bottom of the hole to create a flat, level, and sturdy spot for each block.
I did this for all blocks. Here are a good portion of the blocks after they had been leveled and set in place (in addition to the tail end of our neighbor's lab! :-) ).
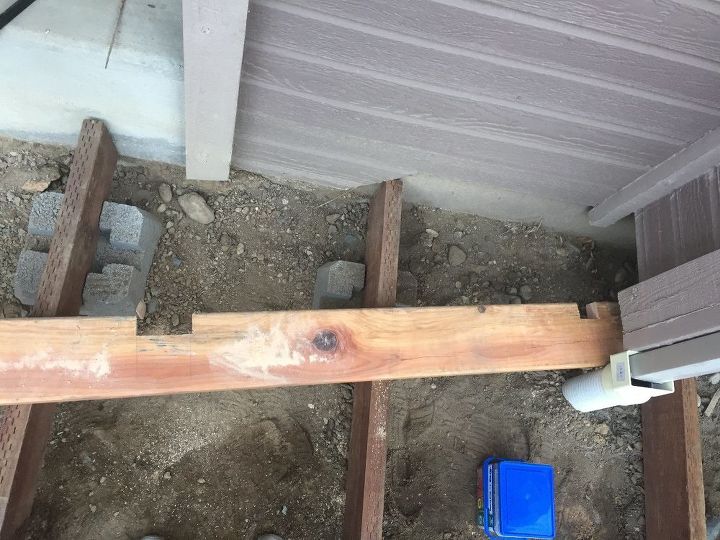
Once the concrete blocks were all in place, I began cutting the 2x6 pressure treated boards to the proper length to span the 13' width, and laying them in the deck blocks. For those joists that ended along a section that would be curved, I did cut the ends of the joists at angles matching the curve.
Once all the joists and support boards were in place, I used the table saw to rip the 1/4" plywood boards into strips that were the distance from the top of the joists to the ground. I then began attaching the plywood strips to the edges of the joists using exterior wood screws. The 1/4" plywood is flexible enough that it bends around the curves. I added a total of three layers of the plywood all the way across the front of the deck, adding the layers one at a time, and making sure the end of one board and the beginning of the next board in each layer of each row were attached to a joist.

I then attached a strip of Hardi Plank siding to the front of the plywood.
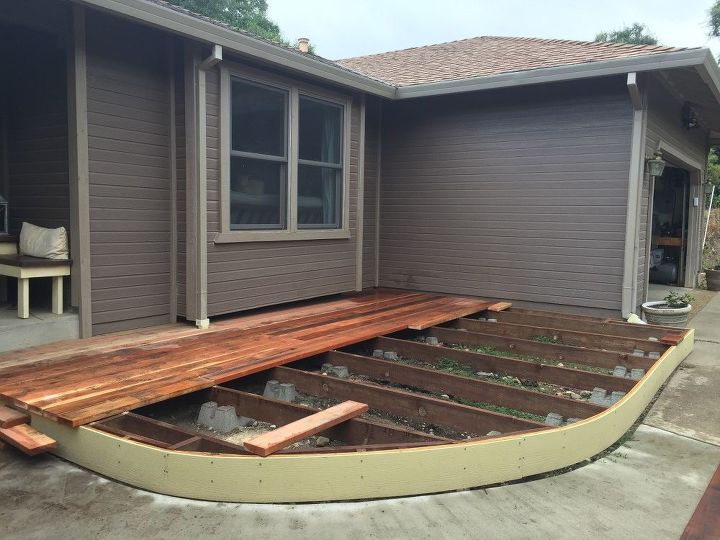
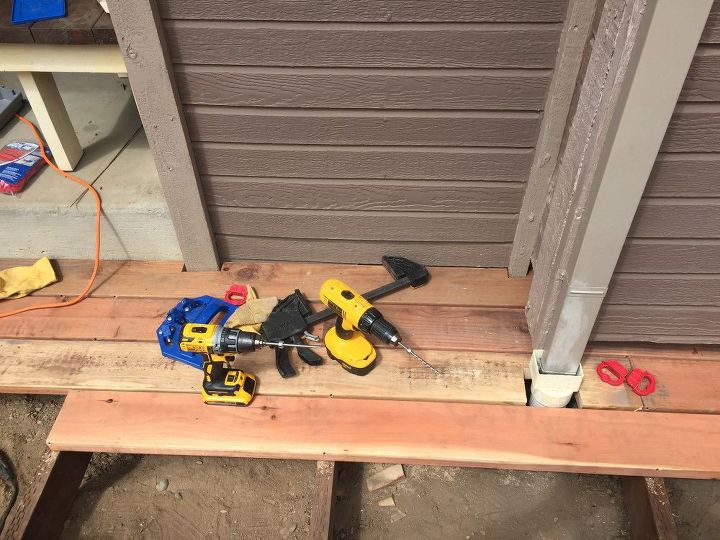
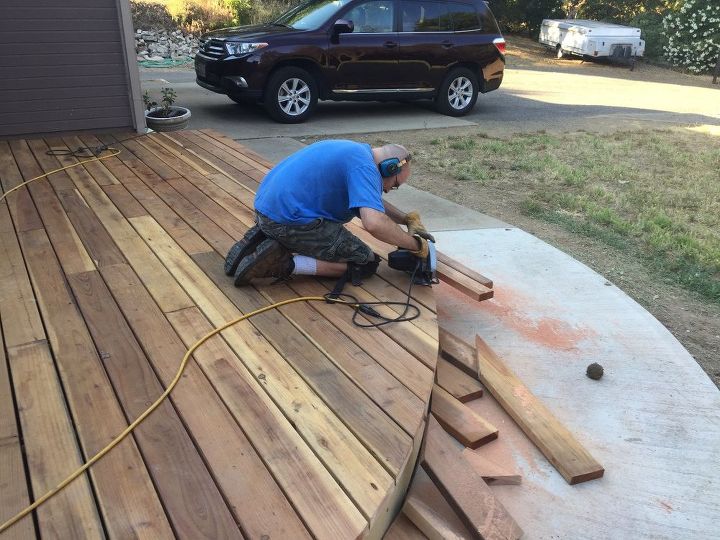
Next up was attaching the deck boards! I used a Kreg Deck jig and spacers to attach the boards. I also had to use the jig saw to cut out areas to make room for trim on the house and the downspouts.
Once I attached all the deck boards, we drew the curve onto the deck to follow the curvature of the sidewalk. Hubby helped with cutting the curve since my freehand cutting skills are not the best and I did not want to screw up the deck at this step after all the work to build it! You can see full details on the method we used to draw and cut the curve on the blog!
I then washed the deck and let it dry.
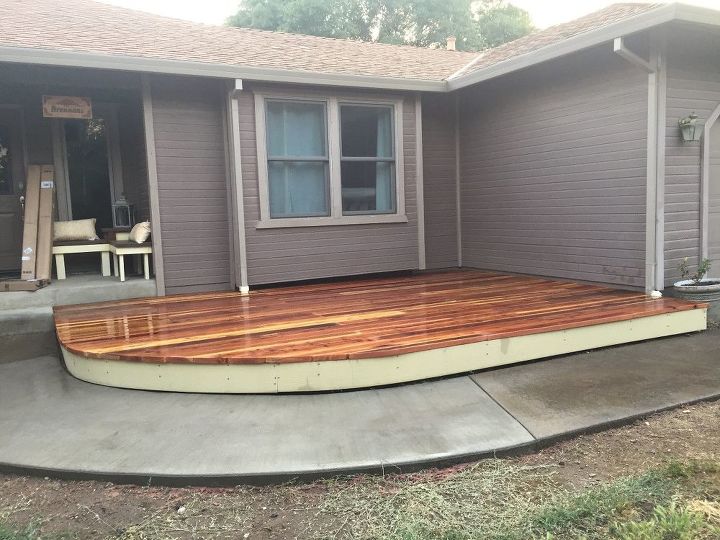
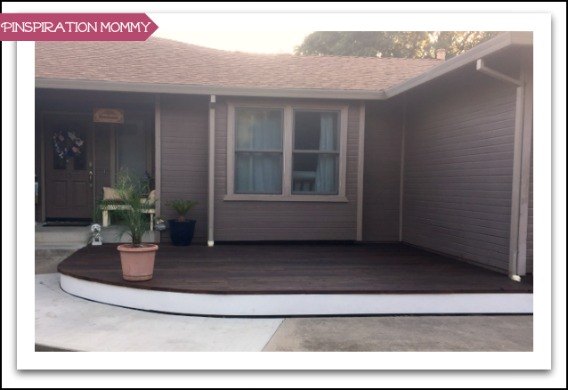
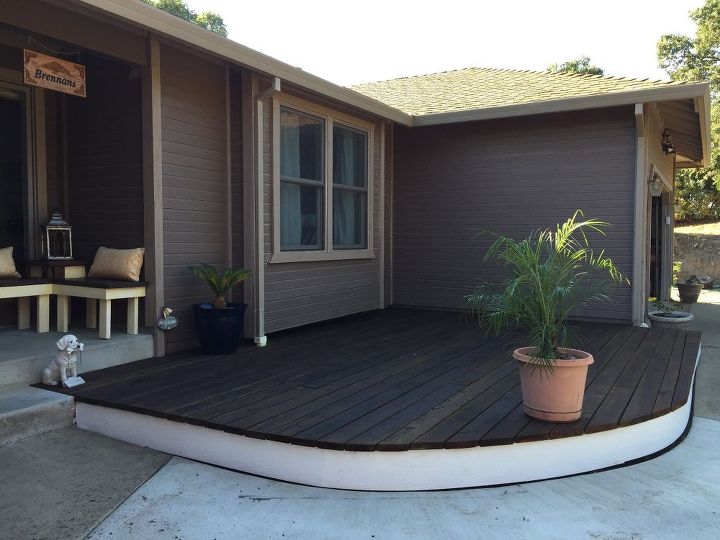
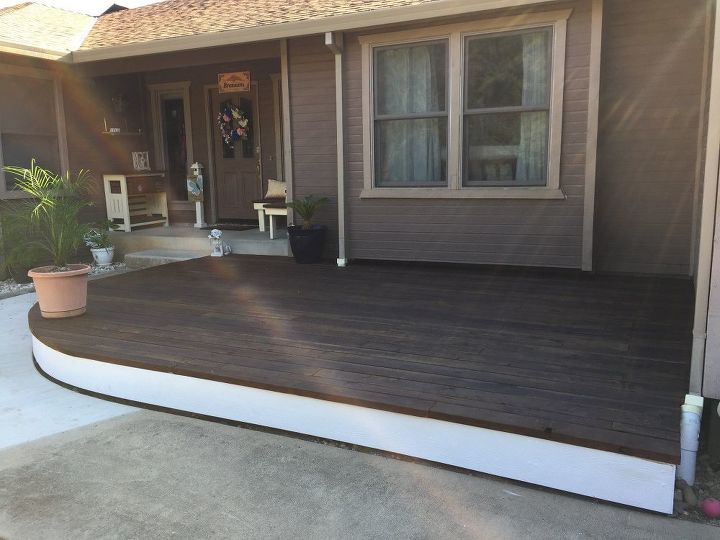
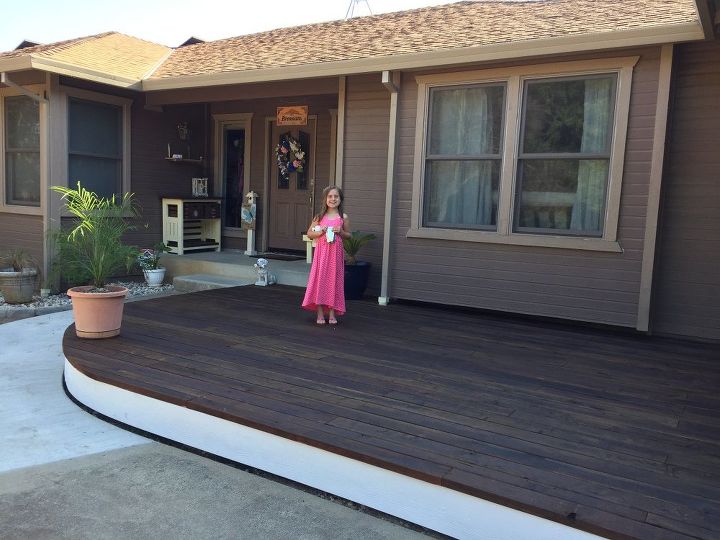
Once it was completely dry, I painted the front of the deck white and used a deck sealer/stain to color the top of the deck in Walnut. Here is the finished project:
More Front Yard Updates
Resources for this project:
See all materials


Comments
Join the conversation
-
Beautiful job!
-
You under took a challenging project and did an amazing job! So well done. Looks amazing. Enjoy and be proud!


Frequently asked questions
Have a question about this project?
This is absolutly beautiful. I have a small area that I would like to do this in. Will I need a permit to make this deck even though it is low to the ground?
I am inspired, BUT I have a raised ranch and need something good like this for the awful front of our house. Could you give us an idea for our plain house front?
how do you dye glass