


DIY Kid's Playhouse Makeover
For our daughter's 4th birthday, we ordered a Kidkraft playhouse kit! [affiliate] Unfortunately you don't get to pick the colors it came in, and we weren't very happy with the color this one came in. Not to mention the wood didn't look like it was sealed and would never hold up outside if it did not get some sort of sealant on it. I suppose you could just seal the whole playhouse, but if you're going to do that, you might as well make it your own.
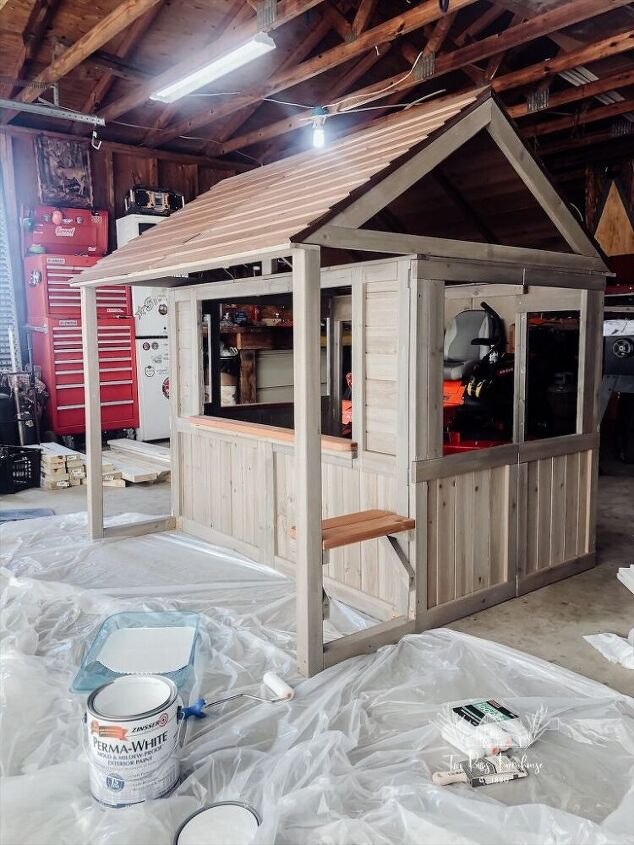
Here is a look at the playhouse before we started. It does come as a kit, so you do have to build it. But they provide all necessary materials, and very detailed instructions! It took us about a weekend to get this built.
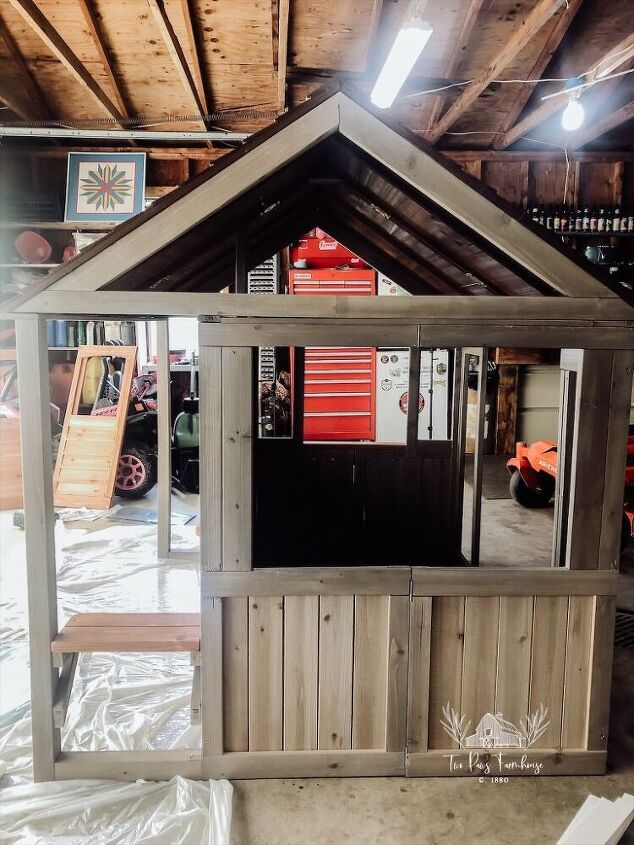
Just another look at what we were working with before the paint started! If you are painting this, I highly recommend leaving windows and doors off until everything has been painted.
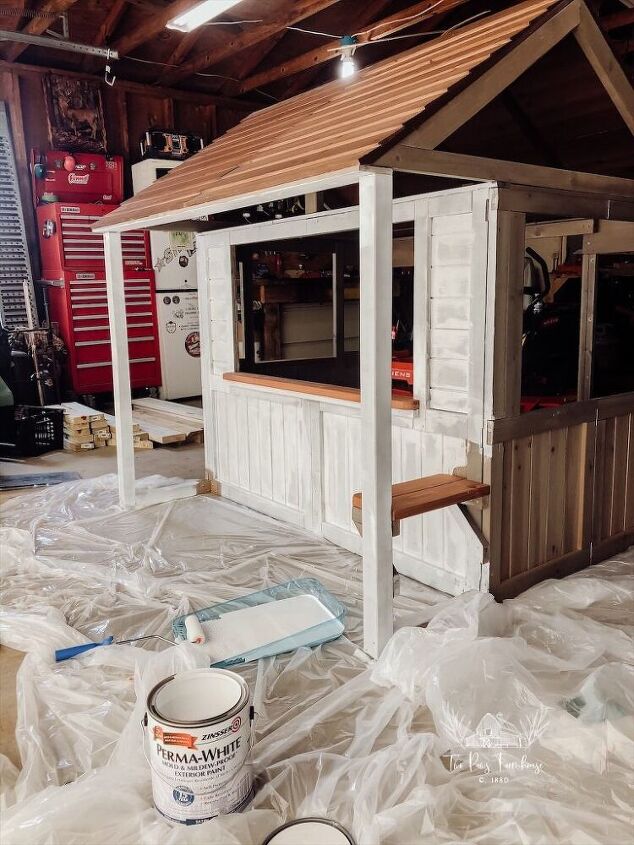
I literally picked up a gallon of basic white exterior paint at our local Walmart, and a few cans of black spray paint. Just make sure you are picking up paint that is suitable for the outdoors or it is not going to protect your playhouse and will eventually chip off!
I just used a foam roller to roll the entire house in white.
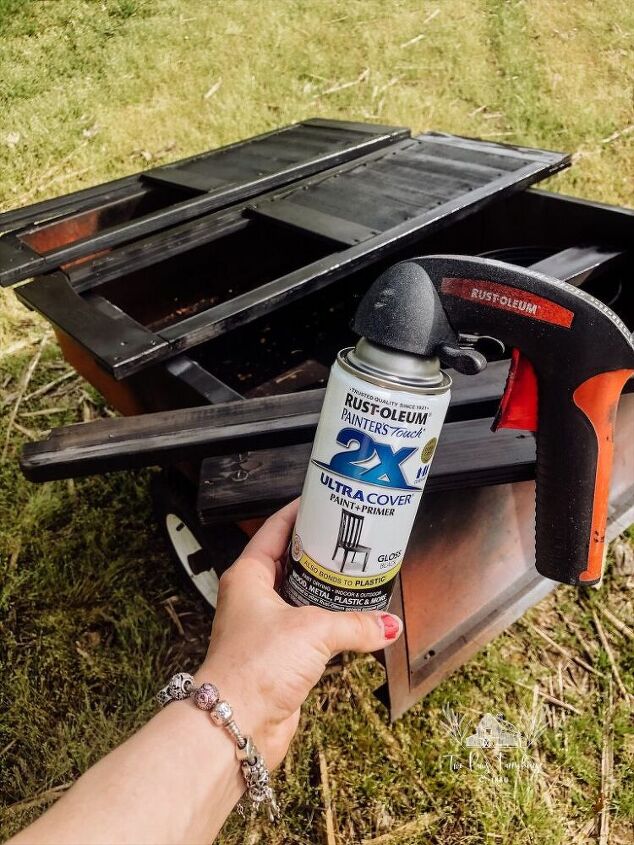
Rustoleum sells these nifty little spray painting tools that clips right on top of your spray paint can. If you're painting larger pieces, this gives you a trigger to pull to spray the paint, keeping your fingers from tiring out!
We painted the doors, windows, and trim with the black spray paint. It took two coats on everything!
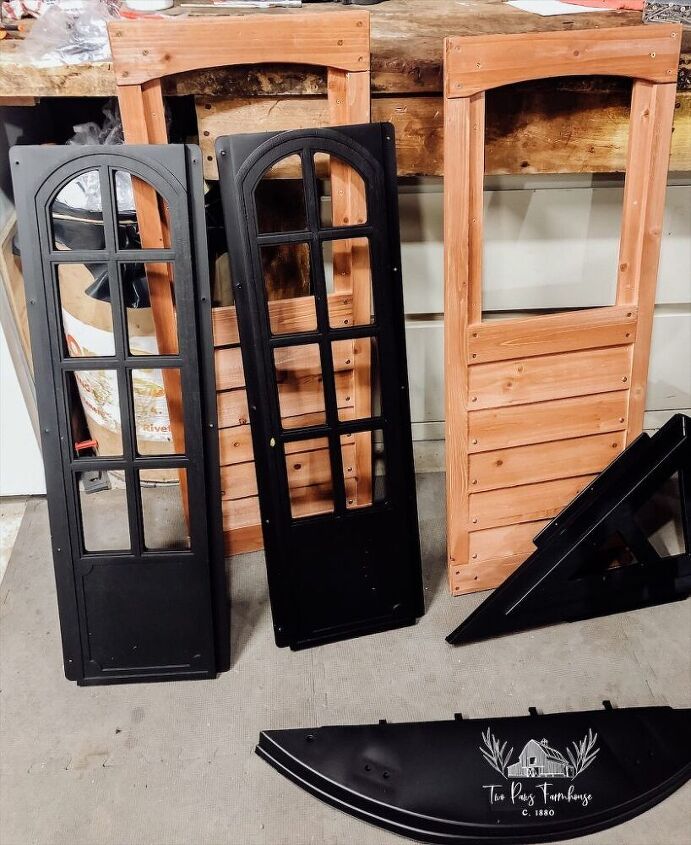
Here is a look with the windows painted, and the doors natural. This was my original plan, but I ended up deciding I wanted the doors to be black too so spray paint to the rescue!
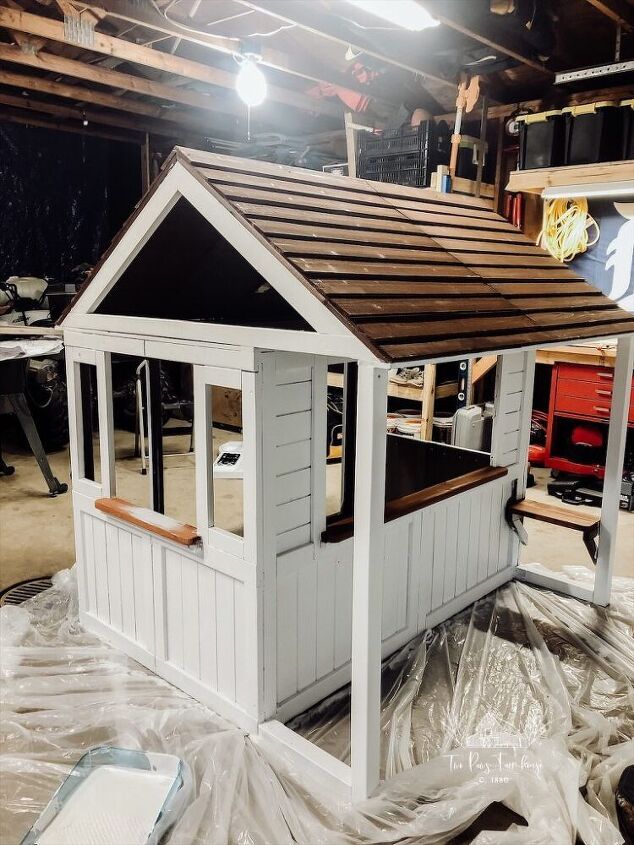
As the windows dried, we started installing them into the playhouse. I still had some finish painting to do here, but it was starting to come together.
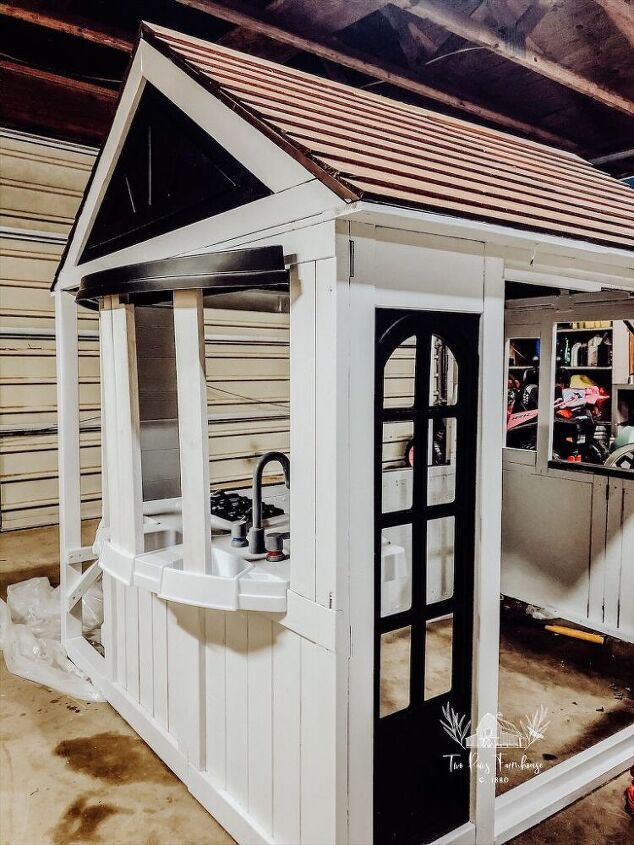
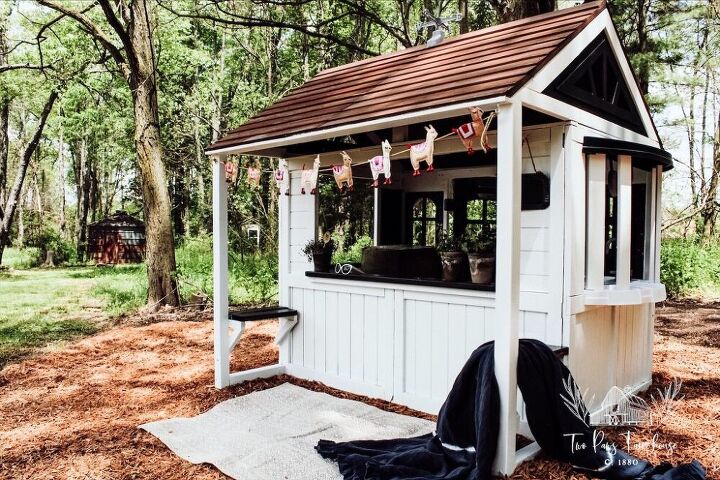
And here was the last steps before placing our painted doors back on! You just can't go wrong with black and white, it is so classic! We had to hurry and get this into place outside in time for our daughter's birthday!

We placed it to the side of our house in a patch of mulch that my husband had specifically cleared out just for this playhouse. We plan on eventually adding a sandbox for her, but this was a pretty big project for the year!
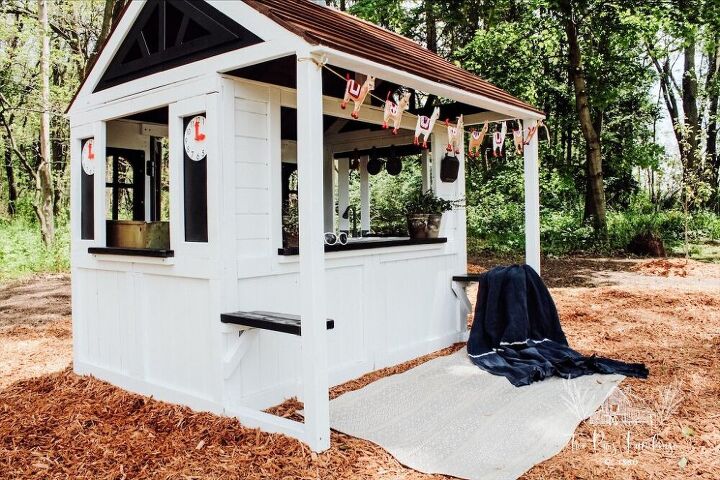
I added some simple cup hooks to the top of the playhouse to hang a llama garland on, and I plan on decorating for all the holidays too! The rug is easily stored inside the playhouse for when she's not playing with it, and we also placed a small cabinet inside the playhouse to store her play food in.
Although this process was a long, it was not hard! Anyone who can handle a drill and a paintbrush can tackle this project! There's many different playhouse options out there to choose from, and if you want to see the exact one we used, you can purchase it here: KidKraft Playhouse Kit [affiliate]
Visit my blog link below to see more of the finished product!
Resources for this project:


Comments
Join the conversation
-
That is so sweet. I love the alpaca garland! I would have loved the playhouse as a child! Great job


Frequently asked questions
Have a question about this project?