


Mid Mod Traffic Cone Planters

These planters are a throw-back to the ‘atomic age’ but are made from contemporary plastic.
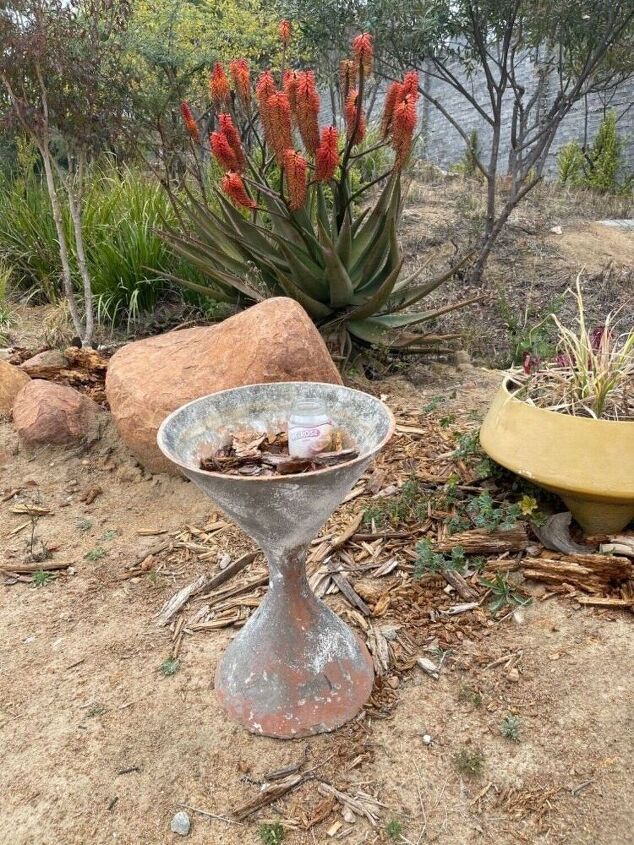
Do you remember these?! A 60's design classic. There were even standing ashtrays in a similar design. Their thin lines were made possible with the use of, shock horror, asbestos. We have obviously moved away from asbestos but I still love the planters and would love some for my garden. So, here is my contemporary take.
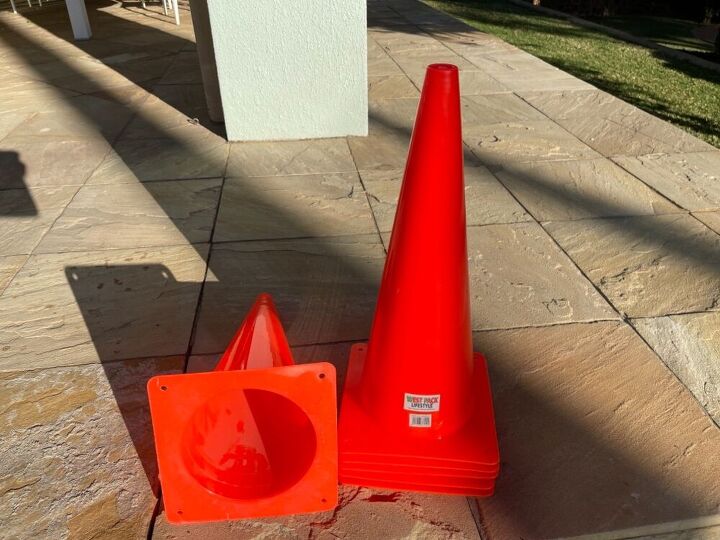
A while ago I made planters from construction hats (see my Hometalk profile). It seems as if I'm crafting my way through an entire road construction site because pictured above is a cheap type of traffic cone that I bought. I say ‘cheap’ because the better quality ones don’t have a flat base like these (suddenly all my car trips became traffic cone appreciation tours!). They are also in a completely different price class. Scuffed, used ones would be even better. You need two per planter.
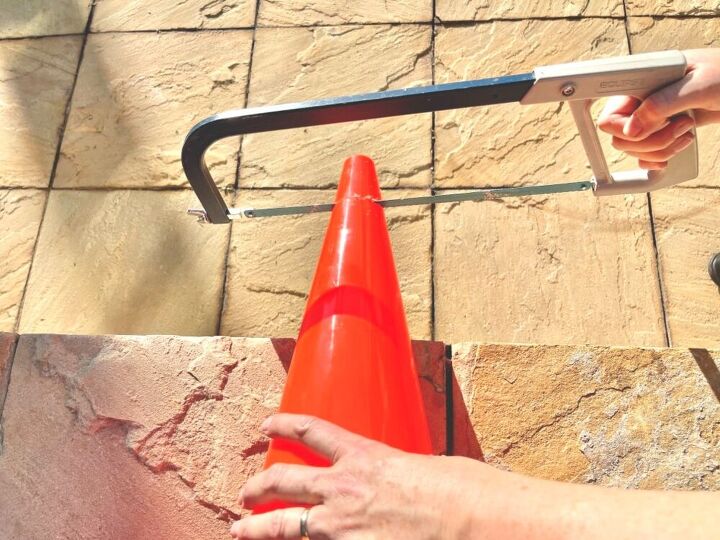
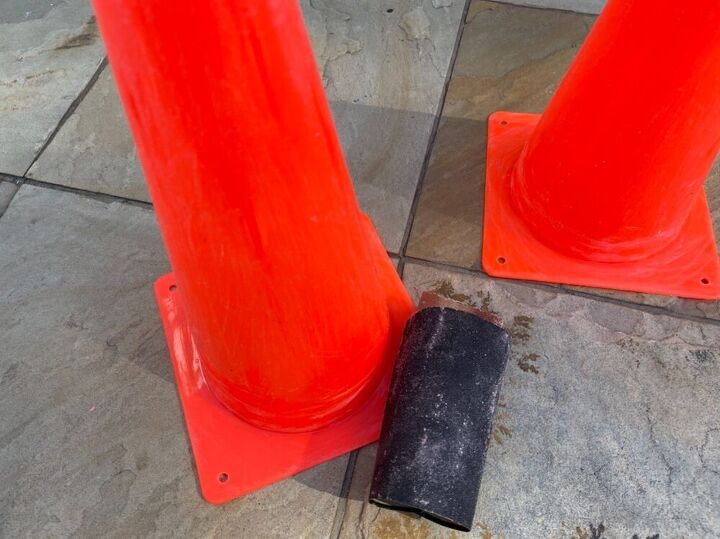
Cut an inch or so off the tip of one of the pair. The idea is that this cone will slide over the other and the bigger the contact area, the more stable the join will be.
Now scuff up the fresh plastic with sandpaper (this will not be necessary with old ones, although you might have to wash them).
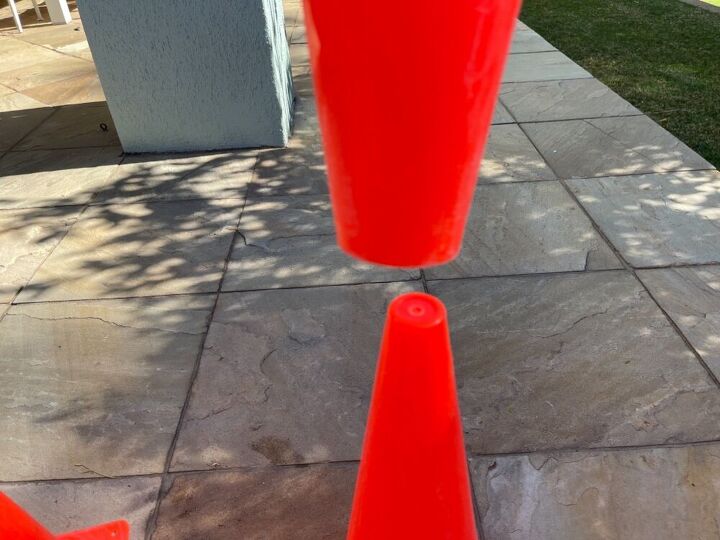
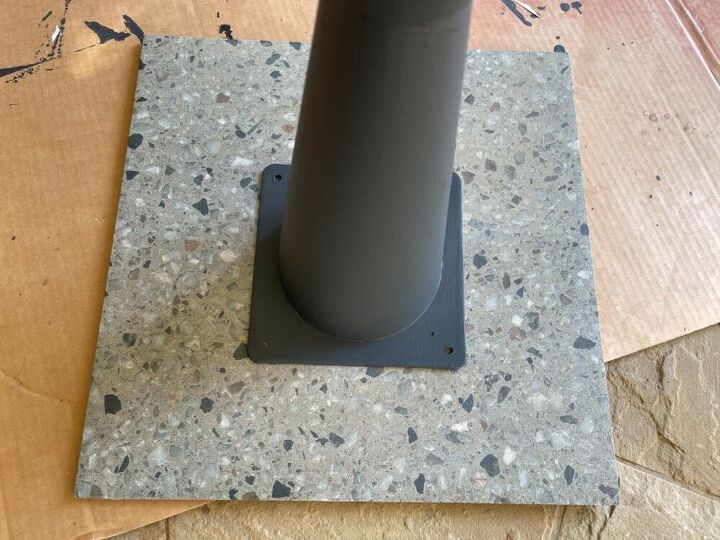
Place the cut cone over the uncut one.
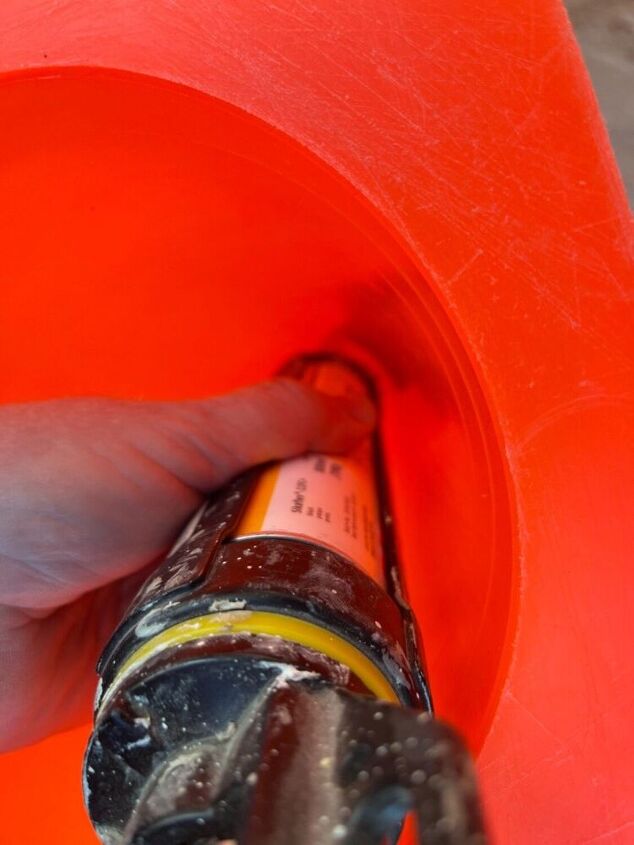
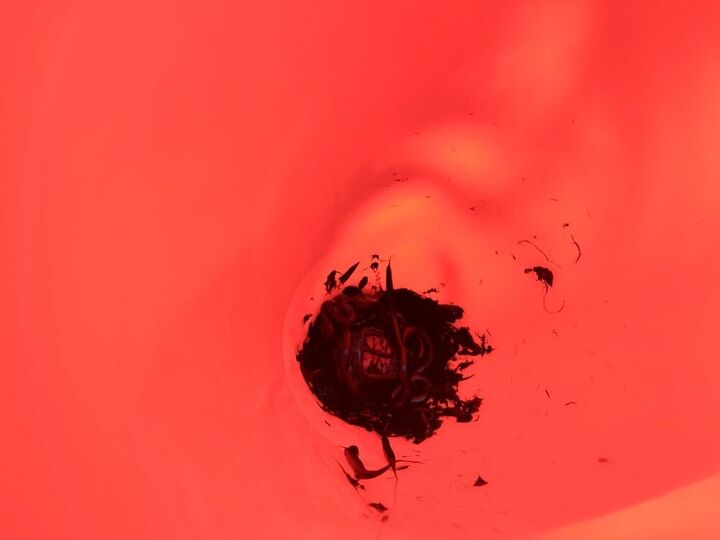
Use a lot of silicon or Sikaflex to glue the two parts together. I used black Sikaflex and even after spreading it with a popsicle stick, it was still a lovely mess with squiggles and smudges (see below) - not necessarily a bad thing since this is going to give the concrete more surface to adhere to.
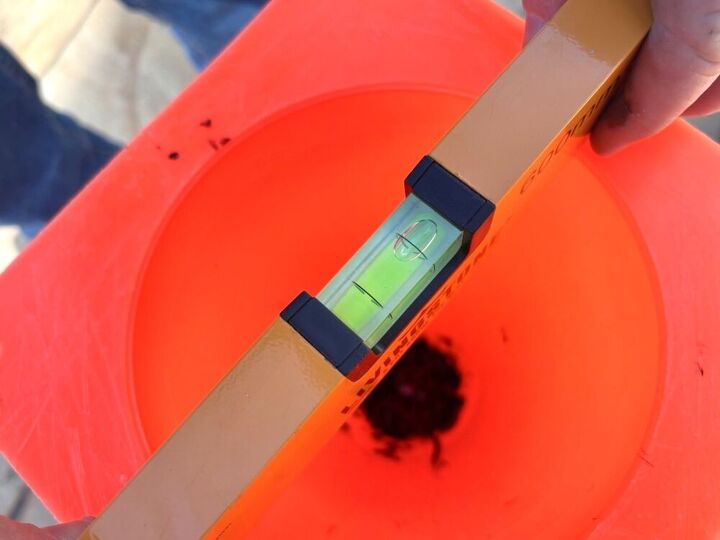
Ensure that everything is level and leave to dry overnight.
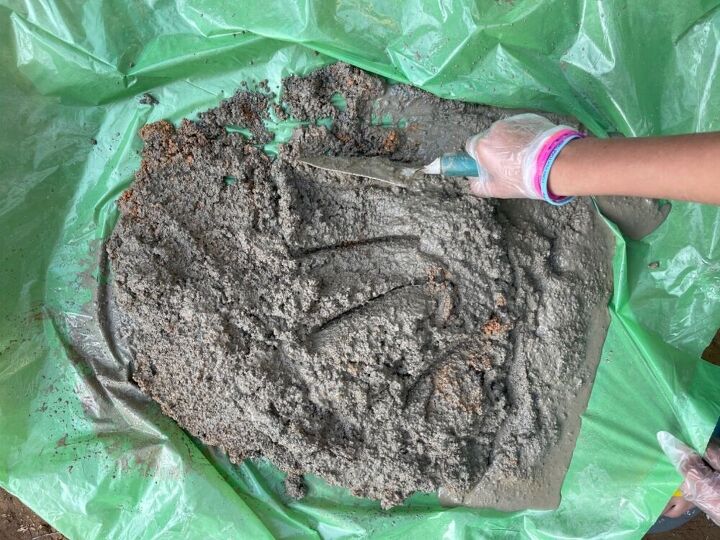
The next day, I mixed some screeding concrete...
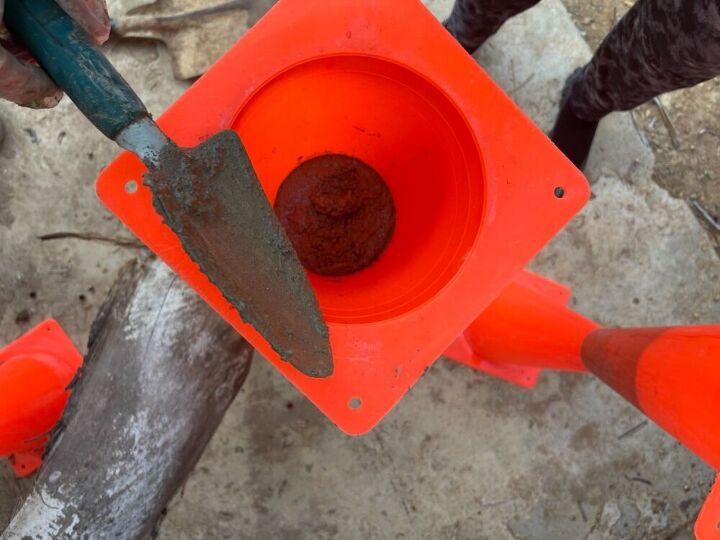
And scooped some into the silicon join to about 2 inches deep and left it to dry overnight. Hopefully this will strengthen the join. You could also fill the entire thing to give it more stability.
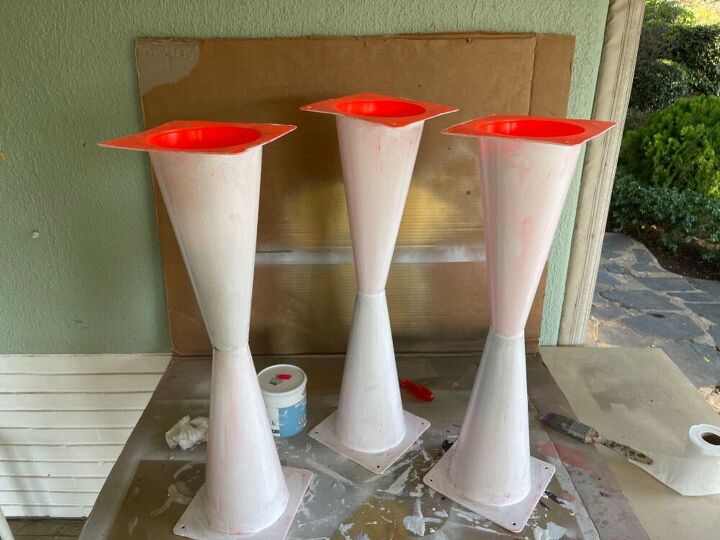
Since my planters were going to stand outside, I used everything I could think of to ensure the paint won't peel with the first drop of rain. The scuffed surfaces were painted with an all-surface primer, all except for those that would have tiles stuck to them.
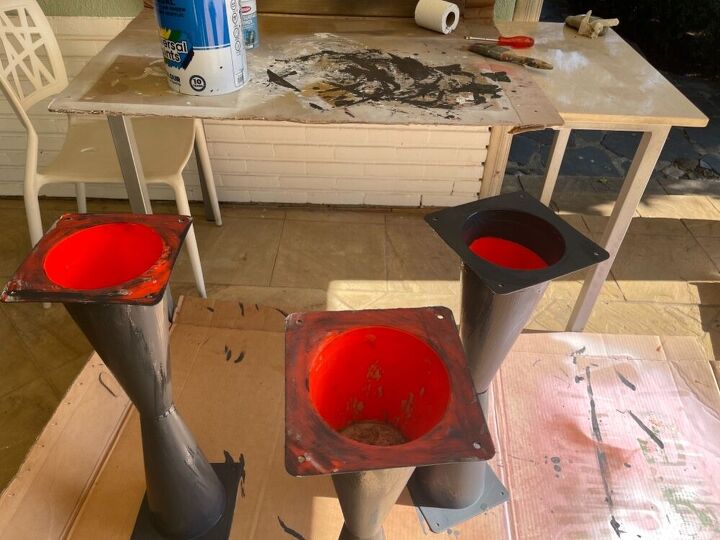
Then a coat or two of charcoal roof paint that I had to hand. If roof paint isn't going to stick, I don't know what is! You will see the one on the far right has it's top painted, this is because it will be used without a tile and the plant will be planted directly into it. Perhaps it needs a drainage hole too.
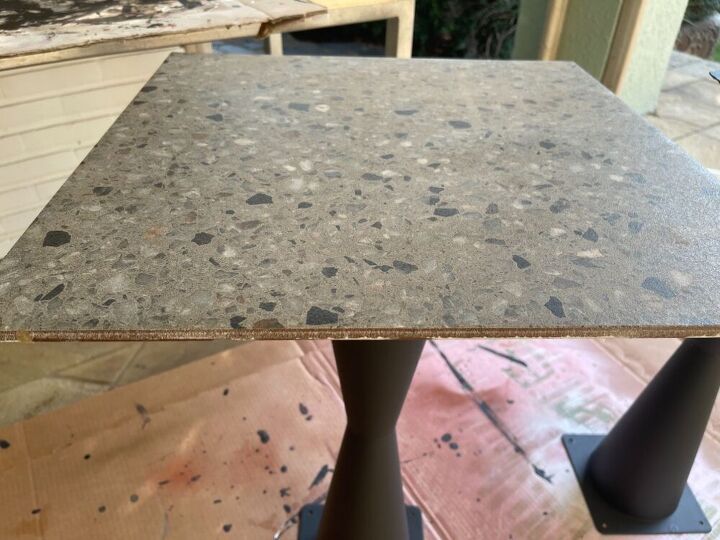
If you want to add a top you can use a piece of wood or a floor tile as I did here. Attach the wood with screws or silicon. But that is pretty much it...
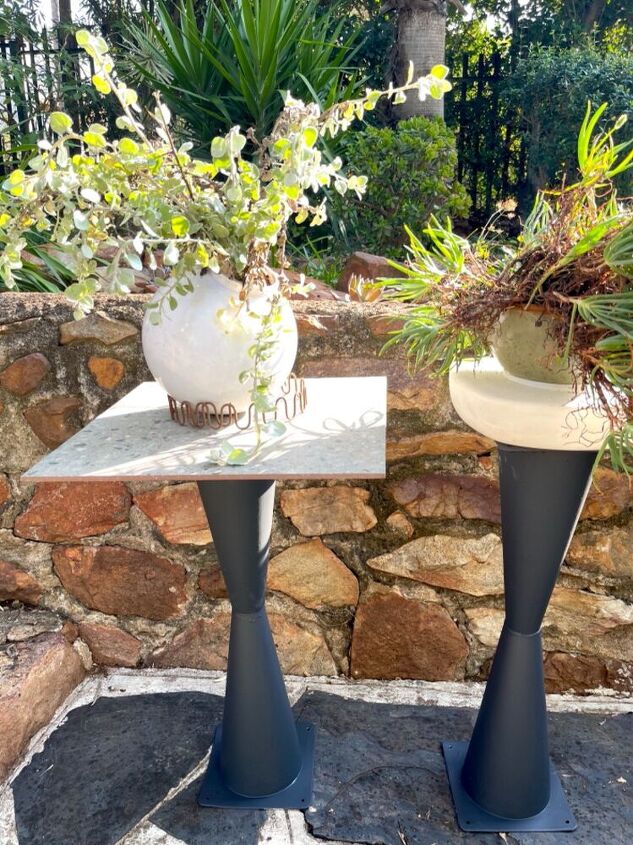
Here they are, with some variations. On the left, I used a plastic light cover as a round planter. It does need a base such as the springs used here, or a piece of pvc pipe though. The one on the right has a lampshade as a base.
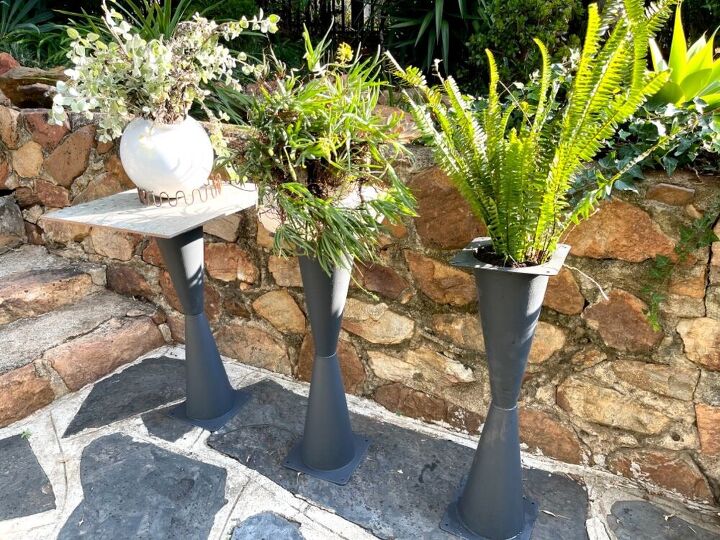
The fern in the third one was planted directly into the cone.
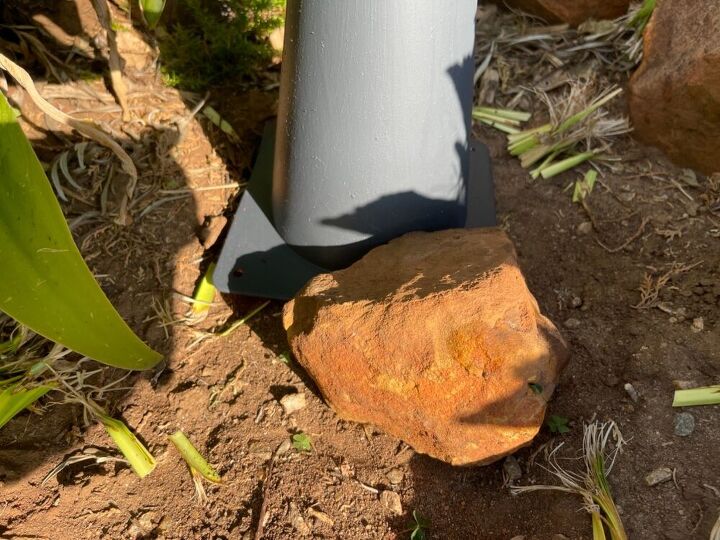
Note: The one problem that you may find with these is that they are top-heavy. Possible solutions to this would be to use more concrete; or to put a rock inside the bottom cone, or to bury the bases or to cover the base with loose rocks.
You could also attach another tile or a wider wood base.


Comments
Join the conversation
-
I love these and I know exactly where to put them!
Thank you for sharing.
-
My Fave: the topless planter. Awesome idea


Frequently asked questions
Have a question about this project?
Could the bottom cone be concrete-filled first?