


How to Make a DIY House Number Sign in a Few Simple Steps
In this step-by-step tutorial, I'll show you how to make a stylish DIY house number sign.
You'll only need some basic supplies and a bit of creativity to achieve a great result. This project is not only fun but also makes for a fantastic housewarming gift. Let's get started!
Tools and materials
- 1x3 piece of wood
- 1x2 piece of wood
- Miter saw or hand saw
- Wood glue
- Nails
- Spray paint (optional)
- Floating address numbers
Steps
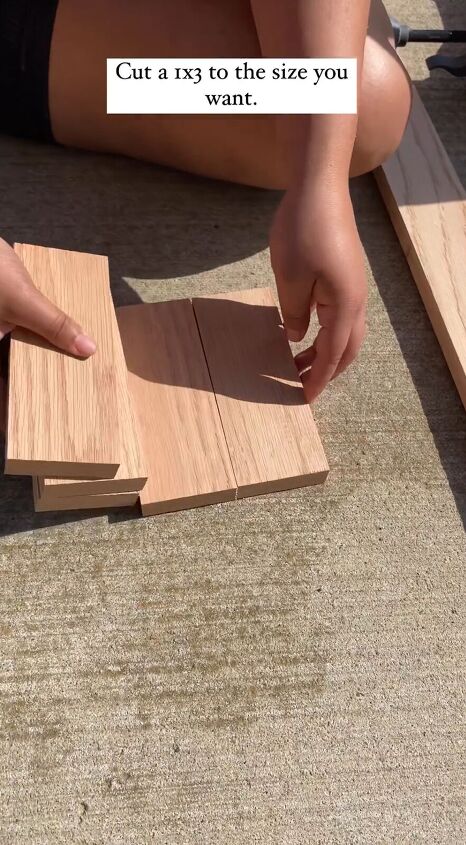
Step 1: Measure and cut the 1x3
Begin by measuring and cutting the 1x3 piece of wood to your desired size. This will serve as the base for your house number sign.

Step 2: Cut the 1x2 at a 45-degree angle
Use a miter saw or a handsaw to cut the 1x2 piece of wood at a 45-degree angle. This will create a frame for your house number sign.
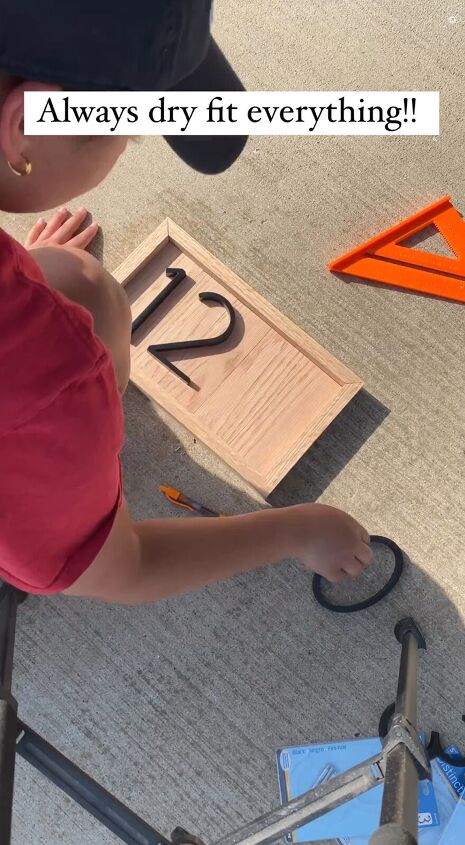
Before applying any glue or securing with nails, make sure to dry fit all the pieces together to ensure they fit perfectly.
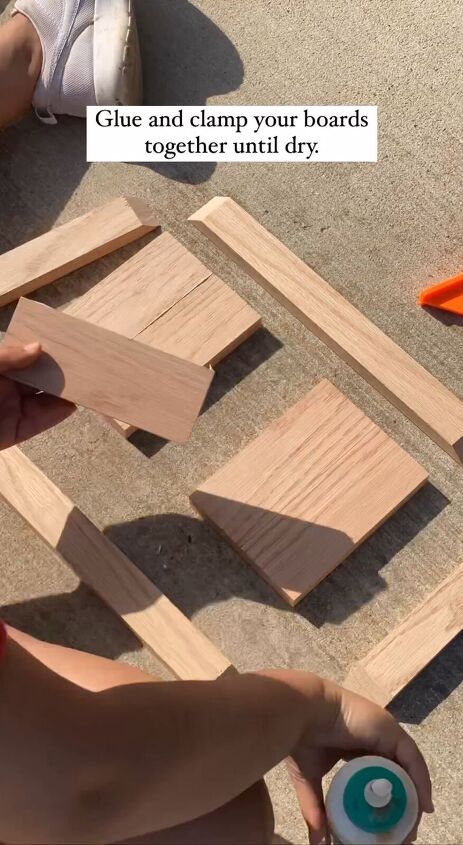
Step 3: Glue and clamp your boards
Apply wood glue to the edges of the 1x3 base and attach the 1x2 frame around it. Use clamps to hold the pieces together while the glue dries. Be patient and allow ample drying time for a sturdy bond.
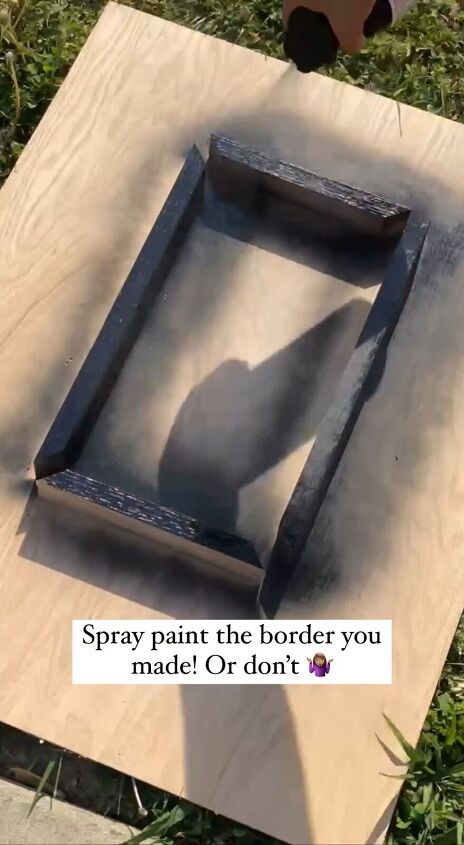
Step 4: Spray paint the frame (optional)
If you want to add some color to your sign, you can spray-paint the frame you've created. Choose a color that matches your home's exterior or complements the overall design.
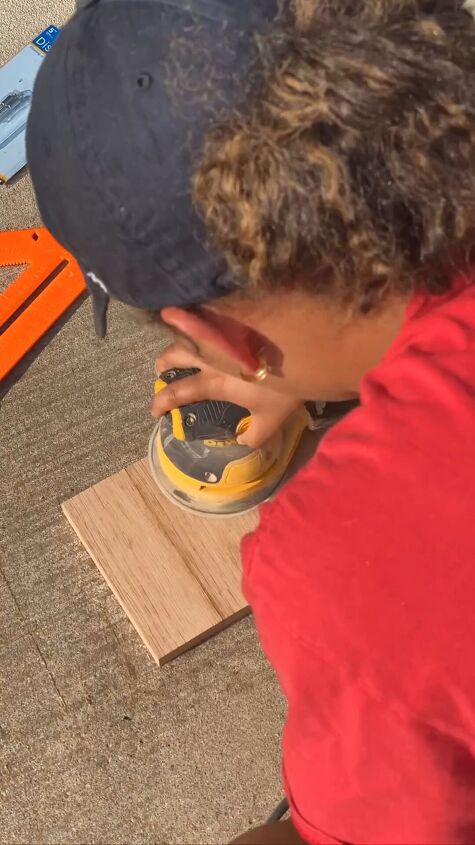
Step 5: Sand and stain the base
Sand any rough edges and surfaces.
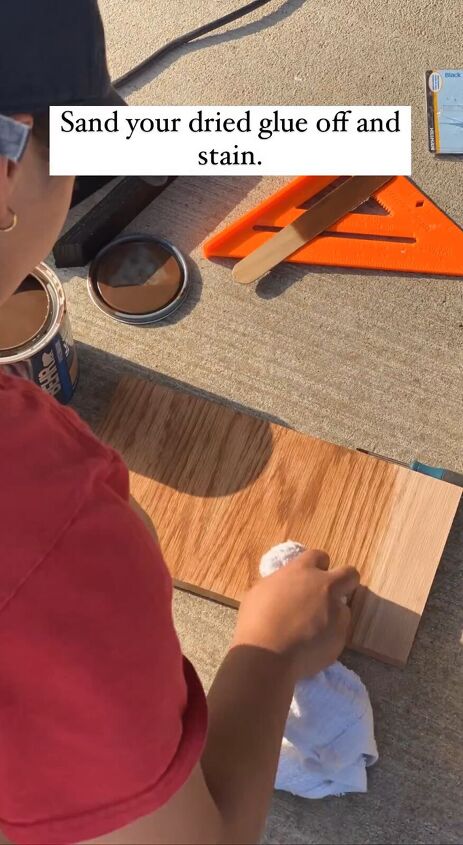
Then, stain the 1x3 base to give it a polished and weather-resistant finish. Follow the stain manufacturer's instructions for the best results.
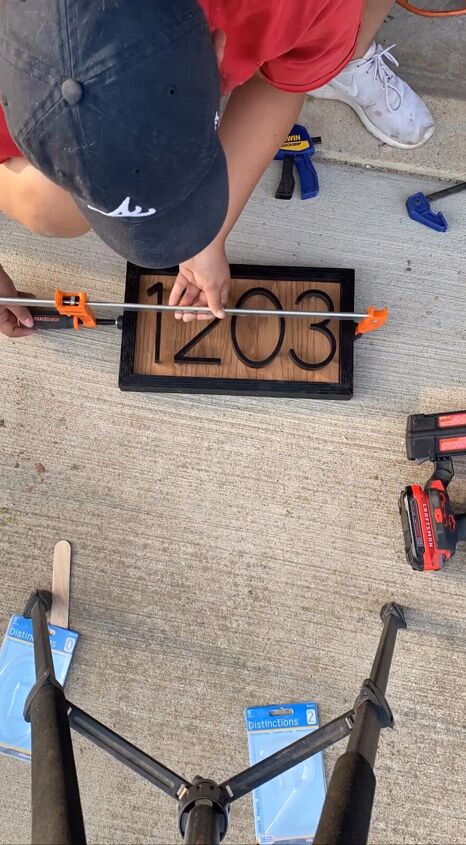
Step 6: Add floating address numbers
Position and attach the floating address numbers to the sign. Make sure they are evenly spaced and centered for a balanced look.
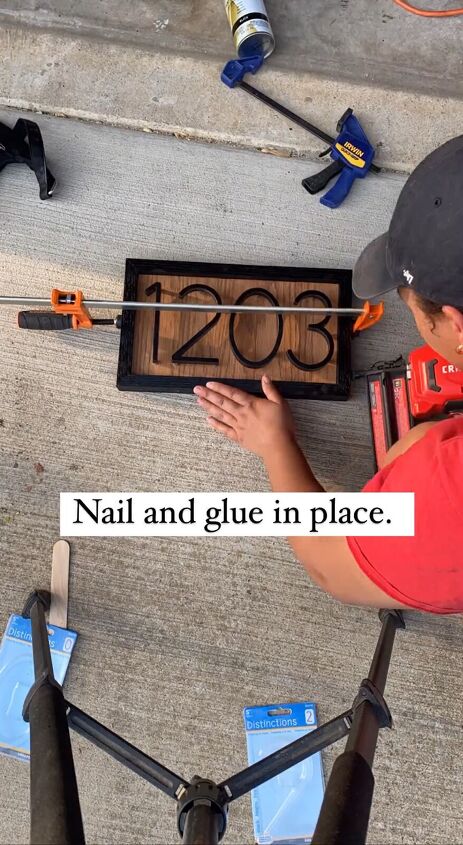
Step 7: Nail and glue everything in place
Secure the 1x2 frame, as well as the address numbers, with both nails and wood glue. This ensures that your sign is not only attractive but also durable and able to withstand outdoor conditions.
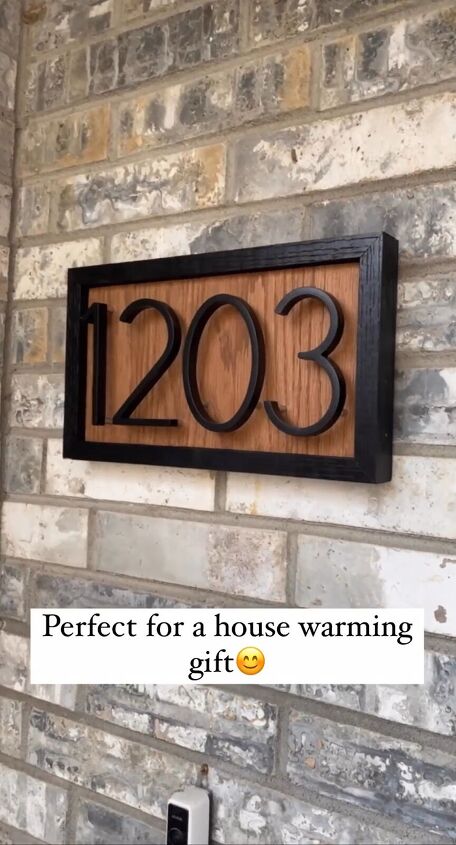
DIY house number sign
You've just completed a simple and cost-effective DIY house number sign project that doesn't require any power tools.
This personalized sign not only adds a unique touch to your home but also makes a wonderful housewarming gift. Enjoy the satisfaction of creating something beautiful with your own hands!
Follow @flippedbyfaith_ on Instagram for more DIY ideas.


Frequently asked questions
Have a question about this project?