


Easy How to: Burning Wood Sign
If you’ve been following me for a while, you know I like to try crafts out of my element. So I decided to make a rustic wooden plaque with a burnt look. Now learning to burn wood without actually “burning wood,” was a science experiment within itself. This method has probably been around for a long time, but I want to tell my fellow DIYers about it. Now, LET ME TAKE YOU TO CLASS.
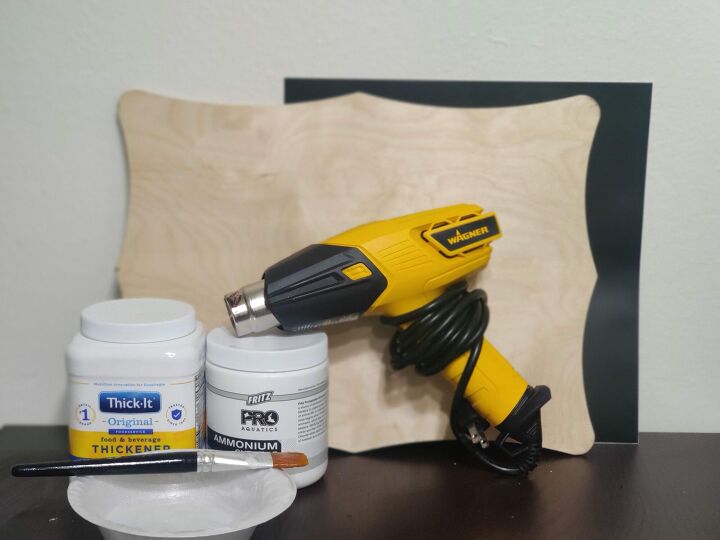
For this DIY you will need a wooden plaque, Thick-it, ammonium chloride, paint brush, disposable bowl, and a Cricut machine.
You are going to start with your design first. If you have a Cricut machine you will be making a stencil on Design Space to place on the wooden plaque. I decided that I wanted a sign with words only. After creating my stencil, I measured my plaque, adjusted the size of my stencil to fit, then cut.
***If you do not have a Cricut machine you can buy reusable stencils from Amazon or any craft store.***
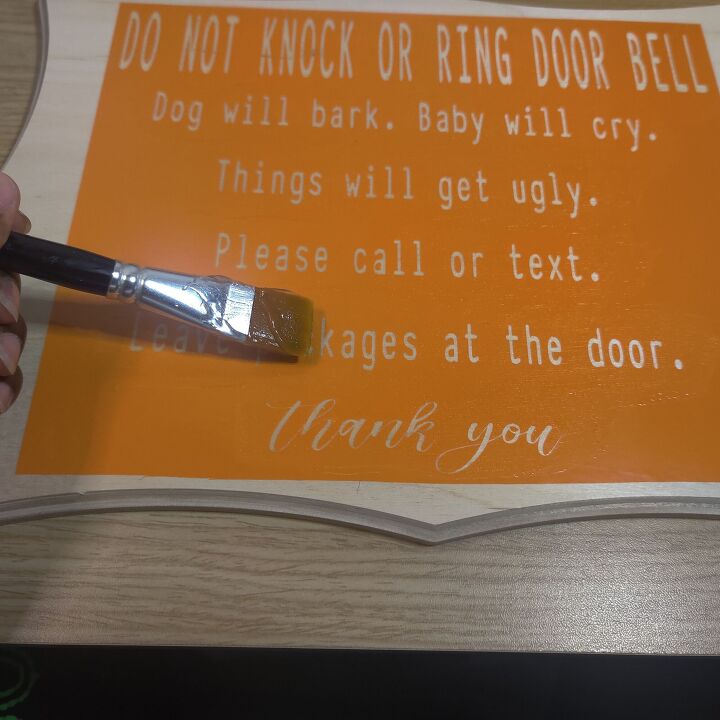
After the stencil is cut. Apply it to your plaque with transfer tape. Make sure you smooth out any air bubbles to prevent the solution from bleeding through.
Now on to the concoction!
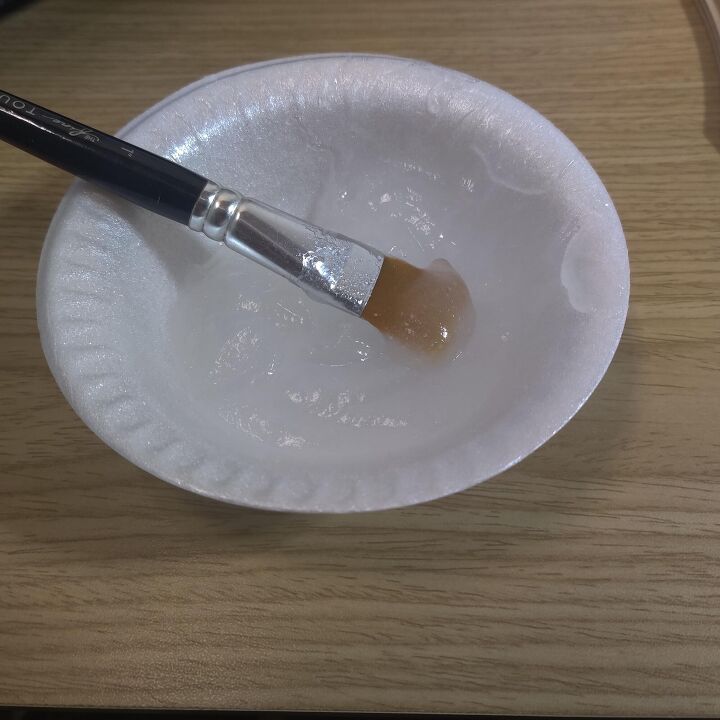
Ingredients
8 teaspoons of the Thick- it
1 tablespoon of ammonium chloride
½ cup of warm water
Make sure you mix it really well and let it sit for about 10 minutes before using. The solution should look like gel once it thickens up.
Now brush it on to your stencil. Applying two even thin coats will give you the best results.
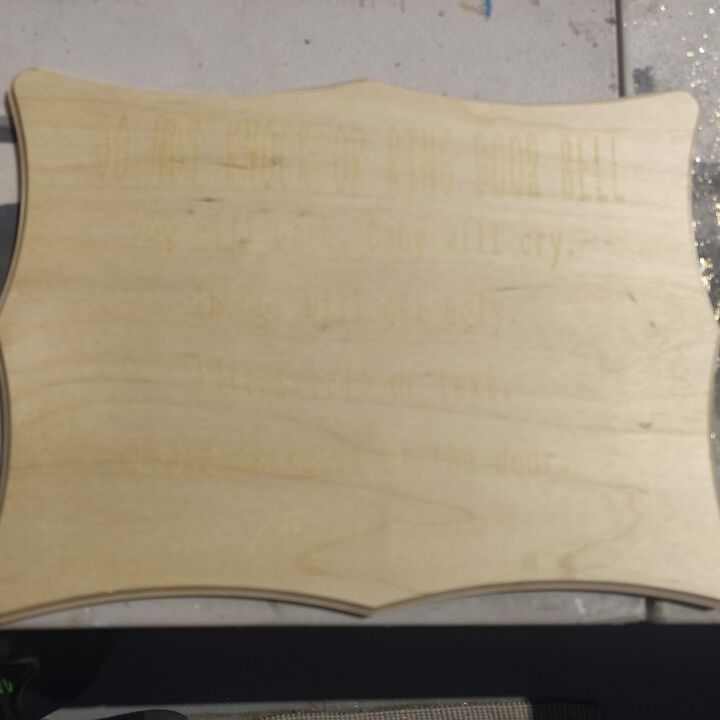
Let it dry for 10 to 20 minutes, pull the stencil off and take your plaque outside to a well-ventilated area to begin the burning process with your heat gun. Now your plaque will look blank but as soon as you apply heat your image will appear . (I will say that this is the longest part of the process because it does take a while). Plug in your heat gun and move it in a back-and-forth motion across your plaque until your image start to appear like this.
Once my words started to appear, I begin to hold the heat gun closely on each section. I did this to achieve a darker burnt look. Continue to do so until you have your desire look.
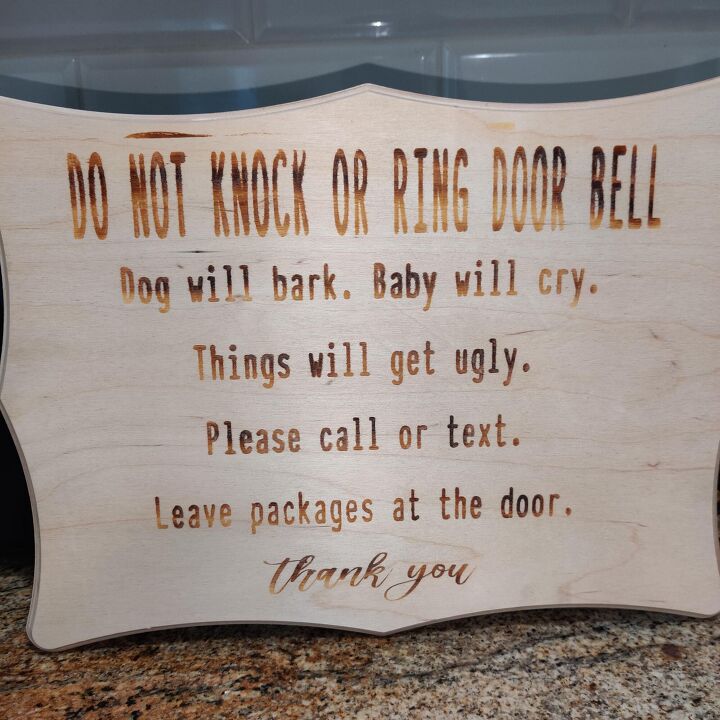
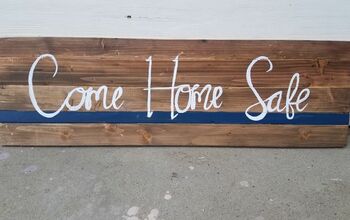
This is the finished wood sign. I have to say it turned out great and so realistic to burnt wood.
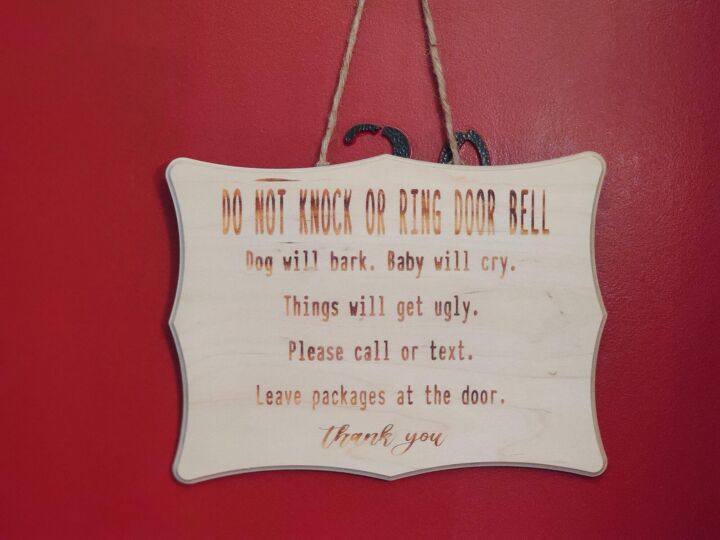
This is another finished look with D-Ring hangers and twine to hang on a door. I ended up giving this one to a friend to warn delivery drivers, but she said they never read it so,  things got real for this new momma.

Comments
Join the conversation
-
Thank you for your crafting project.
Great message for the front door of new mom and dad.


Frequently asked questions
Have a question about this project?