


DIY Floral Arch Backdrop For Under $10

I love planning, hosting, and decorating for parties or events and always try to use fresh flowers and greenery in fun and creative ways. I designed a beautiful floral arch backdrop for a bridal shower I had at my home with a few packages of grocery store flowers and stems for less than $10!
Floral arches look so lovely at any event and I was excited to recreate that look in my home not only for the bridal shower but to frame and accent my chalkboard wall after it was over. My floral arch backdrop was the perfect photo backdrop for a bridal shower and it framed my chalkboard messages perfectly. This DIY project will work just as well on any wall and will create a focal point even without a chalkboard accent wall behind it.
You Will Need:
- Flowers
- Eucalyptus Stems
- Floral Wire
- Tape
- Command Hooks
Step 1: Gather Flowers
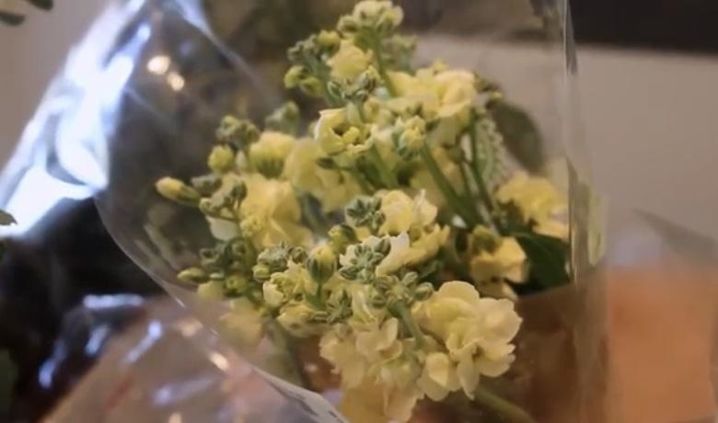
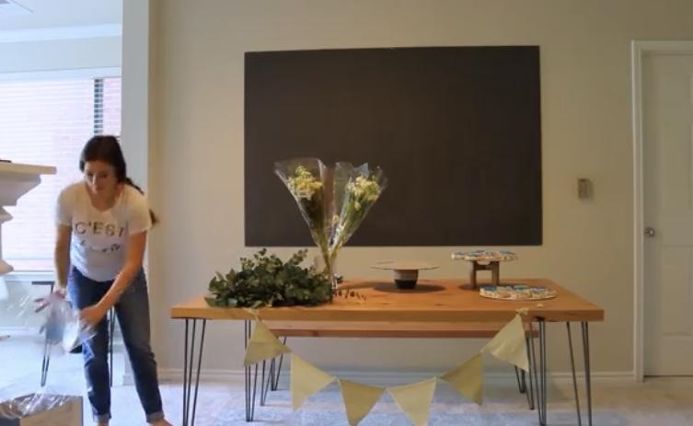
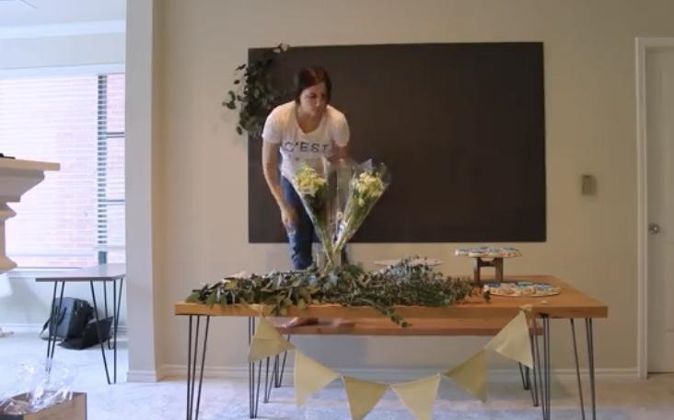
I chose soft white flowers and fragrant eucalyptus that I picked up for about $6 at the grocery store. A good tip to remember is to go heavy on greenery for the arch shape and either scatter small traces of flowers throughout or concentrate them heavily in one section. I prefer to concentrate them in one section. Choose both light greenery and heavier types like the eucalyptus. I intentionally chose items that I knew would last a long time and not look terrible even after losing freshness because I wanted to keep the arch up for longer than just the day of the event. Spread your flowers out on a table to group them and get a feel for the size and layout you can achieve.
Step 2: Choose Wall or Hanging Area
My square chalkboard accent wall was the ideal place for me to hang my floral arch to decorate not only a space for the bridal shower backdrop but one of the focal points in my home. The placement of the floral arch was perfect for a photo backdrop and also left enough room to serve as the backdrop for a food table in front of it. The benefit of using a wall to create the floral arch is that it provides support without the worry of constructing a freestanding arch and takes away the need for a huge amount of flowers but still has the same dramatic decorative impact.
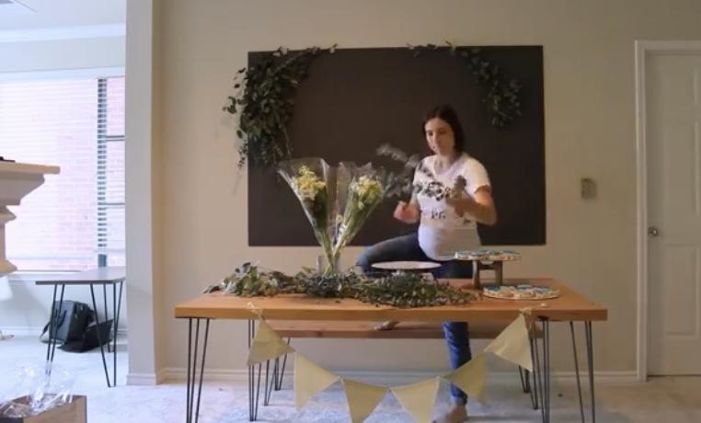
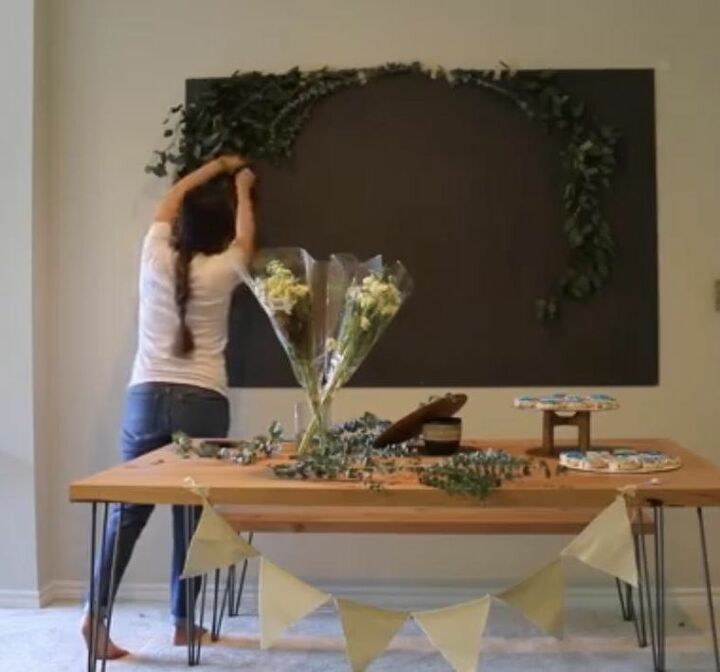
Step 3: Begin Building Floral Arch
I chose the top left corner to attach the first stem and worked from that point to build the shape of the arch. Use tape or command hooks to attach one stem curving downward and then slowly attach a few others in a chain using floral wire. Don’t continue to only build one side, just get it started.
Step 4: Create Opposite Side
To make sure I had a balanced arch, I moved to the top right corner and hung another spray of eucalyptus in the opposite shape of the curve on the left. Spend a bit of time on this side and then start to join the two corners by working across the top. Make sure to have a secure hanging piece in the center!
Step 5: Fill in Arch
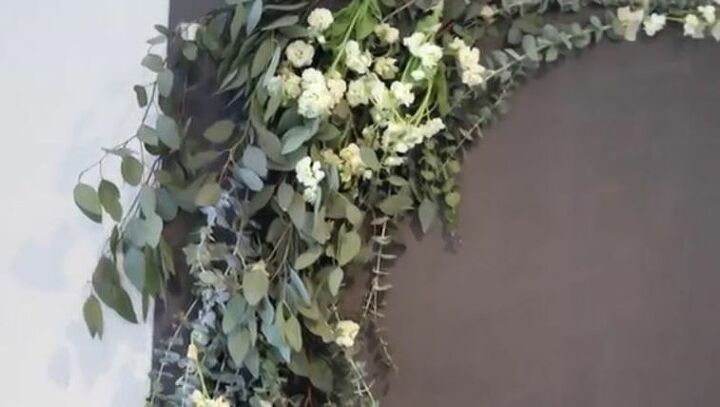
After creating the shape outline with the two corner pieces, I worked around the imaginary arch they created and filled it in with greenery and flowers. I used a combination of tape and floral wire to secure the floral stems to the wall and join the flowers in a chain. The pieces of tape were easily concealed by the flowers and branches. If you are using a lot of flowers or a heavy variety, add small command hooks to your arch to make sure that it doesn’t fall down before or during the event!
Step 6: Concentrate Flowers
Once the shape of the arch was filled with the greenery and nearly complete, I added my white flowers. I chose to heavily concentrate my flowers in one corner and then just place a few scattered throughout the rest of the arch because I like that look better than flowers covering the entire arch in a uniform pattern. Find a point on the arch and fill it in with your flowers or if you like them throughout, make that adjustment.
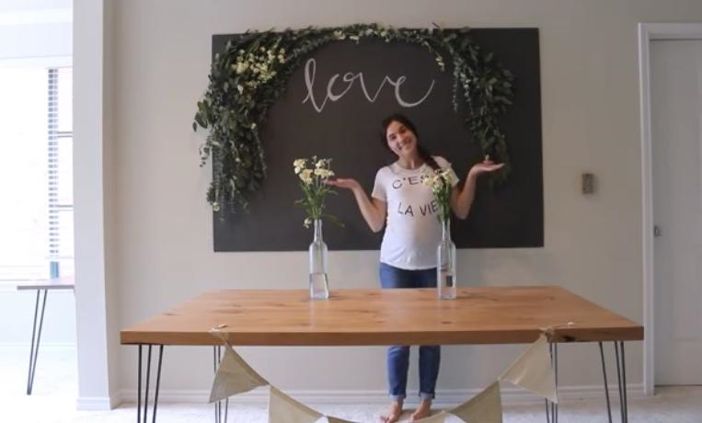
Step 7: Finish Arch
Because my arch had a chalkboard center, I chose to write the word ‘Love’ across the board with white chalk. I thought it was a perfect touch and fitting for a bridal shower. If you create a backdrop on a blank wall, get creative with the decor in the center. You could hang an empty frame on the wall in the center of the arch, add a banner or vinyl decal with a phrase you love, dangle cut pieces of ribbons straight down from the top of it, or simply leave the wall empty and let your floral arch stand alone behind a food table.
I could not be more pleased with the way this inexpensive DIY floral arch backdrop turned out. Flowers are such a special way to add elegance to any event but usually add hundreds of dollars to the decorating budget and I love that I could create such a dramatic and beautiful accent wall using only a few packages of flowers from the grocery store. Because I chose long-lasting flowers and eucalyptus stems, my backdrop was part of my home decor long after the event. Rather than spend money buying decorations that all end up looking the same or ordering decor from a florist; use simple, elegant greenery and white flowers to create a chic, floral arch backdrop and wow guests to your event and home.
Have you used grocery store flowers to create a floral arch backdrop or other DIY deco r for events you hosted? Share your best tips for using store-bought flowers to achieve chic party style or get inspiration for how to create gorgeous DIY party decor instead of spending hundreds at the store at Hometalk!


Frequently asked questions
Have a question about this project?