


How to Hang Window Boxes on Vinyl, Wood, Stucco, and Brick

Window boxes are a charming way to decorate the outside of any home. And with so many great styles to choose from—like modern metal, rustic wood, and coconut coir baskets—you’re sure to find a style that perfectly suits your family’s tastes and your own.
Another great thing about window boxes is that you have plenty of options when it comes to filling them. Whether you only fill them once per year or change them out with the seasons, window boxes can easily take your home’s curb appeal to the next level all year long.
In this guide, we’ll show you just how easy it is to install window box planters on the exterior of your home. Plus, we’ll give you step-by-step instructions on how to mount window boxes on vinyl, wood, or stucco siding as well as on brick.
Disclaimer: Hometalk may receive a small affiliate commission from purchases made via Amazon links in this article but at no cost to you.
How to Select a Window Box Container
Before you hang flower window boxes on the exterior of your home, you first need to select a window box container design.
There are a few things you should also keep in mind when selecting a window box:
Size
Window boxes look nice when they’re the same length as the windows you hang them under or when they’re just slightly longer than the windows.
You also want to find window boxes that have the right depth so that your plants can grow the long roots they need to stay healthy. For that reason, we recommend a minimum depth of ten inches.
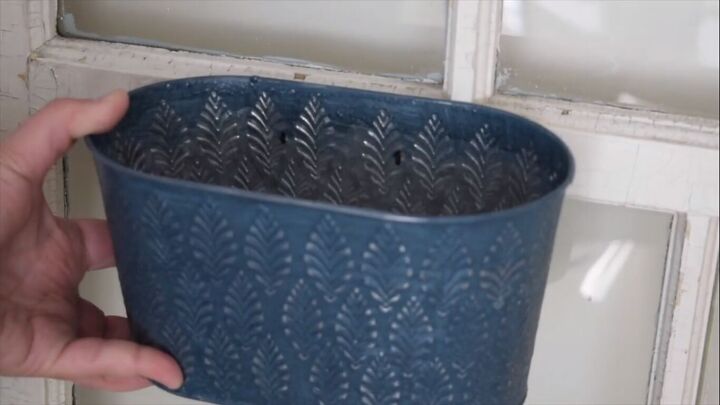
Material
Since you’ll be watering the plants inside of them regularly, it’s best to avoid window boxes made from untreated wood, which tend to start rotting out in as little as three to four years. Instead, opt for window boxes made from treated wood or composite materials like Trex, which can be made to look like wood or metal.
Style
Select a window box that complements the architectural style of your home so it looks like it belongs there.
Instead of thinking about matching your window box to your home’s exterior color (which might make it blend into the house), consider coordinating it with your home’s trim, shutters, or fence.
Watering Needs
Remember how you plan to water the plants in your window box regularly. Watering by hand or adding a drip line irrigation tube to your window boxes works well.
Whereas, the window boxes on the market that have a self-watering design are typically too shallow to grow healthy plants.
How to Hang Window Boxes on Brick
But how do you hang window boxes when your house is built with brick? It seems nearly impossible, but we promise it’s not.
Tools and Materials Needed:
- Measuring tape
- Pencil
- Mounting brackets
- Hammer drill
- ½-inch carbide-tipped masonry drill bit
- Plastic wall anchors
- Hammer
- Lag screws
- Box end wrench
- 2-foot level
- 4-foot level
Step 1: Mark the Location
Using a measuring tape and a pencil, mark the location where you will be mounting the window boxes. The window boxes should be centered below the window frame itself.
If you have double-hung or sliding windows, the drill holes should be about one inch under the windowsill. If you have windows that crank out, the drill holes should be between six and eight inches under the windowsill.
Step 2: Bore the Holes
Once you’ve marked the location of the two holes, use a hammer drill and ½-inch carbide-tipped masonry drill bit to bore holes into the brick.
You’ll be inserting the plastic wall anchors into these two holes next, so make sure that you bore holes slightly deeper than the length of the plastic wall anchors.
Step 3: Insert Plastic Wall Anchors
Then, use your hammer to tap one plastic wall anchor into each hole in the brick.
Step 4: Install the First Mounting Bracket
Next, hold one of the mounting brackets in place and attach it to the brick exterior by inserting a lag screw through the mounting bracket and into the hole and plastic wall anchor. Use a box-end wrench to tighten the lag screw until it's secure.
Step 5: Install the Second Mounting Bracket
Repeat Step 4 to attach the second mounting bracket to the brick exterior.
Step 6: Make Sure Mounting Brackets Are Level
Use the two-foot level to ensure each mounting bracket is level and adjust as needed.
Step 7: Hang the Window Box
Now you can hang the window box simply by clipping it onto the two mounting brackets.
Step 8: Make Sure the Window Box is Level
Use the four-foot level to make sure that the entire window box is now level. Make small adjustments if necessary.
Step 9: Fill the Window Box
Have fun filling the window box with potting soil, plants, and other decor.
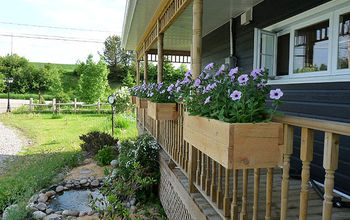
How to Hang Window Boxes on Vinyl, Wood, or Stucco
In this section, we’ll show you step-by-step instructions on how to hang window boxes on vinyl, wood, or stucco siding.
Tools and Materials Needed:
- Measuring tape
- Pencil
- Mounting brackets
- Power drill
- Drill bits
- 3-inch galvanized decking screws
- 2-foot level
- 4-foot level
- 2.5-inch galvanized decking screws
- Window box
Step 1: Mark the Location of the Brackets
Using a measuring tape and a pencil, mark the location where you will be attaching each of the mounting brackets. You’ll need to mark both the location where the top of the mounting brackets will rest and where the top screw holes will go.
Each mounting bracket should be directly in line with the window frame above it. If you have double-hung or sliding windows, the top of the mounting bracket should be one inch under the windowsill.
If you have windows that crank out, the top of the mounting bracket should be between six and eight inches under the windowsill.
Step 2: Drill a Pilot Hole
While holding the first mounting bracket into place, drill a pilot hole through the top screw hole if your mounting bracket has two screw holes or through the middle screw hole if your mounting bracket has three screw holes.
Step 3: Attach the Bracket
Then, attach the mounting bracket by using your power drill to screw a three-inch galvanized decking screw through the screw hole in the mounting bracket, into the pilot hole, through the siding, and into the sheathing behind it.
Step 4: Make Sure It’s Plumb
Use a two-foot level to make sure that the mounting bracket is perfectly plumb, or vertical. Adjust if needed.
Step 5: Drive Remaining Screws
Drill a pilot hole for the remaining screw or screws in the first mounting bracket. Then drive a three-inch galvanized decking screw into each remaining screw hole.
Step 6: Make Sure Both Brackets Are Level
Before attaching the second mounting bracket into place, you want to make sure that the two mounting brackets are level.
To do this, hold the second mounting bracket into place, rest a four-foot level across both of them, and verify that they are in fact level. If not, make small adjustments to the brackets until they are.
Step 7: Repeat Steps 2-5
Once the first mounting bracket is completely in place and you’ve verified that the two mounting brackets are level, repeat Steps 2-5 to attach the second mounting bracket.
Step 8: Set the Window Box Onto the Brackets
The next step is to set the empty window box onto the mounting brackets. If there's an angled side of the box, make sure that it faces away from the house. Make sure that the window box is centered by measuring the overhang of the mounting brackets.
Step 9: Attach the Window Box to the Mounting Brackets
To keep it securely in place, you will now attach the window box to the mounting brackets.
To do this, simply drill a 2.5-inch galvanized decking screw through each of the holding holes on your window box and into the bracket behind it.
No Holes?
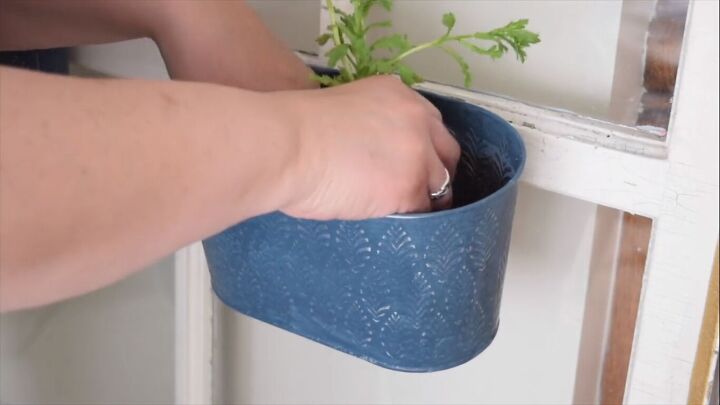
Step 10: Fill the Window Boxes
Now comes the fun part. Once your window box or boxes are firmly in place, fill them with potting soil and any plants you have chosen (we have some window box planting tips at the end of this guide).
How to Fill a Window Box
Attaching window boxes does take some work, but the real fun comes when it’s time to fill them.
The first thing you need to know is that your plants will be a lot healthier if you fill your window boxes with high-quality potting soil. Plain old topsoil is not your best option here. And be sure to fill each window box with potting soil to the brim so that your plants have plenty of nutrients and lots of space to grow those long, healthy roots.
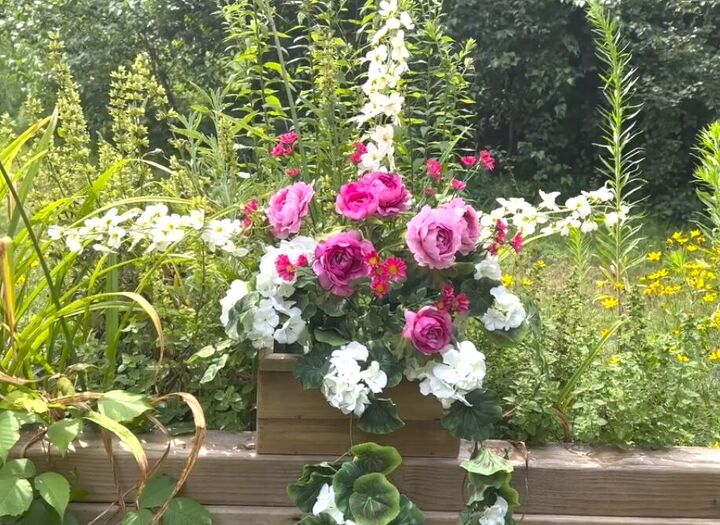
Once you have the potting soil in place, it’s time to come up with a plan for adding plants and other decor items.
You can certainly fill your window boxes only once per year, but many people enjoy changing their window boxes up with each season.

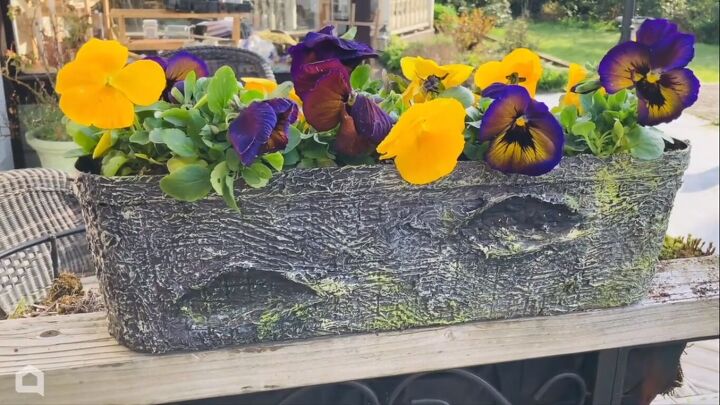
In the spring, fill your window boxes with bulbs like tulips and daffodils, a rustic watering can to celebrate the start of spring, and cute bird decor pieces. Or, fill your window boxes with Easter decor items.
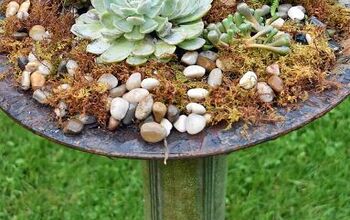
Summer window boxes can be all about heat-loving succulents and fresh herbs, or you can decorate them for the 4th of July with flags and wood letters.
For fall planters, boxwood shrubs, creeping myrtle, a black cat, and pumpkins look great and wear well as cooler weather approaches. Or try flowering kale, mums, and blue scaevola.
Lastly, winter is a great time to turn your window boxes into Christmas planters with cuttings from evergreen trees, pine cones, and other festive items.
How to Hang Window Boxes
Find some inspiration online and let your creativity flow. What are your best window box ideas? Let us know in the comments below!
Comments
Join the conversation
-
Thanks for the useful insights!
-
I totally agree; window boxes are like a little burst of nature's beauty right outside our windows. I recently installed a no drill window box on my vinyl siding, which was surprisingly easy. I opted for a charming rustic wood design, and now my home feels even cozier. Switching out the flowers with the seasons is a fun way to keep things fresh and vibrant. Thanks for sharing these helpful tips!


Frequently asked questions
Have a question about this project?