


Stock Tank Pool DIY Tutorial
Everything you need to know for a stock tank pool DIY project!Today I’m walking you through the install of our Stock Tank Pool DIY project! I’m sharing the products we used, the steps we took to DIY the entire project, and the cost of the project!
step 1: find a stock tank pool
Hometalk Recommends!
Originally, I tried to do this project last year after everything closed during the pandemic (including our country club pool.) Problem was, I could not find a stock tank pool anywhere! This year I made sure to locate one early! As I’m writing this (in the middle of June,) our local farm supply store still has 10 in stock! Maybe they learned from last year!
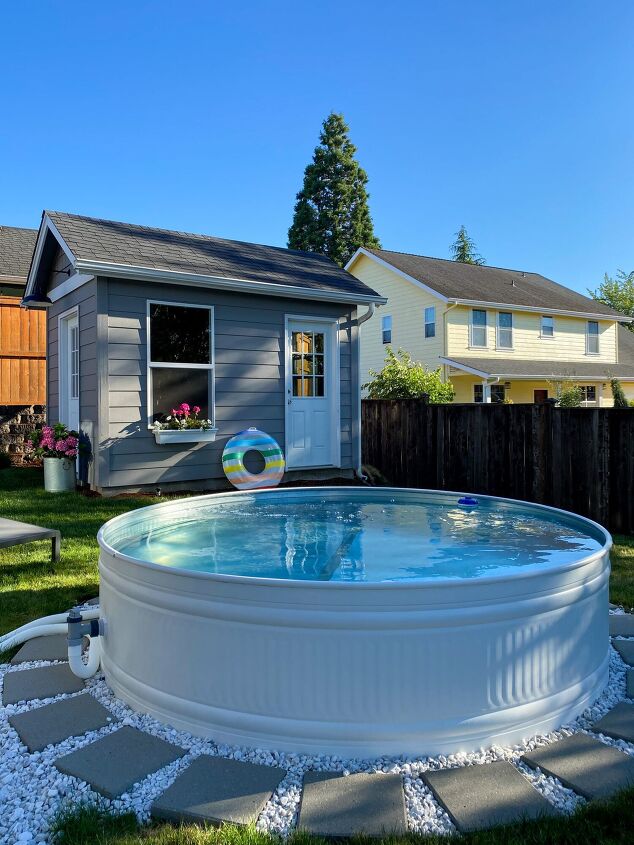
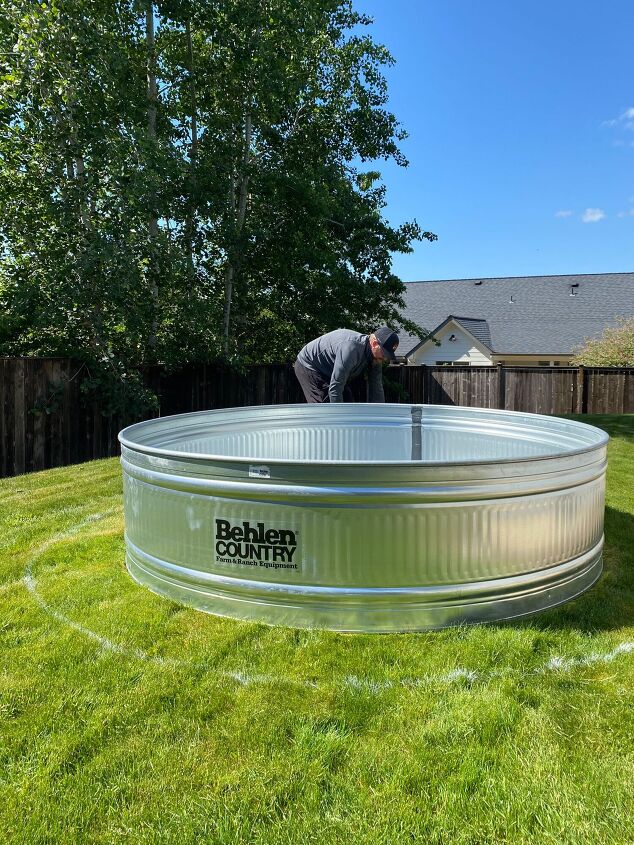
We bought the Behlen Country 8 foot stock tank pool from our local farm supply store, and had my father-in-law transport it to us in his truck. Once it was here, my husband and I easily lifted it off the truck and rolled it to our backyard. Step 1 done!
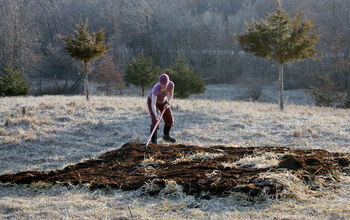
step 2: prepare the ground for the stock tank pool
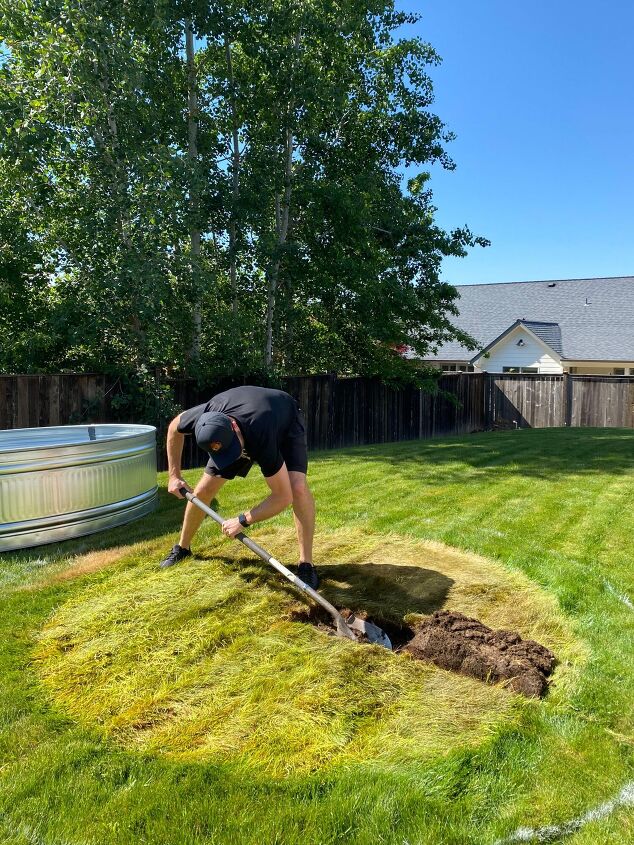
We placed our stock tank pool on our grass, so we had to prepare the area for it. If you are placing yours on a level concrete slab, you obviously won’t need to do the steps related to leveling out the ground. This was by far the most labor-intensive and time consuming part.
My husband started by removing the grass. As you can see from the photos above, he marked out the area with spray paint, taking into consideration the pavers we were planning to place around the pool. He then removed all of the grass. This took him a couple of hours.
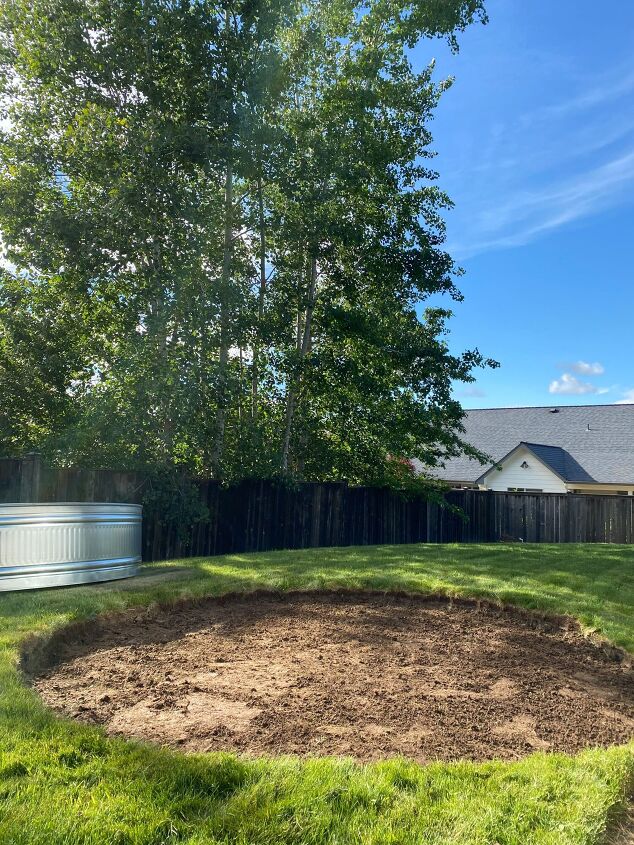
step 3: start to level the ground
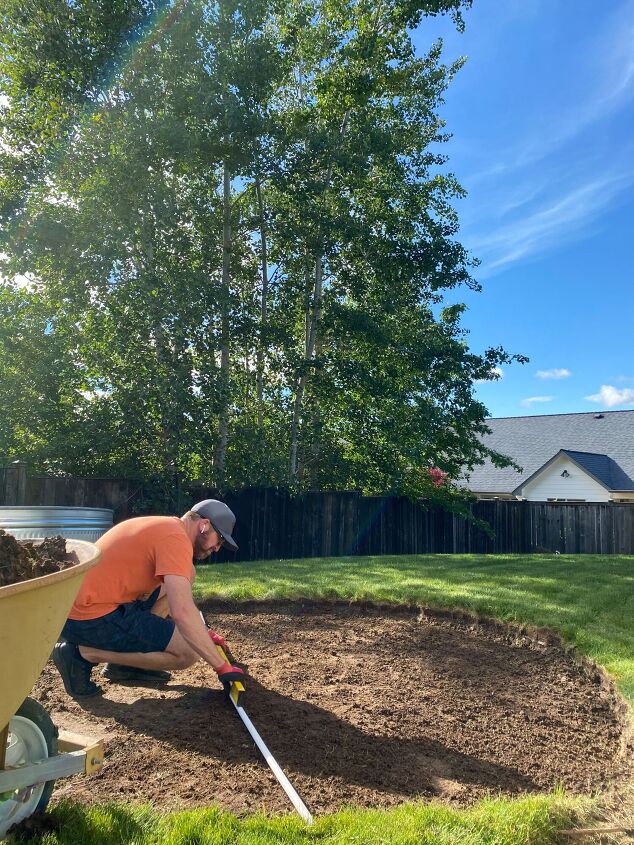
At this point we thought it would be smart to level the dirt area in preparation for the sand. It will get leveled more later, but my husband wanted to start with the dirt fairly level. So, he used a PVC pipe and level to do so, shown above.
step 4: bring in sand for the base of the stock tank pool
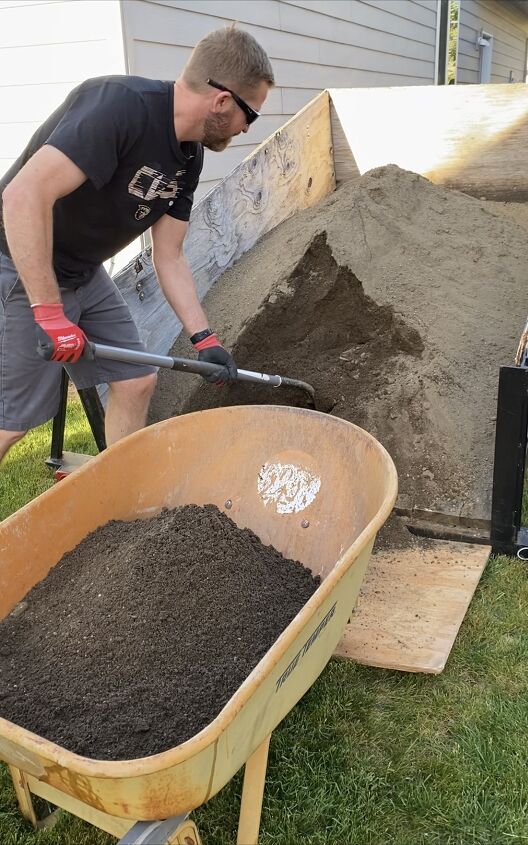
My husband took the trailer to our local garden center and picked up a yard of construction sand. This we used to ensure the ground was entirely level. As you can see from the photo above, a yard of sand is a lot. Initially we thought we had WAY too much; however, by the time we completed the project, we only had a couple of buckets left.
The photo above shows him leveling the sand the same way he did the dirt earlier in the process.
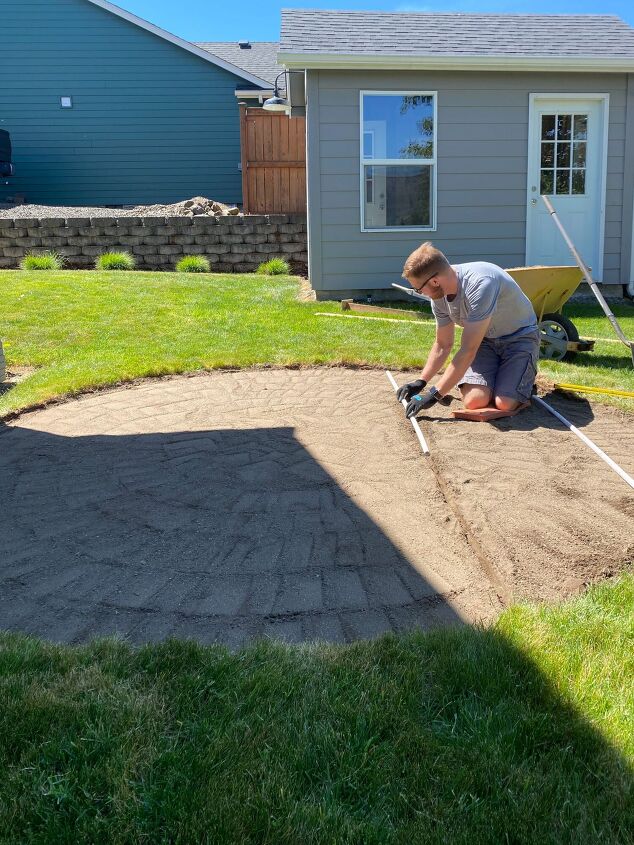
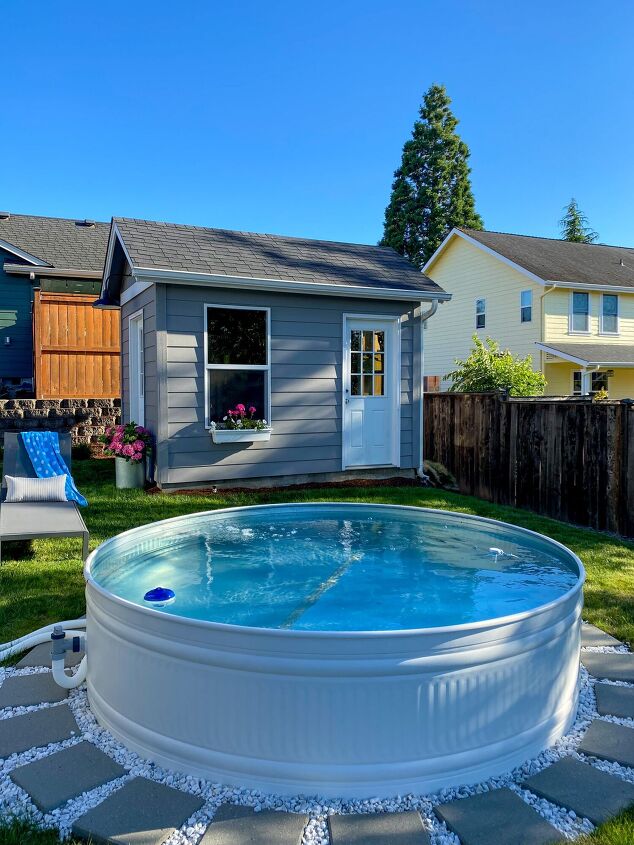
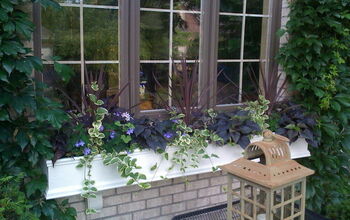
step 5: time for pavers (and paint)
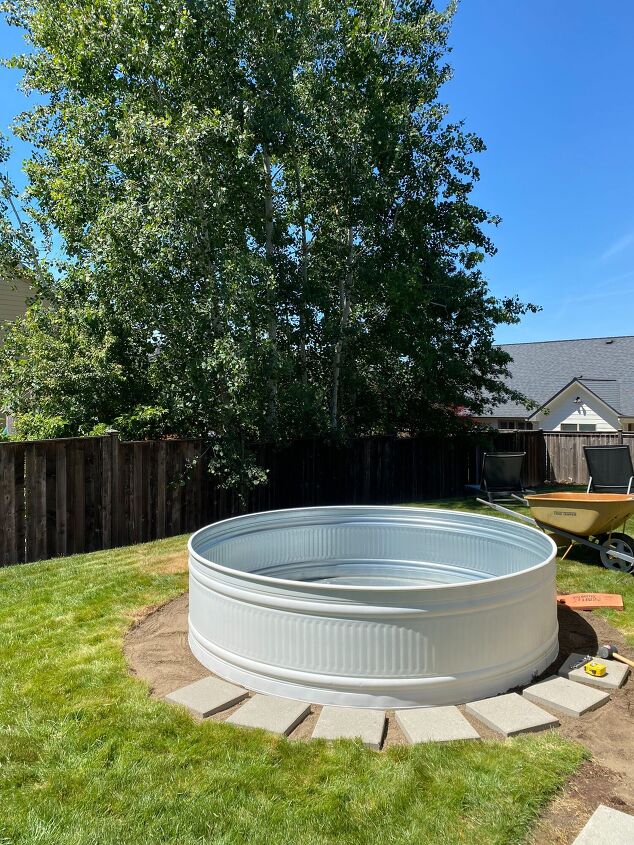
If you are going to paint your stock tank pool, now is the time. I used Benjamin Moore Simply White Exterior Paint in their low lustre finish. For me it took 3 coats. This paint dries really quickly, and I did it on a warm day, so I was done in probably 2 hours.
After I did the first 2 coats, we moved the stock tank pool to its final spot, so my husband could start the pavers. I did the 3rd coat in-place.
We used these 12″ Pavers from Home Depot. As far as laying the them, he placed sand under each one, and spaced them out evenly, measuring each paver (the distance from the pool, as well as the paver next to it.) He used a small level to ensure they were each placed on level ground, as well as level to the one next to it, using more or less sand as he went. He used a mallet to set them in place. Tip- he broke the first paver by hitting it too hard with the mallet. So, easy does it!
(I have a highlight on my Instagram Page, which you may find helpful for this part.)
step 6: rock between pavers
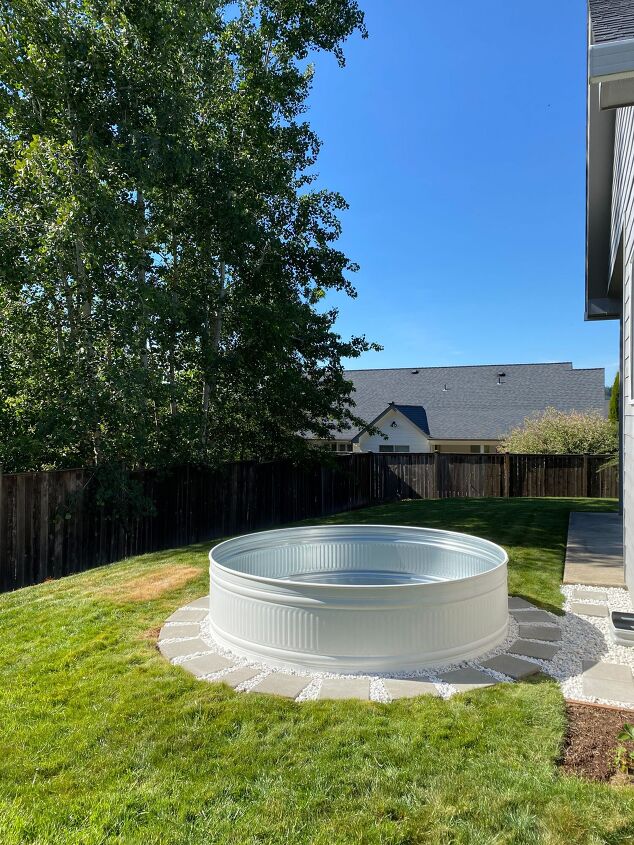
We used Bagged Marble Chips surrounding the pavers. We ended up using around 8 bags. I love the white of the rocks against the gray pavers & white pool!
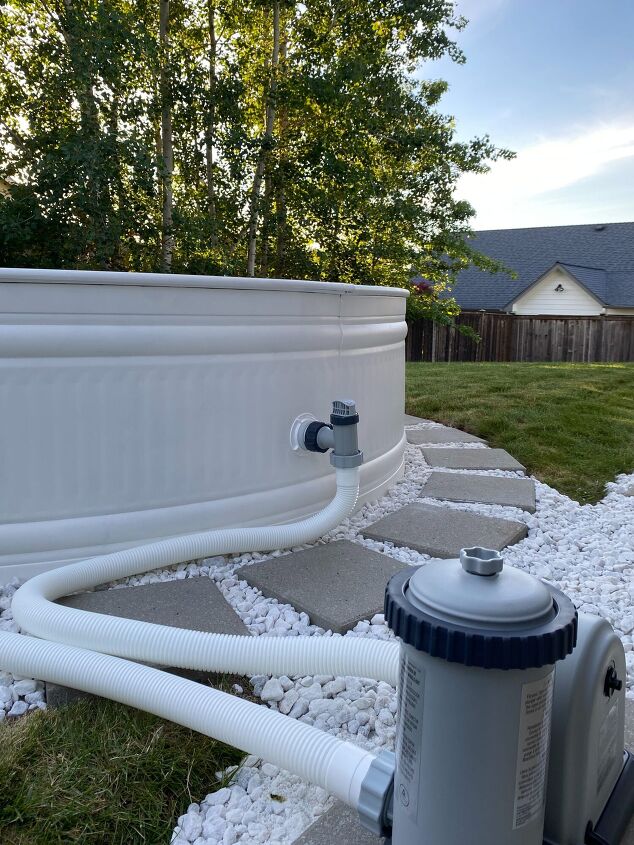
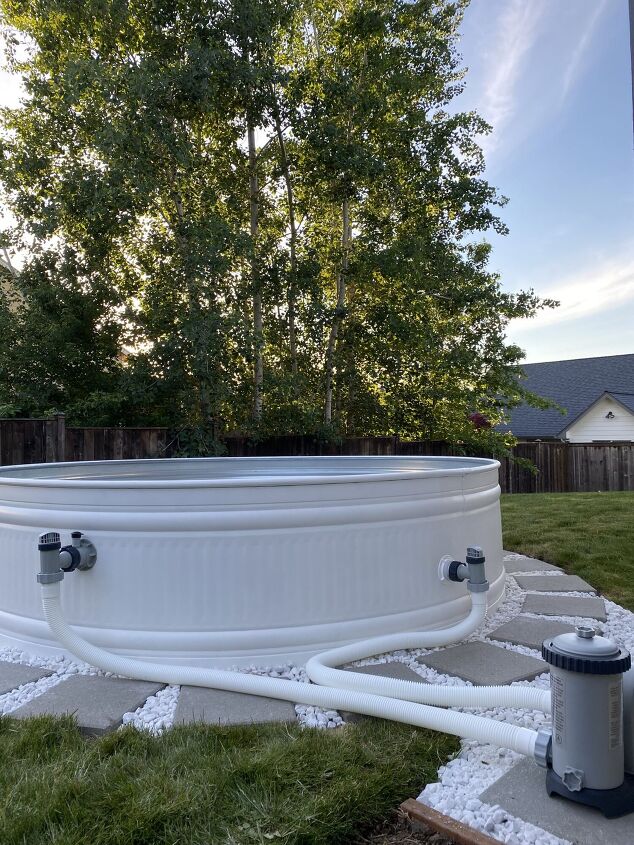
step 7: installing the pump on the stock tank pool
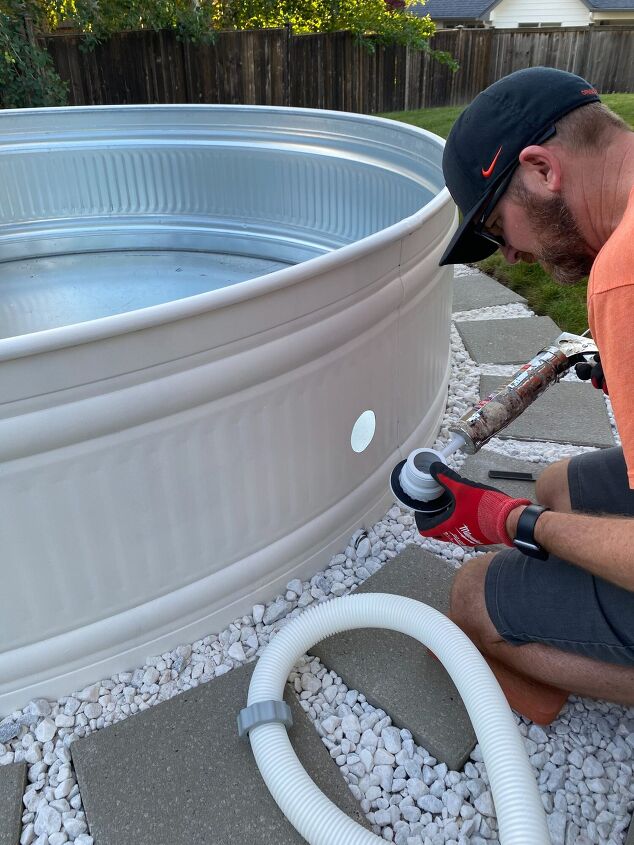
We are treating this pool just like a regular pool, so we wanted to install a pool pump to keep the stock tank pool clean. We used this Above Ground Pool Pump.
Along with the pump, you will need these Above Ground Plunger Valves, and this Threaded Inlet Strainer Kit For Stock Tank Pools. Note- if you are buying a different pump than what we used, you will need to double check on the plunger valves & inlet strainer kit to ensure compatibility.
Following the pump instructions you will drill holes in the pool for the plunger valves. In the photo above, my husband has drilled the holes, and is using this silicone around the plunger valve & inlet strainer kit. Note- the strainer kit goes on the inside of the pool to keep large debris from going into the pump.
At this point we let the silicone dry overnight.
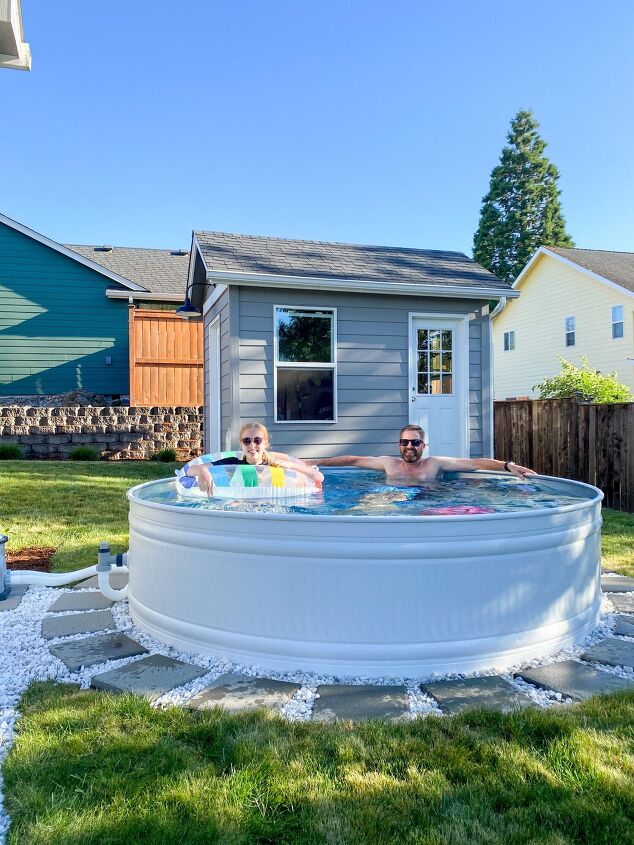
Ready to fill up the pool!
When researching this project, I read several blogs that said to check for leaks before filling up, and several that said just go for it. We just went for it. No leaks!
step 8: enjoy your new stock tank pool
maintaining your stock tank pool
Like I mentioned above, we are treating our stock tank pool like a real pool, chlorine and all. We are using 1″ Clorox Chlorinating Tablets inside a floating chlorine dispenser. We check the chemical levels with test strips.
We ordered a solar cover, and have been really happy with it so far. We went through about a week of wind and rain after we set up the pool, and this cover handled it all like a pro!
Lastly, let’s talk cost:
8 foot stock tank pool $300
pump & replacement filters $215
threaded inlet strainer kit $50
plunger valves $50
solar cover $45
pool net, chemical dispenser, chlorine tablets & test strips $65
pavers, sand, rock & paint- $175
Our backyard stock tank pool total cost- $900, which is a lot more affordable than the $100k+ pool quotes we were getting! (Note-this was for a 10×15′ pool-even fiberglass! Pool installation is outrageous in our area right not.) Eventually I would love to do a larger, in-ground pool, but the cost is going to have to come down substantially! For now, we will enjoy our new, smaller pool!
When I was researching this DIY stock tank pool, I read Arrows & Bows Tutorial, as well as Hey Wanderers YouTube Video. Both you will find helpful!
Tools: We used a wheelbarrow, shovel, level, rubber mallet, and a hole saw attached to a drill.


Comments
Join the conversation
-
Love it!!
-
We have a 36' above ground pool with steel walls and liner; did the same set up with grass removal and sand. A lot of work with rain, heat, trees, bugs. Liked it except got too cold for us when we got older even with solar covers. Had saltwater cleaning and auto robot and still hard to maintain pH. Just giving it away this summer. Had to have a locked fence put up too for insurance purposes.


Frequently asked questions
Have a question about this project?
Does pools inc sell above ground liners and do they install them?
Do you use a liner?
Where did you get the cover?