


Head to Dollar Tree and Grab Some of These Bowls!
Get to your local dollar store and pick up some of these party bowls and you can make these fun lights to add some magic to your summer nights! Thanks for stopping by! See more of my creations at Celebrate & Decorate!

Off to Dollar Tree!
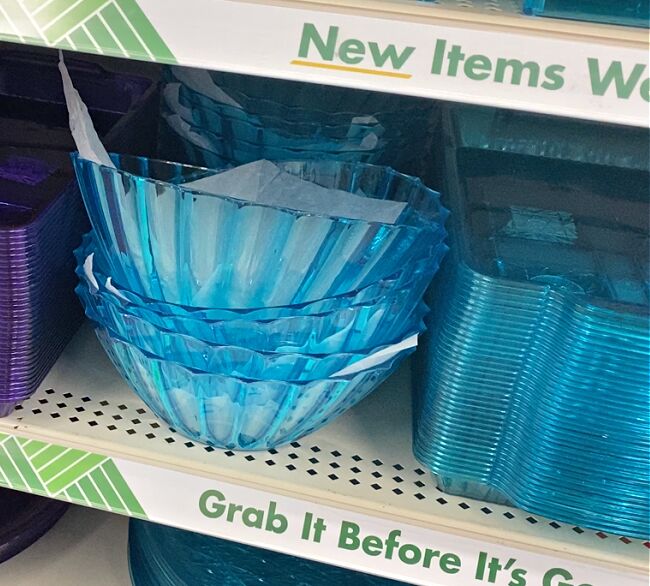
I was planning on making these summertime lights with the clear bowls like I did for Christmas and putting something colorful inside of them, perhaps some of the colorful leis from Dollar Tree. When I got to the aisle I was pleasantly surprised to discover these colorful bowls! I decided to go with blue! I picked up some of those big “crystal” clear punch bowls and some of the smaller blue bowl.
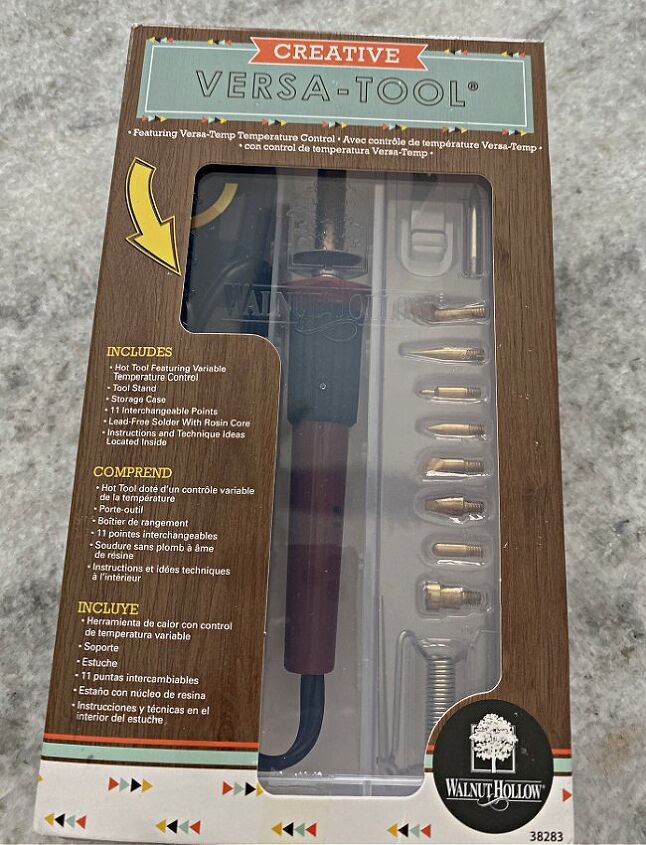
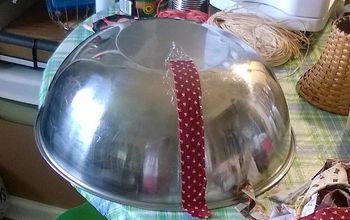
In the past I have used an old glue gun for this process, but I have upgraded to this heat tool and I highly recommend it. It is not expensive and works MUCH better, and I imagine it is also much safer!
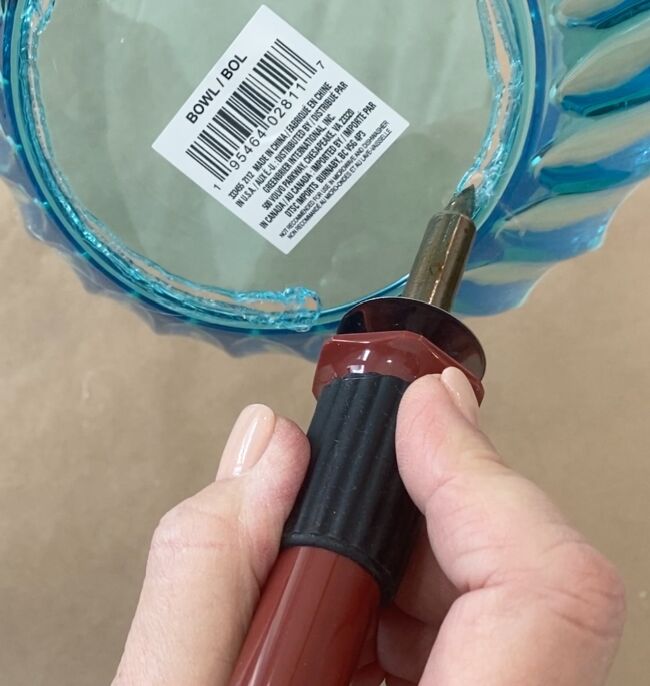
Use the heat tool at medium heat to melt around the edge of the bottom of the smaller blue bowl.
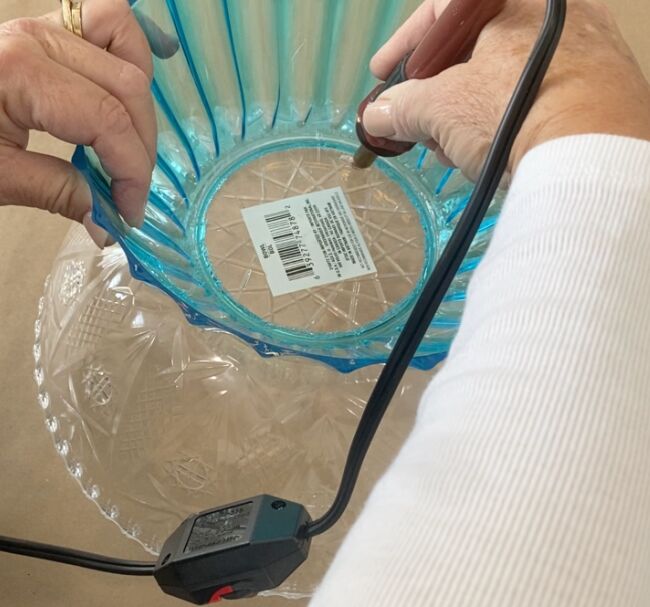
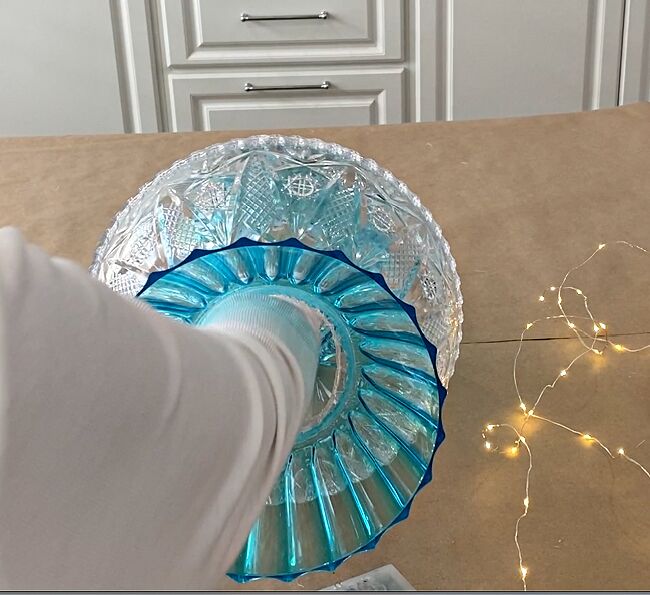
Make a hole in one of the large cut crystal bowls using the hole in the blue bowl as a guide for the size for the hole. The holes should be about the same size.
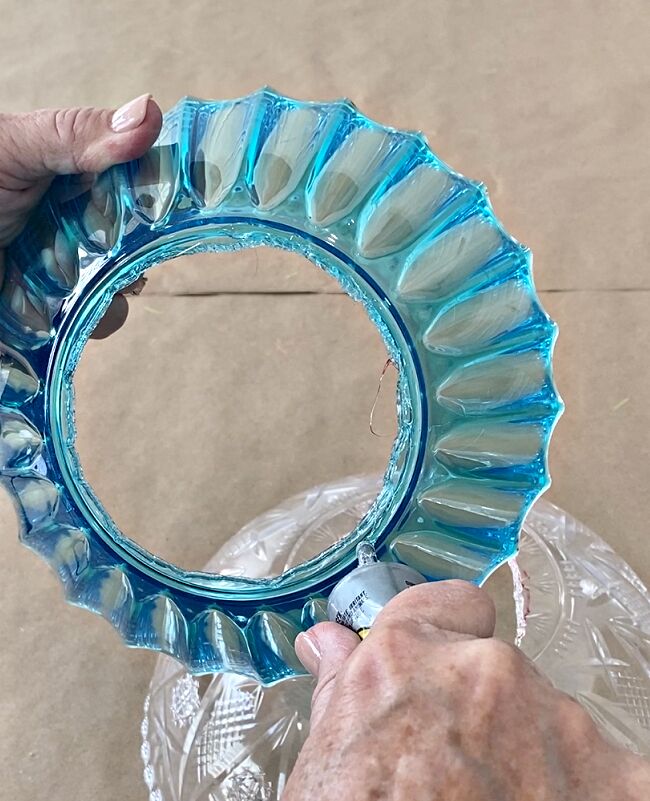
Apply your adhesive on the raised edge around the hole on the bottom of the blue bow. as shown above.
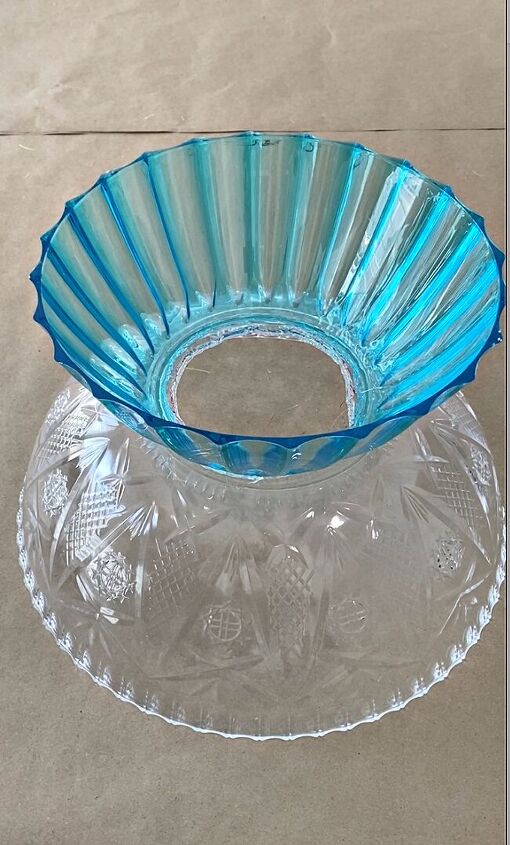
Put the blue bowl down on the clear one, lining it up carefully. You may hold the blue bowl down until the adhesive sets or sit something heavy like a book on top of the blue bowl to keep the pieces together as the adhesive sets up.
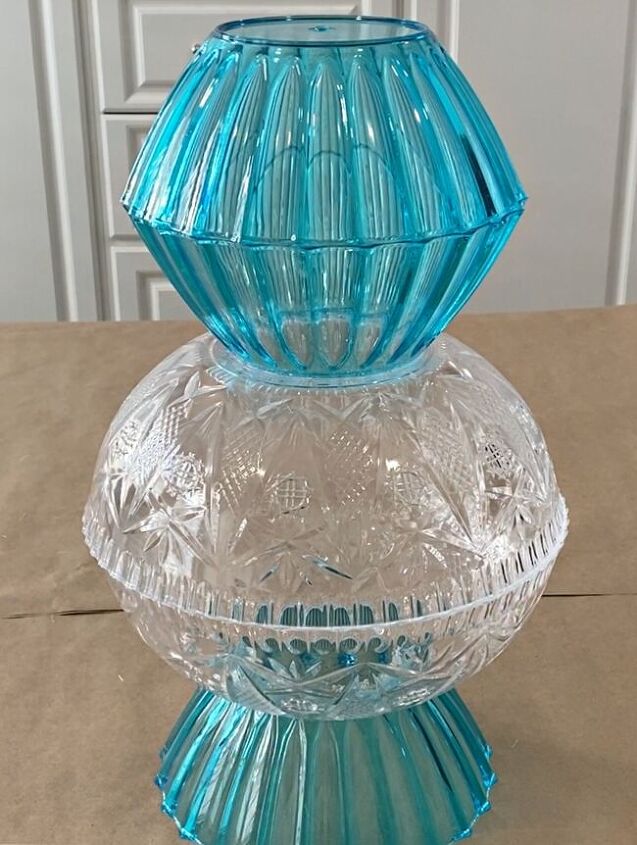
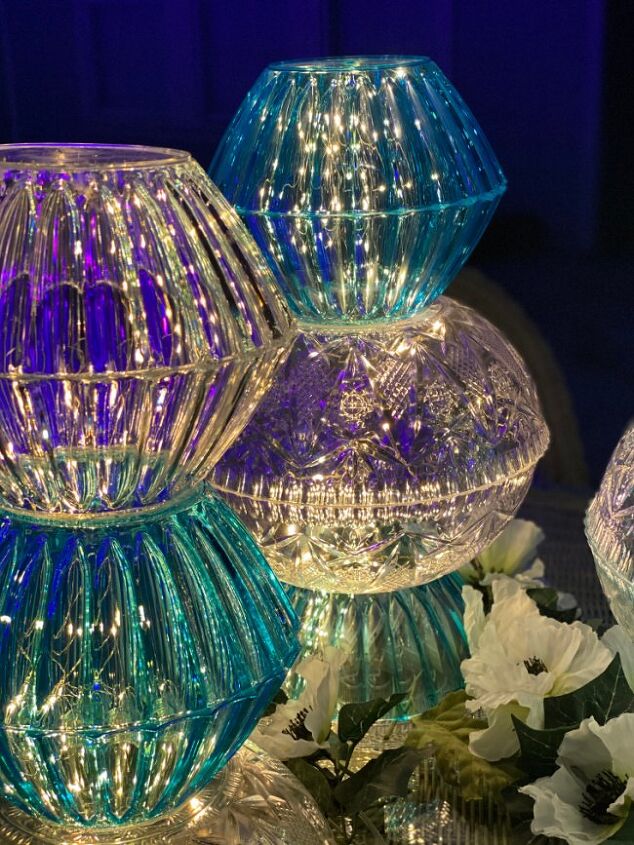
The first light to make will be this simple one, one blue bowl for the base, a pair of the clear crystal bowls and a pair of the blue bowls. You can use any combination of the bowls to make these.
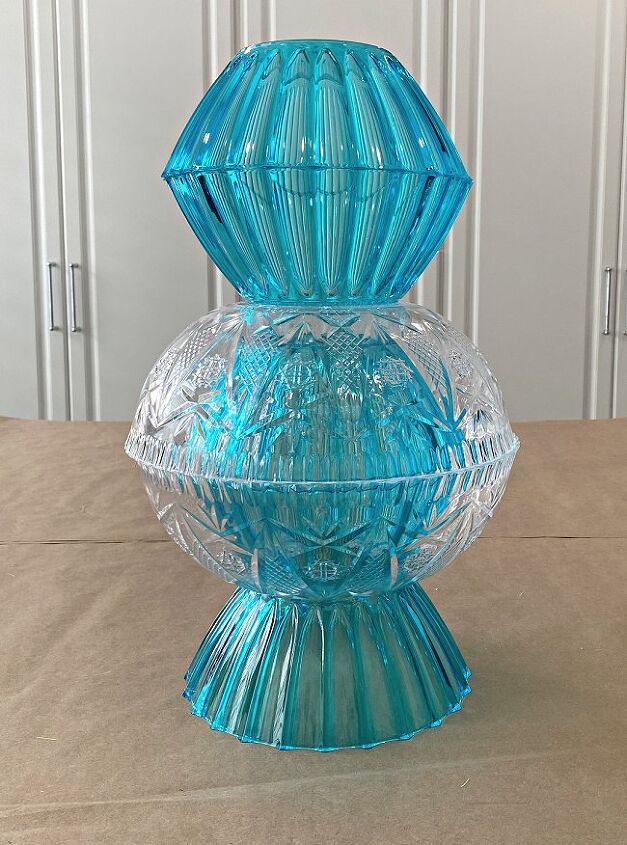
This turned out to be one of my favorites after the lights went into them! Inside the crystal bowls I put a pair of the blue bowls attached to one another. I used the adhesive to attach the pair of blue bowls to one another and then attached them to the bottom of the one crystal bowl before attaching the crystal bowls to one another.

These are the three different ones I made. These are so easy and kind of addictive, I could have just kept making them!
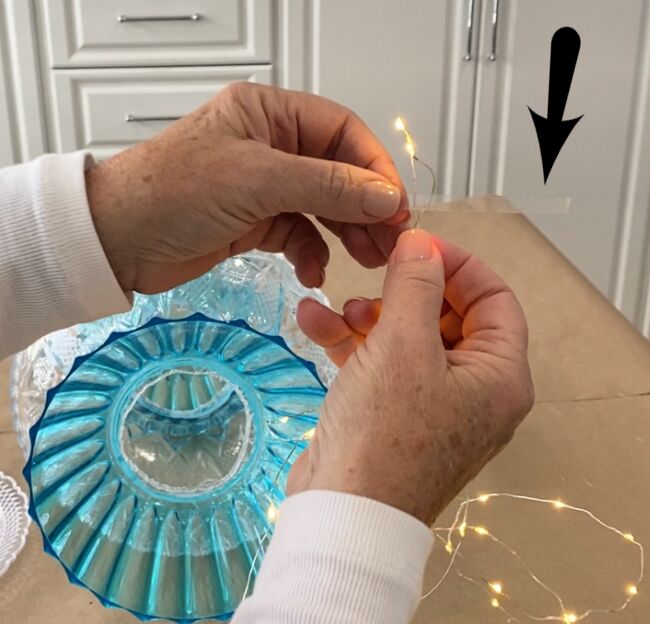
Take your fairy lights and take a piece of tape, (I used clear, waterproof floral tape) and tape the end of the lights.
This is why it is very important to make your tower of lights only tall enough that you can reach to the top AND that the holes are large enough that you can reach through. Reach up and tape the end of the lights to the top of the top bowl. Stuff the lights up into the bowls, so that they are distributed as evenly throughout the bowls.
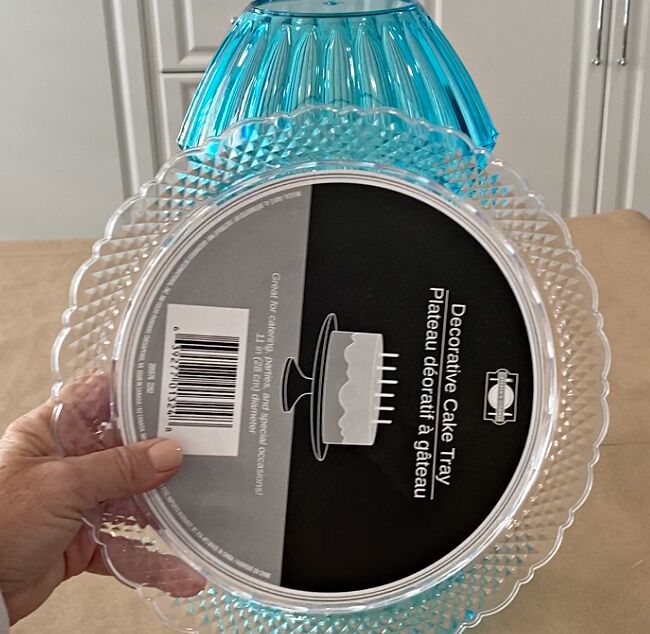
You can stand up your light. A Dollar Tree cake tray makes a good base for each of your lights. You can rest your fairy light battery packs on these instead of just on the tabletop.
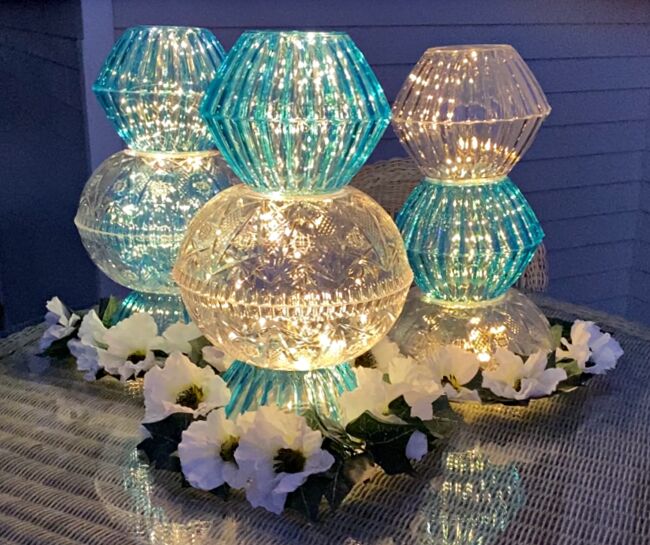
I tucked some silk flowers and ivy around the bottom of the lights for a pretty display. These would be perfect for an evening alfresco dinner.
These will add magic to whatever nighttime event you have planned this summer! Please stop by and see what other crafts I have created at Celebrate & Decorate!
Resources for this project:
See all materials


Comments
Join the conversation
-
these are so pretty 😍
-
If you just use all clear they make great additions to any season by just adding different color decorations to the outsides To keep mine from falling over, I pick up cheap big large plates from a thrift store as a base. Old microwave plates work the best because they are so large.


Frequently asked questions
Have a question about this project?
Very nicely done! The things you could use these for is simply unlimited. I am a little confused about using the heat gun? Is the purpose of this so that you can run the lights straight through?
I so want to try this! I am pretty new at crafting and don't know much about the tools and such. I get the gluing part, but getting the holes in the bowls lost me. I am sure it is very simple, but I haven't developed my crafting 'eyes' just yet. I think you used a heating gun to cut them? Is this right? Sorry, but I just need a little more guidance. I used to be really crafty, but many years of pushing creativity to the back burner has kinda stunted my artistic mind.... LoL does that make sense? Any extra guidance is greatly appreciated. These are beautiful! 🌈🕊️✌️😊💕😆
How do you turn the lights on? Do you have to lift the towers up?