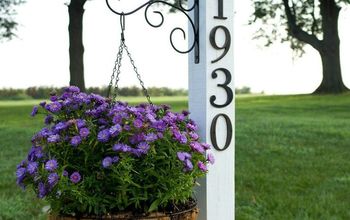
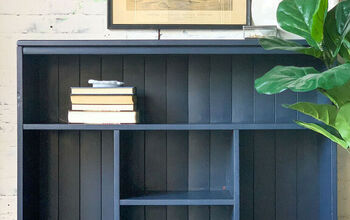
4 Great Chalk Paint Techniques for Carved Surfaces

Royal Design Studio
by Royal Design Studio
Want to learn some very easy and effective Chalk Paint® techniques for accenting carved surfaces? Painting with Chalk Paint® decorative paint by Annie Sloan is the easiest way to transform furniture and moldings with a few quick brushstrokes, as it allows you to get straight to the painting without sanding, stripping, or priming. If you have a furniture piece that includes carved accents, though, get ready to have some REAL fun with just a few extra, simple steps. Read on to find out how to take your painted furniture pieces to the next level.
Dry brushing or "tipping" with Chalk Paint:


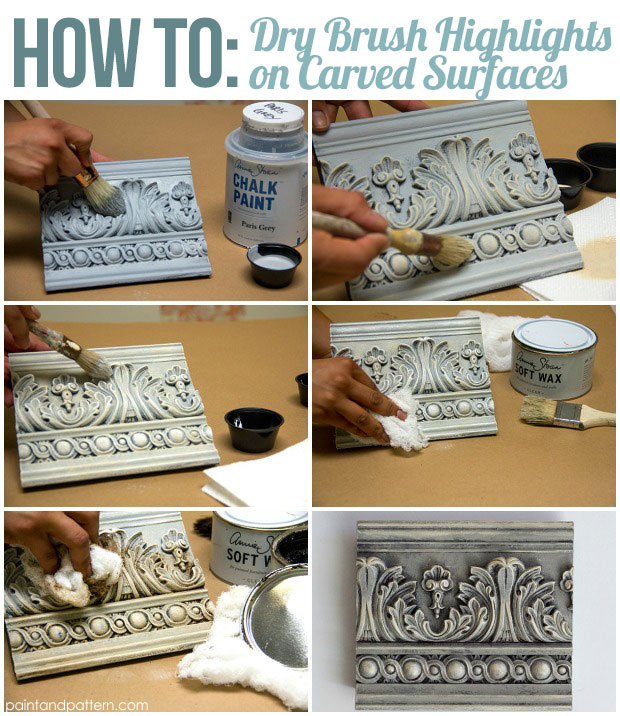
Use a dry brush to easily apply a contrasting color of paint focusing on just the raised areas of the carved molding. This is a great way to add to the illusion of depth, especially when you use a lighter color over a darker base coat. In our studio, we've found that the very best brush for both base coating and dry brushing is a Pointed Sash Brush. Featuring full natural bristles and a tapered tip, they are the perfect tool for painting in recessed areas


The piece above began with a solid base coat of Graphite Chalk Paint(R).


1. When dry, Paris Gray Chalk Paint(R) was applied with a Large Pointed Sash Brush. Rather than paint fully into the carved areas, though, we left the deepest recesses with the Graphite paint still exposed. This is a great way to add instant depth and antiquing when painting a lighter color over a darker color.


Then the dry brushing fun begins!


Pointed Sash Brushes, with their beveled edge also provide a great amount of control and easy use for dry brushing techniques. The basic dry brushing technique is a follows.


"Load just the tips of the brush with paint.


Offload excess paint onto paper towels or absorbent paper.


Hold the brush sideways and brush the beveled edge lightly over the surface. Magic!"


2. Use a Small Pointed Sash Brush to dry brush over the Paris Gray areas, this time with Old Ochre Chalk Paint(R). Use a VERY light pressure to brush over LESS of the raised areas. Think of "highlighting" the raised areas of the Paris Gray paint with this lighter color.


3. Finally, using a Small Pointed Sash Brush and lighter pressure, dry brush with Pure White Chalk Paint(R) on just the very uppermost raised areas of the molding to add a final highlight. Allow to dry thoroughly.


4. Apply a layer of Annie Sloan Clear Soft Wax, use cheesecloth to remove any excess wax.


5. Apply a layer of Annie Sloan Dark Soft Wax to add warmth and depth to the piece, focusing the wax in the recessed areas of the molding. Use cheesecloth to remove excess wax, particularly on the raised areas of the molding. You can use additional Clear Wax to remove the Dark Wax on the raised areas, if needed. Allow to dry and polish.
Light Sandpaper Distressing:


Apply a contrasting color of paint over another dry color of Chalk Paint(R). In this case Graphite was used over Emperor's Silk Chalk Paint(R). Allow the top coat to dry and wax with Annie Sloan Clear Soft Wax. The wax will both seal and temporarily soften the paint underneath. Use fine 400-grit sandpaper to lightly rub back through the top color of paint and reveal the underlying color. Focus mainly on the raised areas of the molding, where "wear" would naturally occur. Use a very light pressure so you do not sand also through your base coat color. Be sure to apply a little more wax over the sanded areas to reseal them, let dry and buff.
Gold Leaf Accents:


Add a rich, dramatic look to molding and carved furniture pieces with a quick, random application of Gold Leaf or other Metal Leaf from Royal Design Studio, including Silver or Copper.


Clear Royal Stencil Size is ideal for this as it's thick formula give you greater control. Brush Clear Stencil Size just onto the areas of the molding you would like the gold leaf to adhere to. The metal leaf will ONLY adhere where you have applied the size.


1. Basecoat with Aubusson Blue Chalk Paint(R). Allow to dry. Apply Clear Royal Stencil Size generously to random raised areas of the molding you would like to cover with gold leaf. Wait from 10 to 15 minutes for the size to get tacky.


2. Lay pieces of gold leaf over the areas painted with the size. Use a small soft brush to help works the metal leaf on and into the carved areas.


3. Burnish the burnish the gold leaf with a soft cloth to press it into the size and remove excess leaf.


4. Paint Duck Egg Blue Chalk Paint(R) over all. Immediately use a piece of cheesecloth and wipe back through the Duck Egg Blue to reveal the desired amount of Aubusson Blue color and gold leaf below.


5. Apply a layer of Annie Sloan Clear Wax to add shine and protection to the paint. Additionally add a layer of Dark Soft Wax if you want a more antiqued look. Use cheesecloth to remove any excess wax and polish the piece.
Dry brushing, highlighting or "tipping" with metallic Royal Stencil Cremes:


Royal Stencil Creme paint will add a shimmery highlight in gold, silver, pearl, or whatever color you choose over a painted carved surface. Use the same basic method shared above for dry brushing with paint. Here, the Royal Stencil Cremes will offer amazing coverage and flow, so be sure to offload your brush well each time you reload it. Royal Stencil Cremes will dry to a hard, durable finish in about 15 minutes-after which you can feel free to wax your surface.


Want more tips, tricks, and how to's for DIY stencil projects? Visit our blog at Paint + Pattern for more!
Frequently asked questions
Have a question about this project?
  1 question
  • Annalisa Minichiello Annalisa Minichiello on Jan 06, 2021

    Hi. I love your work! Thanks for sharing! Where I could purchase the silicone mould? So beautiful!

Comments
Join the conversation
2 of 7 comments
  • Eroque022810 Eroque022810 on Dec 01, 2017

    I love the gold leaf that's just amazing. But the last picture on crown molding is over the top. I'm seriously considering that for my bedroom but in super pale grey with a pearl finish. Yes you inspired me. I can do this and then have our carpenter cut to fit the room properly because that's something you have to leave for professionals since their is that strange cutting that they use and matching up a detailed molding is better left to him.

  • Georgia Georgia on Mar 27, 2019

    A great product I've used in the past instead of the dry brush technique is rub and buff. I purchased it at Michael's for around $4. It comes in metallics such as gold, pewter, ect. It's super simple to use. Put a small amount on your finger and simply rub it on the high points. The small tube was enough for me to do 2 projects. I did an old steamer trunk with floral embossed tin, and a large carved mirror for my bathroom. Both turned out beautifully, and so simple.

Next