


Four Fab Faux Finishes
5 Materials
$12
1 Hour
Easy
Faux finishes are a lot of fun to paint and can be simulated with just a few simple steps. This project features four unique looks, using 8" paper-mache letters purchased from Pat Catan’s. The letters H, O, M and E each have a different technique used.
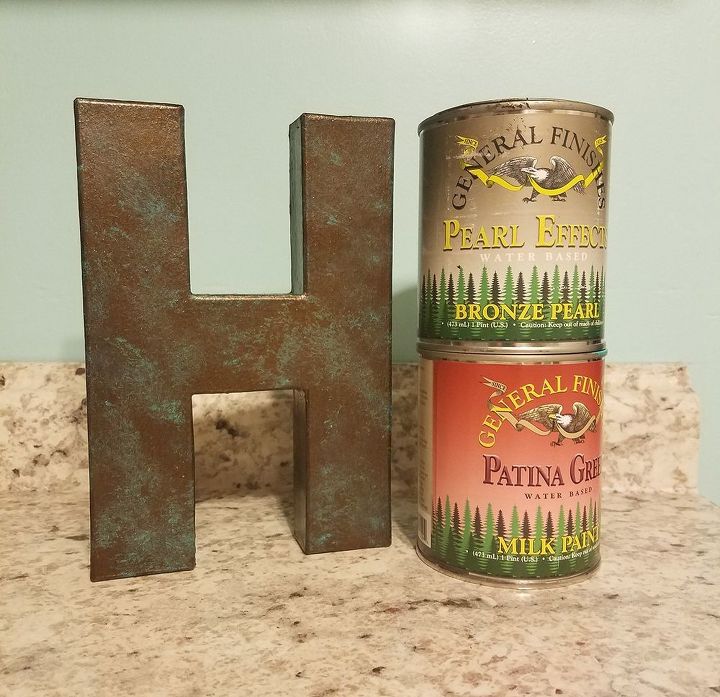
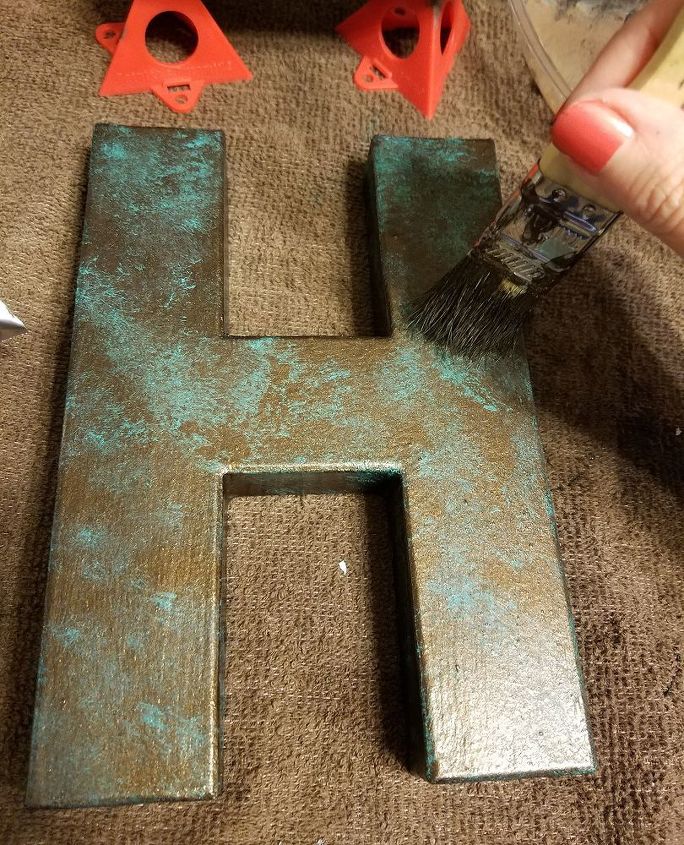
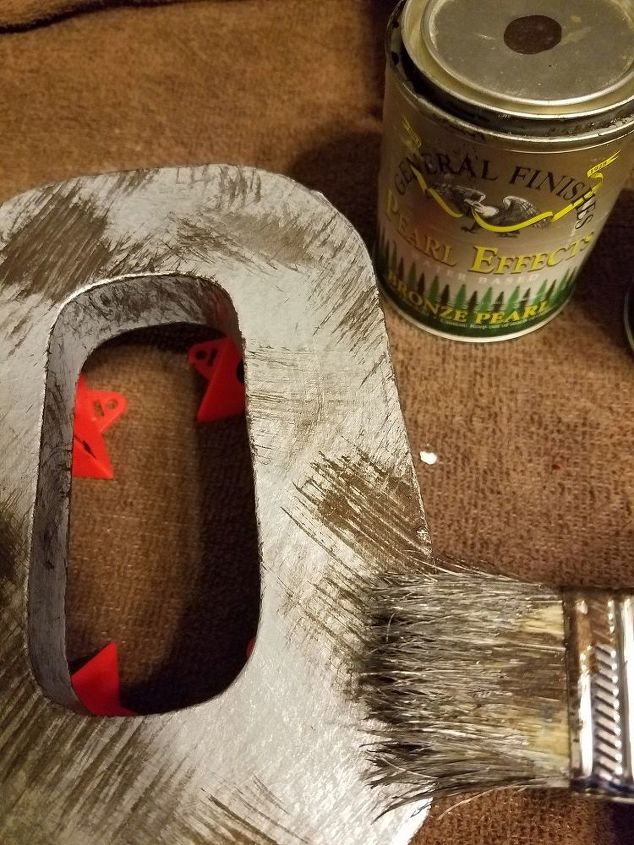
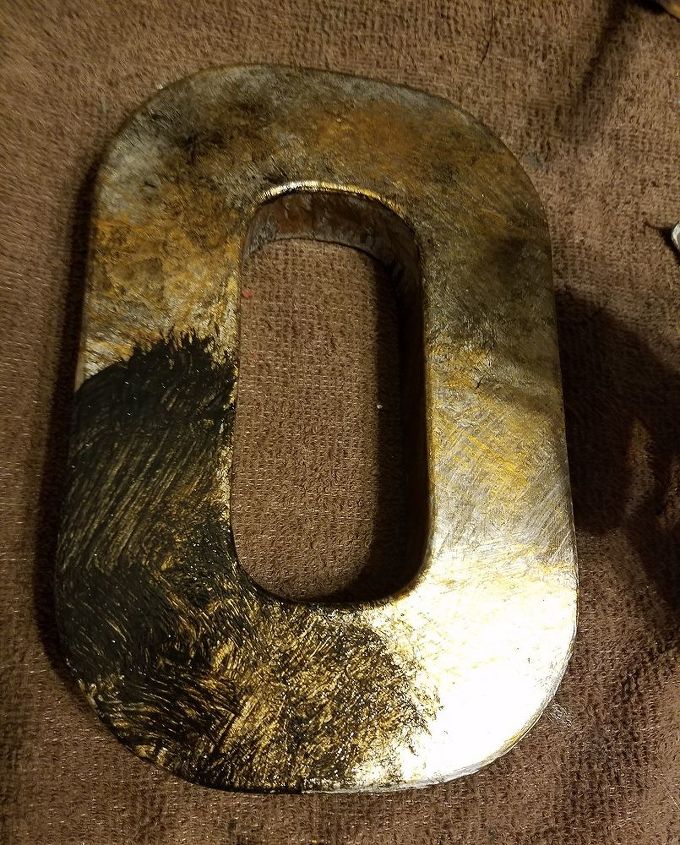
Oxidized Bronze faux finish
Faux Finish #1 – Oxidized Bronze
General Finishes Bronze Pearl Effects
General Finishes Patina Green Milk Paint or Black Dog Salvage Furniture Paint Mix “Retro Blue”
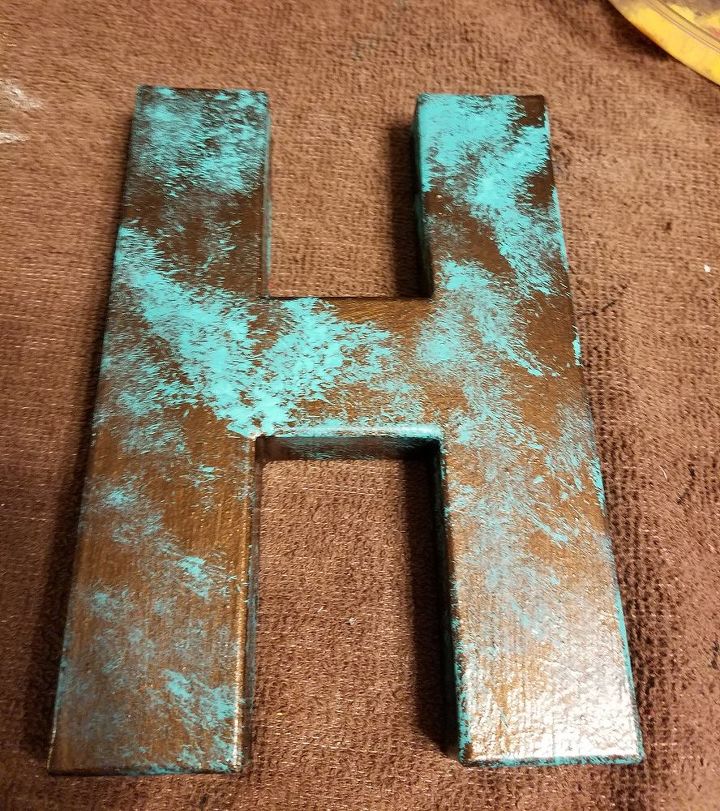
Dab on Patina Green over Bronze base
1. Apply 1-2 coats of Bronze Pearl Effects. Let dry between coats.
2. Using a chip brush, dab on random spots of Patina Green (or Retro Blue mix).
Layer more Bronze Pearl if needed
3. While still wet, go back over with more of the Bronze Pearl, layering if necessary, until you get a mottled look.
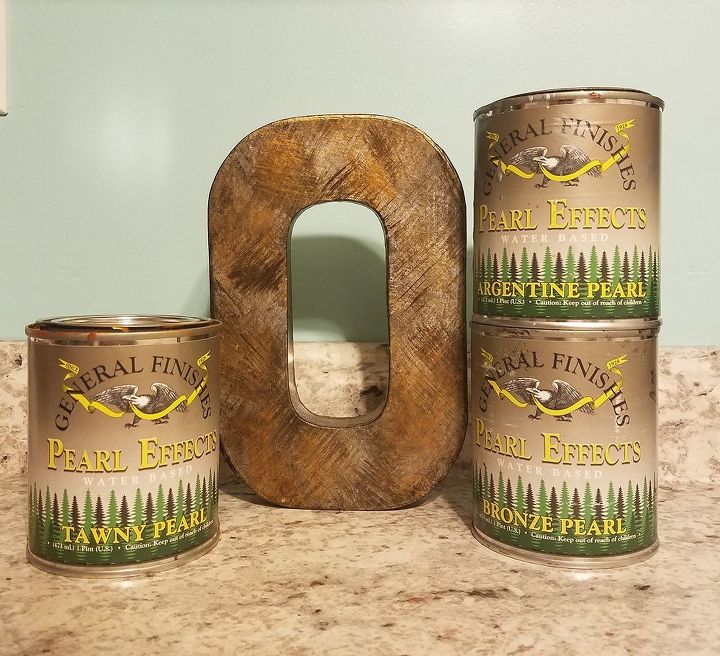
Aged Metallic faux finish
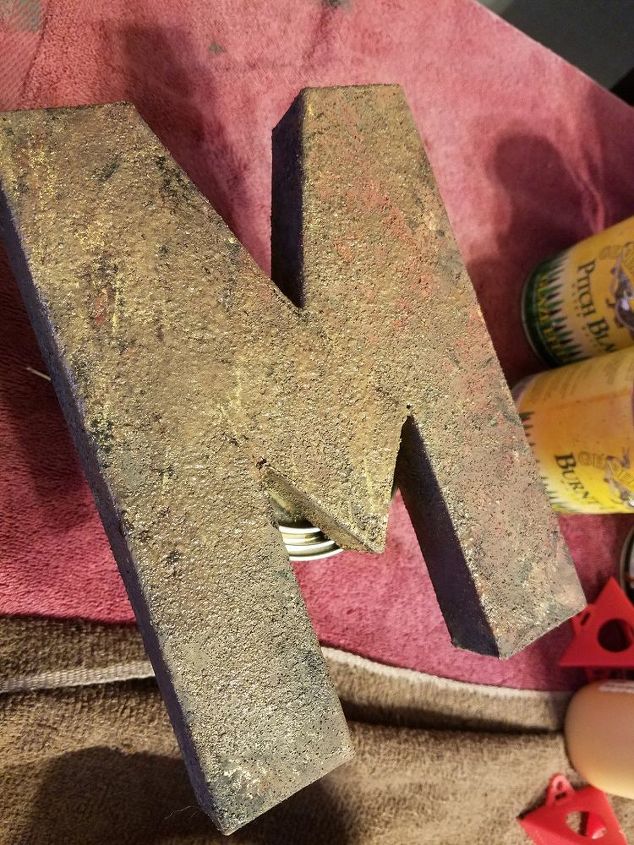
Faux Finish #2 – Aged Metallic
Colors Needed:
Gray base coat – Black Dog Salvage Furniture Paint Galvanized or 50/50 mix of General Finishes Milk Paint Queenstown Gray and Seagull Gray
General Finishes Pearl Effects – Argentine, Bronze and Tawny
General Finishes Pitch Black Glaze

Gray base, then Argentine Pearl
1. Paint 1-2 coats of gray base coat.
2. Paint Argentine Pearl thickly in a crisscross manner leaving strokes visible.
Add Bronze and Tawny Pearl Effects
3. Paint Bronze and Tawny Pearl randomly in a few spots in crisscross manner. Let dry.
Apply black glaze, blot off.
4. Apply Pitch Black Glaze. Blot off immediately with a crumpled paper towel.
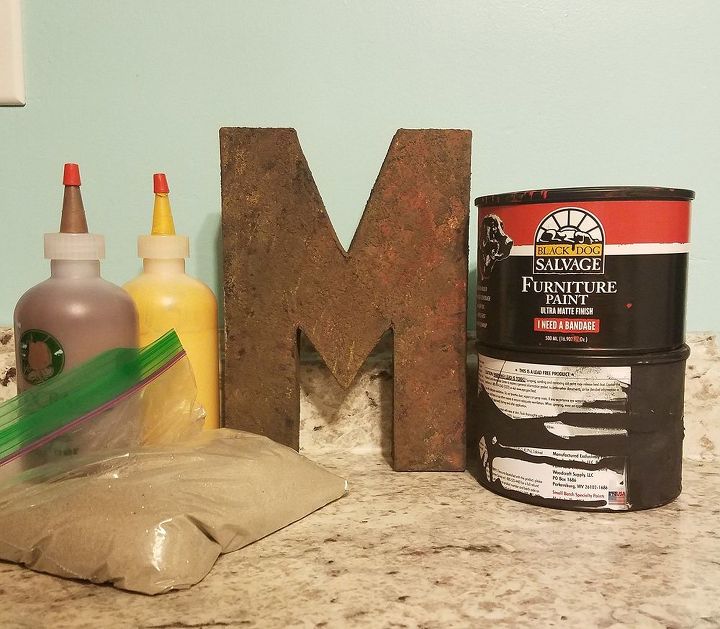
Rust Effect faux finish
Faux Finish #3 – Rust Effect
Colors Needed:
Black Dog Salvage Furniture Paint – Dirt, Caution Dogs at Work, I Need a Bandage and Black Dog
Also need Fine Sand
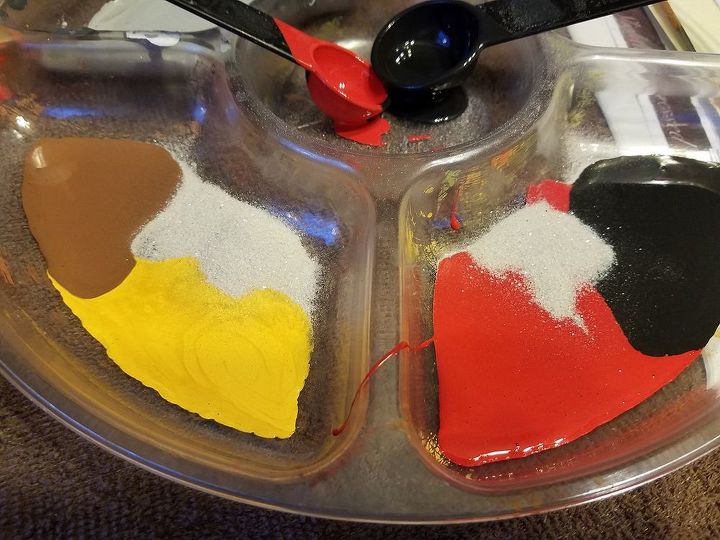
Create palette with sand
1. Create a palette of the 4 colors. Add sand.
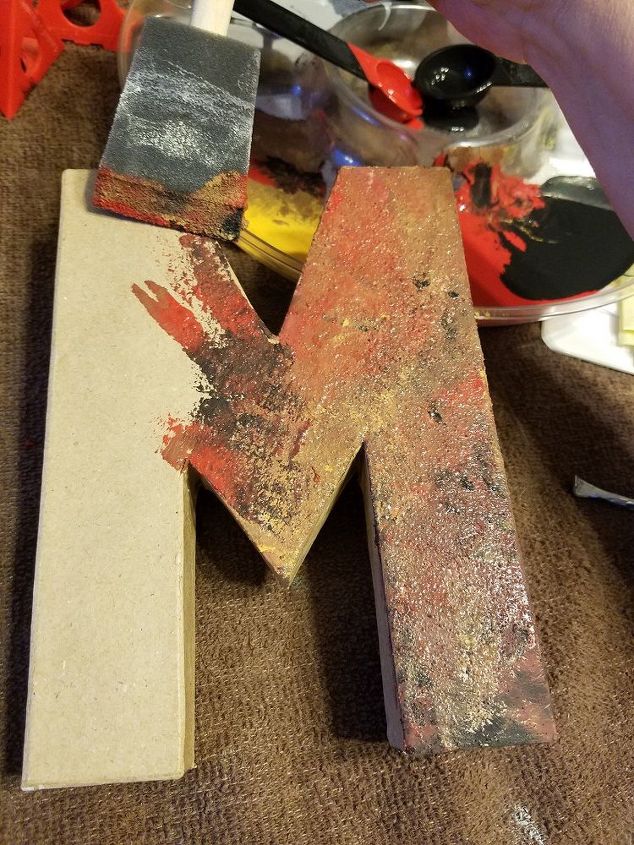
Layer colors in a stippling effect
2. Stipple on layers of colors with a chip brush, making sure to mix in sand for a rough base. Let dry.
Add more layering after dry, if needed
3. If needed, add more layering with less sand to variegate the colors.
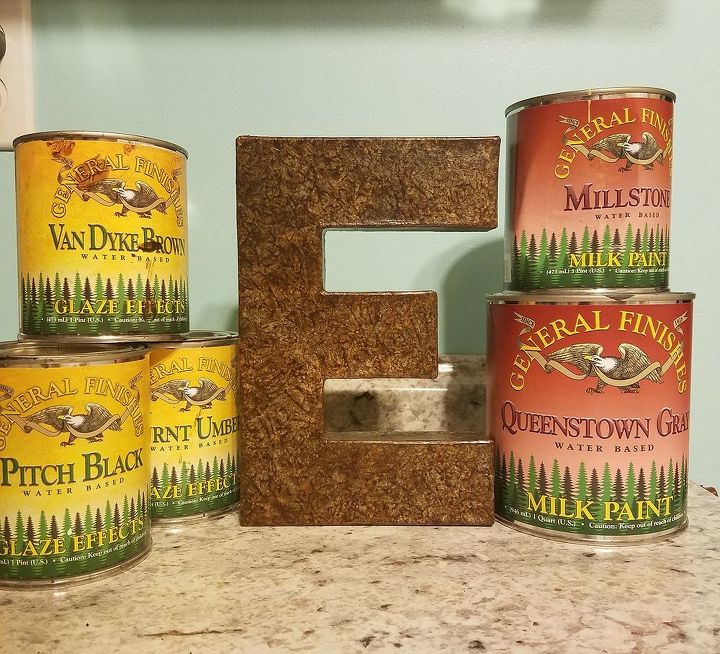
Cracked Leather faux finish
Faux Finish #4 - Cracked Leather
Colors Needed:
General Finishes Queenstown Gray Milk Paint or Black Dog Salvage Furniture Paint Mix – either “Coal Dust” or “Fog”
General Finishes Millstone Milk Paint or Black Dog Salvage Furniture Paint Dog Bone
General Finishes Van Dyke Brown Glaze
General Finishes Burnt Umber Glaze
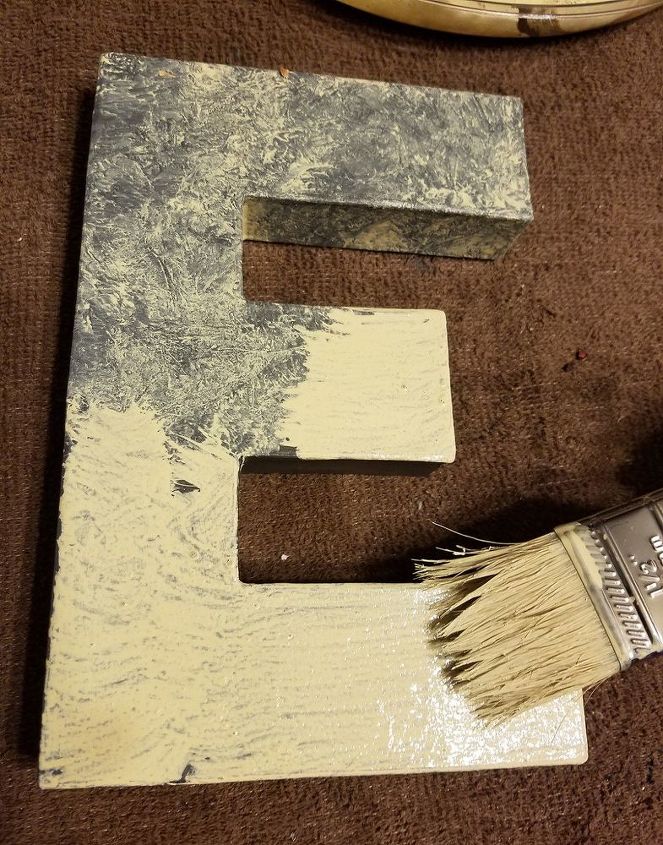
Apply wash over gray base, then blot off
1. Apply 1-2 coats of gray. Let dry.
2. Apply a 50/50 wash of water and Millstone or Dog Bone. Blot with crumpled newsprint or paper towel. Let dry.
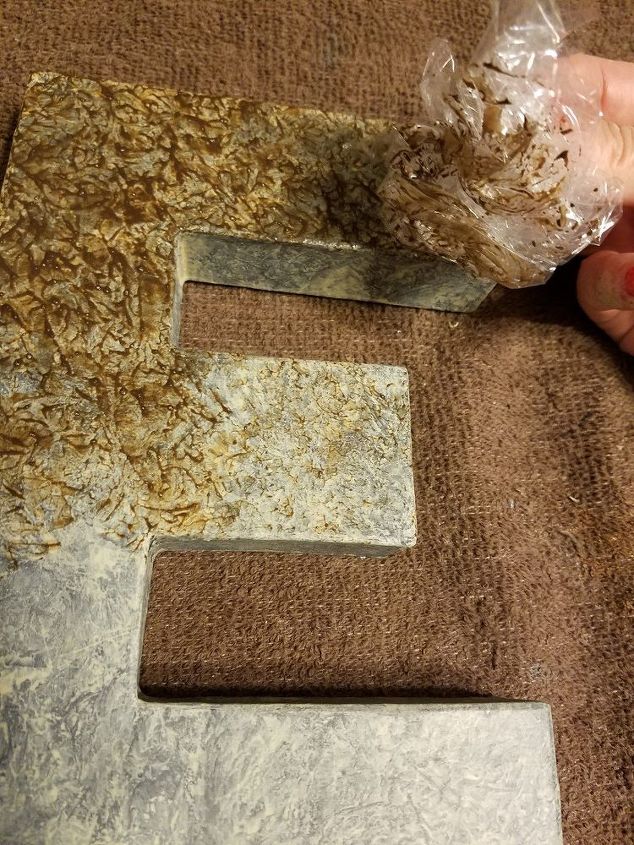
Brush on glaze then blot off with plastic
3. Brush on Van Dyke Brown glaze. Blot with crumpled plastic wrap. Let dry.
4. Brush on Burnt Umber glaze. Blot with crumpled plastic wrap. Alternate glazes and texture until cracked leather look is achieved.
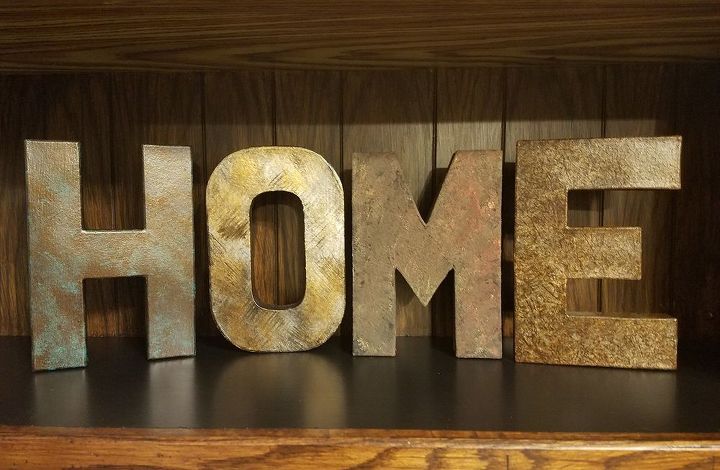
Four Fab Faux Finishes in one!
Which faux finish is your favorite?
My cost for this project was kept low because I used very little paint and it was all leftover from other projects. The main cost was the paper-mache letters. See blog link below for more photos.
Resources for this project:
See all materials


Any price and availability information displayed on [relevant Amazon Site(s), as applicable] at the time of purchase will apply to the purchase of this product.
Hometalk may collect a small share of sales from the links on this page.More info

Want more details about this and other DIY projects? Check out my blog post!


Frequently asked questions
Have a question about this project?