


This Technique is a Blessing When You Want a Unicorn !

1 Material
$25
8 Hours
Medium
Inspired by a gorgeous purple paint color that made it's way off the "oops" shelf in Home Depot right into my workshop; I decided to pair it with Unicorn SPiT to create a Unicorn Dresser !! ..... If my 4 year old niece sees this, I will be figuring out a way to ship it to New Jersey !!
We want to help you DIY, so some of the materials in this post are linked to sellers. Just so you know, Hometalk may collect a small share of sales from the links on this page.

When we saved this Basset dresser from the curb, it was sans hardware...not all wood, but if you're like me, good bones means it gets stuffed into the vehicle and has a chance at a new life ! This is the top drawer..and that middle piece had holes, but simply seemed awkward. Jim {best husband and prep guy in the biz} filled them in for me, and off I went ! I blended several colors of Unicorn SPiT on the drawer faces to create a rainbow effect. Usually I like blending with antibacterial wipes, but I did use my cling-on brush here, as the faces were particle board, the brush seemed to move better. when dry, I sealed the Unicorn SPiT with gloss polyurethane. SPiT is water based and needs to be sealed with an oil based sealer !
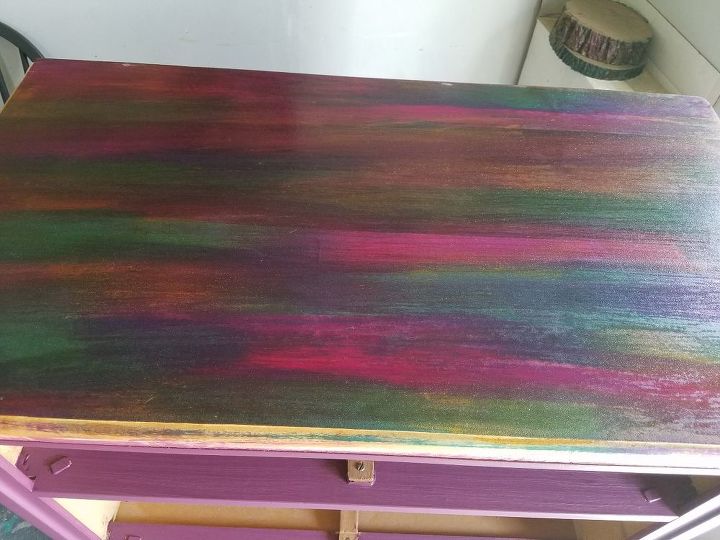
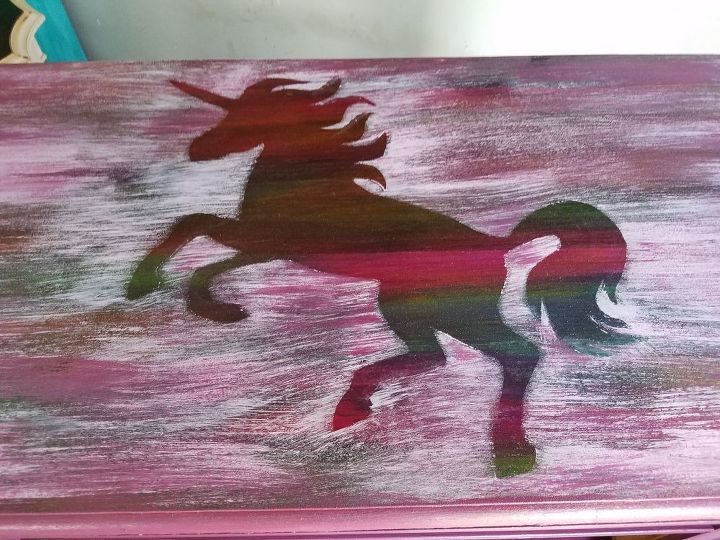
Oh, the top of the dresser was really bad !! , Maybe I should have inspected better while on the side of the road..haha. Again, Jim to the rescue ! He recycled a part of a tabletop we had in our "spare parts" to create a new all wood top ! ....Using the same SPiT colors, I emulated the look from the drawers on the top. I then sealed with a generous coat of gloss polyurethane.

Believe it or not !! , I do not own a Unicorn stencil ! How crazy is that considering !! ....so, I Googled a unicorn outline, saved it, and used blockposters.com to enlarge the image. annnnddd......PRINT ! {card stock is highly recommended as your printer paper for this technique...it doesn't absorb your paint as quickly as regular paper}
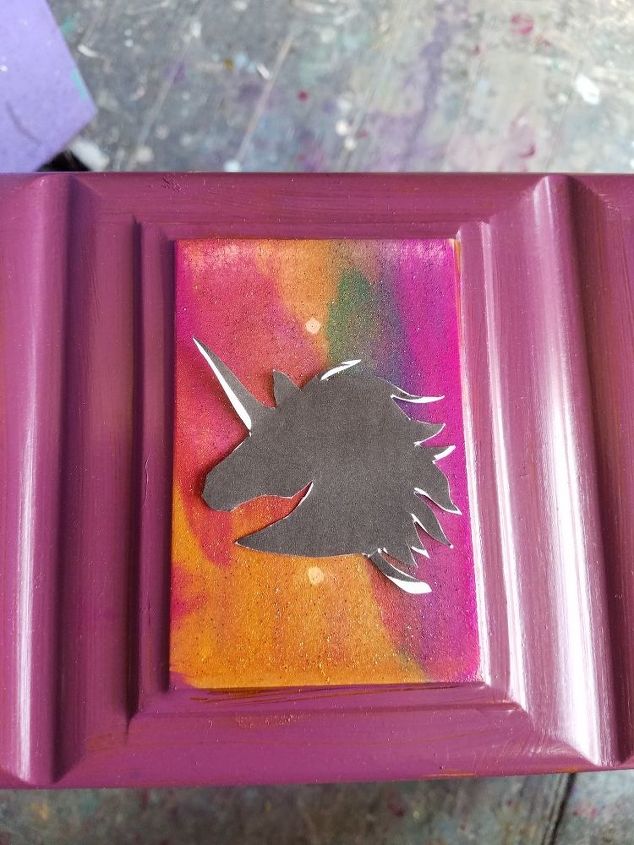
Oh, remember that little weird spot in the middle of the drawer ? Well, it's getting a unicorn too !! ...... this time, I shrunk the image to a wallet size print. Smaller images are much more difficult to cut out, a little patience goes a long way.

I mixed my crazy purple paint with a little plain old white to create a lighter contrasting, yet matching version. Using a good old dollar store paint brush, I held my card stock image in place, and carefully dry brushed over it; first with the lighter color, then ever so slightly with the actual purple .
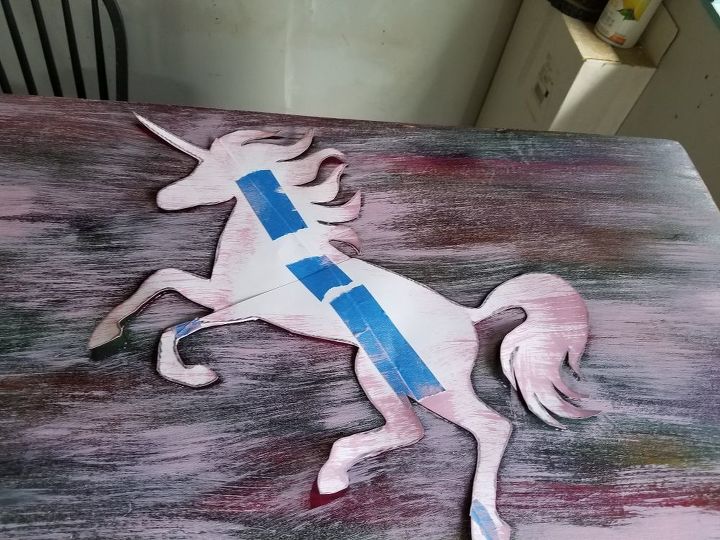
Now that my enlarged image is together and all cut out {again, patience ! }, I placed it on to the top {the poly was just a bit tacky ,which helps hold your image in place} and used the same dry brush technique, first lighter, then a little of our dark purple to blend.
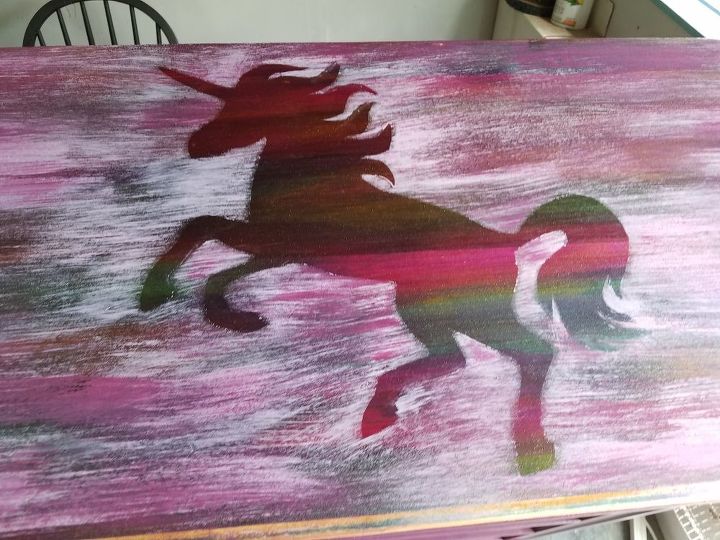
Remove your reverse stencil to reveal your rainbow unicorn image !!! ....Don't worry if a bit of paint bleeds under..... you can use a damp q-tip to clean your lines. The poly coat acts as a barrier so your paint doesn't adhere quickly; makes for easy clean up of your image !
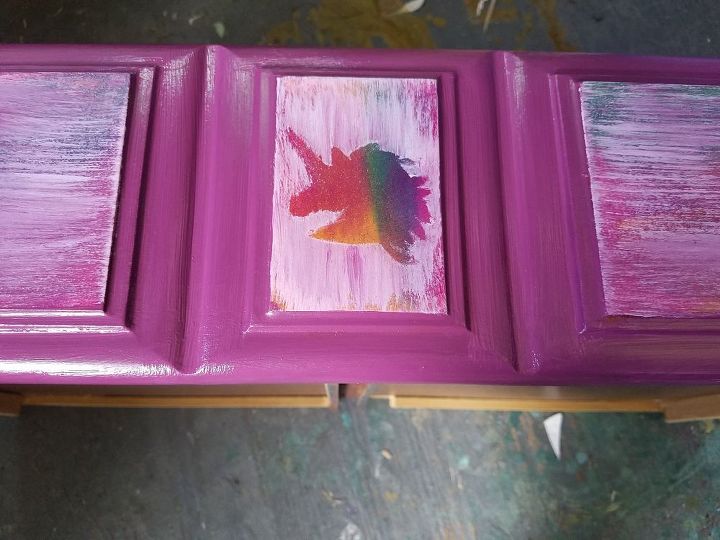
Oh, that little weird spot looks awesome and has a purpose now !!! ..Oh, the other drawer faces were dry brushed the same way, minus the image !
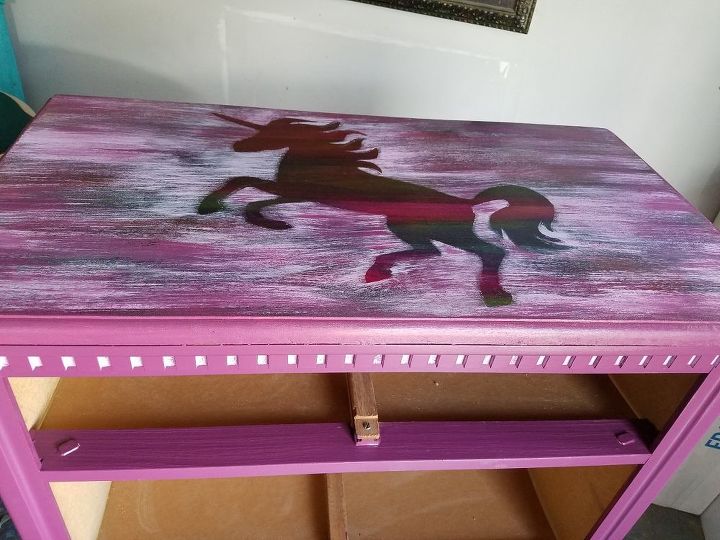
I finished up painting the trim around the top !!! and added yet another coat of gloss polyurethane to the entire area. {when dry, I recommend a light sanding with 220 paper, and another poly coat for shine and durability}
Every purple dresser needs a rainbow Unicorn !! ....I have done this technique before, using mermaid images, as well as many others !! Give it a try !!
Comments
Join the conversation
2 of 4 comments
-
How fun!
-
This is so beautiful!


Frequently asked questions
Have a question about this project?
Where in the world do you find Unicorn Spit?