


How to Patch a Large Hole in Drywall
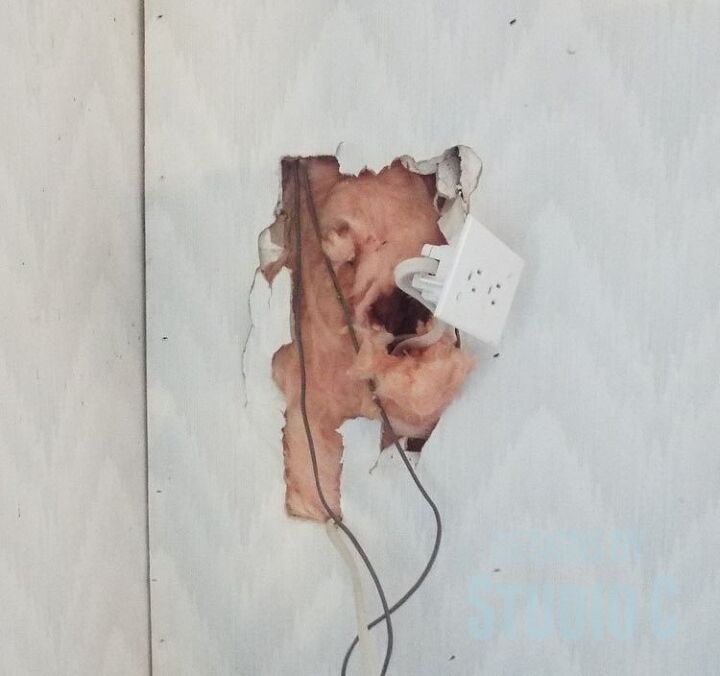
I was finally replacing the windows in my dining room (the final three in the whole house!!), and laying new flooring in the kitchen and dining room. When we removed a sort of “built-in” corner cabinet, there was a giant, gaping hole in the drywall.
Patching a hole in drywall is really, really easy. It is also really, really time consuming. Why? When patching a hole in drywall, the transition between the existing wall and the patch has to be seamless in order for it to look right. In other words, it is the same process as taping and mudding drywall, and takes longer than paint to dry since the mud (joint compound) takes approximately 24 hours for each coat to dry.
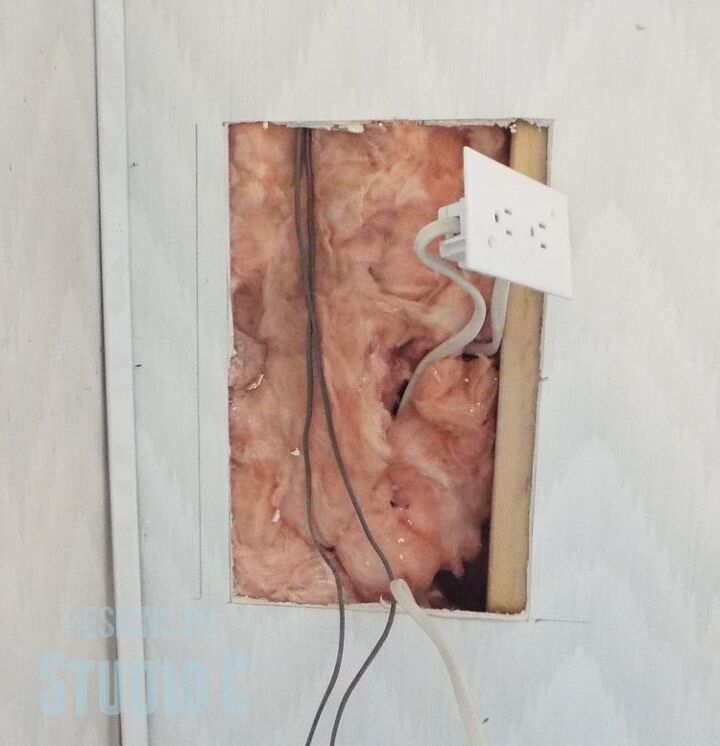
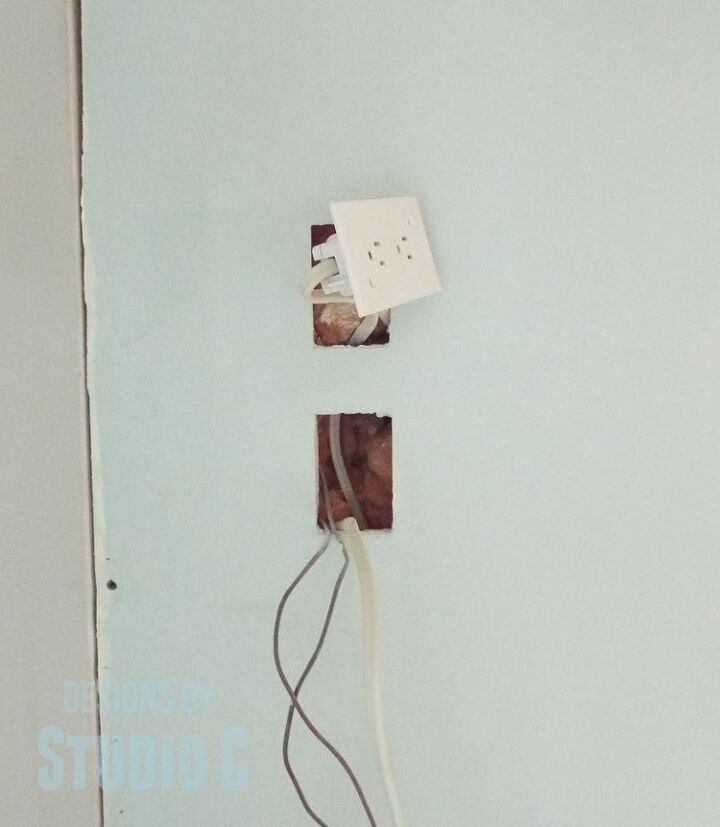
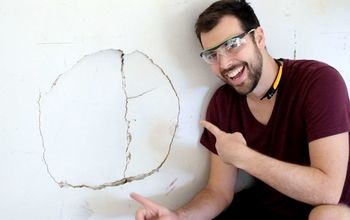
It looks as if the person putting in the outlet decided it was in the wrong place and instead of cutting a new hole with a saw and patching the other hole, they just used their hands and ripped the drywall out. I started by drawing a rectangle around the hole, and I cut the drywall out, trying making the hole as square as possible.
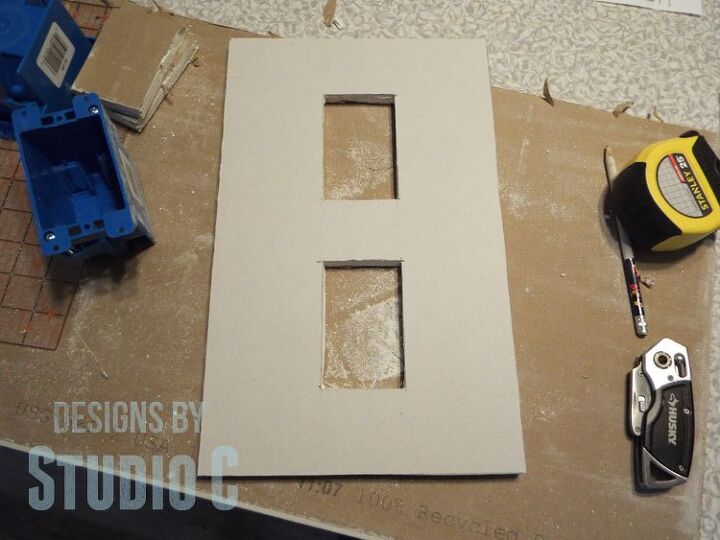
I measured the newly square hole and cut a piece to patch the hole out of scrap drywall. Because I am not a glutton for punishment, I measured the new electrical boxes I was going to add and cut the holes for those in the patch before I installed it.
I cut scrap pieces of furring strips (1×4) and screwed them to the back of the existing drywall with a portion of the strips visible in the hole. I screwed the patch to the furring strips. Make sure the screws are sunk slightly below the drywall surface. This makes it easier to hide them with the mud. (I forgot to photograph this step!)
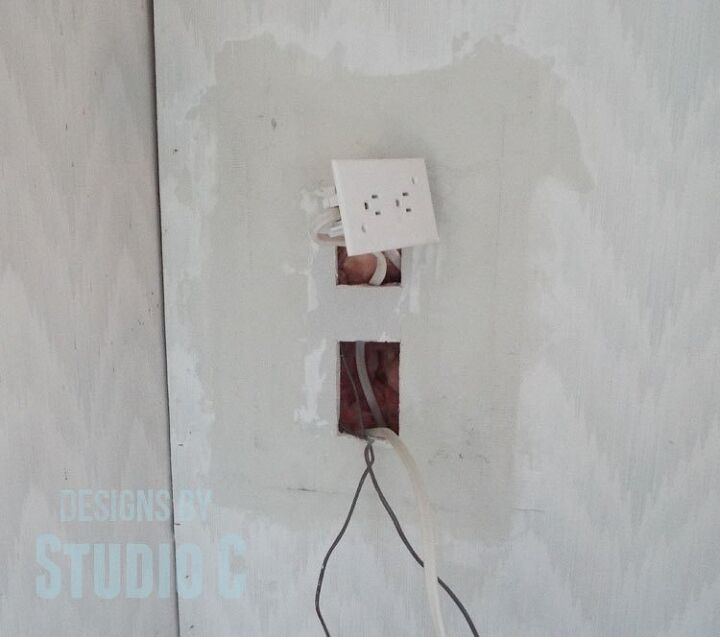
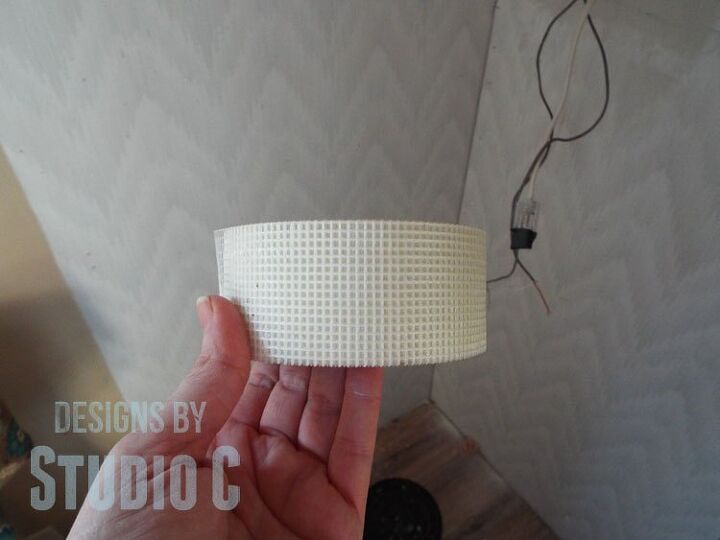
I added mud to the seam between the new patch and the existing drywall, then placed mesh tape over the mud and added another coat of mud. The tape will help stabilize the seam and keep it from cracking. I normally use paper tape instead of mesh but I put the paper tape “in a place where I could find it” which means it will never be seen again.
The next day when the mud was dry, I used a sanding sponge to sand it and smooth it out, then applied another coat. Rinse and repeat.
When the final coat was dry, I could paint… I must say, the patch doesn’t look as bad as I thought it might – mainly because I was frustrated and just want to get this remodel over with! I guess I will save that for another post. all I have left to do is to install the electrical boxes and wire the new outlet.
The finished job didn't look too bad, and I was super proud of my work! Mudding and taping drywall is not my favorite job but I keep practicing and hoping I'll get better!

Comments
Join the conversation
-
Great job. I used to use paper tape back in the day and it was a pain. Now I only use mesh tape. Sticky on one side so no compound needed to embed it. Just put it over the seams and mud over it. Also the layers of compound need to be larger than the patch with each layer for a level finish . I just put enough compound that's needed. When dry I use a drywall knife to scrape off any bumps and a damp sponge to smooth it out. Don't need to sand. You should be proud of your work and you will get better. Just takes practice.


Frequently asked questions
Have a question about this project?