


How We Tole Painted a Door Using a Photo Editing Program
3 Materials
$20
2 Days
Advanced
Photo editing programs like PhotoShop, Photo Studio, PicMonkey, or Canva can really give you a leg up on doing crafts like tole painting. Not only can you search for lots of ideas for designs, you can create a pattern to trace onto your project like we did. It's really not as hard as it looks. Here's how …
Our skills with a paint brush are not master-level, BUT we've learned to make up for our limited talents by leaning on the power of photo editing software. We've listed a free photo editing program in the materials list if you are looking for something to help you with painting designs on your furnishings, like we did with this old door.
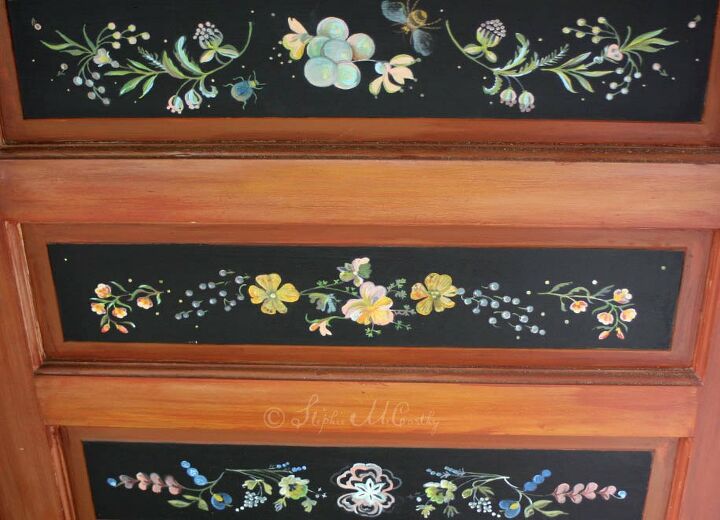
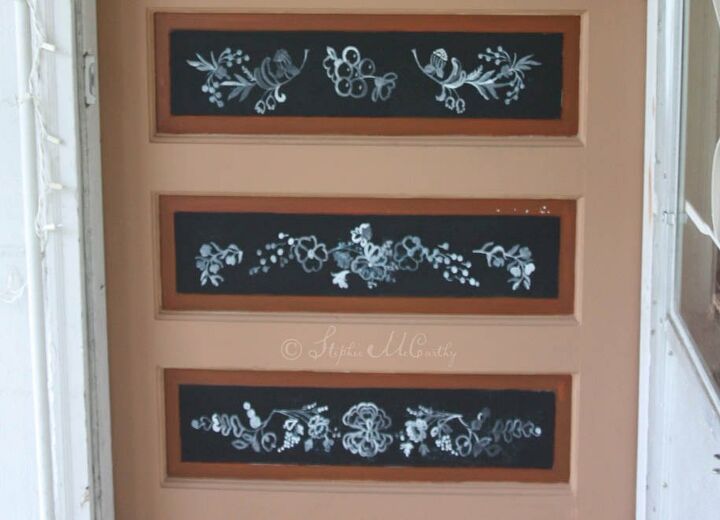
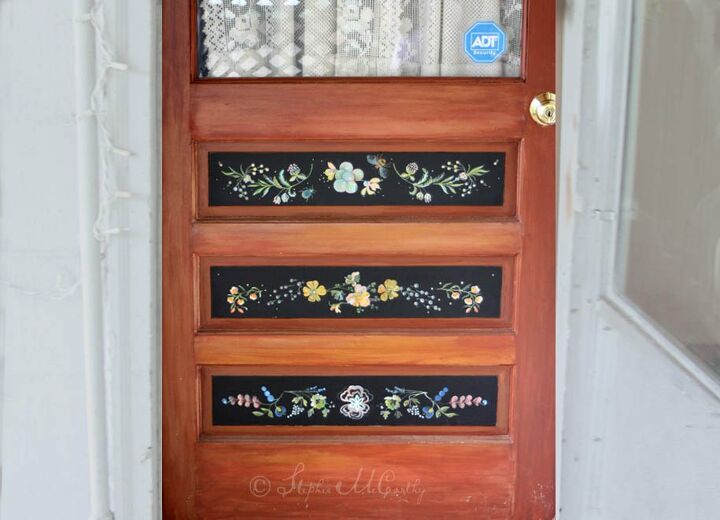
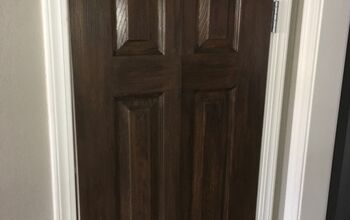
For a folksy look, we started by giving the door new chalky colors as a base. Black is a great color to use behind tole painting, so we used that where the "tole" designs would be painted. Later we used a stain created with wax and chalk paint to give a wood grain around around the panels.
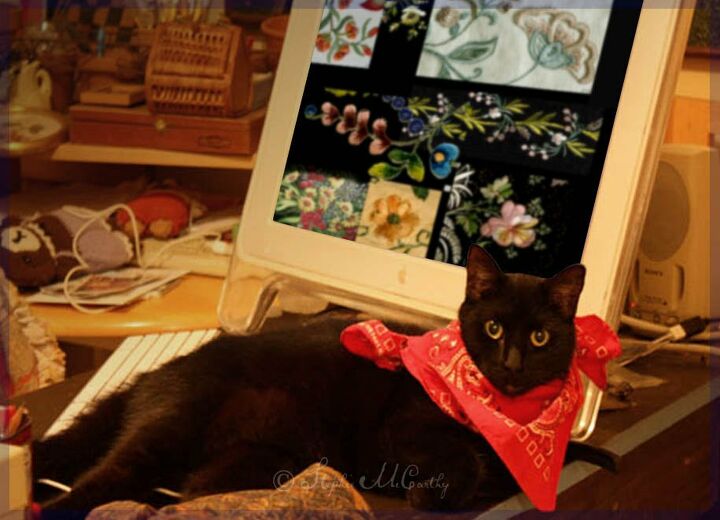
For art that is very decorative but not too hard to paint, we looked for embroidery motifs on Pinterest and Google. The next step was to make some full-sized patterns and transfer the designs we liked onto the black spaces on the door panels.
We measured the black panels and created a digital canvas that was the same size — 4" x 21". We colored the background of the digital canvas black so we could get a good idea of what the colorful embroidery motifs would look like on them.
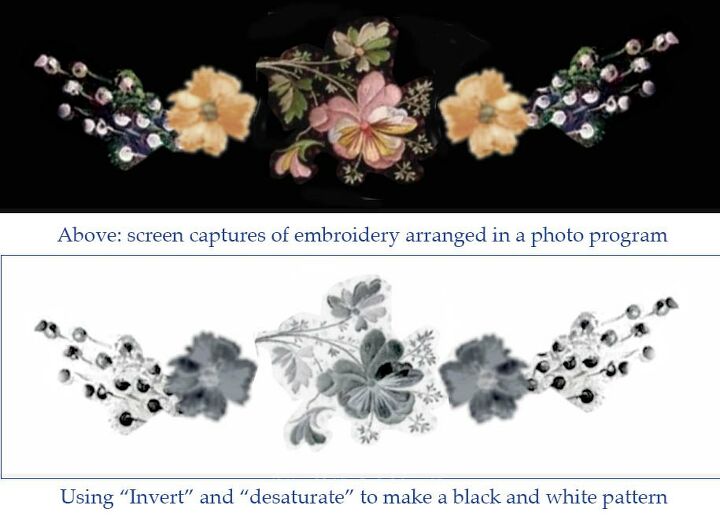
We pasted up three different panel designs using screen captures of embroidery art. Clipping, duplicating, flipping, and cleaning up where necessary with the eraser. After saving these files, we took each one and used the "invert" and "desaturate" commands to make a black and white pattern. You can use print outs of any type for your pattern, but we liked the inverted black and whites so that we would save ink from our printer when we printed out the artwork.

Photoshop let us print the patterns as "tiles" that we could tape together to the exact shape of the panels. You can also use BlockPosters.com to print out your patterns if they are bigger than what your printer can do. All you need to do is tape the pieces together.

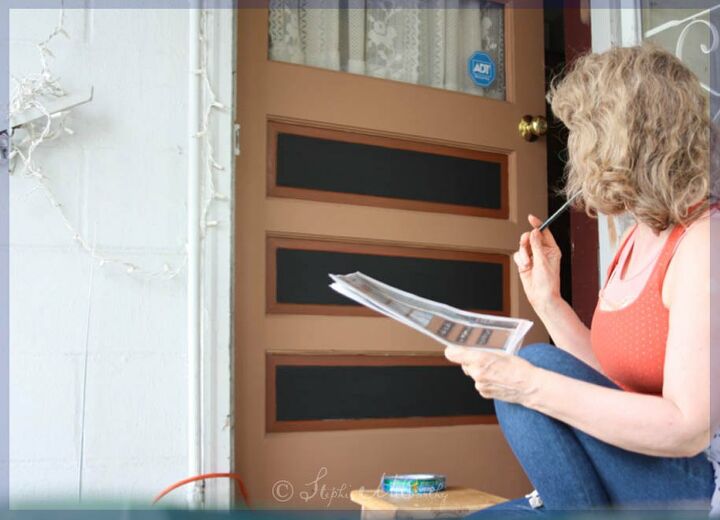
To transfer the designs onto the panels of the door, we coated the back of the patterns with blue chalk, taped the patterns onto the door, then used a pencil to trace all the shapes. Remove the pattern and you can see chalked designs where you will be adding paint colors.
Here's a really good trick to start your painting project. Paint all your outlines with a contrasting color first and let it dry. We used white over our chalk lines. Now you just have to fill in with colors! The chalk will be absorbed or you can wipe it away later too.
Boy, do we love lots of colors! You won't need expensive paints to do a project like this, but we recommend you buy the best brushes that you can in all different sizes.
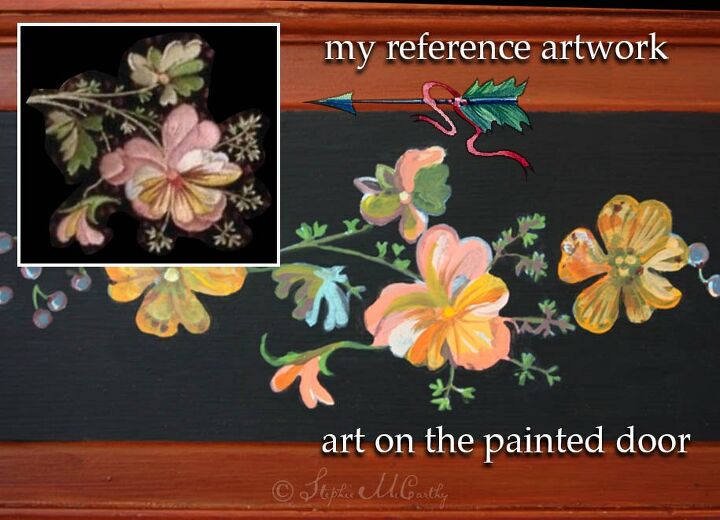
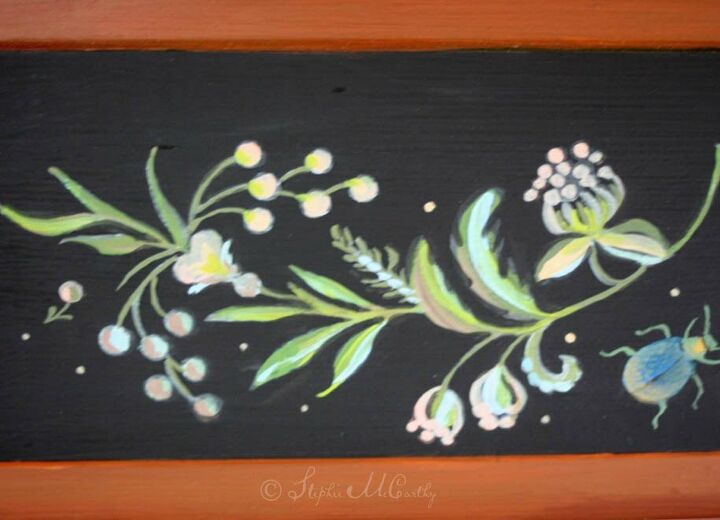
Having a page with all the embroidery designs printed out was great to use as a reference when we started adding colors to the door. It's a good idea to use some of the same colors over and over again as you work, to tie your overall design together.
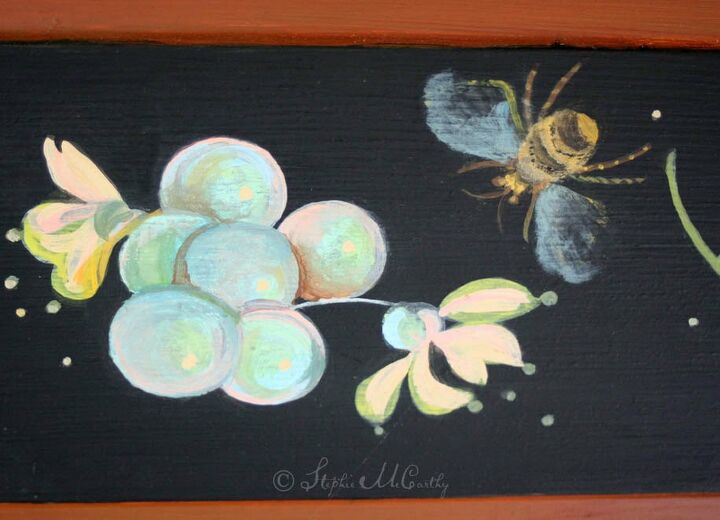
Using just a little bit of paint at a time is a good way to fill in your designs. For the bee's wings, some of the paint was removed to create a bit of transparency (just use your finger tip or a cotton swab). If you make a mistake (and we made dozens of them) you can easily paint over them with your background color. That's what we did, so we ended up with nice crisp outlines.
Look closely and you can see a lot of our sloppy edges. But the black background paint tidied up the outlines well enough!
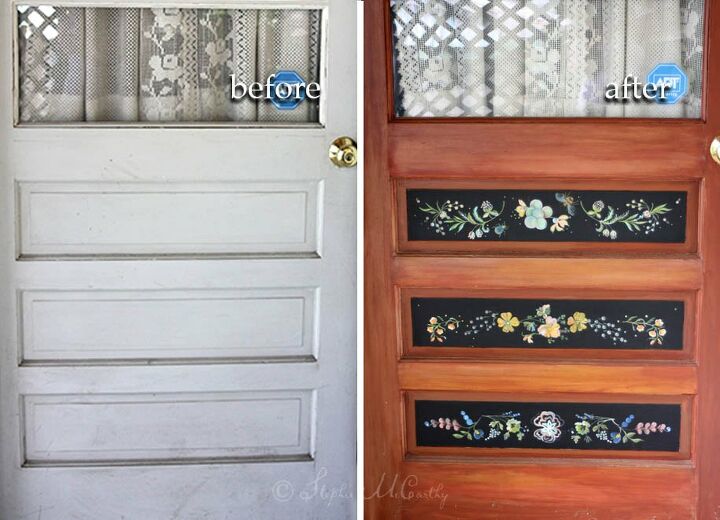
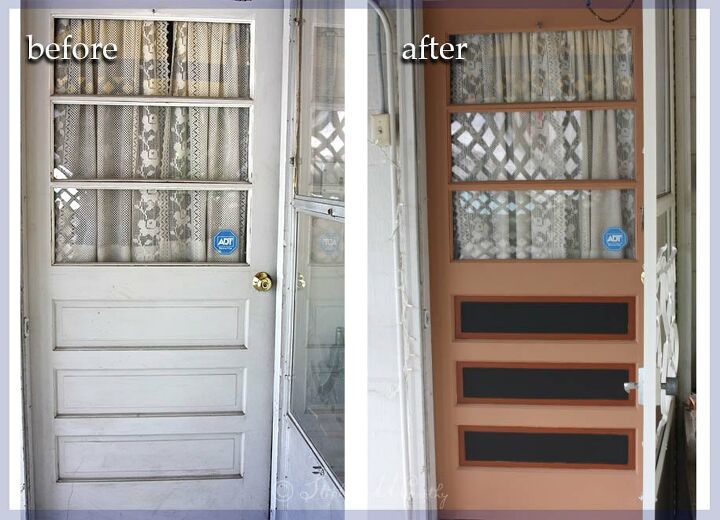
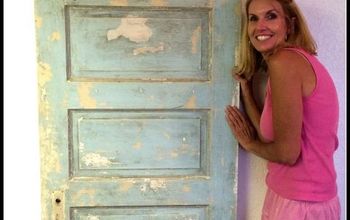
Before and after …
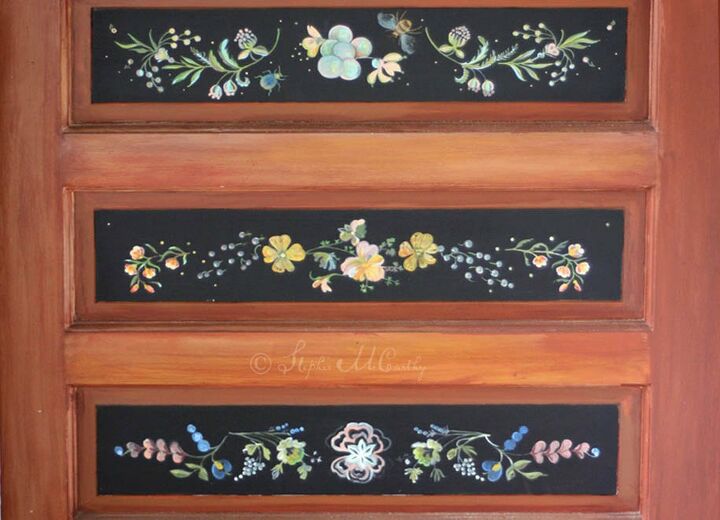
Three door panels completed. Our colorful kitchen door!
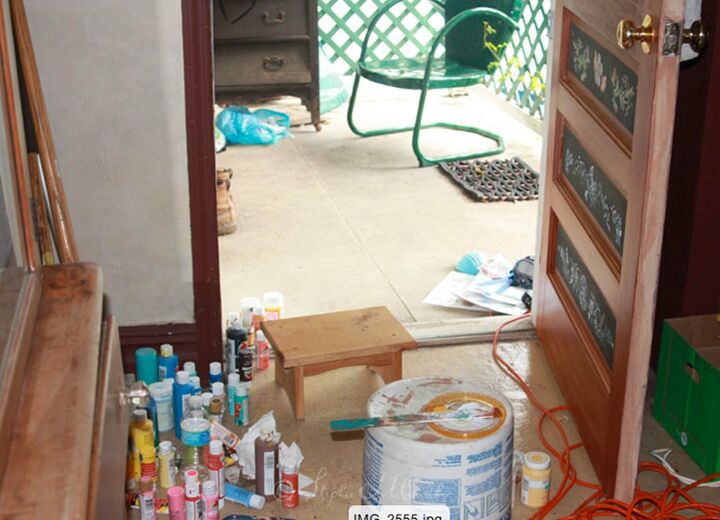
Here's the final before and after. This door creates a bit of excitement for what lies beyond. Unfortunately, the room behind is a temporary garage of tools and supplies as we are renovating this old place in our free time. Curious about how our projects are going? You can see more and download free design work at our blog here.
Resources for this project:


Any price and availability information displayed on [relevant Amazon Site(s), as applicable] at the time of purchase will apply to the purchase of this product.
Hometalk may collect a small share of sales from the links on this page.More info

Want more details about this and other DIY projects? Check out my blog post!
Comments
Join the conversation
3 of 206 comments
-
Thanks for sharing your very innovative techniques. I hope to use this photo editing advice to take advantage of digital opportunities that are available!!! Your directions are so detailed and thoughtful…your painting skills are way beyond mine, but I will use the many tips you’ve shared. And I love your lace curtain; exactly my taste.
-
What a beautiful door. It’s a statement piece now. I hv 2 square panels on the bottom of my door…you hv inspired me…hmmm…we hv an old 1860’s Farmhouse…
need to go look at stencil ideas for that era…thank you


Frequently asked questions
Have a question about this project?
I have three large bundles of reclaimed wood, approximately 25 pieces, I was wondering is it usable for flooring or not.
Lovely and charming. So much better than before. However, project seems labor intensive and this is an exterior door. This door will get lots of use and nicks, dings, scrapes are to be expected. What is durability of painted finishes for heavy traffic? Wax doesn’t seem sufficient to me. Hand prints to be expected, washable? Maintenance? I’d hate to see such a labor of love messed up in a year because of non durable finish
Is there a way you can do this project without squaring down or kneeling the whole time?