


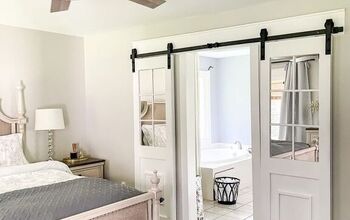
Trumeau Style Mirror From an Old Door

13 Materials
$40
3 Hours
Advanced
Many people really love the details and fine craftsmanship of a Trumeau piece. Did you know you can create one of your own? Add some molding and a nice piece of millwork to an old door and a plain mirror and you are in business! This Trumeau style mirror can be customized in color and size and even the details can be adjusted to get exactly what you are looking for!
We want to help you DIY, so some of the materials in this post are linked to sellers. Just so you know, Hometalk may collect a small share of sales from the links on this page.
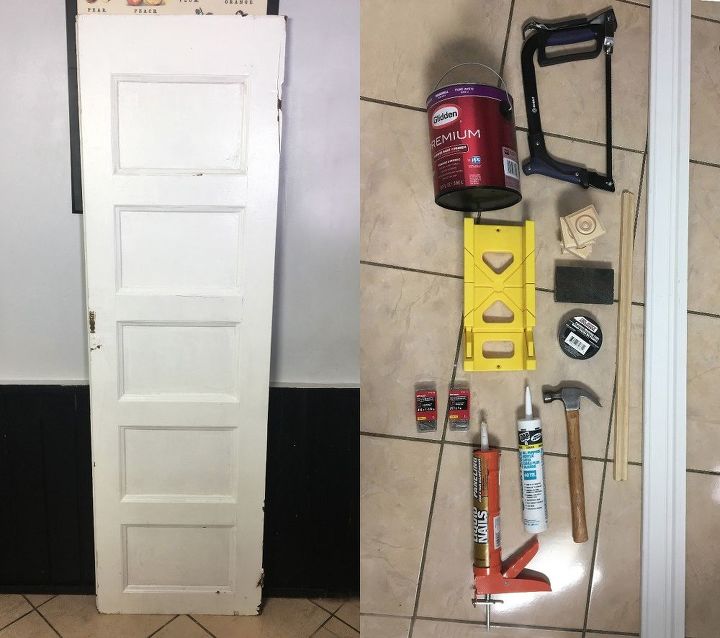
SUPPLIES:
-Door (or 3/4" thick piece of plywood larger in size than your mirror)
-Mitre Box
-Paint
-Crown Molding / Baseboard Molding
-Painter's Tape
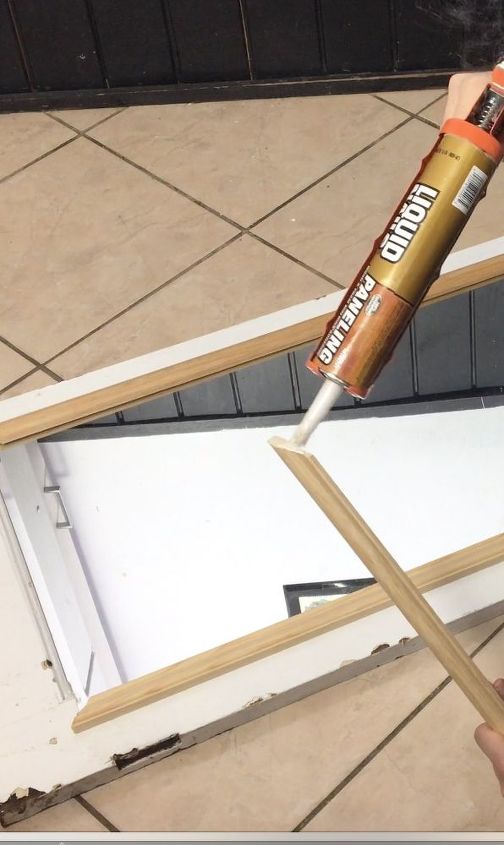
-Liquid Nails
-Paintable Caulk
-1" Tack Nails
-Sanding Block
-Millwork Piece(s)
-Hacksaw / Mitre Saw
-Mirror (not pictured above)
-Ply Cap with a groove on one side (long enough to surround perimeter of your mirror)
STEP 1: Prep your door or wood and attach mirror
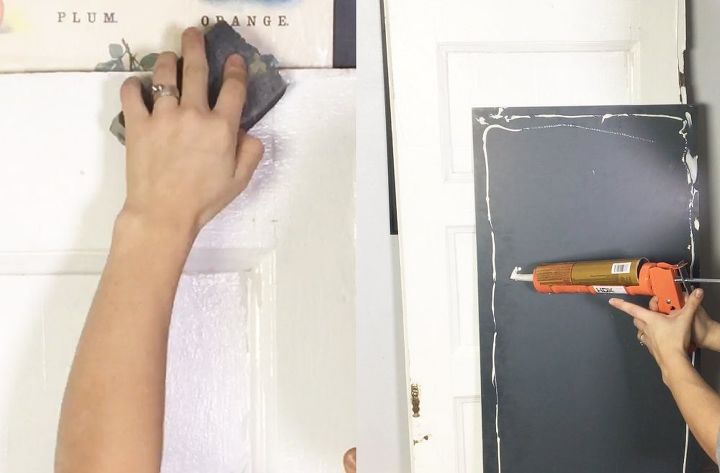
I decided I would keep my door white, so I didn't strip the paint, but I did sand it down to give it a bit of grit and to knock off any chips of paint. I figured I would go for an older and more worn down look so I didn't worry about it too much.
Use liquid nails to attach the mirror to the door. (We will be securing it in place in a later step.)
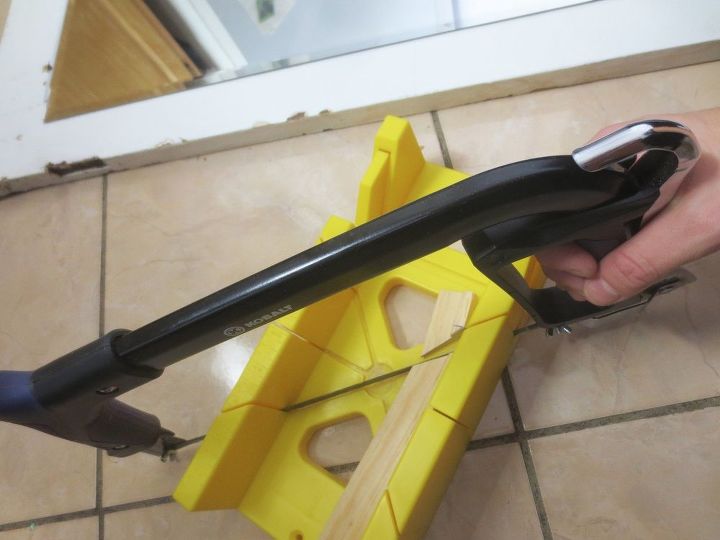
STEP 2: Cut your ply cap
Measure the length and width of your mirror. Grab your ply cap that has a small groove on one side, and cut out a piece for the top and bottom of the mirror and two for the sides. Make sure that you cut your pieces in your mitre box so that each end is at a 45° angle and each piece looks like a trapezoid with each angle pointing towards the other. Keep in mind that because the corners are mitred, the the length will need to be slightly longer than that which was measured. A good way to ensure that they are cut correctly is to cut one end at a time making sure they line up with their adjoining piece.
STEP 3: Nail the trim around your mirror
Grab your liquid nails and nail the trim around the mirror so the groove lines up against the edge of the mirror. Also make sure your mitred corners line up well.
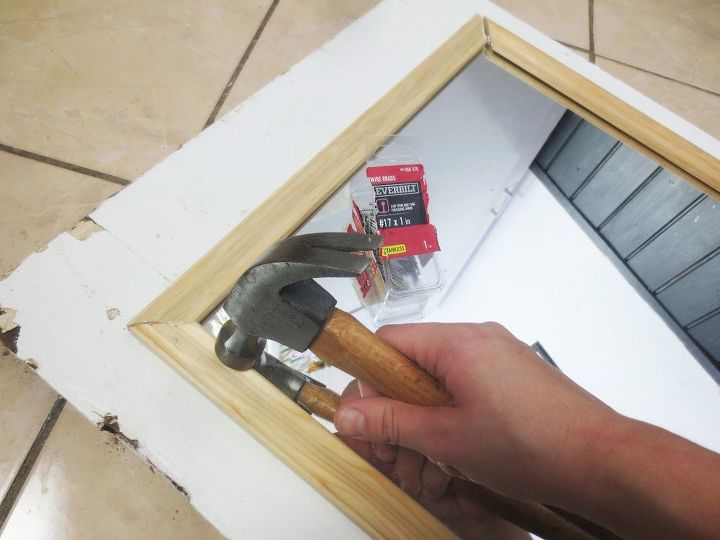
STEP 4: Nail the trim in place
Use some 1" tack nails for trim to secure the mirror border in place.
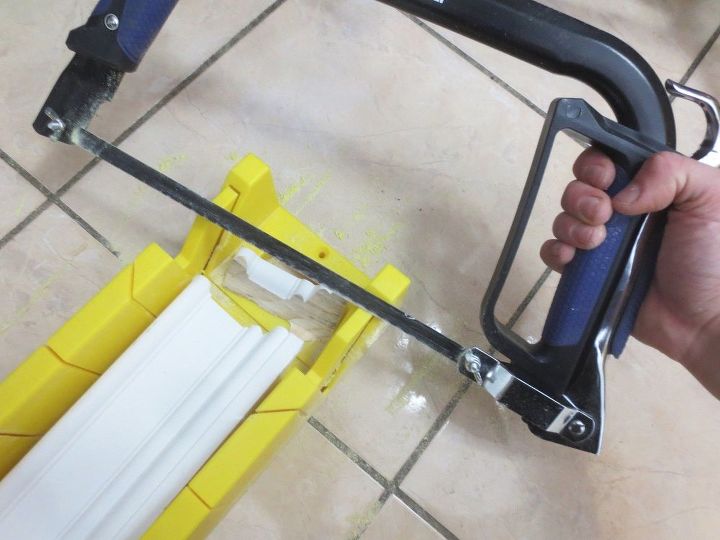
STEP 5: Cut your moldings
Now it is time to cut the molding for the top and bottom of the mirror. The top and bottom will be the same, but flipped in opposite directions. Both top and bottom consist of 3 pieces of trim cut to fit together. Each end cap is cut with one flat side and one cut at a 45° angle from front to back whereas those cut in step 2 were cut from top to bottom (see picture above). Be sure to use your mitre box as a guide.
The main piece that rests between the end caps is cut at a 45° angle from front to back on both ends.
*This part can be tricky so double check your pieces several times before you make your cuts. Make sure that the flat of the trim that will lay flush against the door is the full width of the door and the angle hangs over the edge. Also know that each end caps 45° cuts will go opposite directions, while the main pieces cuts will do the same.
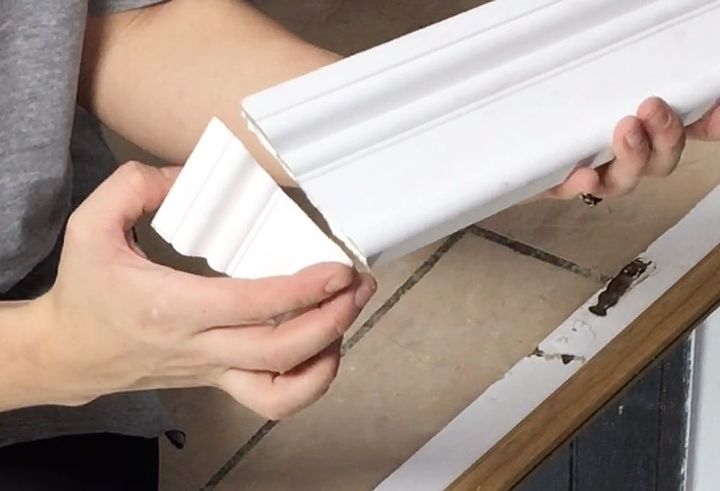
STEP 6: Glue the molding together
Use liquid nails to glue your end caps to your main pieces accordingly. You can tape them in place while they dry.
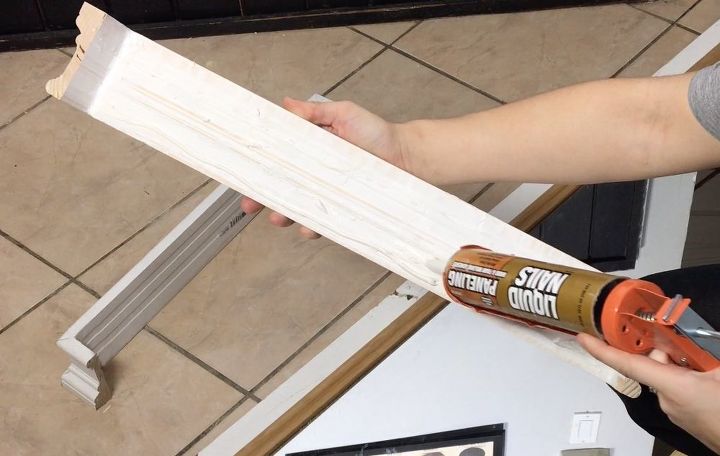
STEP 7: Glue to the frame
Once the top and bottom mold are dry you can glue them to the top and bottom edges of the door using liquid nails. You can secure these in place with tack nails as well.
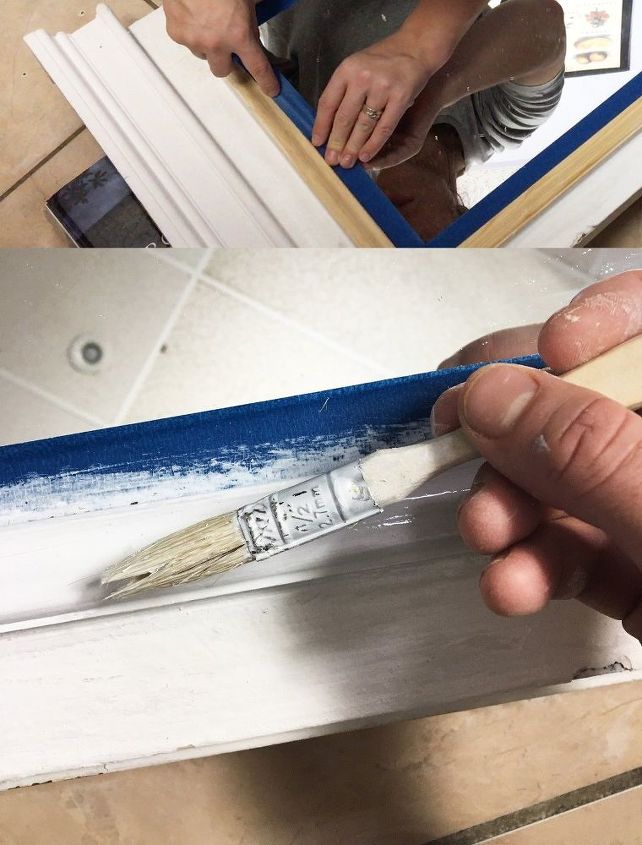
STEP 8: Paint it all to match
Now tape off the inside border of your mirror with some painter's tape and paint the raw wood mirror border to match the color of the door. You can paint the entire door (or piece of wood) and trims the color of your choice.
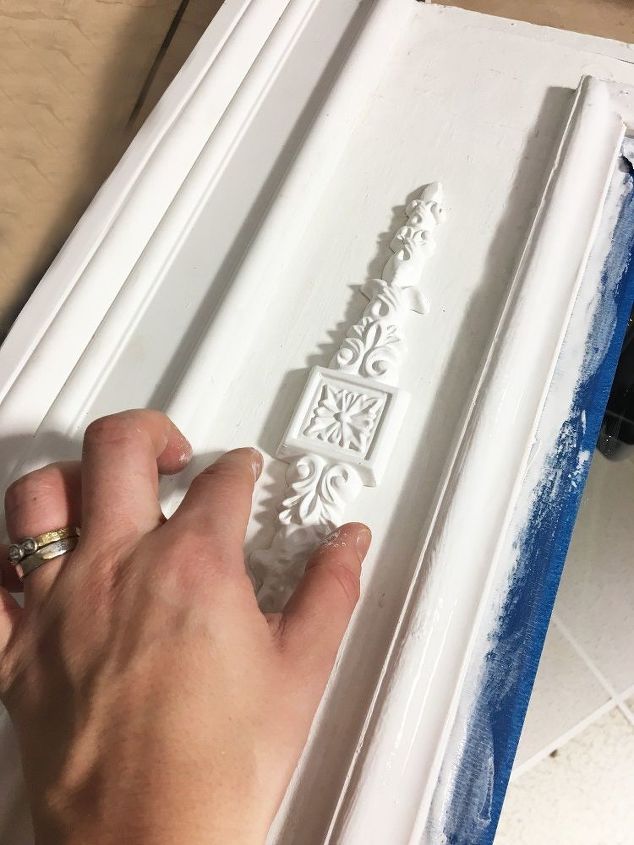
STEP 9: Attach your millwork piece
Use liquid nails to attach your millwork piece between the top of the mirror and the top trim piece.
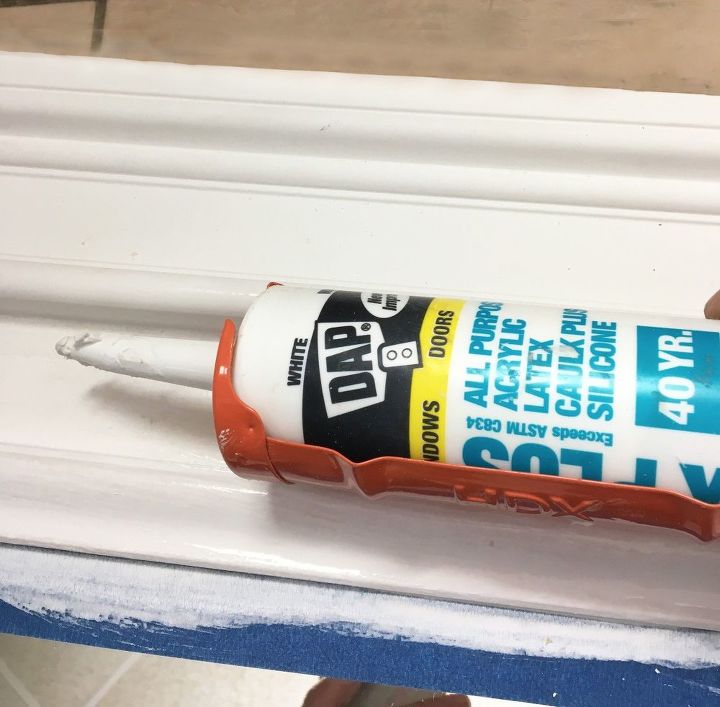
STEP 10: Caulk it
Use paintable caulk to not only seal in the trims you have added at the top and bottom as well as around the mirror, but to give it a seamless look so it appears to be one piece that was simply carved out rather than being pieced together. Once all is dry remove your painter's tape and place it where you wish!
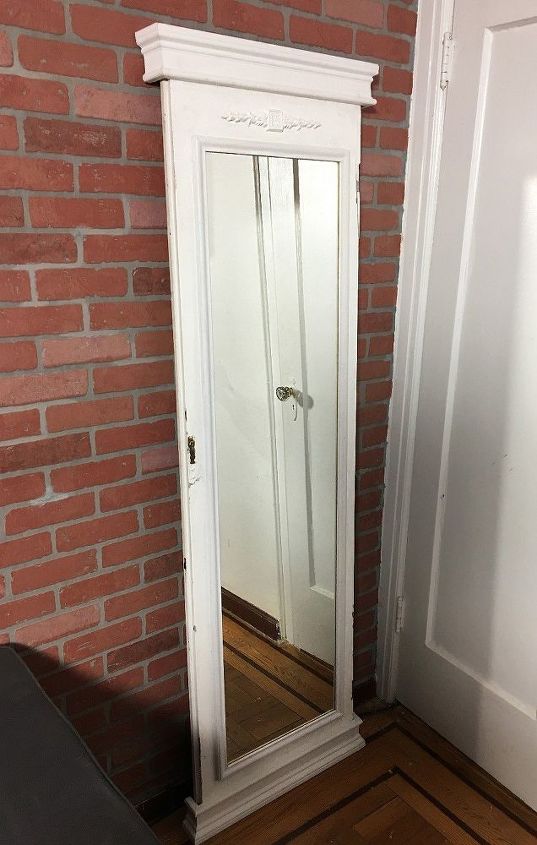
I love how much character the door adds with it's cracks and age.

If you have more space between the mirror and the top trim you can add a border around your millwork piece as well!
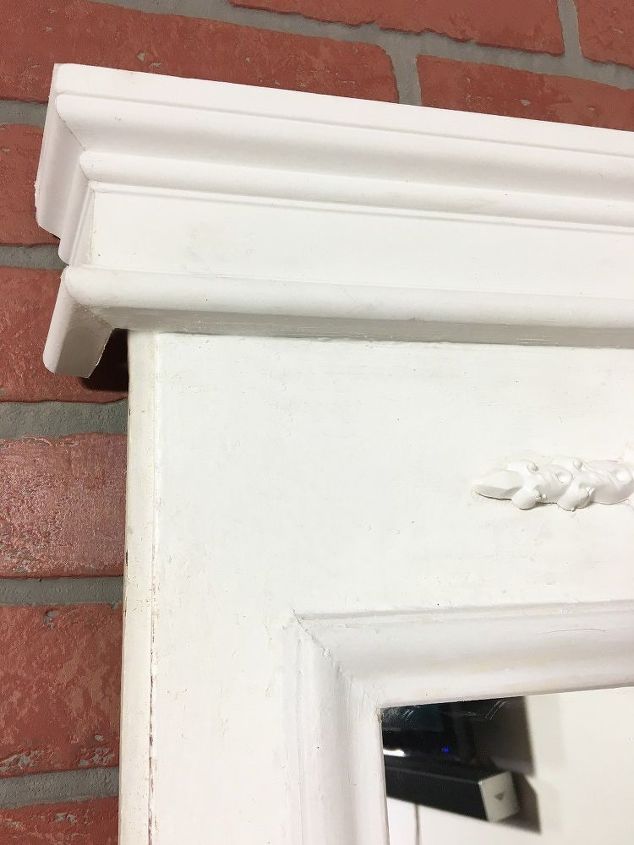
Here is a close up of some of the detail. The caulk really helped blend the pieces together!
{
"id": "4094948",
"alt": "",
"title": "",
"video_library_id": "7980",
"thumbnail": "https://cdn-fastly.hometalk.com/media/2017/07/31/4094948/trumeau-style-mirror-from-an-old-door.jpg"
}
{
"width": 634,
"height": 357,
"showRelated": true,
"noautoplay": ""
}
Comments
Join the conversation
2 of 32 comments
-
You did a great job. Thumbs up. I really like it.
-
That looks awesome!! I have some very old doors and windows in a little loft above the garage. I'm excited to go and check them out! Thanks!


Frequently asked questions
Have a question about this project?