


Thrift Store Bucket Makeover for Farmhouse Storage
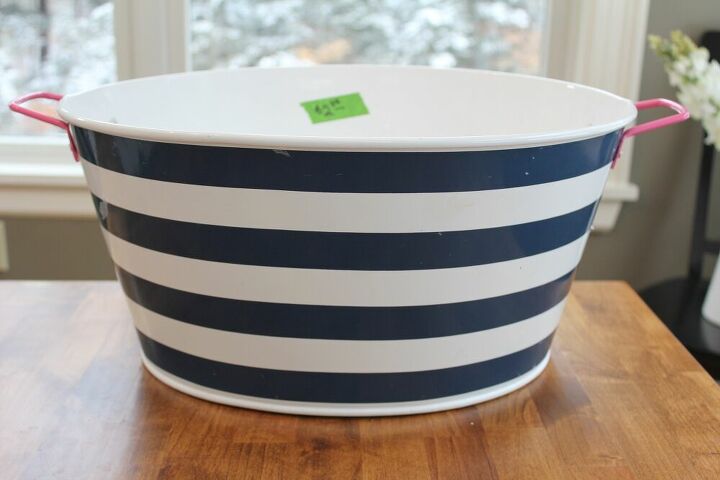
Hey everyone, it’s Thrift Store Thursday! I have the cutest project to share with you today. I found this light weight metal bin at at thrift store for $2. I can just imagine it had toys in it at one point or maybe drinks out on the porch. It’s cute but not my style, at least not for long. I grabbed some spray paint and stencils and transformed this thrift store find into farmhouse storage.
Supplies needed:
- metal or plastic bin
- spray paint
- stencils
- stencil brush
- craft paint
- twine
- hot glue gun
First things first with any project, I gave it a good cleaning. When I was wiping it down, some of the very thin layer of plastic wrap started to peel so I pulled it all off which was surprisingly easy. You can see in the picture above where it was starting to bubble.
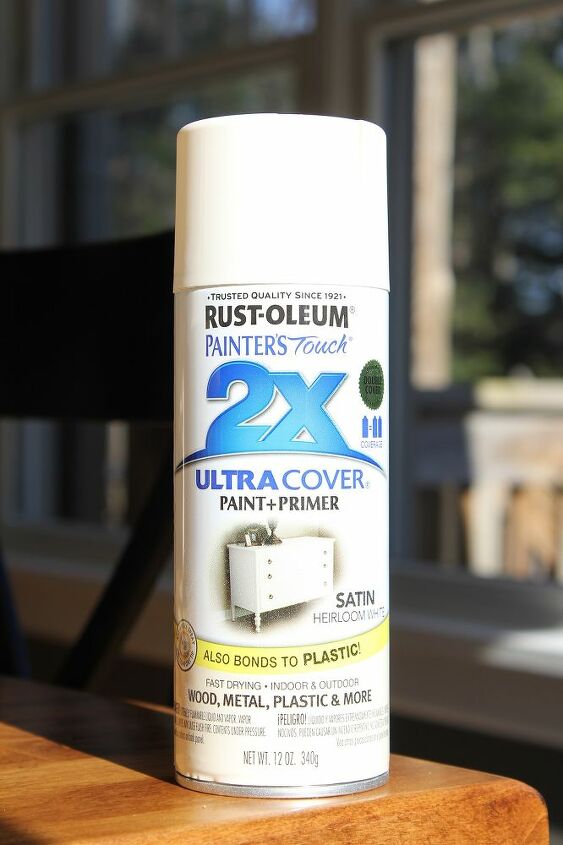
Once it was clean and dry, it was ready to paint. Since the stripes on this bin are dark, I was pretty sure it was going to take quite a bit of spray paint to cover it. I picked up two cans of Heirloom white spray paint and used a coupon so they were 2/$7. It turned out I only needed half to two thirds of one because this paint has primer mixed in it. It took about 5 layers to cover completely.
Did I mention how much I love spray paint??
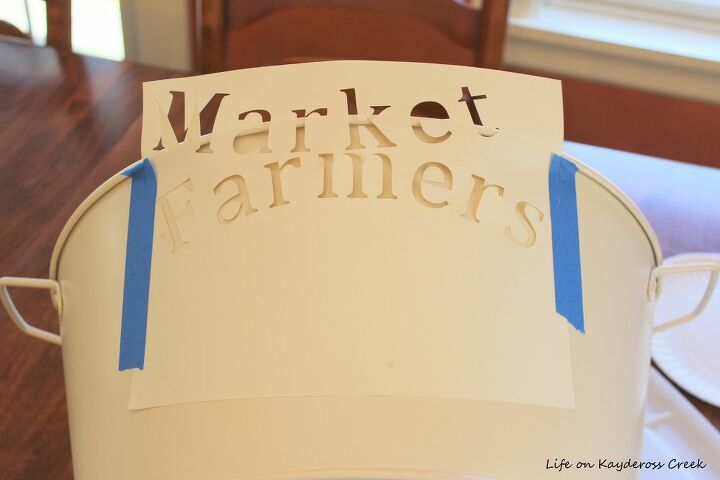
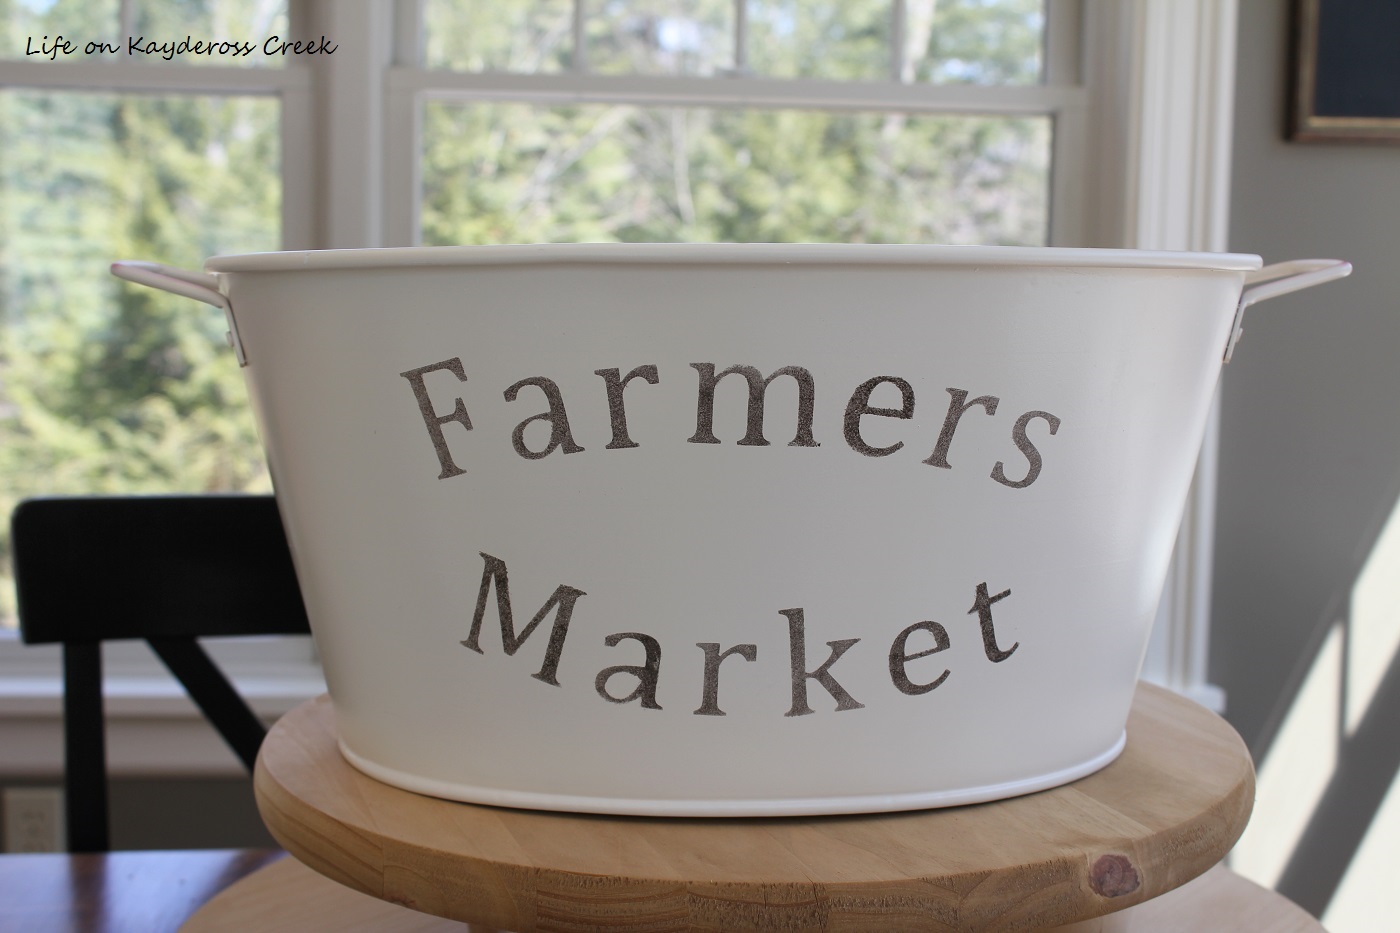
Now for some farmhouse style. I wanted to add a saying on the front using a stencil I have a number of different stencils in my stash but and decided to create something new myself using my Cricut. I chose the font, bent the words so they were in sort of a circle and then printed it out on card stock to create a stencil.
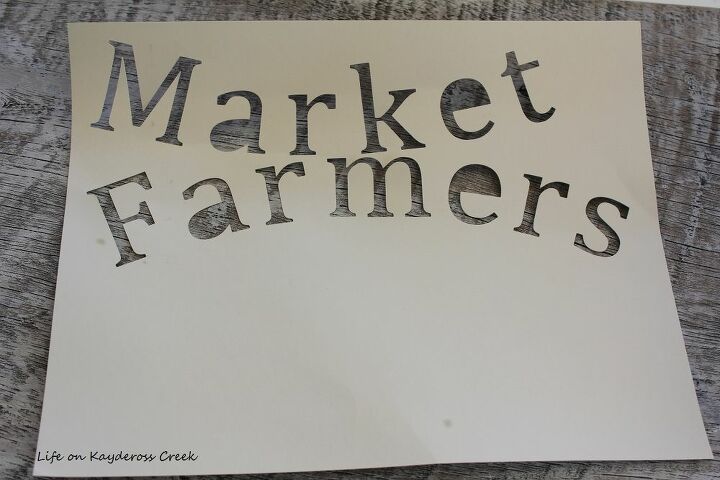
The Cricut cuts it out like this to make the most of the space on the paper but it would have been so much easier to stencil it if it were actually in the correct shape. Even though I used a measuring tape to measure from the sides to the stencil, it’s a bit off. I’m OK with that
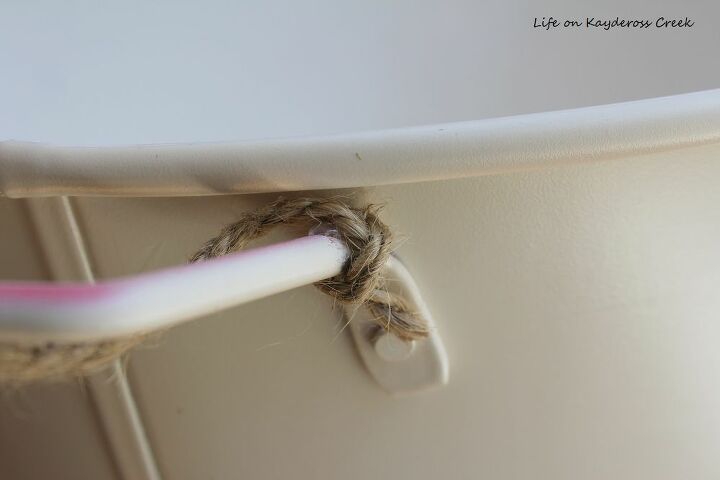
While that was drying, I took the twine and wrapped each handle with it, attaching it with my hot glue. I started by tying the end of the twine in a knot, tucking the end in and gluing it and then wrapped it all the way around the handle adding beads of hot glue as I went.
I added a couple more stencils on the sides and contemplated adding a rooster or something in the middle but decided to hold off and live with it for a while. I’m not sure where it’s going to live. I certainly won’t need it for toys but it may end up with beverages in it.

Or how about flowers?
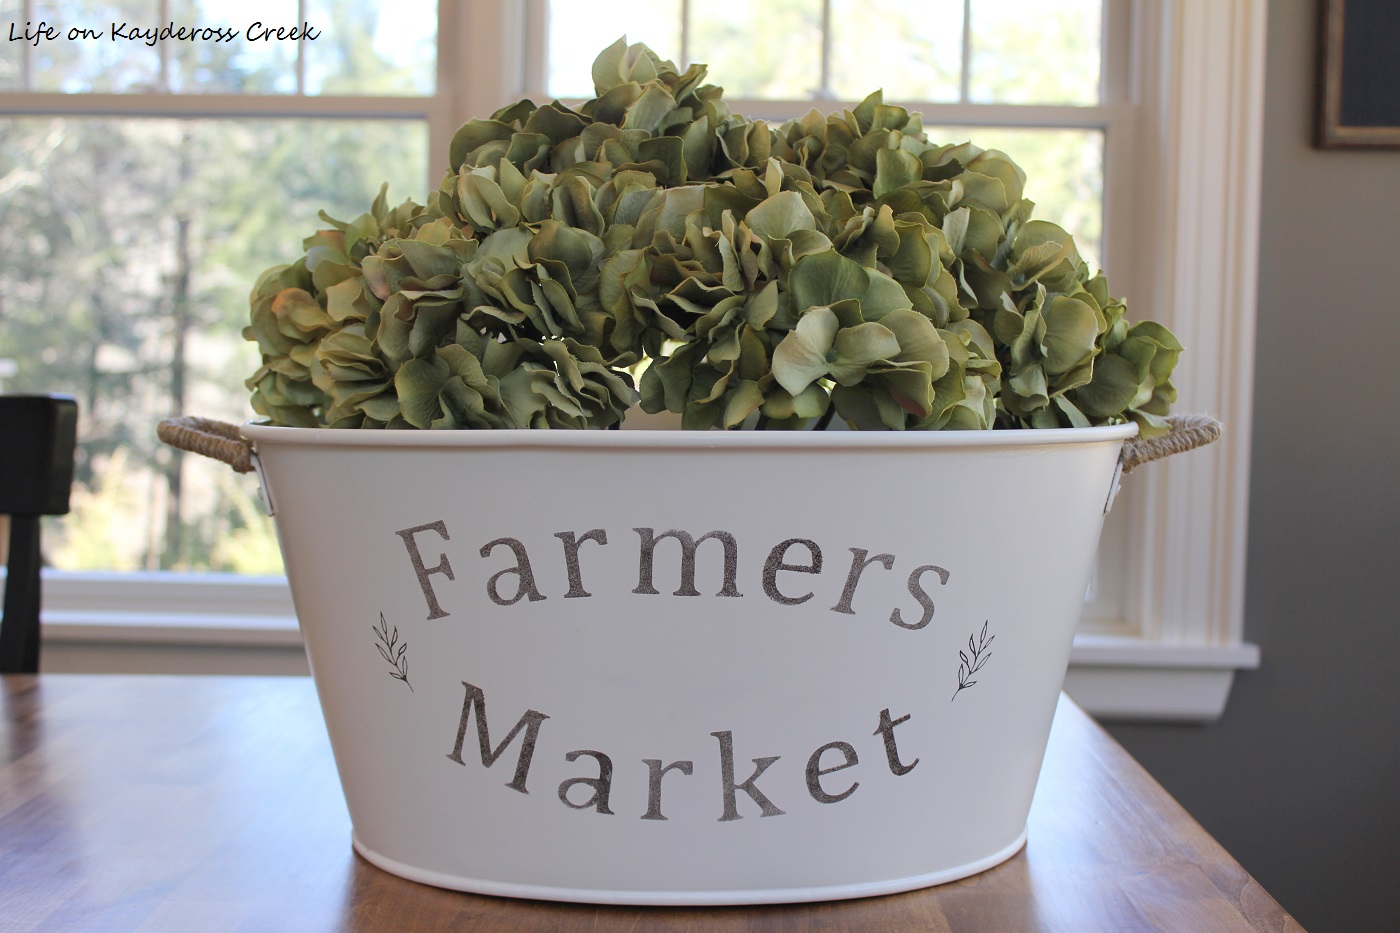
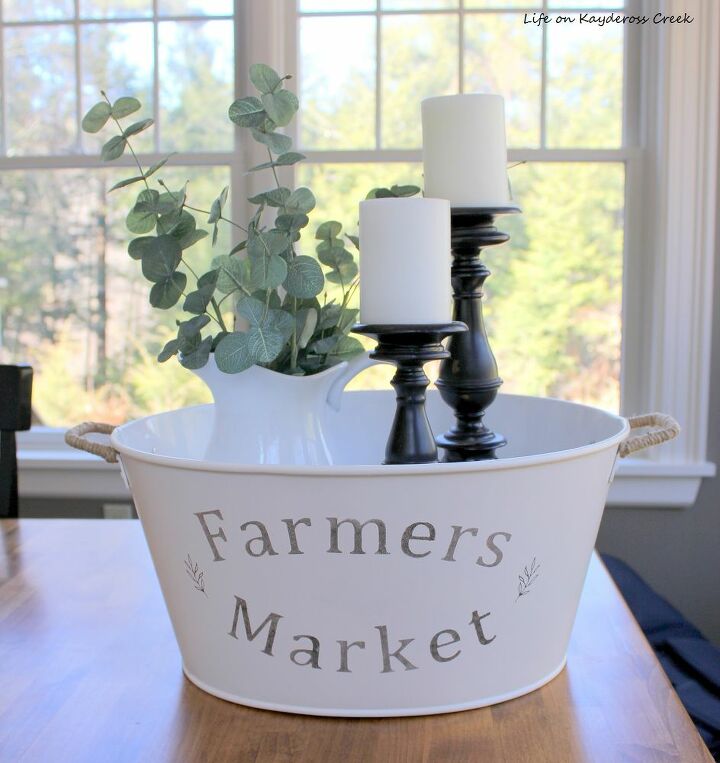
There are a bunch of different ways to use this DIY farmhouse storage and I’m sure I’ll work it into my everyday and seasonal decor, too.
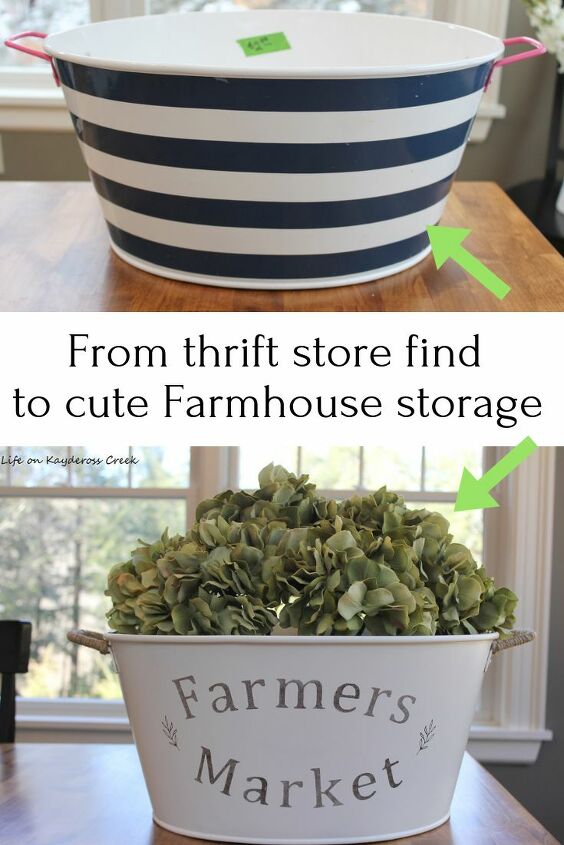
There you have it, a simple, inexpensive thrift store upcycle to create your own farmhouse storage. Once the spray paint was dry, this DIY project took about an hour to add the stencil and twine. The whole thing cost me $6 since I already had the twine and made the stencils.


Comments
Join the conversation
-
Very Country Chic!
-
I love this ❤️ You’re very creative I’m definitely going to make one and I like the shape of your stencil too it looks great! Thank you for sharing


Frequently asked questions
Have a question about this project?
How did you make the stencils? Very cute project... very neat too!