


Light Up Snowman Ornaments

I saw a video on YouTube that used battery operated tea lights as the primary component of a Christmas ornament. We have a large bag of battery operated tea lights so I was inspired by to use them in a similar manner. I've made two so far, here's what I did.
Supplies used:
- Battery operated tea light candles
- Glue (I used hot glue)
- Scrap material
- Pipe Cleaner or string (for hanging the ornament)
- Craft paint
- Styrofoam ball

I made two styles, both use a battery operated tealight like those pictured above as the head.

Above is a picture of the first style completed. It's a very simple ornament to make.
- Cut a hat out of material- I used black felt and embellished with flannel
- Cut flannel for hat embellishment and scarf
- Embellish hat as desired (I painted red berries and added greenery)
- Paint eyes, mouth and rosy cheeks or whatever you desire
- Add a loop to the back so it can be hung

- I cut a long thin strip of flannel and folded it so the seam was in the back and added a bead of hot glue to hold it closed then cut some fringe into the ends.
- Cut a thin strip of flannel for the hat brim.

- Cut a hat shape out of felt. This can be any hat style you desire, mine is top hat style.
- Glue the flannel strip onto the hat brim.
- Add any flowers, greens, feathers etc to the hat.
- Attach the scarf at the bottom front of the tealight and the hat to the top front.
- Using a permanent marker draw the eyes onto the tealight beneath the hat brim
- Using a permanent marker draw the mouth onto the tealight above the scarf
- Using a permanent marker or craft paint add some soft pink circles for rosy cheeks to the left and right sides of the flame/nose.

Glue a loop of string, Jute, felt, pipe cleaner or whatever you'd like to the back so the ornament can be hung and admired.
** Be sure not to glue it over the on/off switch.

Is he cute or what??
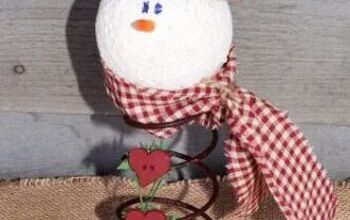
The idea for the ornament face is essentially the same although the materials used for the hat and scarf are different.

This cute guy gets a body to go with his face :)
Since I clearly have an abundance of Styrofoam balls I decided to use some.

- Create an indent or divot into the ball so the tea light will sit more flush with the ball.
- I cut a thin strip of black felt and glued it around the middle (my ball had a seam so middle was easy to find) this is going to be a belt

I bought this little tree skirt several years ago from Dollar Tree & have used pieces of it for so many projects.
- To create a Santa style hat I removed a small piece of the white "fur" and cut a triangle shape of red.

This is the fur being taken apart
- Glue the tealight to the foam ball
- Glue the belt onto the foam ball (if not already done)
- Create a cone shape with the red material, glue it onto the top of the tealight
- Embellish the hat with the white fur. Add any flowers, greens, feathers etc. to the hat.
- Using a permanent marker draw the eyes onto the tealight beneath the hat brim
- Using a permanent marker draw the mouth onto the tealight above the scarf
- Using a permanent marker or craft paint add some soft pink circles for rosy cheeks to the left and right sides of the flame/nose.

- Add a scarf 🧣 I used red pipe cleaner that resembles is the hat. Since pipe cleaner is pliable I just wrapped it around the "neck" area then twisted it up the back creating a loop to hang it with.
I hope you enjoyed this tutorial and I've sparked a desire for you to create something fun. This is easy, inexpensive and fun. It could be a great project to do with children either at home or in school or church groups. These are fun embellishments to gifts, cookie trays or just little gifts.
Shout out to Kelly Barlow Creations for inspiring these cute guys.

















Frequently asked questions
Have a question about this project?