


Wood Slice Banner With Wood Beads
A wanted to make a wood slice banner for our mantel, but wood slices hanging on twine do not hang flat. Hummm! I found an idea that works and bonus, it uses my favorite craft supply!
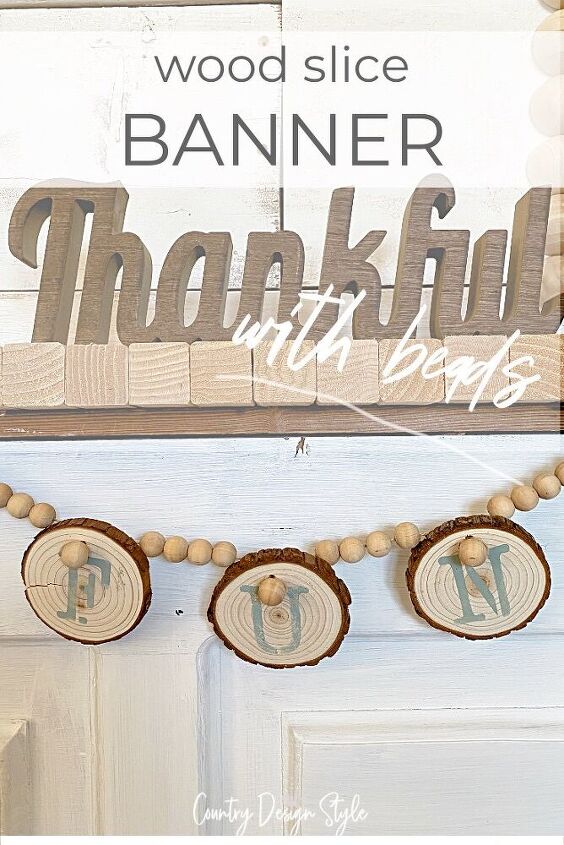
The finished banner with bead helping the slices hang to read the words.
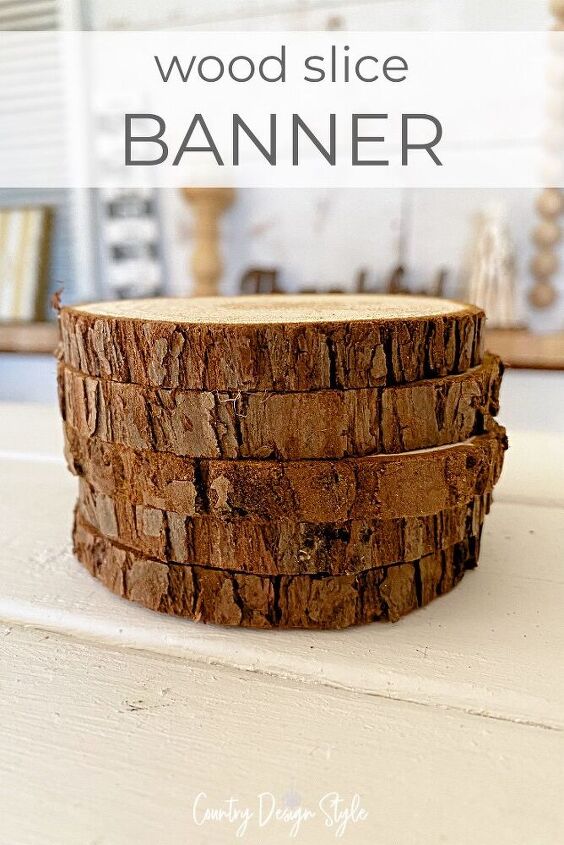
I found wood slices on Amazon and they have a hole for stringing. But I wanted the slices to hang so I could see the stencils.
Other Supplies:
- Wood beads (1/2 Inch)
- Twine
- White craft glue
- Letter Stencils
- Craft paint
- Stencil brush
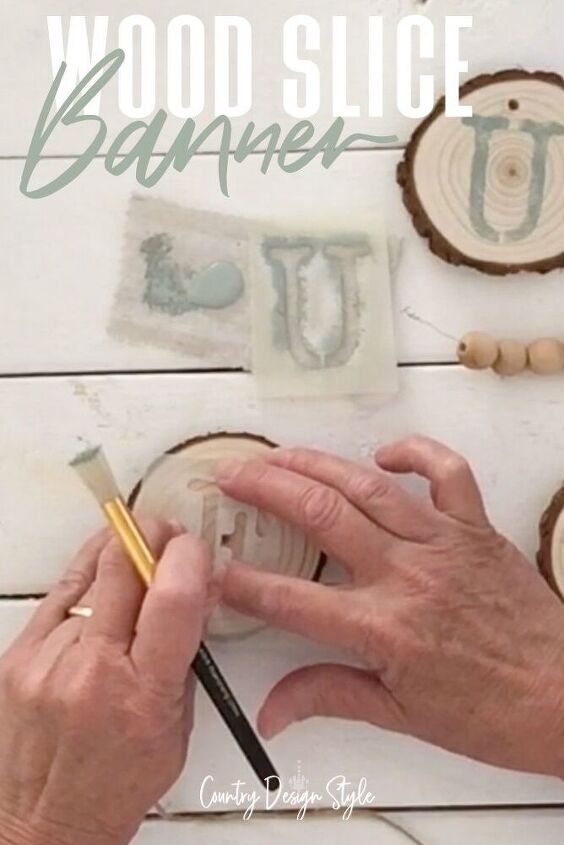
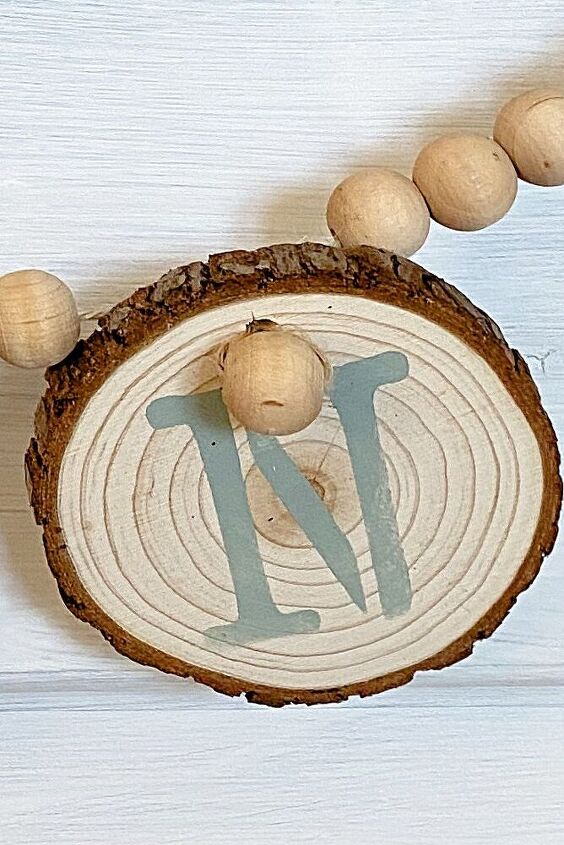
First, I dipped the stencil brush in paint and then dabbed on a paper towel to remove extra paint. This helps to keep extra paint from getting under the stencil. I used a sage green craft paint.
Then I held the stencil in place and pounced the brush over the lettering. Holding the brush straight up and down.
When the stenciling is done, I let the paint dry.
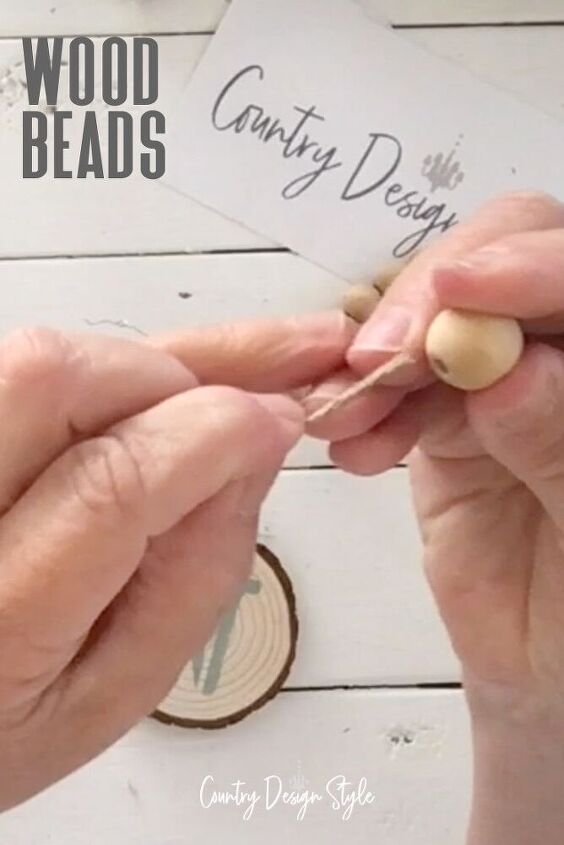
I cut a piece of twine about 2 feet long. On one end, I added glue along 2 inches the twine. Then, using my finger made the twine stick together and come to a point at the end. Let the twine dry. This makes a "needle" and easier to thread the beads.
On the other end, I made a knot.
I added 5 beads then added the "F" slice by poking into the hole from the back.
Then I added a wood bead and threading the twine back into the hole. The wood bead is held in place at the front of the hole.
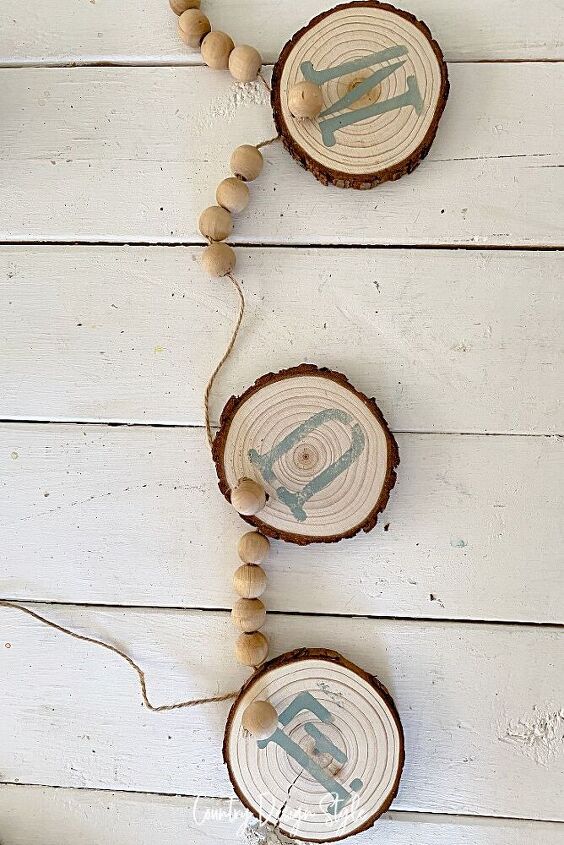
Next, I added 4 beads and another wood slice like the first one. Continue finishing the word. Then added another five beads.
To finish, I made knots in each end of twine, cutting away the "needle."
I love the wood slices with the wood beads. The banner is perfect to hang on the cabinet under the TV in the motorhome!
If you learn best by watching, you can click here to see the live video.
Resources for this project:
See all materials


Frequently asked questions
Have a question about this project?