


How I Built A Range Hood Cover

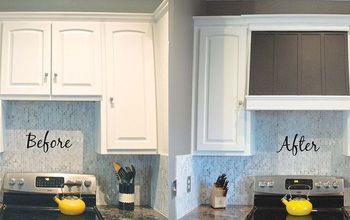
When we moved into our home the wall behind our stove was dominated by heavy, imposing cabinetry that made the ceiling feel low and the room feel cramped. I had in mind the look I was going for and I knew I could achieve the style I was going for on a budget.
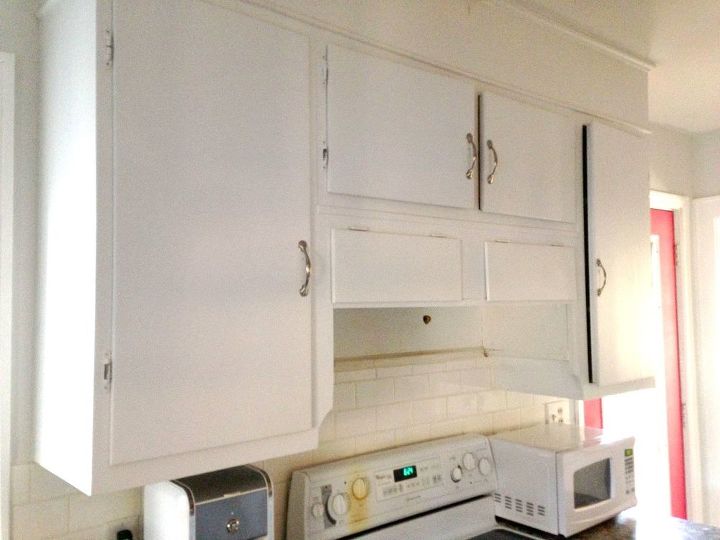
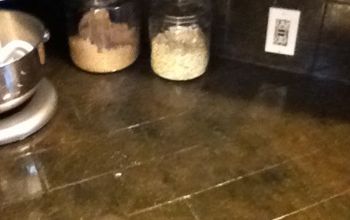
Here is the "before" photo....
I was able to remove the cabinetry and tile the whole wall from counter to ceiling. I had found a vent/fan at Ikea in the AS IS for 50% off. It's designed to be an under cabinet mounted vent/fan and it vents to the outside of our house.
I was able to remove the cabinetry and tile the whole wall from counter to ceiling. I had found a vent/fan at Ikea in the AS IS for 50% off. It's designed to be an under cabinet mounted vent/fan and it vents to the outside of our house.
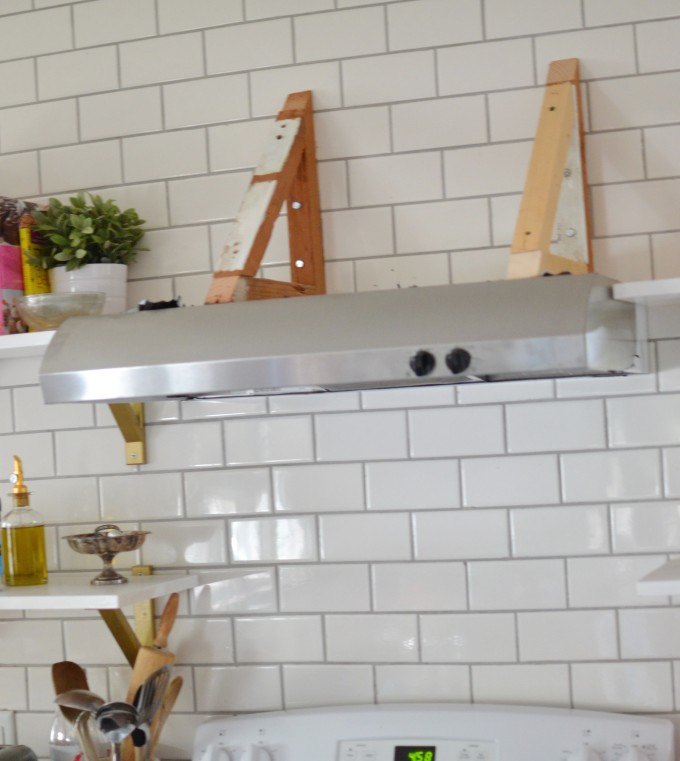
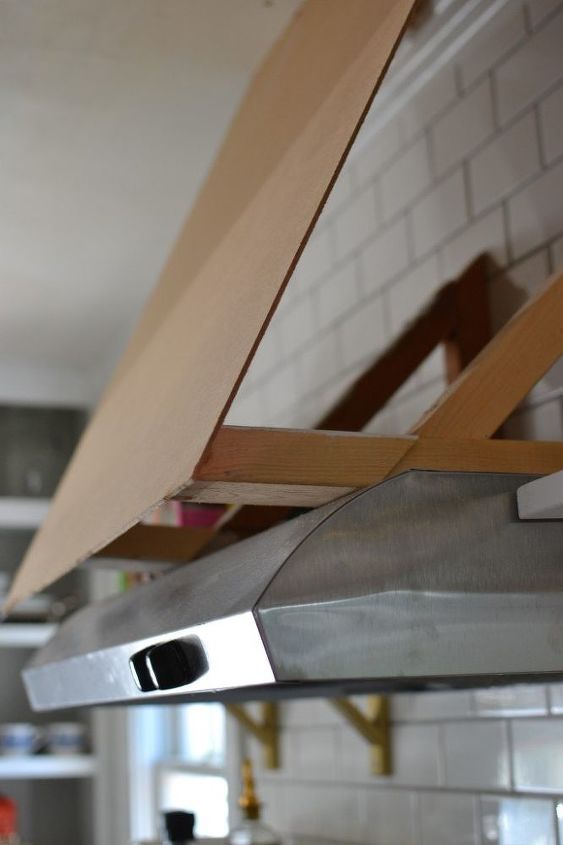
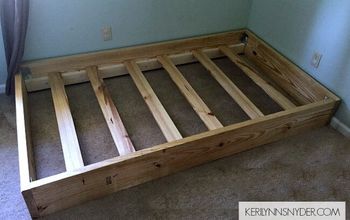
Because the vent was not going to be mounted under a cabinet we constructed a triangular anchor for the vent to be mounted to.
Next I determined where the ceiling studs were and attached anchors for the front of the range hood cover.
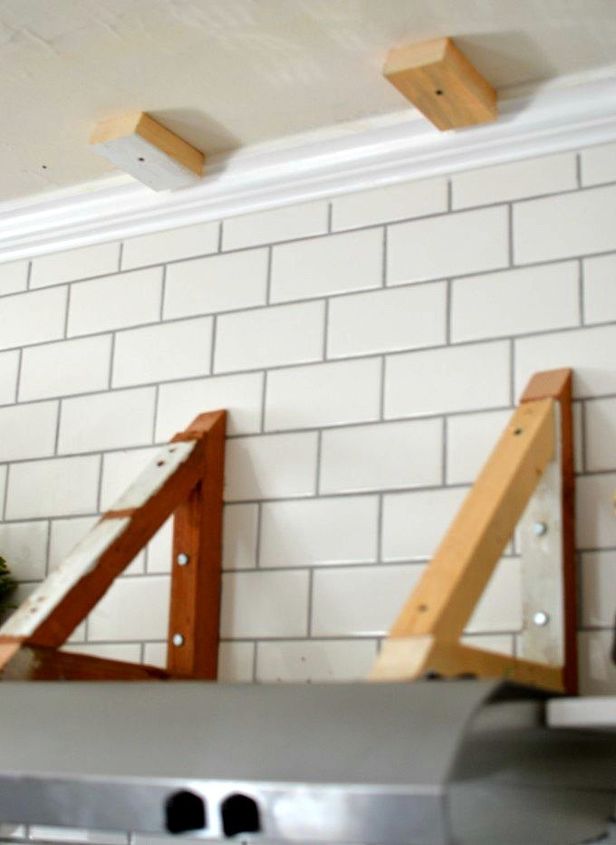
Next I determined where the ceiling studs were and attached anchors for the front of the range hood cover.
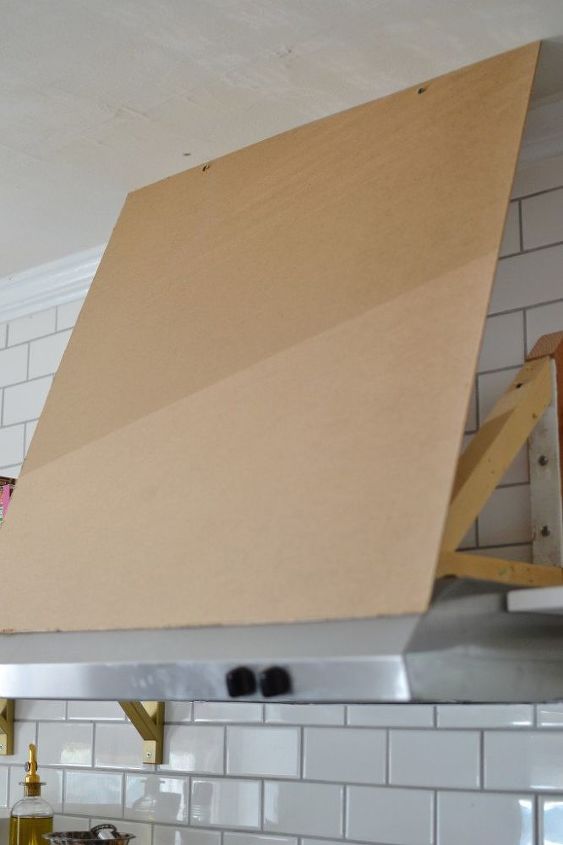
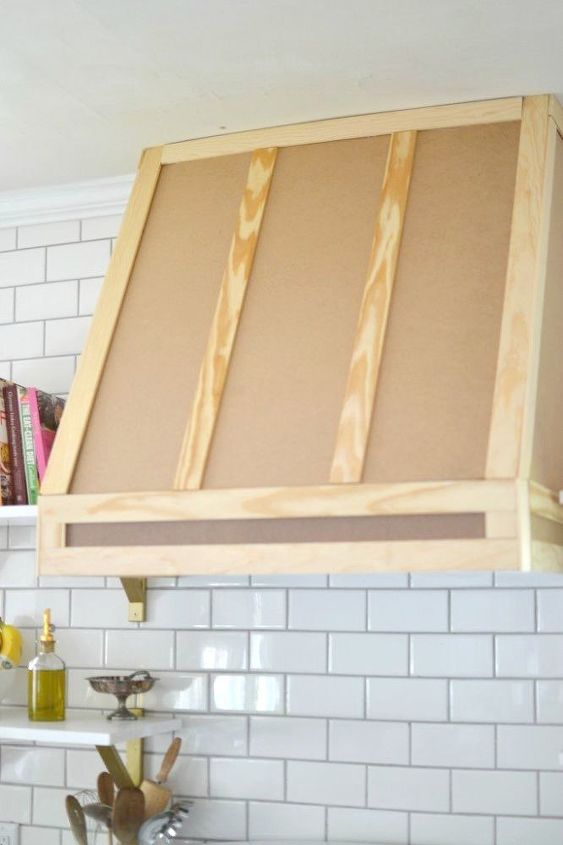
I used thin MDF to make the facade of the range hood cover. It's purely decorative and doesn't support anything, the thin grade MDF is so light that it's the perfect material for a project like this.
I determined how far I wanted my range hood cover to stick out and attached spacers to the triangle anchors.
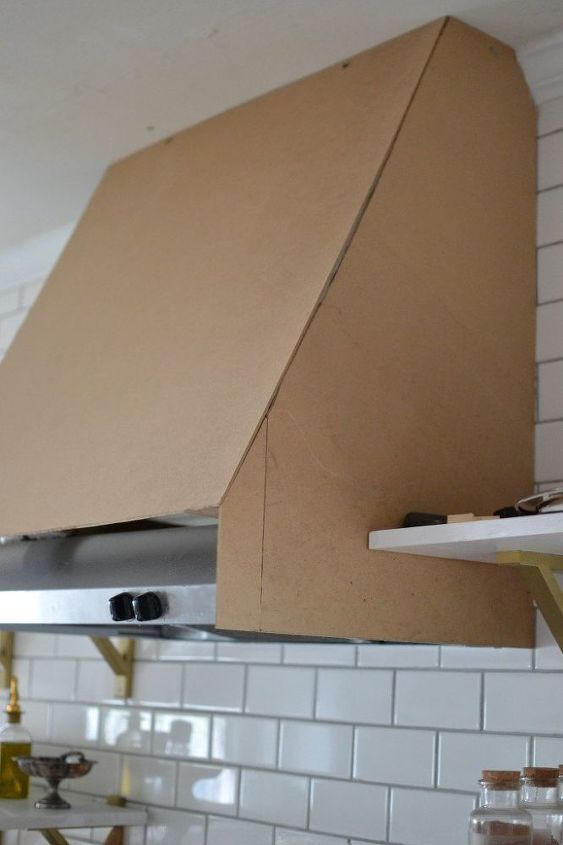
I then measured and cut out MDF for the sides of the range hood cover.
I then measured and cut a piece for the front of the range hood cover.
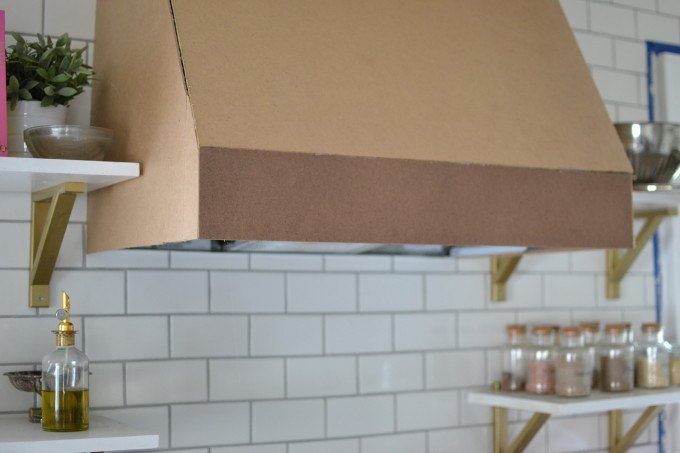
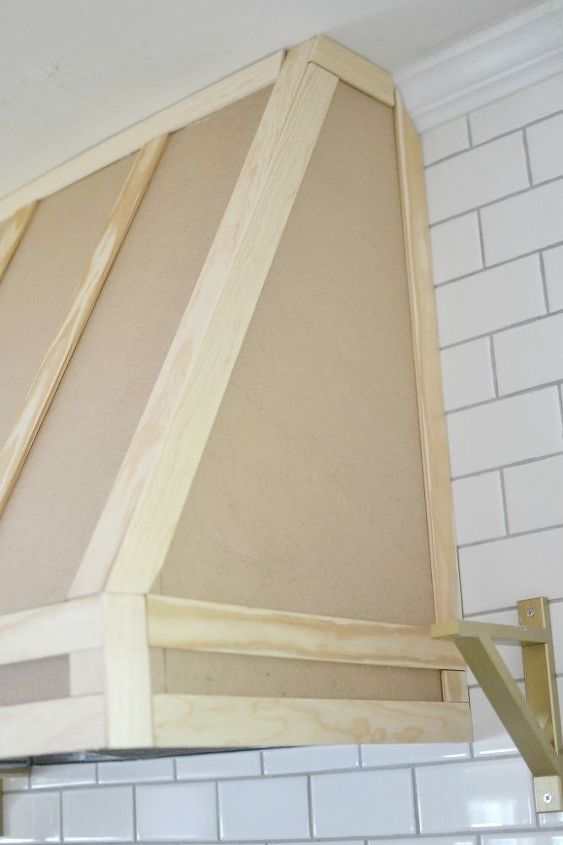
I used 2" kraft board to trim out the range hood cover. I used construction adhesive to attach the trim.
I used 2" kraft board to trim out the range hood cover. I used construction adhesive to attach the trim.
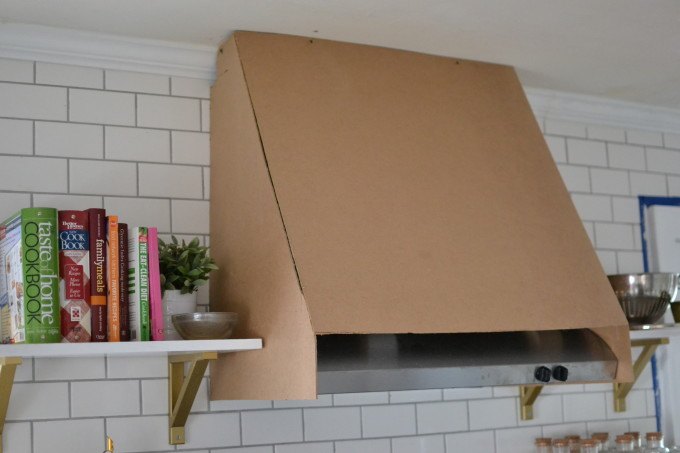
After all the trim was attached I filled all the seams with caulk, primed and painted the entire range hood cover. The knobs that turn on the range hood vent and light are right up under the front of the range hood cover. There is about a 3" clearance so there is no complications switching the vent and light off and on. (I added a photo in the comments showing my husband turning the knobs off and on. When you are standing at the stove you can see the knobs clearly but if you step back a foot or two the knobs are hidden. I also added a photo in the comments of the underside of the vent for those wondering how we clean the filter.)
After all the trim was attached I filled all the seams with caulk, primed and painted the entire range hood cover. The knobs that turn on the range hood vent and light are right up under the front of the range hood cover. There is about a 3" clearance so there is no complications switching the vent and light off and on. (I added a photo in the comments showing my husband turning the knobs off and on. When you are standing at the stove you can see the knobs clearly but if you step back a foot or two the knobs are hidden. I also added a photo in the comments of the underside of the vent for those wondering how we clean the filter.)
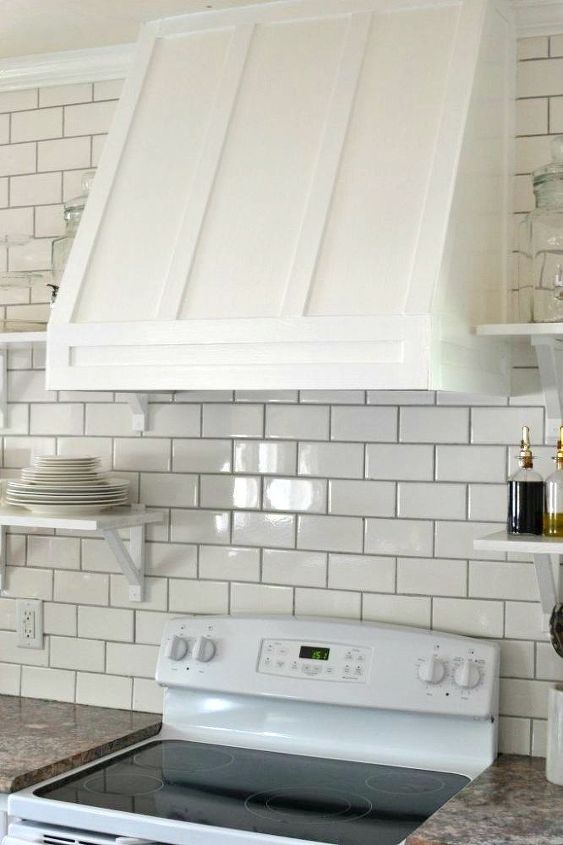
For such a quick and easy project it sure makes a huge impact in here.
For such a quick and easy project it sure makes a huge impact in our kitchen.
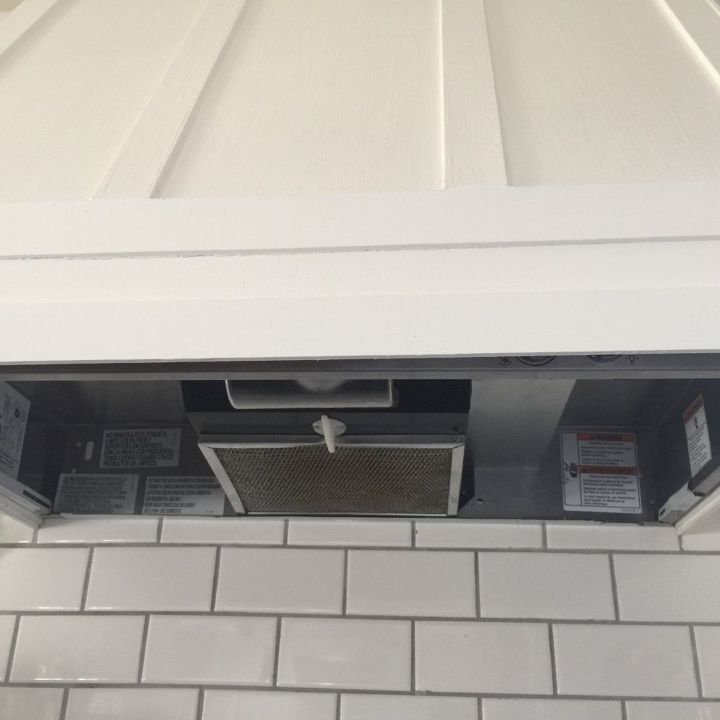
Public Service Announcement: So here’s my own little PSA since I get so many comments about the “safety” of the vent hood. As you can see the entire bottom of the vent hood is metal. This is a vent hood made to be attached to cabinets and hang over a stove therefore it has been rated for use in the way it is being used here. There is no wood/mdf etc exposed to potential flare ups/ steam etc. which makes this inherently more safe than a kitchen with no vent hood and cabinets over the stove. For those worried about the safety of the electrical side of things, I had an electrician wire this in and also vent it to the outside for me. I Don’t have pictures of that but rest assured it happened. For those worried that this will not pass inspection, it did in 2016 with flying colors - thanks for your concern. For those just worried in general - it’s okay the world is scary, swipe right, scroll on and find a project that you feel comforatble reading about. I hear gardening is pretty safe 


Comments
Join the conversation
-
Beautiful 😍
-
Looks fan frickentastic! Great Job! I love your comment to the negative people . which I feel has gotten out of hand . Move along people it’s not like she wants to burn her house down 🤪


Frequently asked questions
Have a question about this project?
How did you attach MDF ‘sides’ to front and to back wall? I have same set up as you and this could work in my kitchen.
How do you turn it on and off?
THIS IS JUST BEAUTIFUL! Your PSA is HILARIOUS! Way to go girl!!