


Make a Statement: End Table Refresh
It's that time again...the big reveal of my latest project for the monthly Fab Furniture Flippin' Contest! I love getting to be a part of this group and having the opportunity to try new products each month. For the month of February, the sponsor was DecoArt (specifically their Americana Chalky Paint), and the theme was "Make a Statement".

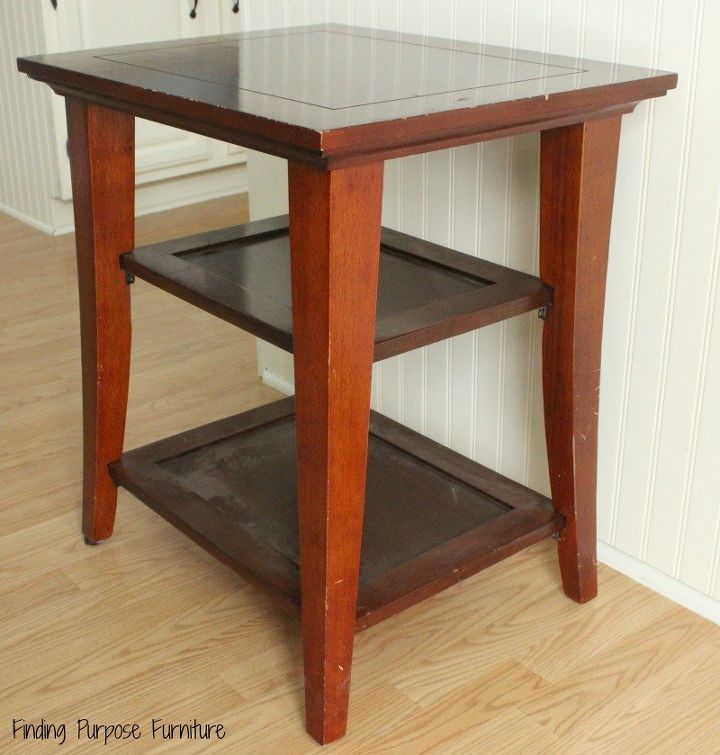
I knew right away which piece I wanted to tackle for this month's theme. A good friend has recently gone through a pretty major life change and is about to move into a new house. As she was telling me all about the bold color choices in her almost finished house, I knew these end tables I was refinishing for her would be the perfect "Make a Statement" project. Not to mention, this particular friend can be quite BOLD herself. She dropped off her two little end tables and I got busy. Honestly, these tables were in decent shape, minus a few nicks and scratches here and there. After a good wipe down, a small repair to one leg, and a quick sanding (I used a 240 grit sanding block), these tables were ready for paint.
The process for this project was short and sweet. As this was only my second time working with chalk style paint (read about my first experience here), I was hesitant but again pleasantly surprised with the outcome. No real sanding, no primer...just two coats of this chalky paint. After coat one, I was a bit nervous. The coverage wasn't super and the dark wood was still showing through quite a lot. However, as soon as I started the second coat I could see that it was going to work and cover perfectly. This chalk paint is definitely thick, but it applies with a smooth coverage. I'm definitely a fan. I really liked that this chalky paint dried quickly and I was able to re coat after only an hour or so. I used a tiny brush to get into the small crevices on the top surface, and my favorite Purdy brush for the rest. Once the second coat had time to dry, I did my scratch test to make sure the paint wasn't going anywhere. Good news...it didn't scratch at all. Once I finished the two coats of paint and could tell that I was happy with the coverage, I sealed the tables with DecoArt Ultra Matte Varnish. I liked the zero-sheen and no-glare characteristics of this varnish, along with the high level of protection. This varnish went on well and gave the tables the finished look I was hoping for.
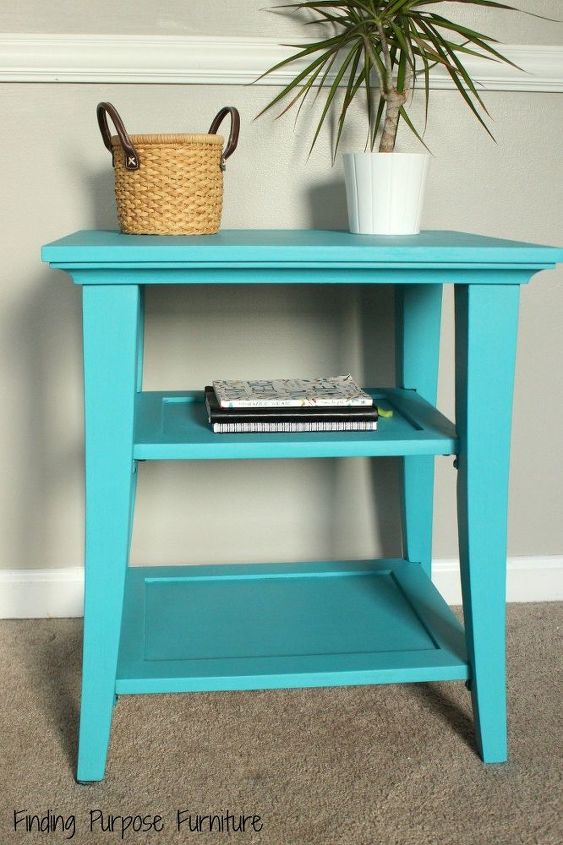
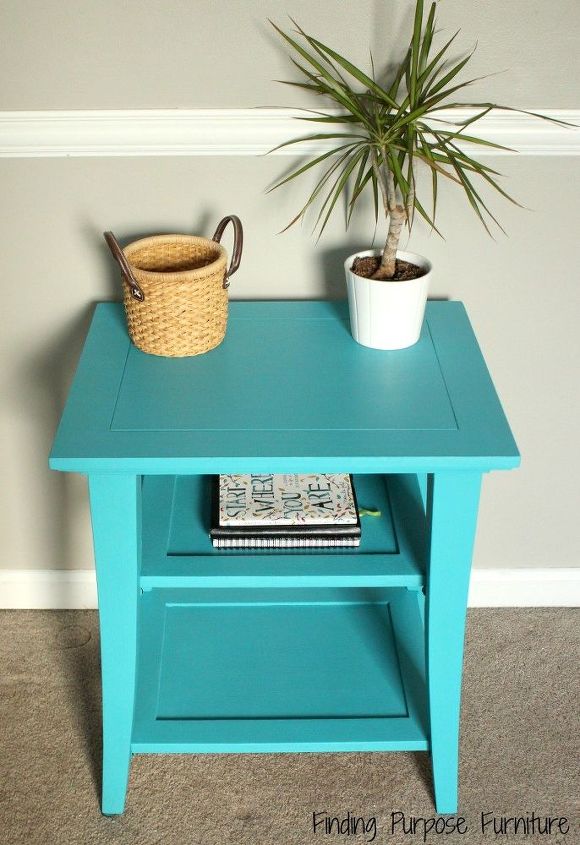

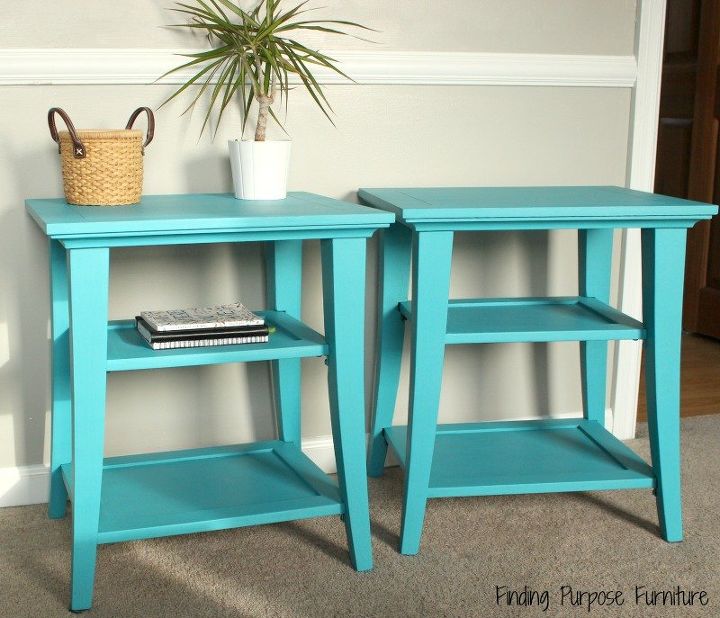
I'm really happy with how these tables turned out, and I cannot wait to see how they look in their new home!
Resources for this project:


Comments
Join the conversation
-
They look great. I love that colour so much and I have lamps that colour in my livingroom as well as accent pieces. I have to stop or it's not going to be an accent.........


Frequently asked questions
Have a question about this project?