


Busted to Beautiful: a UNICORN SPiT Table Transformation!

5 Materials
I got my first order of unicorn spit about a month ago and I am obsessed with it! Not only is it non toxic, water based, safe for use indoors, and smells like jasmine, it also can be used on literally everything! I came across this table in pretty good shape (just filthy dirty) at a barn sale for $4 and knew instantly what I wanted to do with her! Please know that I live in Florida and we are currently experiencing weather from tropical storm Colin so I am sadly confined to my ridiculously full garage. Try not to be distracted by my mess please y'all!
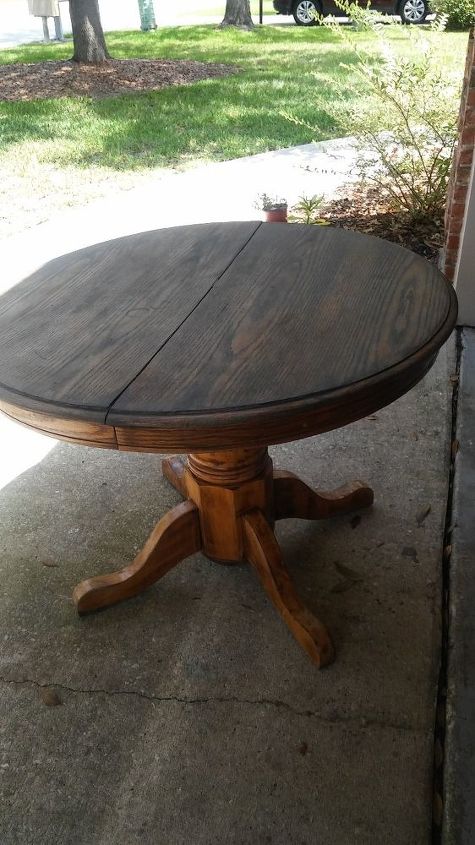
After tightening some bolts and repairing the veneer with wood filler I got to work sanding down the little bit of finish that was left on the top.
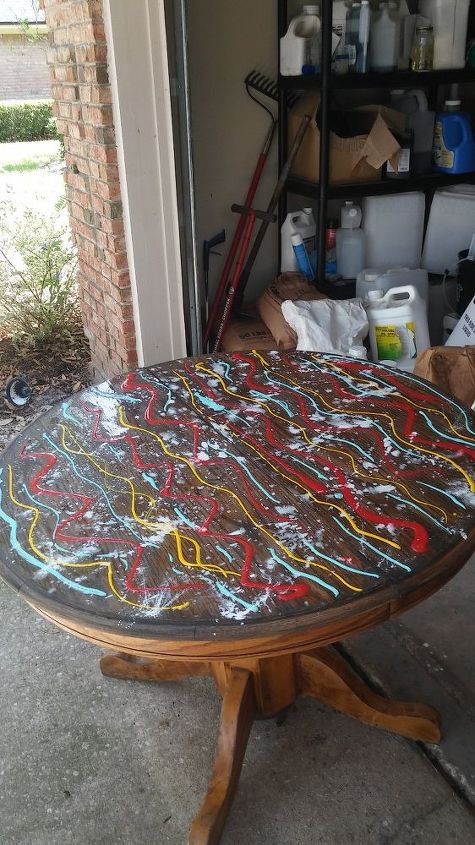
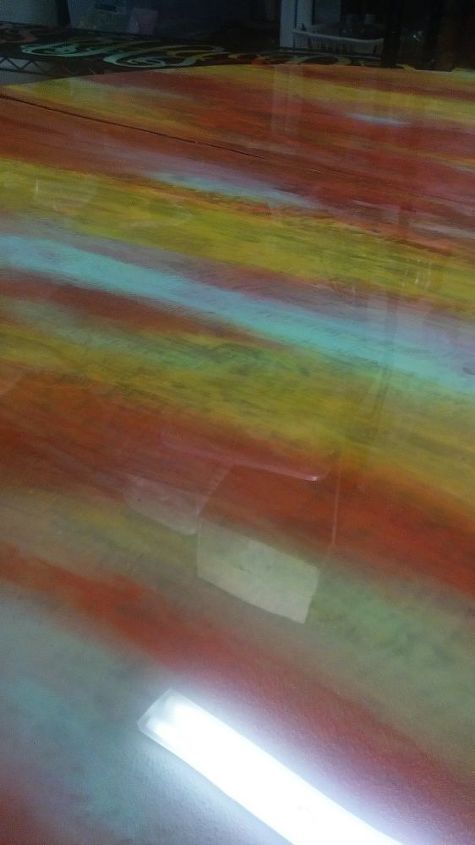
I then moistened the top with my spray bottle of water and applied the Unicorn SPiT in a zig zag type pattern and flicked the white with my fingers. I used Molly Red Pepper, Lemon Kiss, Zia Teal and White Ning. In the end I had to add more SPiT and it covered the white almost completely. The great thing about unicorn spit is there are no mistakes! It takes on a life of its own and creates amazing art. Spray the top with water generously before moving on to the next step.
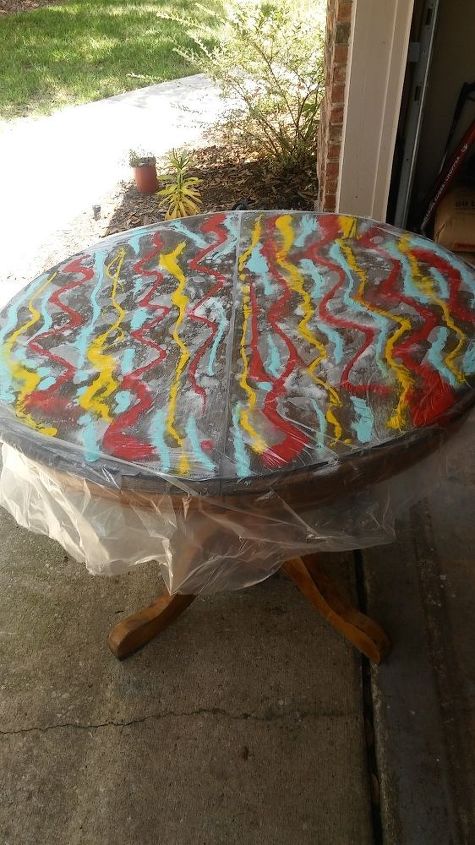
Next, I used a plastic tarp that I pre cut to the size of the table and draped it over the top allowing it to suction all of the air out. This is best done with 2 people if you have a large project because you want to get the plastic tight over the top so there's minimal air bubbles and wrinkles. You can lift up the tarp and help some of the remaining air bubbles out. Then spray the top of the plastic with water to allow your hands to glide on top of the plastic without moving it. Use your fingers to smooth out the colors and move them around where you want them to go and then use a paint roller or your hands to go from side-to-side blending the colors together.
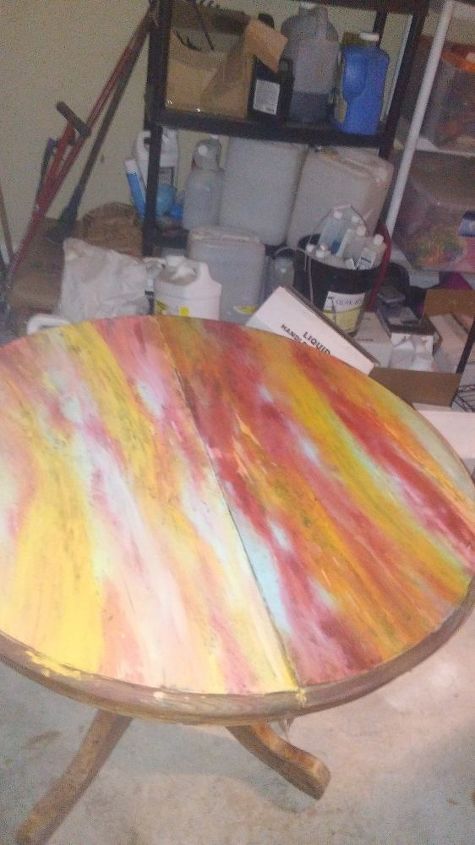
With someone else's help, grab all four corners of the plastic and pull up with such balance that the center pops up the very last. This step is very challenging for me and I have yet to do it perfectly. This is what I got when I pulled my plastic off. You can leave it like this but I decided to go in with more unicorn spit after the first layer had dried.
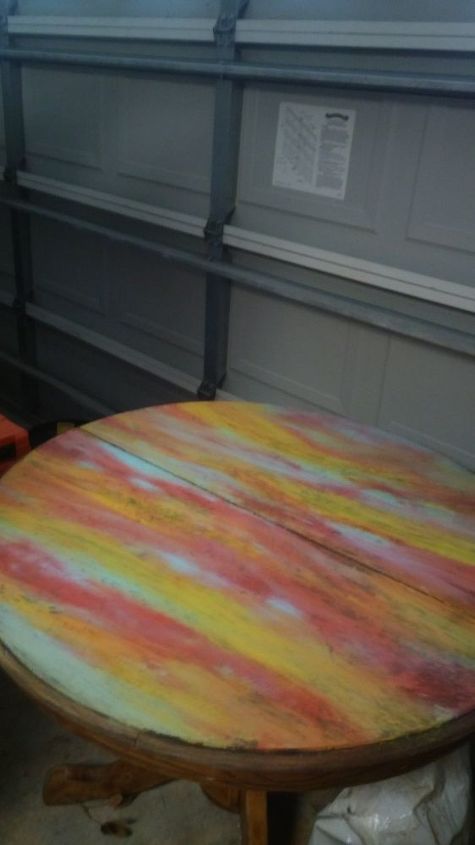
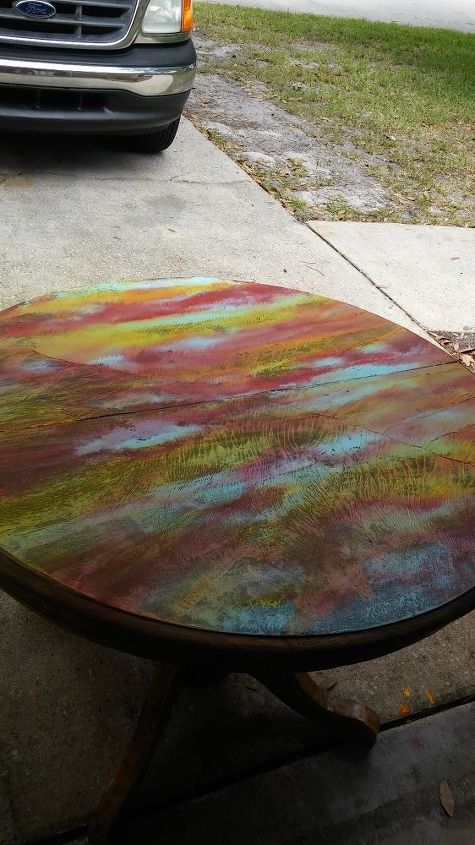
The spit looks very chalky when it's dry, but don't worry we aren't done yet!
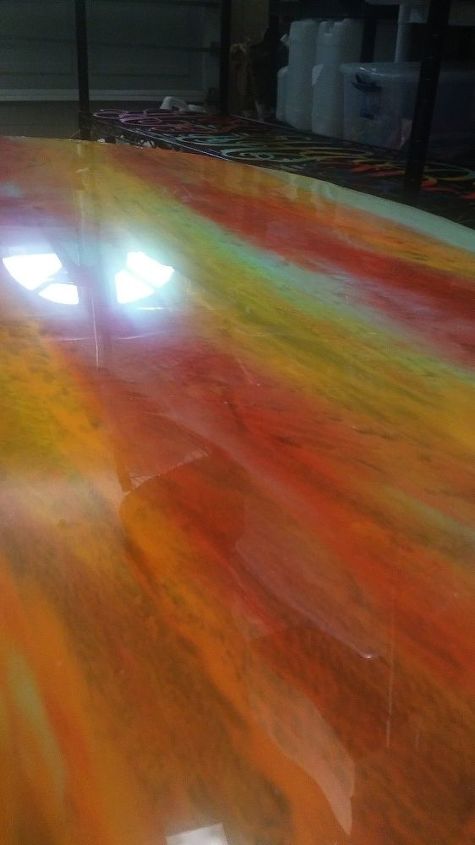
What a difference Tung oil makes!
Apply Tung oil with a foam brush being sure to carefully follow warning labels. I did a couple coats letting it dry completely before each coat.
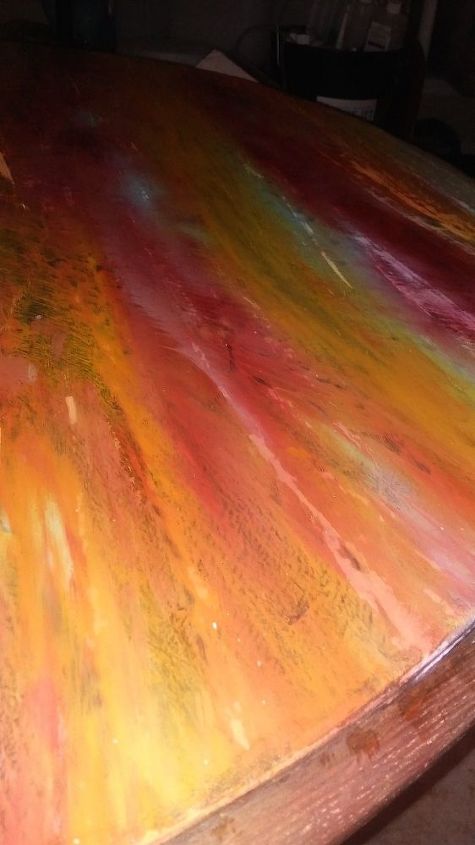
I love how you can still see the wood grain!
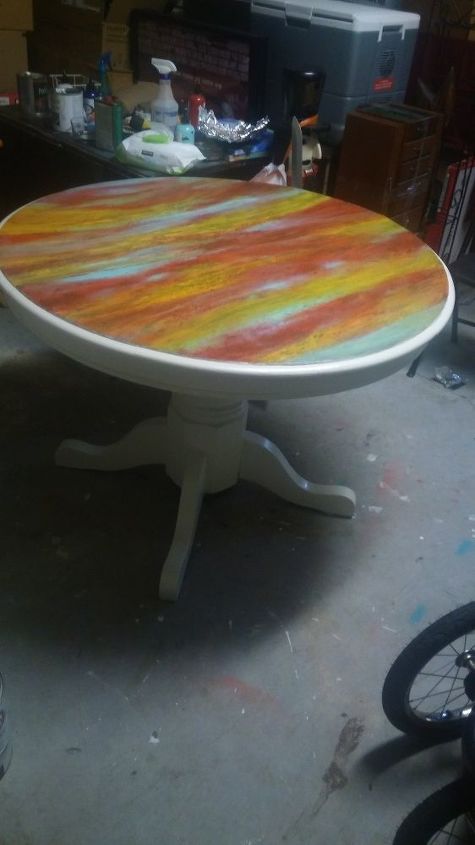
I painted the base with Valspar furniture paint. It requires no sanding or prep just paint on! I prefer Rethunk Junk paint but I was in a pinch for time. It took 3 coats of the Valspar paint to achieve the look I wanted.
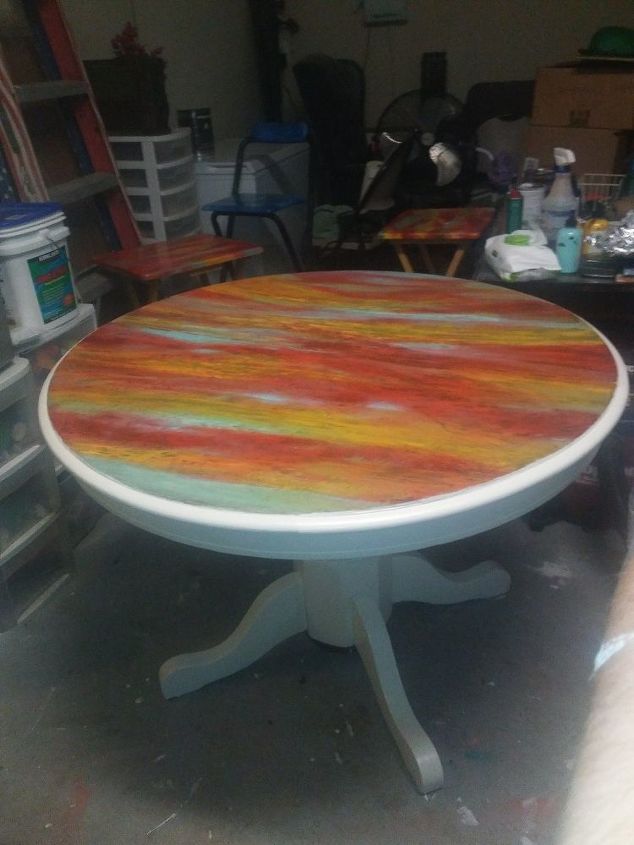
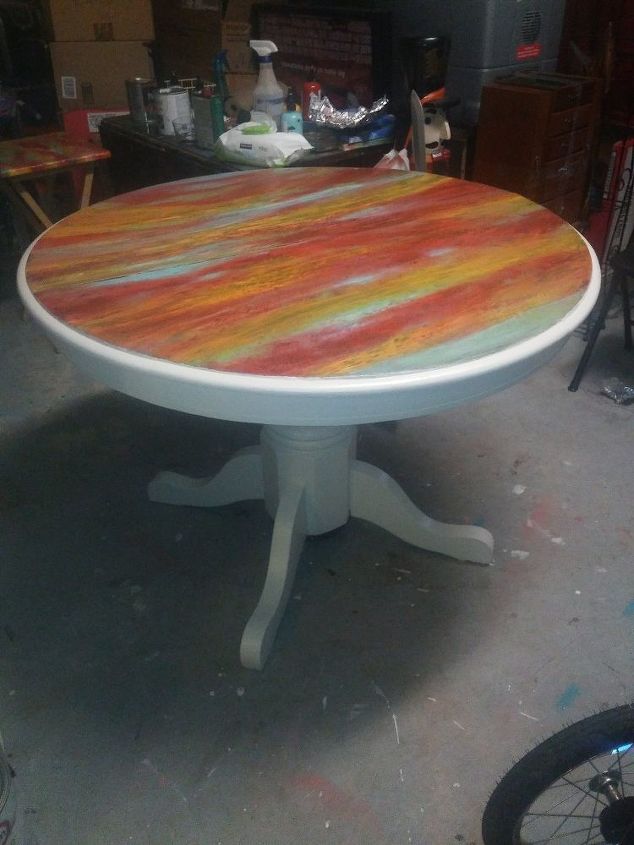
I think she looks like a planet! I will also be using famowood 2 part epoxy on the top to give it a glass like finish. *UPDATE: see photos below showing right after I applied the famowood 2 part epoxy!
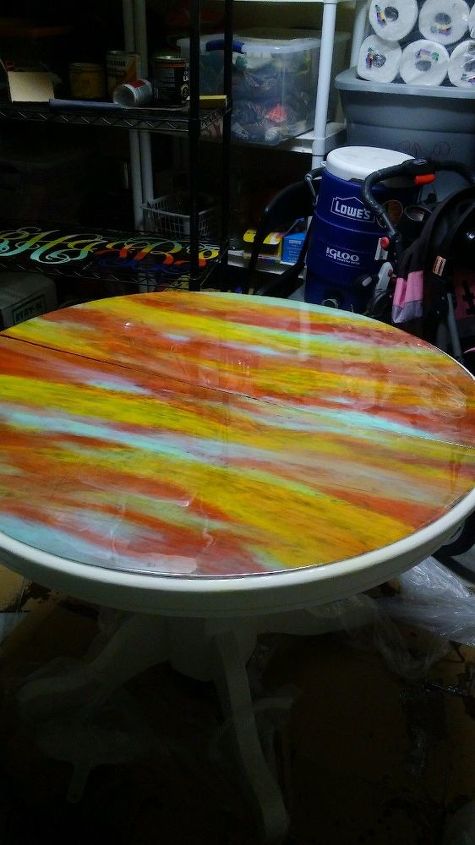
Right after applying famowood 2 part epoxy!
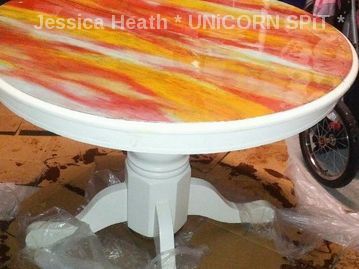
still a mess but I LOVE how she turned out!
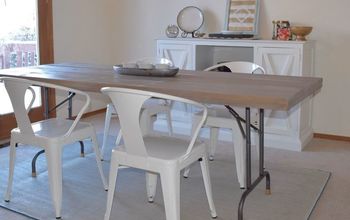
Still look like I paid $4 for this table?! Hope you enjoyed my post!
Comments
Join the conversation
2 of 69 comments
-
I love your table - I appreciate the details of how you did it....I'll be trying it soon.


Frequently asked questions
Have a question about this project?
Beautiful! I was curious about the use of Tung Oil... did you have to remove it before you applied the epoxy?