


DIY Statement Light Fixture

by
Homes.com
Homes.com is excited to bring you a winning project from the Creating with the Stars contest we had the pleasure of sponsoring. We are in awe of Sarah’s, from Sarah M. Dorsey Designs, out of the box thinking for this light fixture. You’re not going to believe what she used to make this DIY statement decor piece. See how you can make a similar piece for your space with this step by step tutorial from Sarah.
Brought to you by Sarah M. Dorsey:
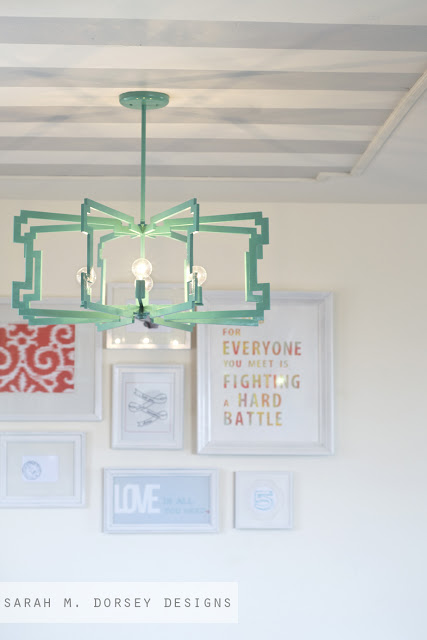
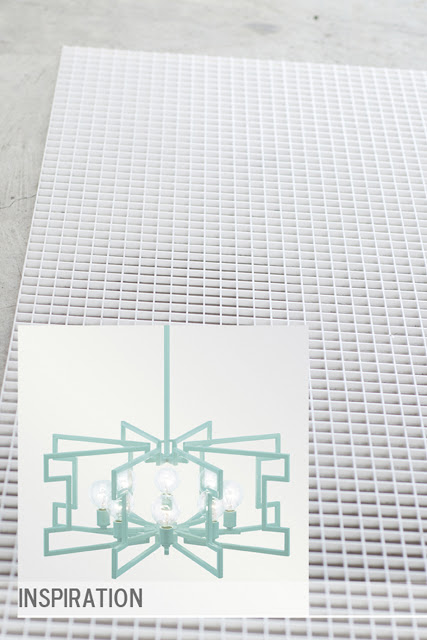
Walking through Habitat ReStore I spotted a few egg crate diffusers. It’s the last lighting fixture I would consider for a project, but then I began thinking how neat it would be to use the grid to create any square geometric shape that I wanted. At $2 each, what could I lose?
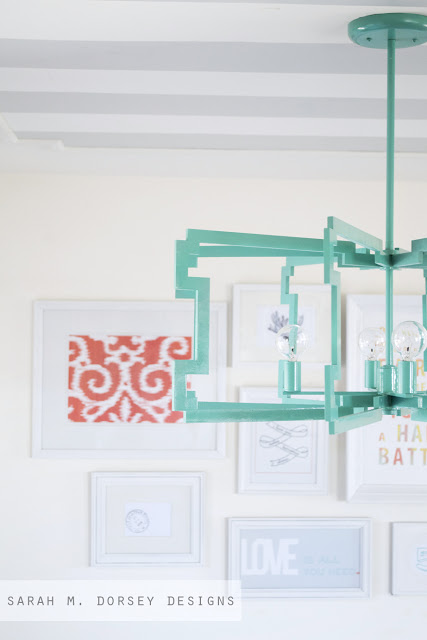
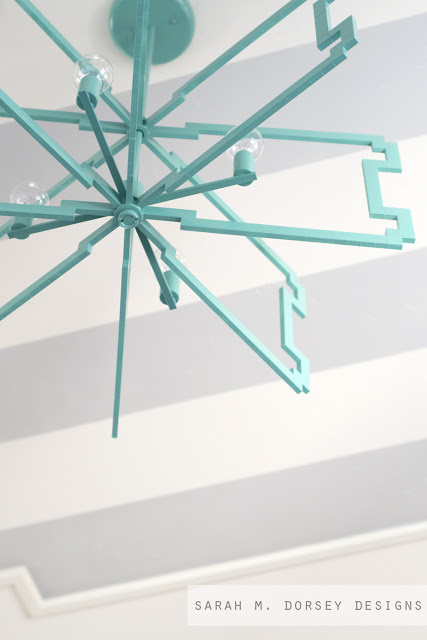
Browsing Pinterest I found this amazing light, Lolita – Shine by SHO and fell in love with the arms. It’s lines are simple, but make a big impact! Perfect for a statement piece!
Once we decided on the shape, we measured and marked the edges with a permanent marker. The egg crate diffuser was cut into the shape of the arms with small clippers (clipping as close to the edge as possible).
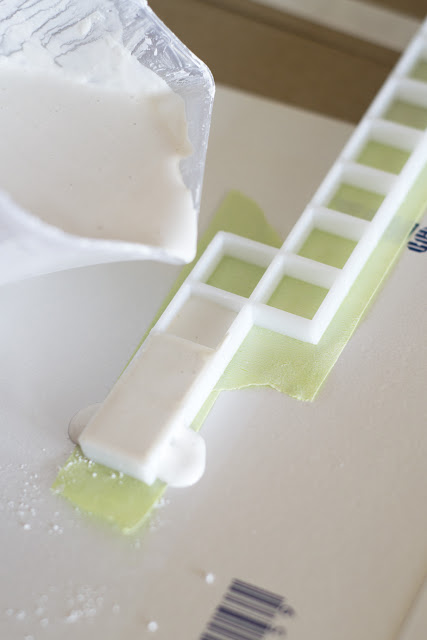
Next we taped the bottom with painters tape and filled with plaster of paris (mixing it on the thinner side so that it would level itself at the top). You want it as level as possible to reduce sanding. Any excess was leveled off with a spackle knife.
- Sarah M. Dorsey
For the full tutorial visit blog.homes.com
http://blog.homes.com/2013/07/diy-statement-light-fixture/
project
Brought to you by Sarah M. Dorsey:
Walking through Habitat ReStore I spotted a few egg crate diffusers. It’s the last lighting fixture I would consider for a project, but then I began thinking how neat it would be to use the grid to create any square geometric shape that I wanted. At $2 each, what could I lose?
Browsing Pinterest I found this amazing light, Lolita – Shine by SHO and fell in love with the arms. It’s lines are simple, but make a big impact! Perfect for a statement piece!
Once we decided on the shape, we measured and marked the edges with a permanent marker. The egg crate diffuser was cut into the shape of the arms with small clippers (clipping as close to the edge as possible).
Next we taped the bottom with painters tape and filled with plaster of paris (mixing it on the thinner side so that it would level itself at the top). You want it as level as possible to reduce sanding. Any excess was leveled off with a spackle knife.
- Sarah M. Dorsey
For the full tutorial visit blog.homes.com
http://blog.homes.com/2013/07/diy-statement-light-fixture/
project

Comments
Join the conversation
4 of 20 comments
-
@Erin@UpcycledUgly Glad you love this! Would you use a different color? Where would you hang this?
- See 1 previous
-
I was just looking at this and thought, instead of filling it with plaster of Paris, what about using one of the various designs of duct tape just on the outside of it. Wouldn't need to paint it, either! :-D (BTW, I like this one better than the inspiration piece!)


Frequently asked questions
Have a question about this project?