


Homemade Cheeseburger Costume
Last year my nut ball son insisted on being a cheeseburger for Halloween. After a good deal of time trying to talk him out of this idea, I surrendered and set out to find a cheeseburger. I looked up Cheeseburger Costumes to purchase but none of them were to his liking so I had to make one. It turned out to be a fun project so I thought I would share it. I know its not likely that many of you are looking for a cheeseburger costume but my hope is that some to the techniques and materials used will help you tackle your own homemade costume ideas
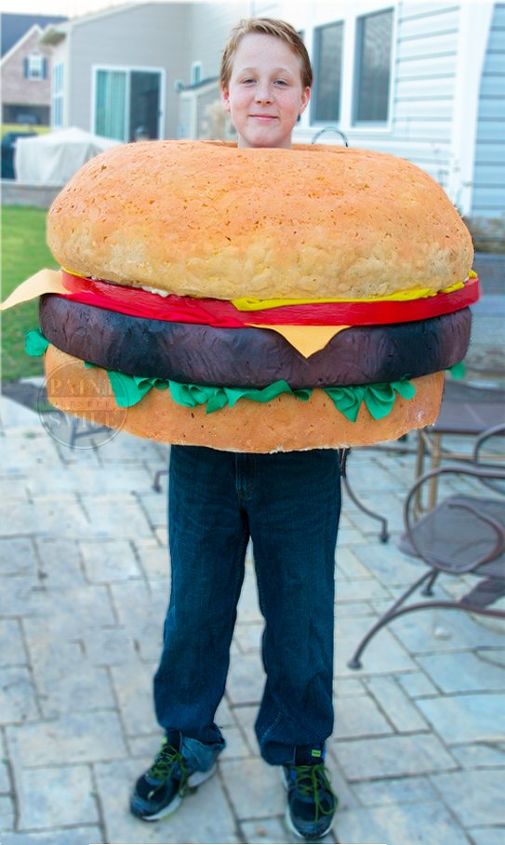
He wanted it to be large so my solution to create bulk without the weight was to make the majority of the costume out of foam insulation board. Foam insulation board is relatively inexpensive and is purchased in sheets from a home improvement store
Materials
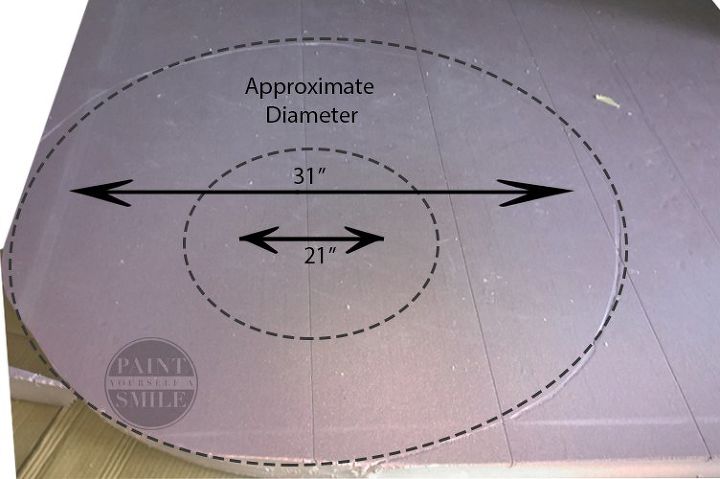
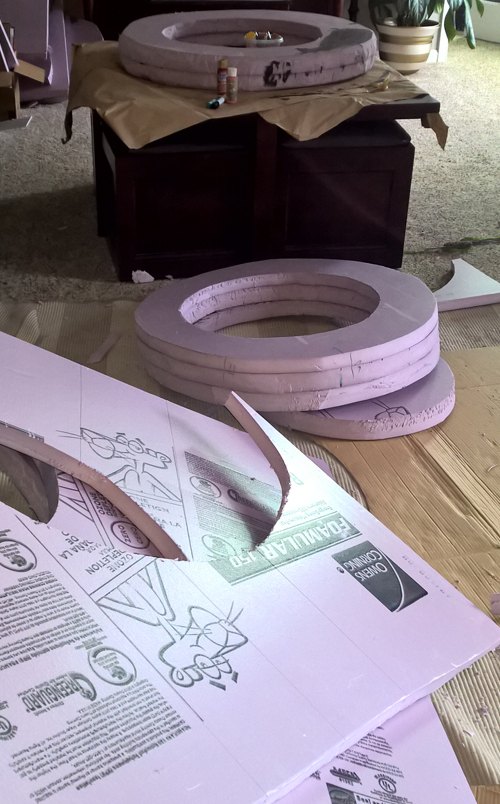
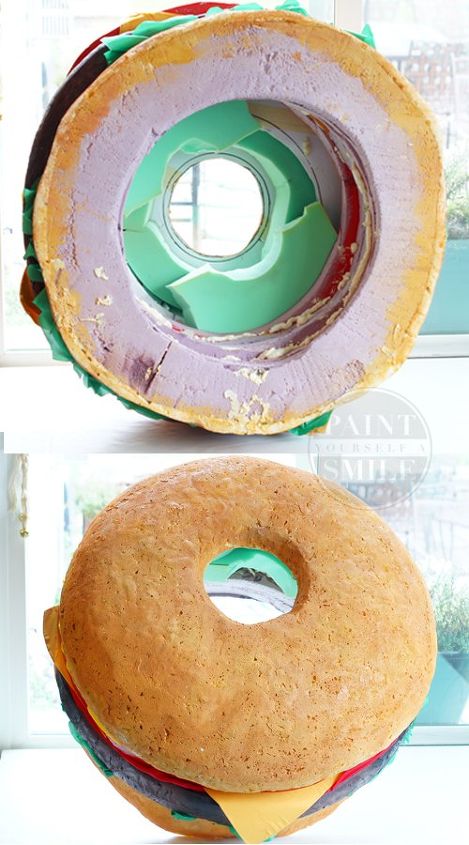
For the Burger Meat I cut (2) circles out of 2″ thick foam insulation and glued them together “3M hi-strength spray contact adhesive” to make one big 4″ thick piece.
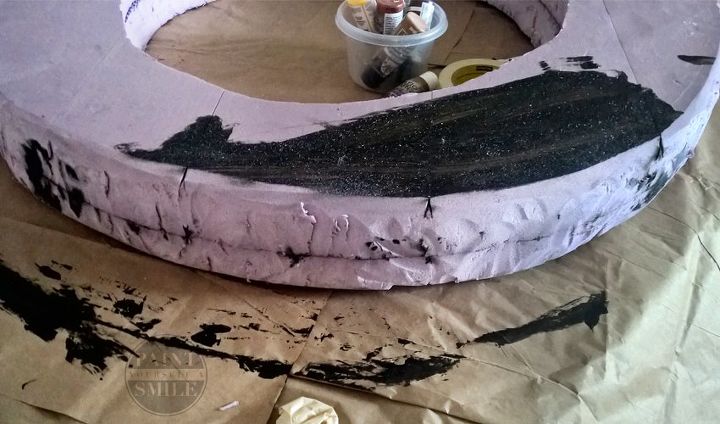
After the Hamburger Meat was glued, I used an orbital sander to smooth the glued pieces that may not have lined up perfectly and I rounded the top and bottom edges. Also, I created indents in the middle for texture like a hamburger patty. Then I painted the meat with a mixture of black and brown acrylic paint.
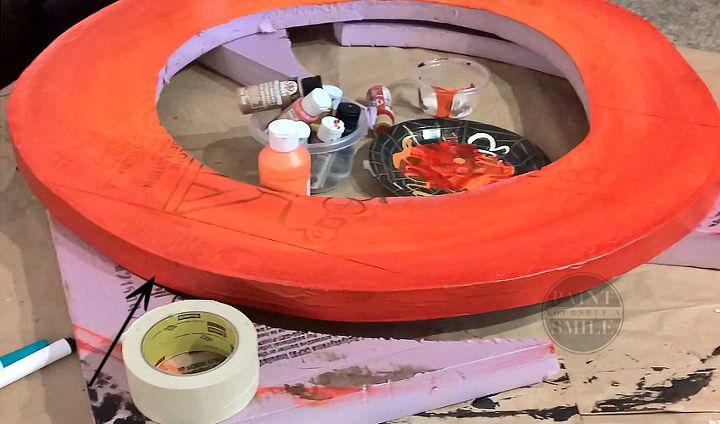
For the Tomato Slice, I did not use the sander since it was a single slice of foam. I did wrap the outside of the tomato with masking tape. The tape smoothed the outside of the foam and made it look like tomato skin once it was painted. I used orange and red acrylic paint.
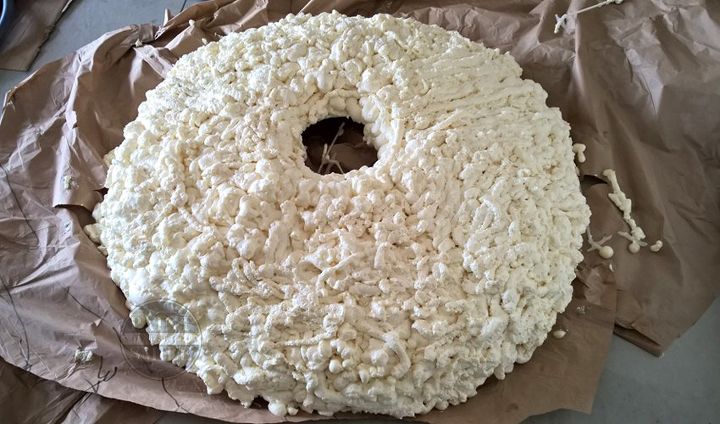
For the Top Bun, instead of Foam insulation I used 2 pieces of foam core poster board and spray insulation foam. I have more details on my original blog post on how to create the buns here

I used simple acrylic craft paint to paint the bun. It wasn't hard.
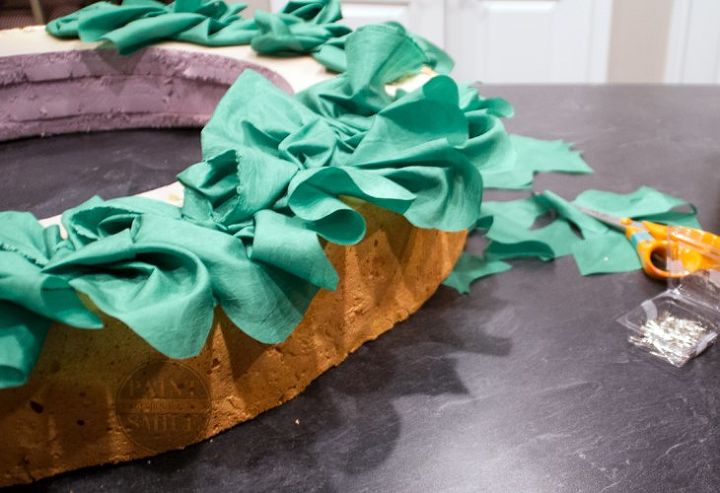
After I had the lettuce attached I glued the hamburger layer to the bottom bun with the spray adhesive.
I had planned on drilling out arm holes but it turned out that there was plenty of room in the costume for him to move about and reach out from underneath. It worked out very well. He loved the costume and it was a big hit in the neighborhood. Check out the original post on my blog for more detail and photos.

Want more details about this and other DIY projects? Check out my blog post!


Frequently asked questions
Have a question about this project?