


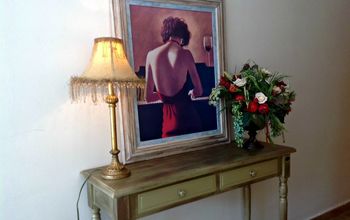
Torched Alder Console Table

This was a lot of fun! I experimented a bit with some new finishing techniques, and I'm very happy with the results. But I'm also a little bummed that I didn't get a better picture of the finished project, I'm not much of a photographer, but the lighting made it impossible for me to get a good shot, so you'll have to browse through or watch the video to see the finish. I also encourage you to watch my super amazing mind blowing masterpiece of a 6 minute build video!
{
"id": "3677208",
"alt": "",
"title": "",
"video_link": "https://www.youtube.com/embed/Z4p6FxlyZb4",
"youtube_video_id": "Z4p6FxlyZb4"
}
{
"width": 634,
"height": 357,
"showRelated": true
}
Here is the build video! There are a few details here that aren't in the image gallery.
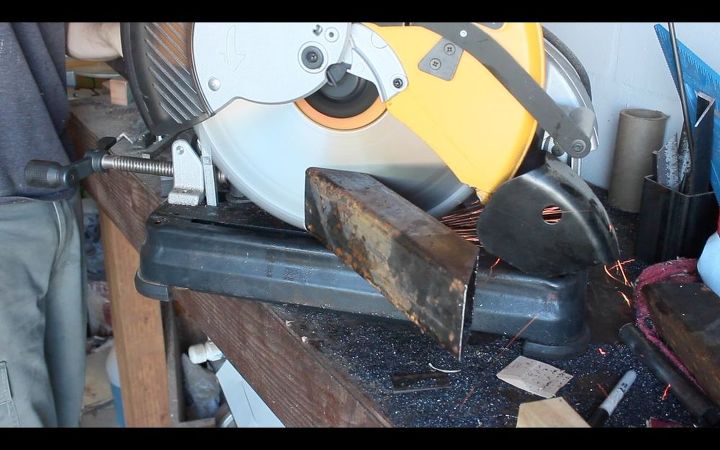
Most of the frame is made from 2"x3" square steel tubing. Here I'm using a cold saw to cut the frame pieces to size.
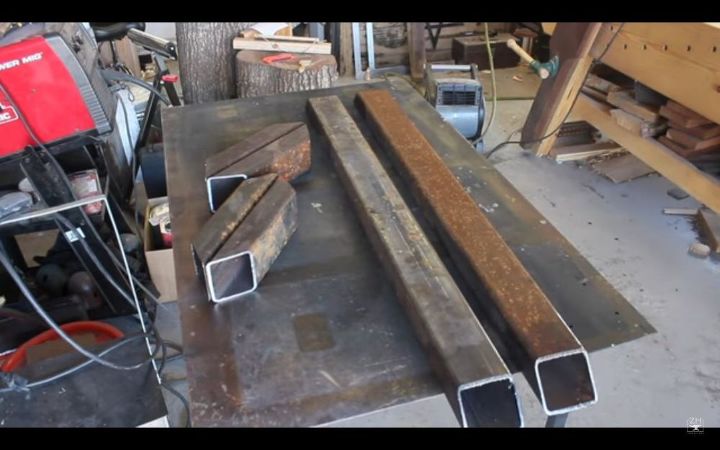
Here are the components for the frame cut to size. Standard bar height is 40-42", this will stand 41" tall.
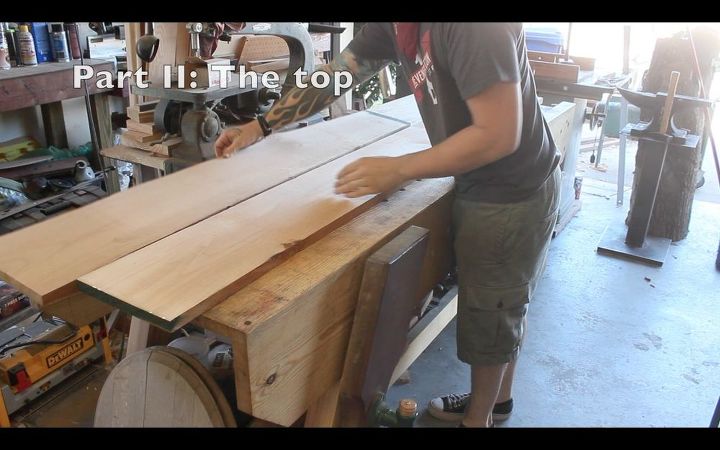
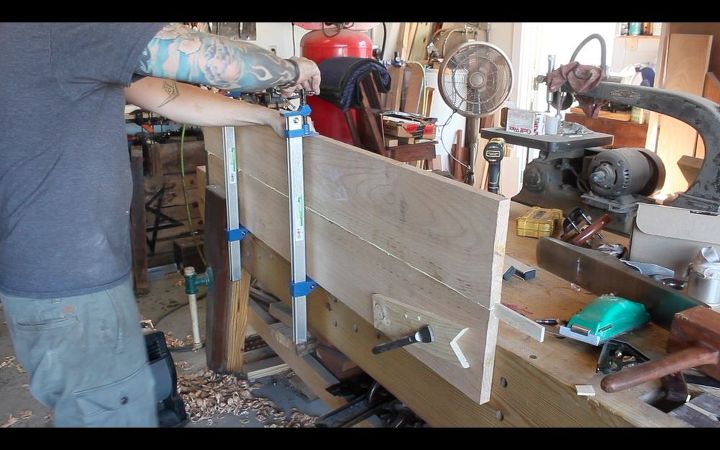
The next step was to prepare the two pieces of 4/4 alder for glue up. The total width is going to be 14".
The first step was to plane the glue joint perfectly square.
The glue up. This is pretty self explanatory, and I couldn't be happier with the spline joint. I typically use Titebond II for most glue-ups.
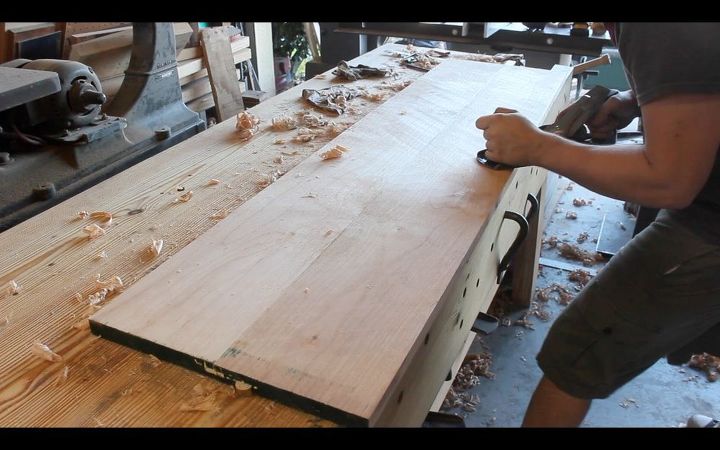
Next it was time to flatten the top. I guess it makes me sort of rebel, not only that I own a #6 plane, but more so the fact that it is hands down my favorite bench plane. Most people hate them for some reason. I find that when set up with the slightest blade radius it is the perfect plane for flattening panels.
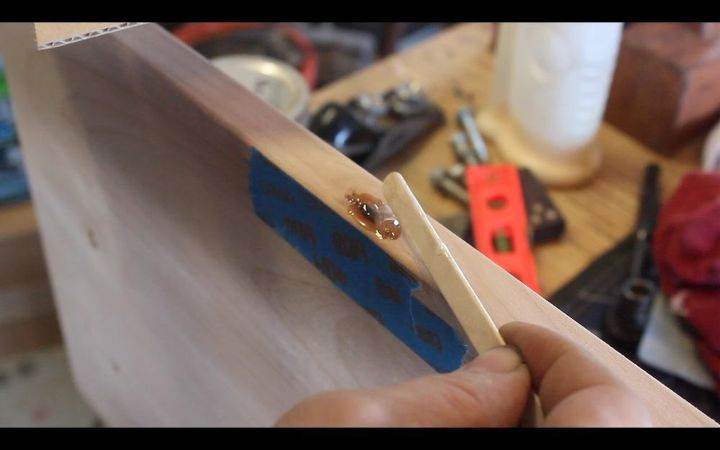
On to the finishing process. The first step here was to fill the knots/voids with epoxy. I find that popsicle sticks are awesome for mixing and dripping epoxy, you can get yourself a lifetime supply for cheap.
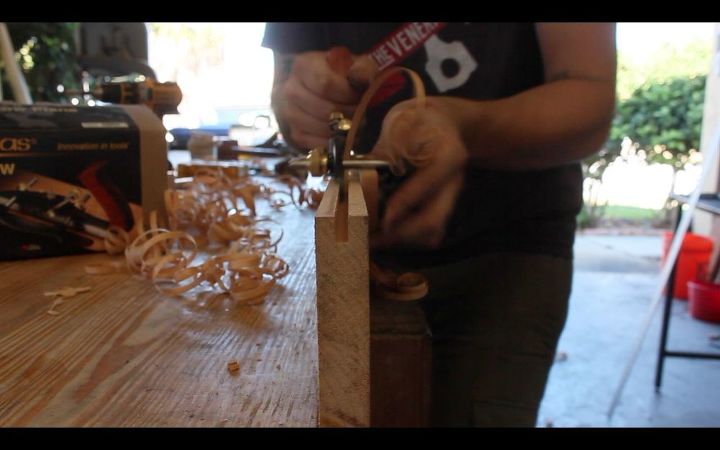
I threaded in some brass inserts to accept the bolts,(can be seen in the video) This is how the top will be secured to the frame.
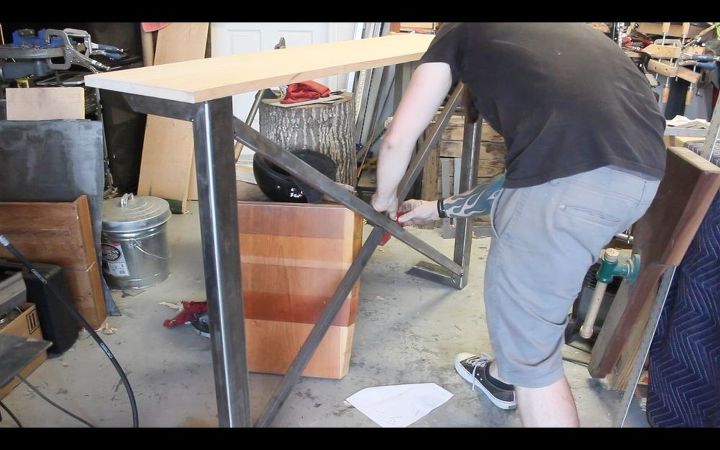
After the main frame was welded up, I welded in the cross brace. The cross brace was made of 1"x2" tubing.
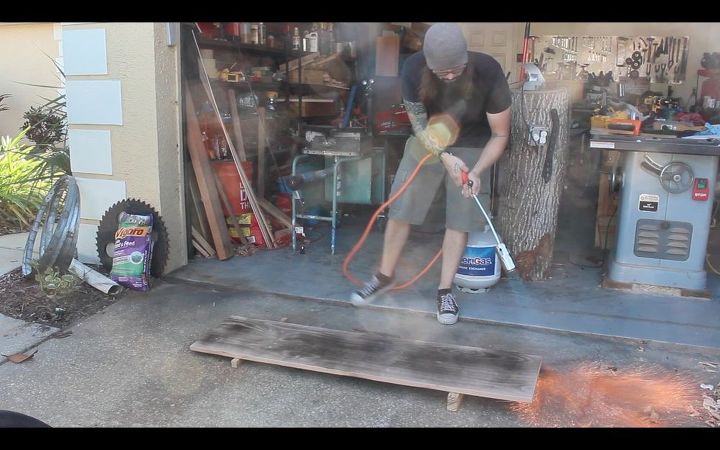
This was definitely the most fun part, I used a tar/weed burner torch to burn the alder. This gigantic torch makes it a lot easier(and faster) to get a uniform burn on the wood.
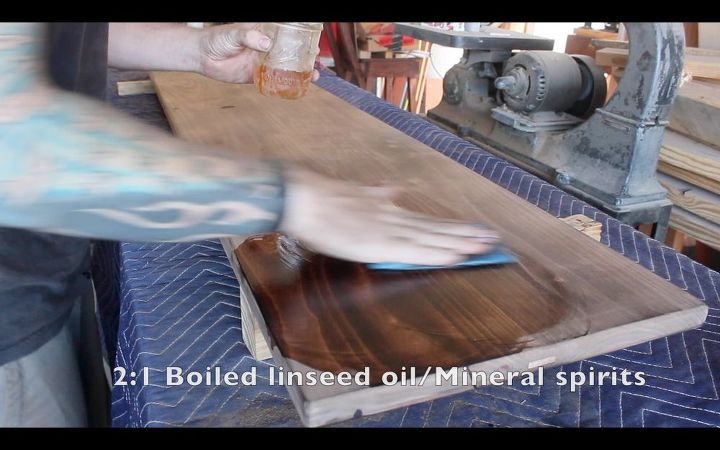
After torching and lightly sanding the top, I applied a mixture of Boiled linseed oil and Mineral Spirits. You can see how much this makes the figuring of the wood jump out. I use a ratio of 2:1 Boiled linseed oil to Mineral Spirits.
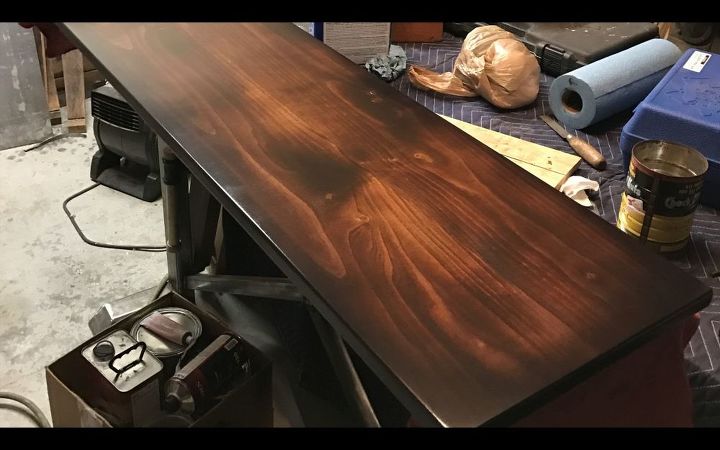
The top all finished. It was a pretty involved process, but I am very happy with the finish. There were a few steps I did not include in the pictures, including a walnut stain, the black edge fade, and a shellac seal coat.
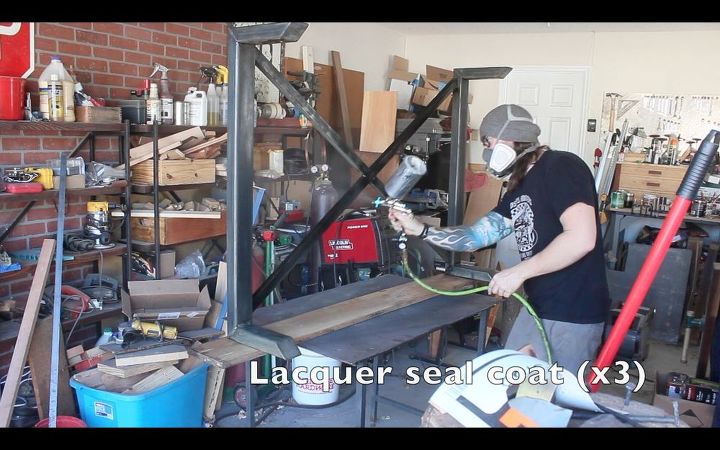
Now I'm sealing the blackened patina with 3 coats of Lacquer. I just use generic brushing lacquer, it sprays fine, but It's probably illegal to do so.

Again, I'm a little bummed out that the lighting was poor when I delivered the table, so I couldn't really get any good shots of the finish, but the client and myself were happy with the finished product!


Frequently asked questions
Have a question about this project?